Icebox
Attack
A Site
Rafters
From T Spawn
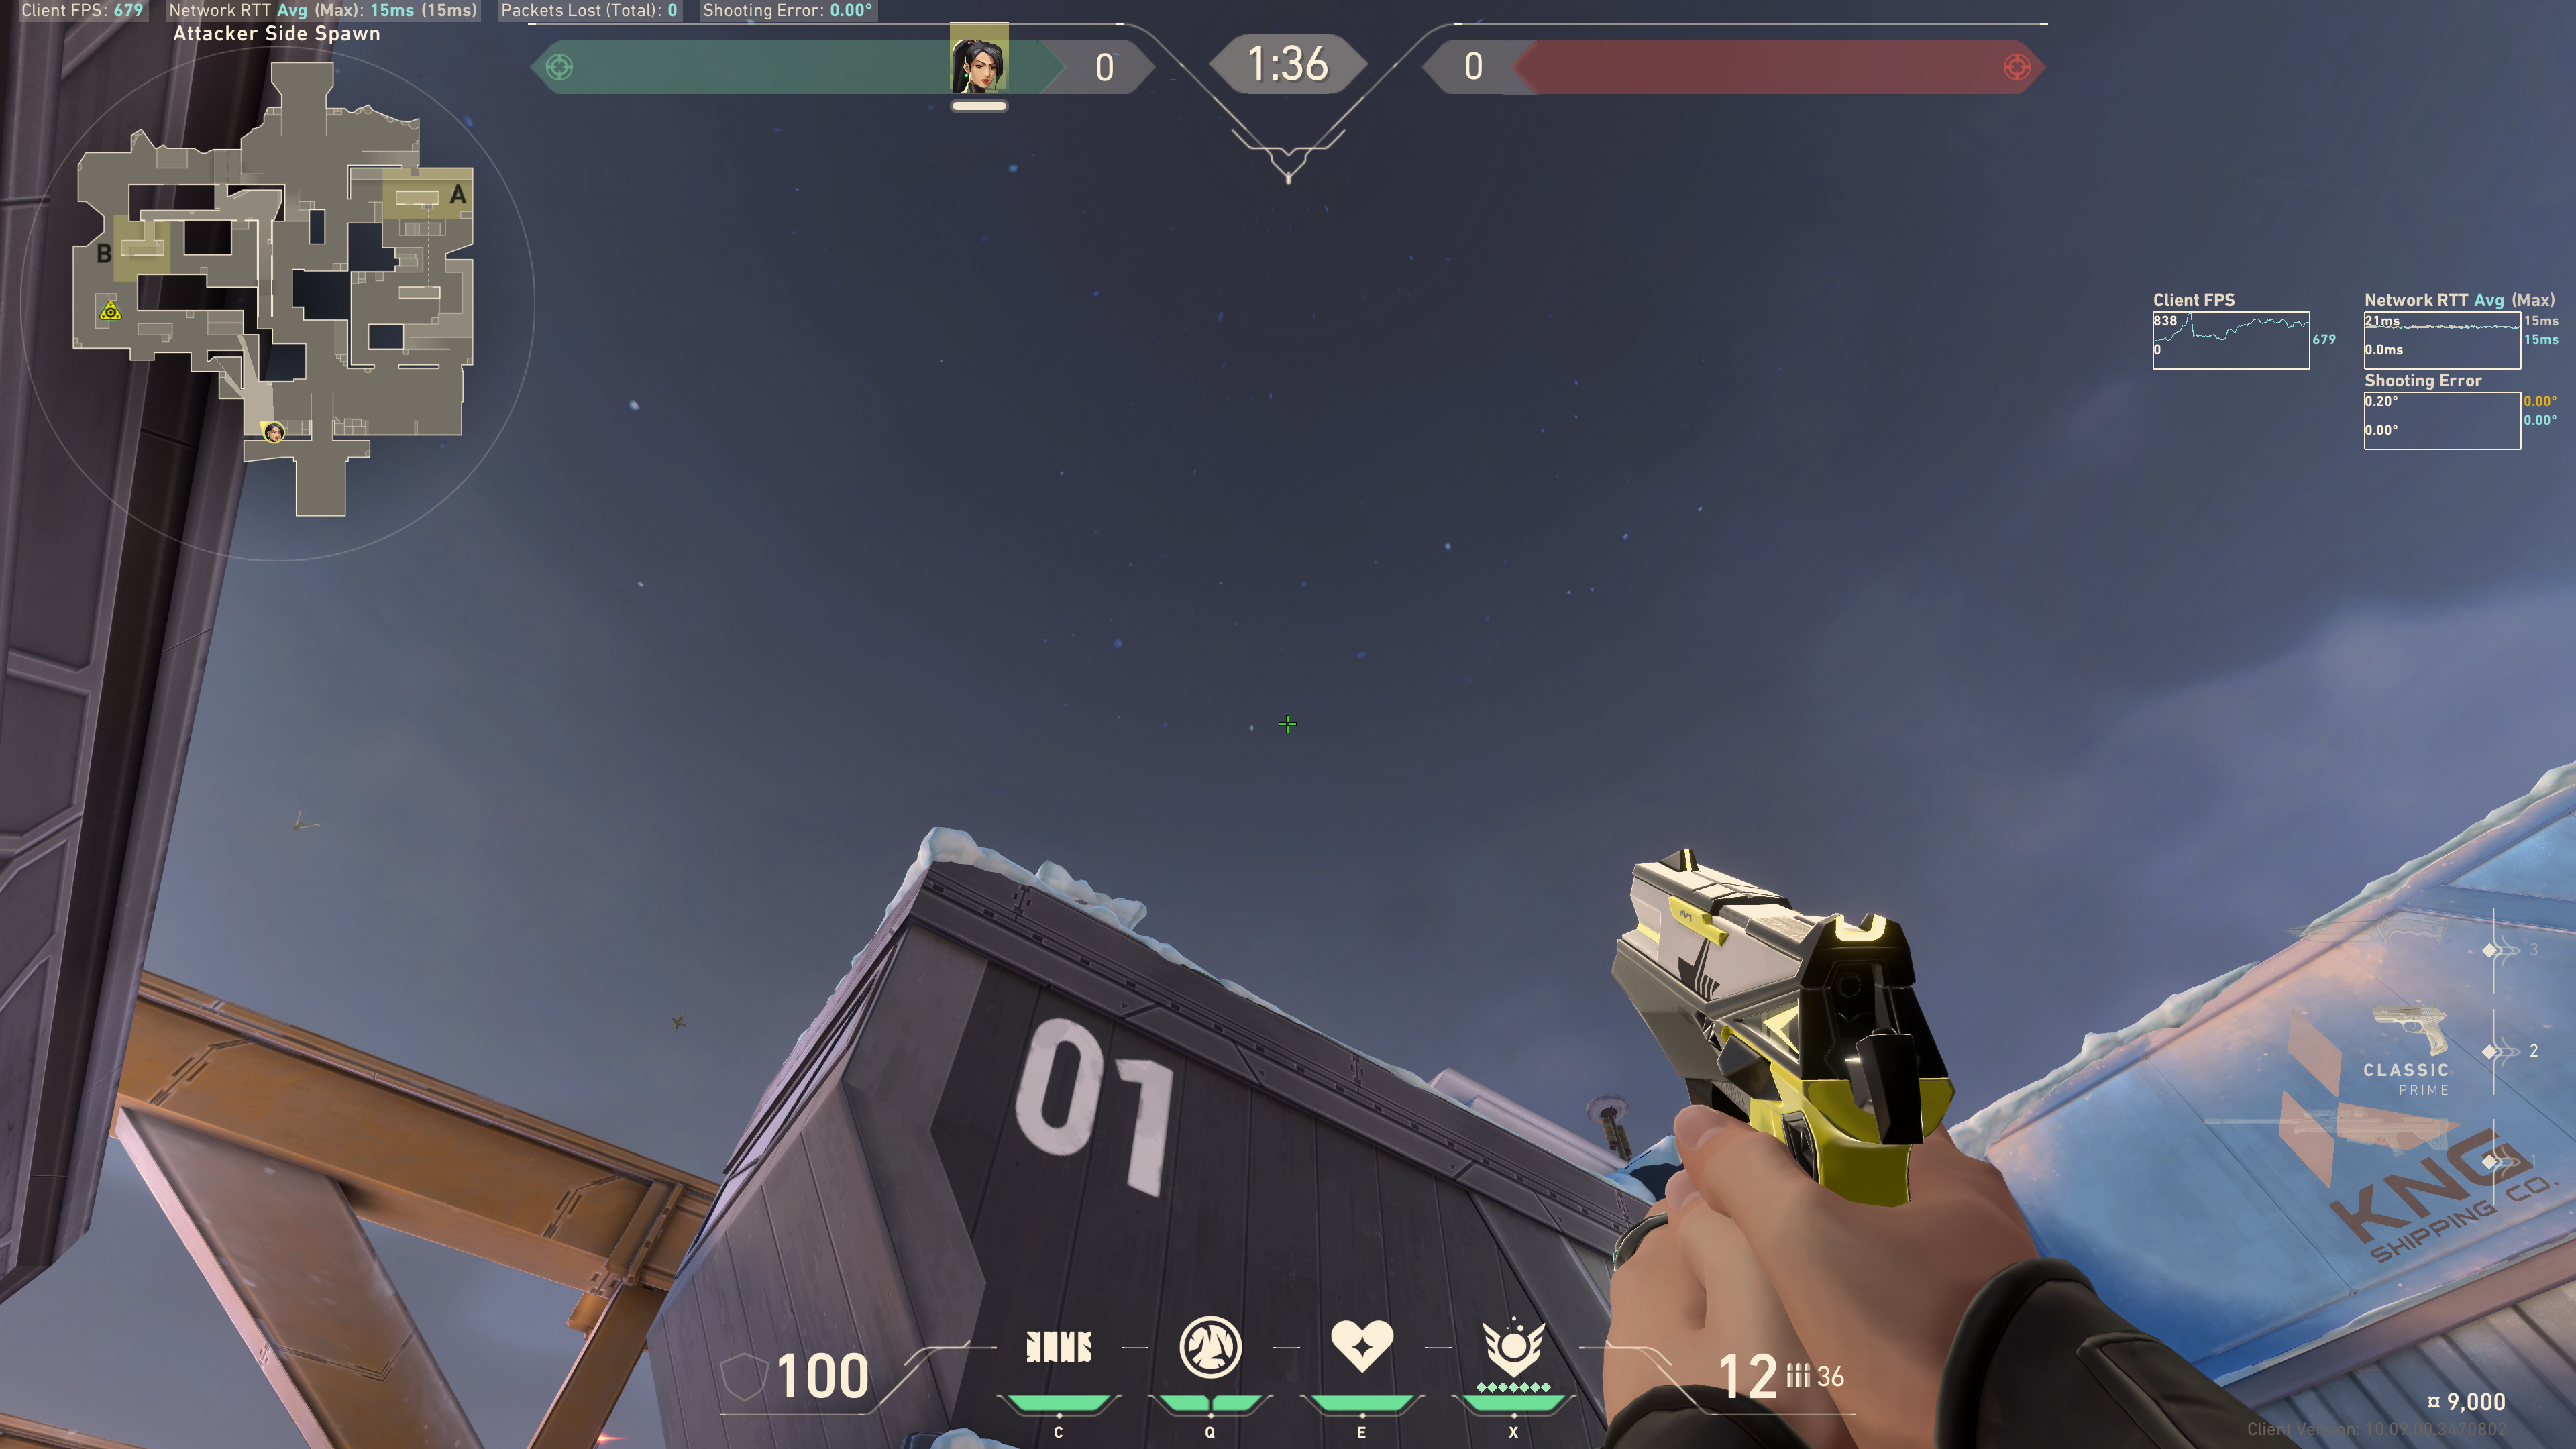
Hug this wall:
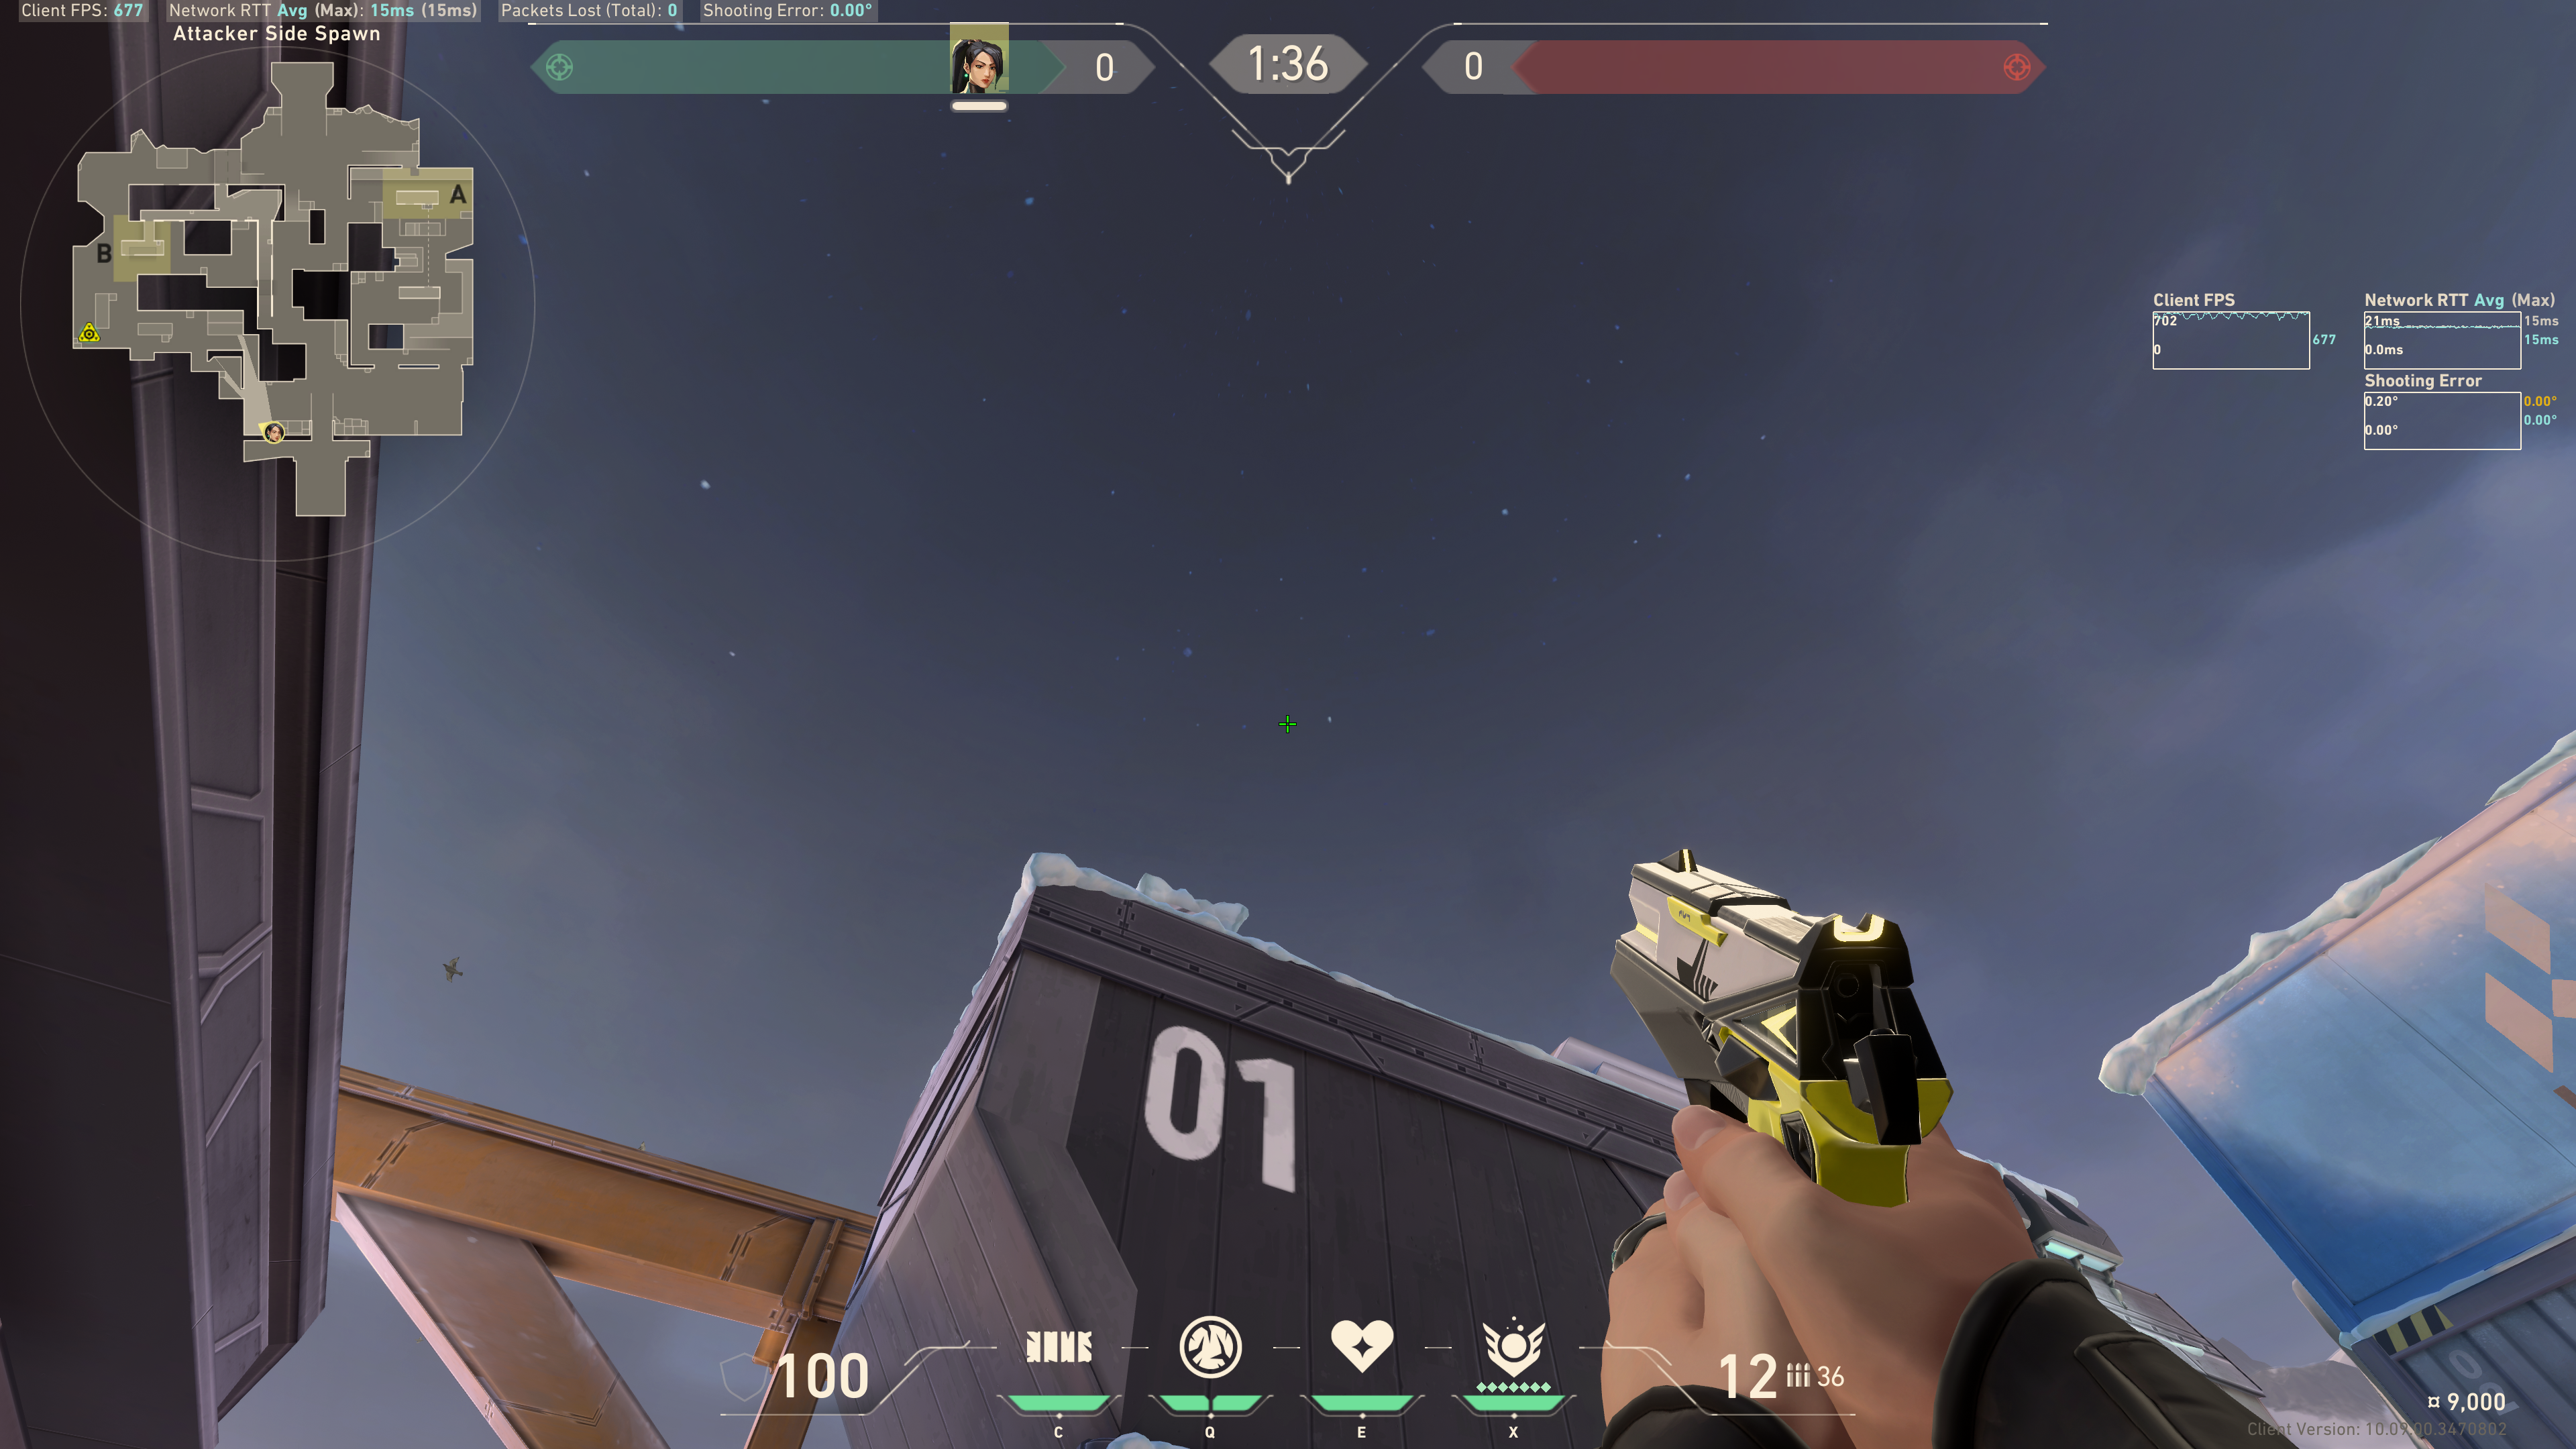
 Aim along this black horizontal line:
 Note: avoid the yellow glow, as it has the risk of bouncing off the top site wall.
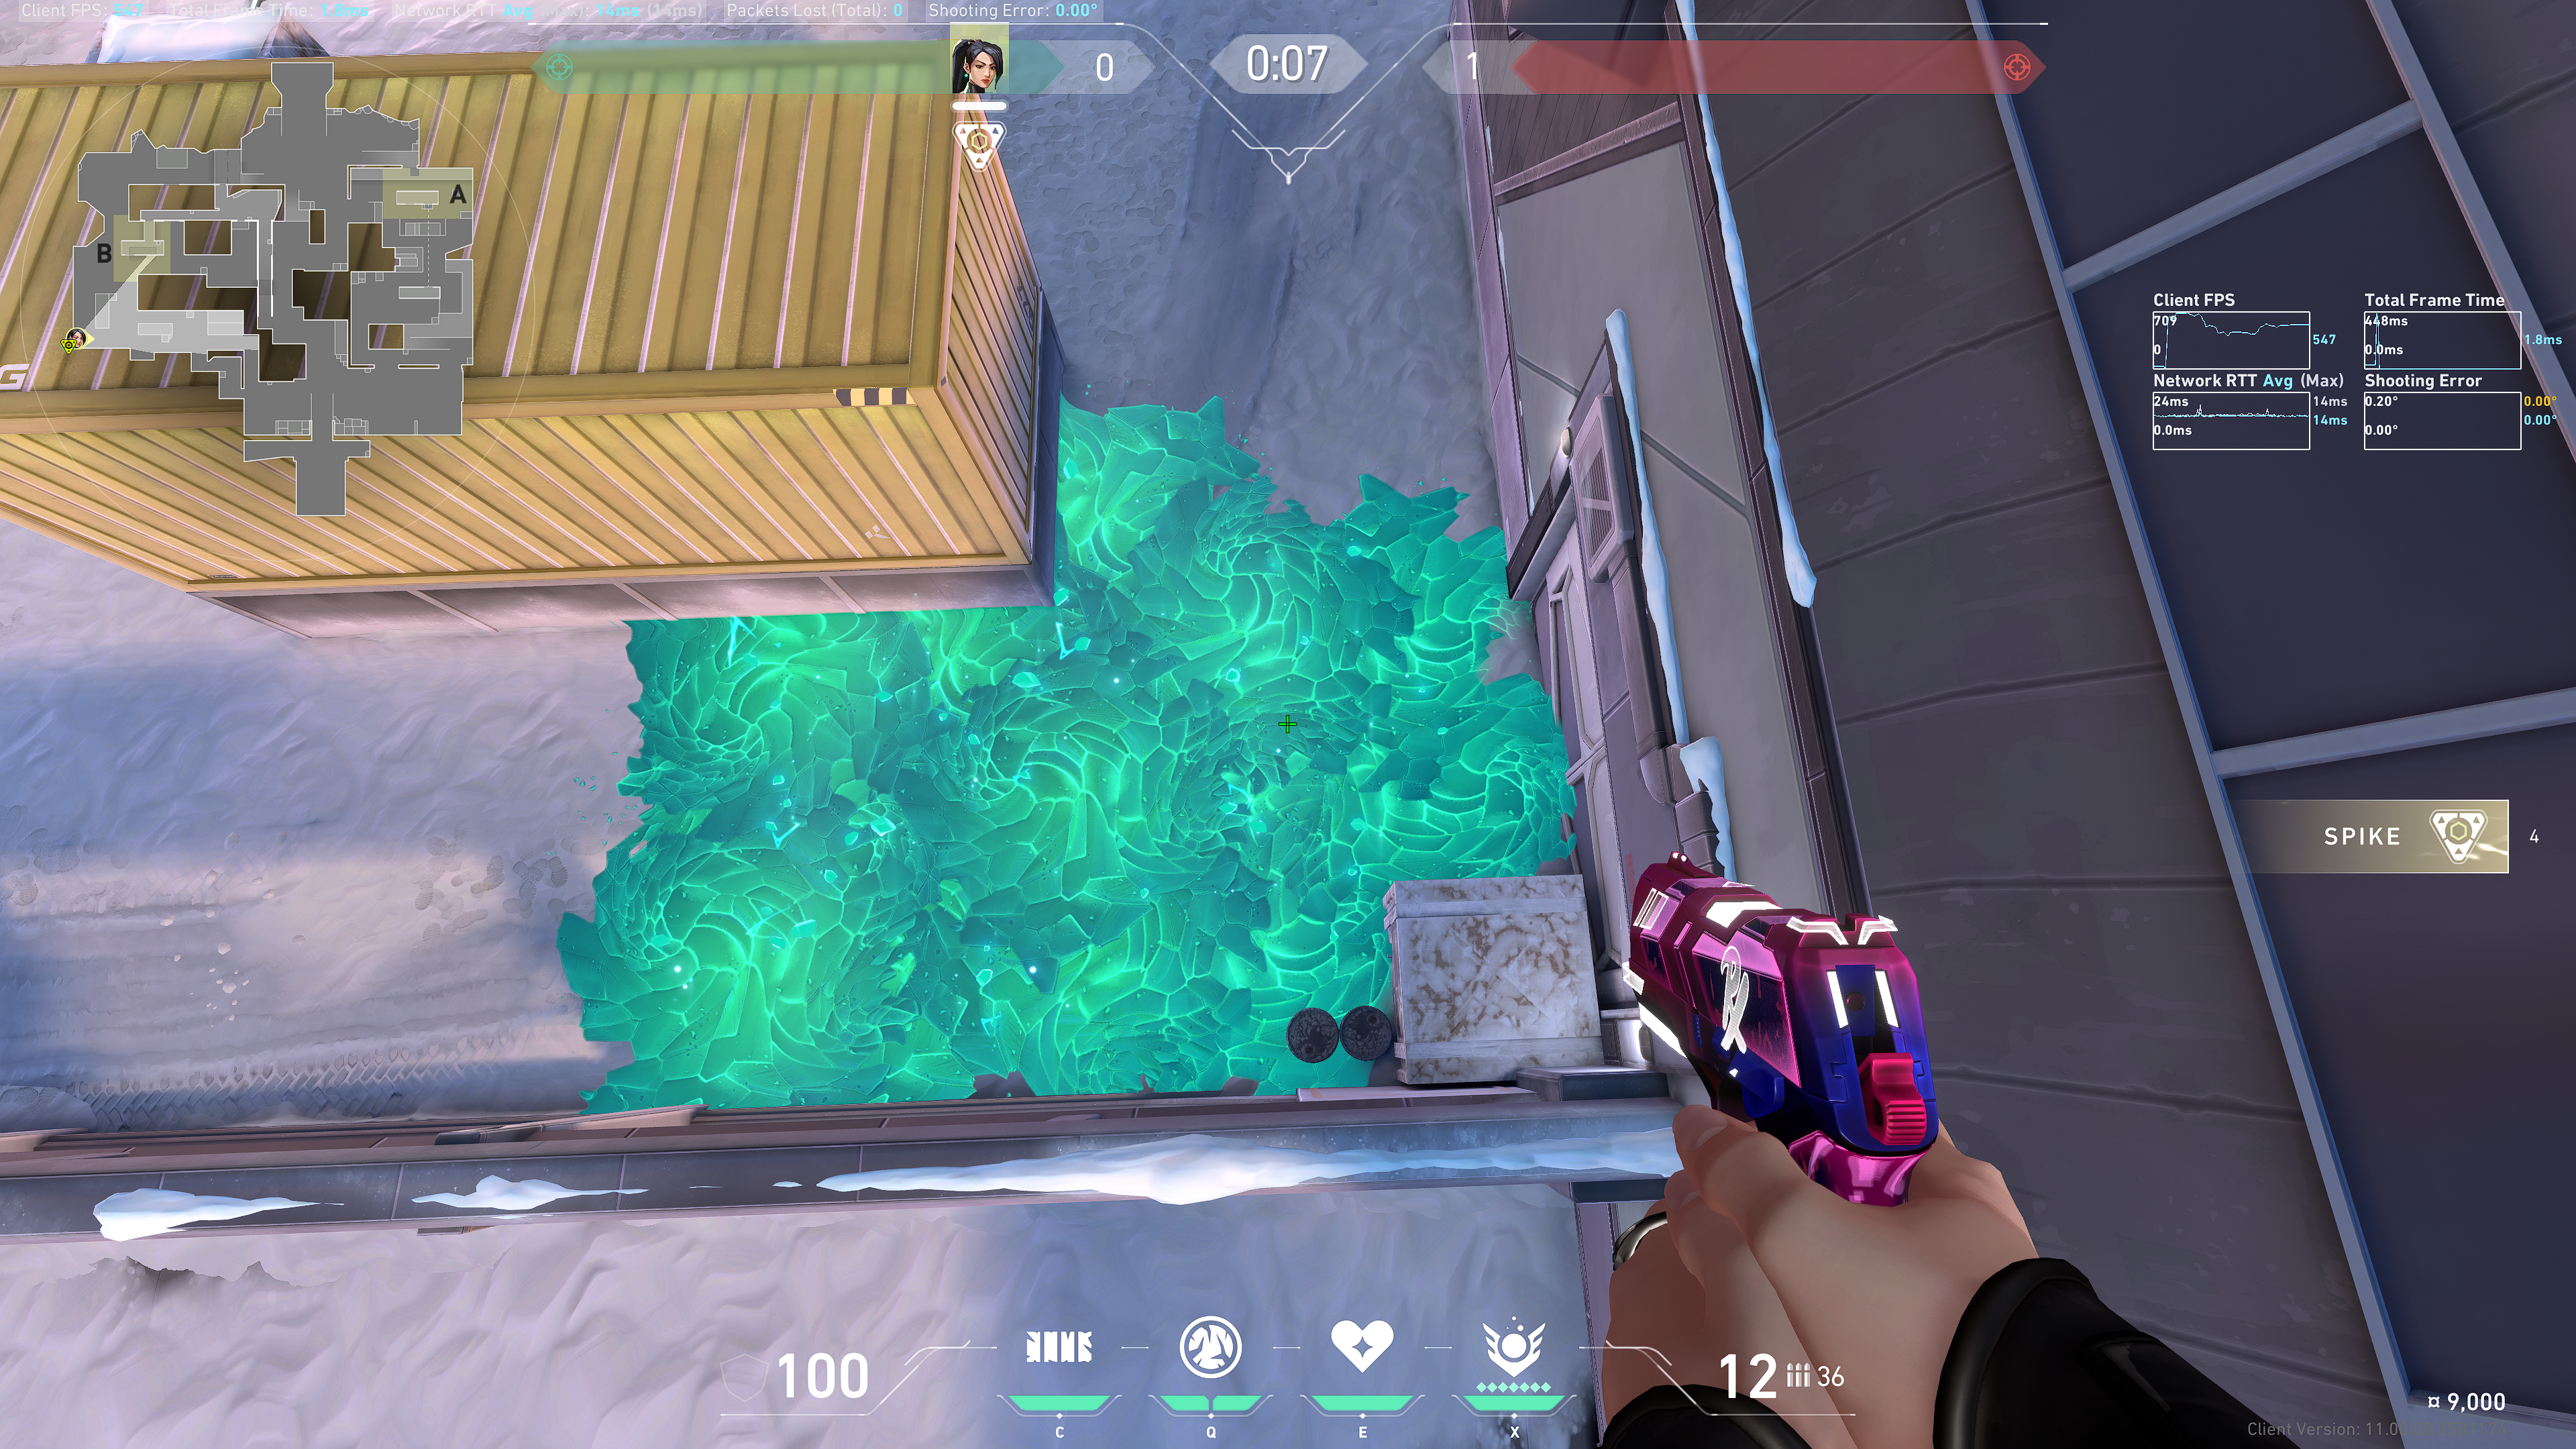
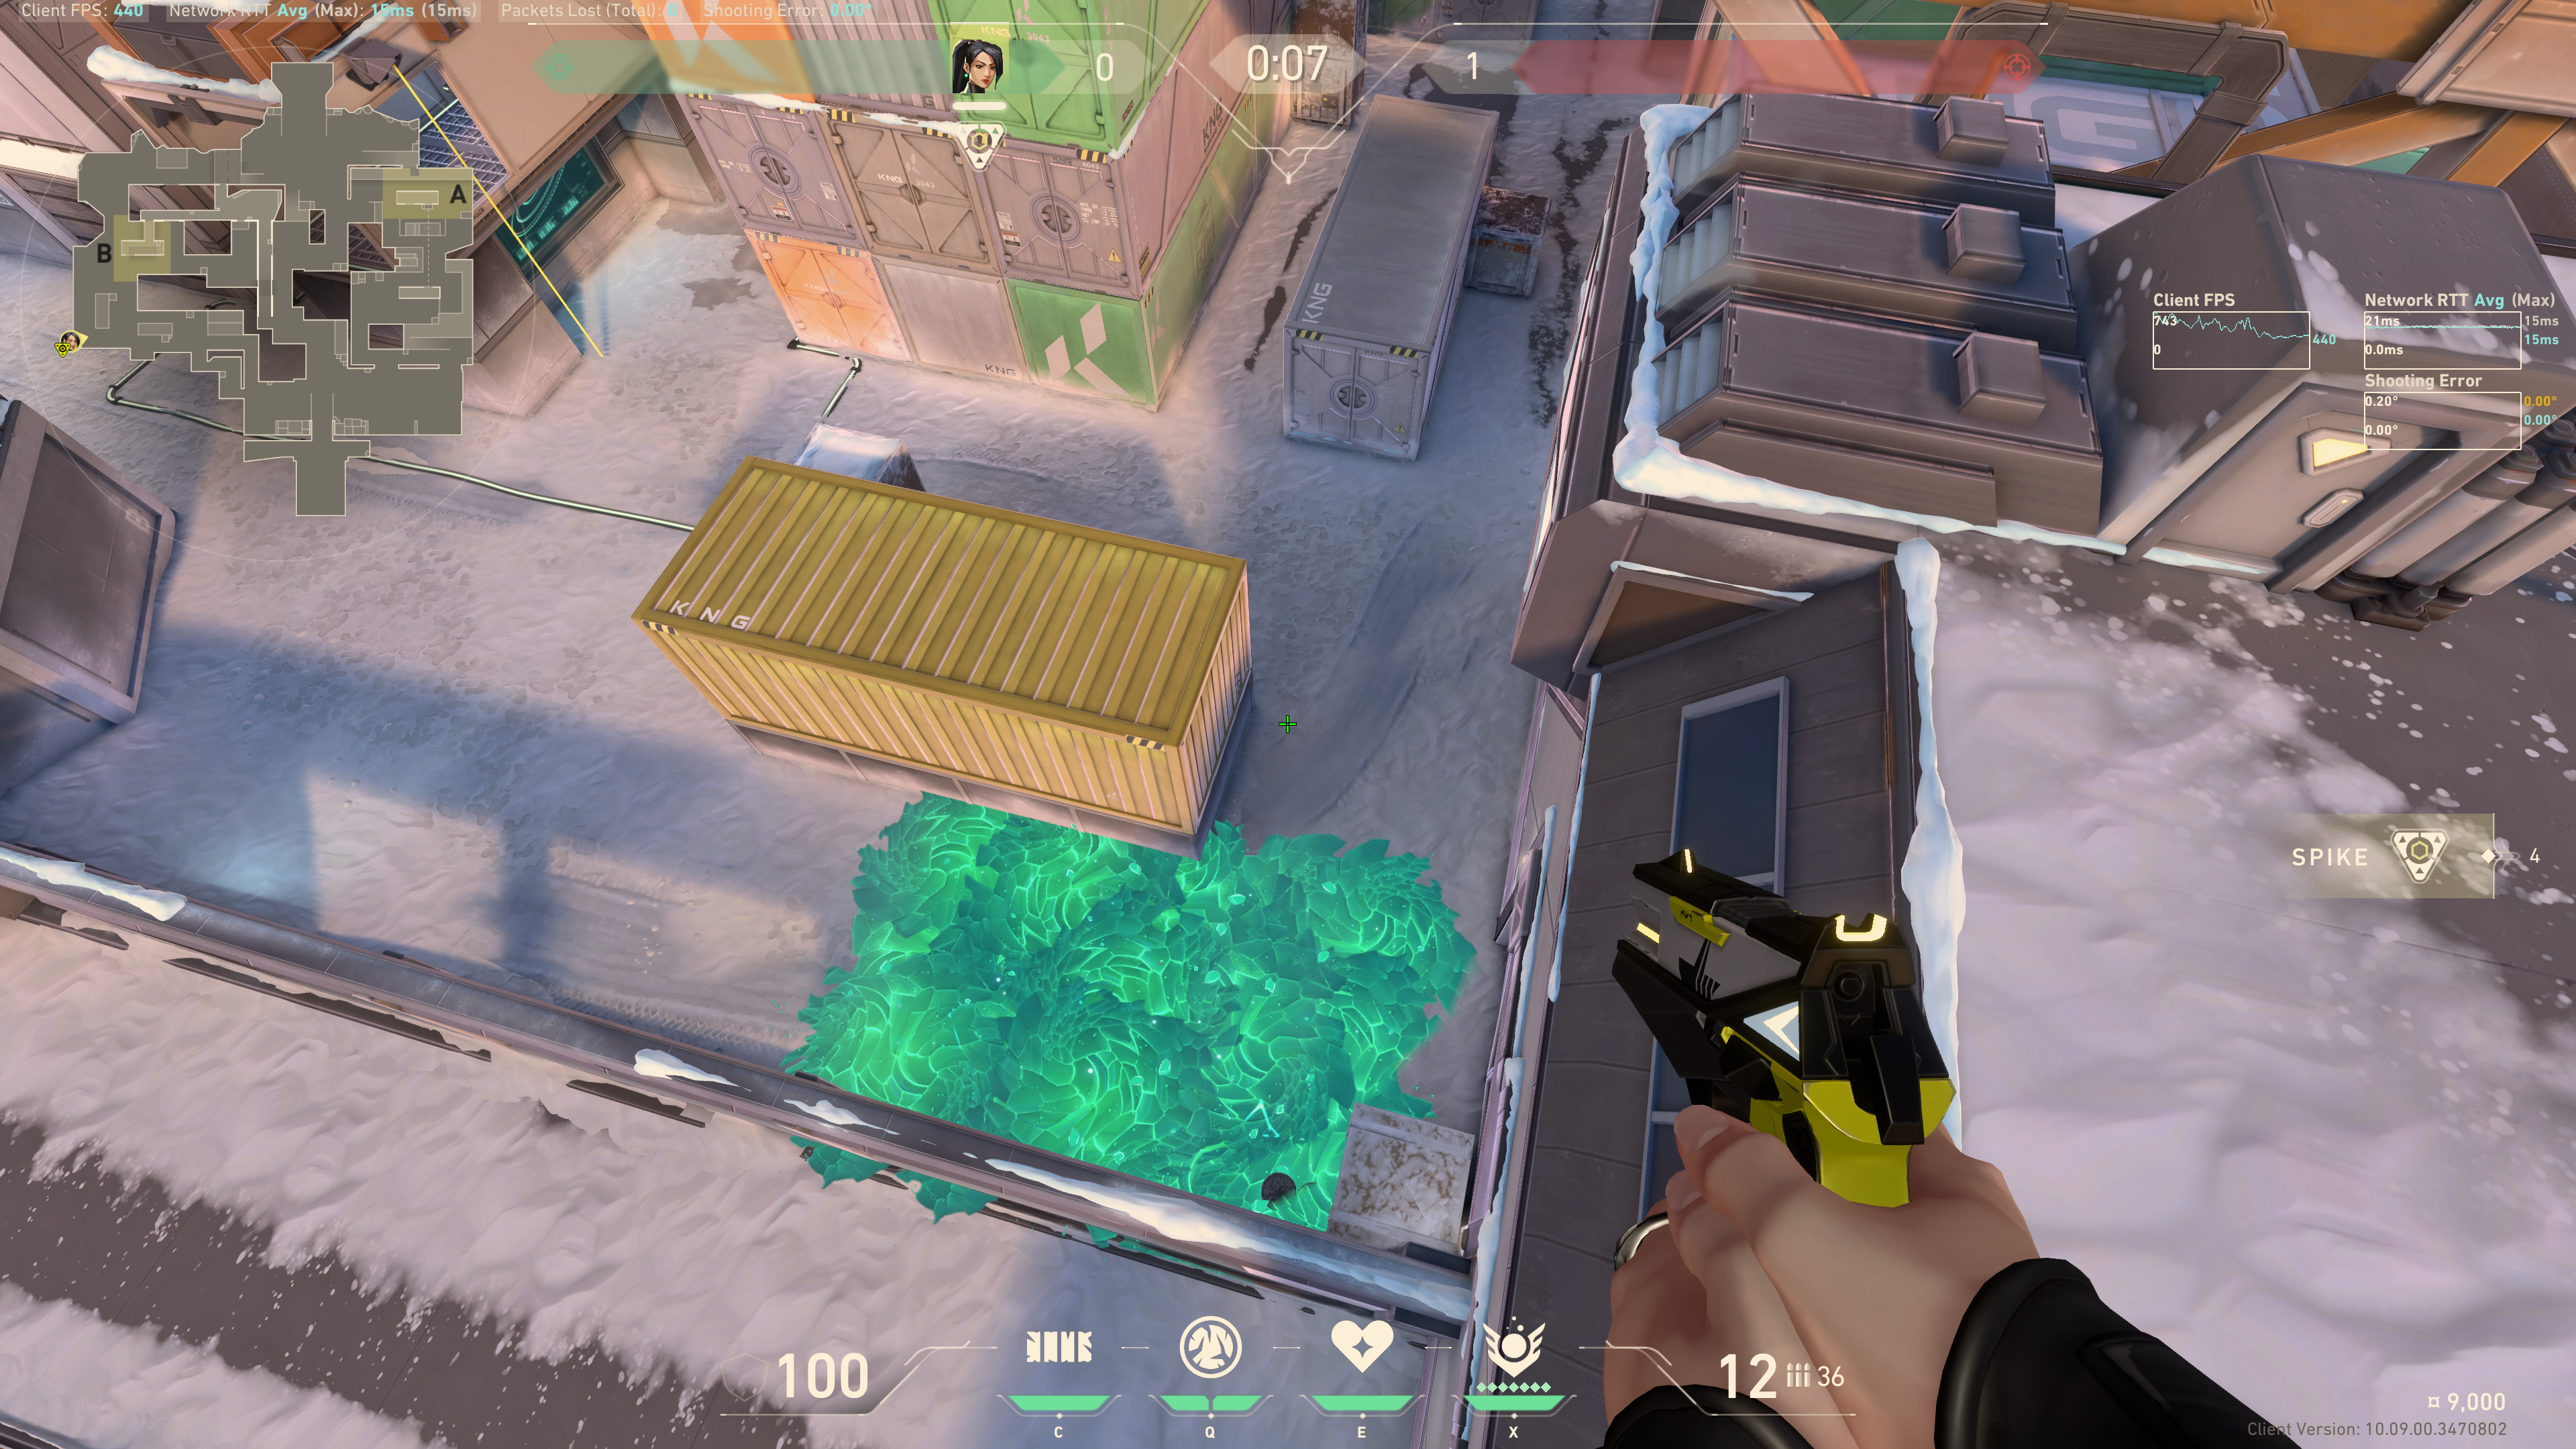
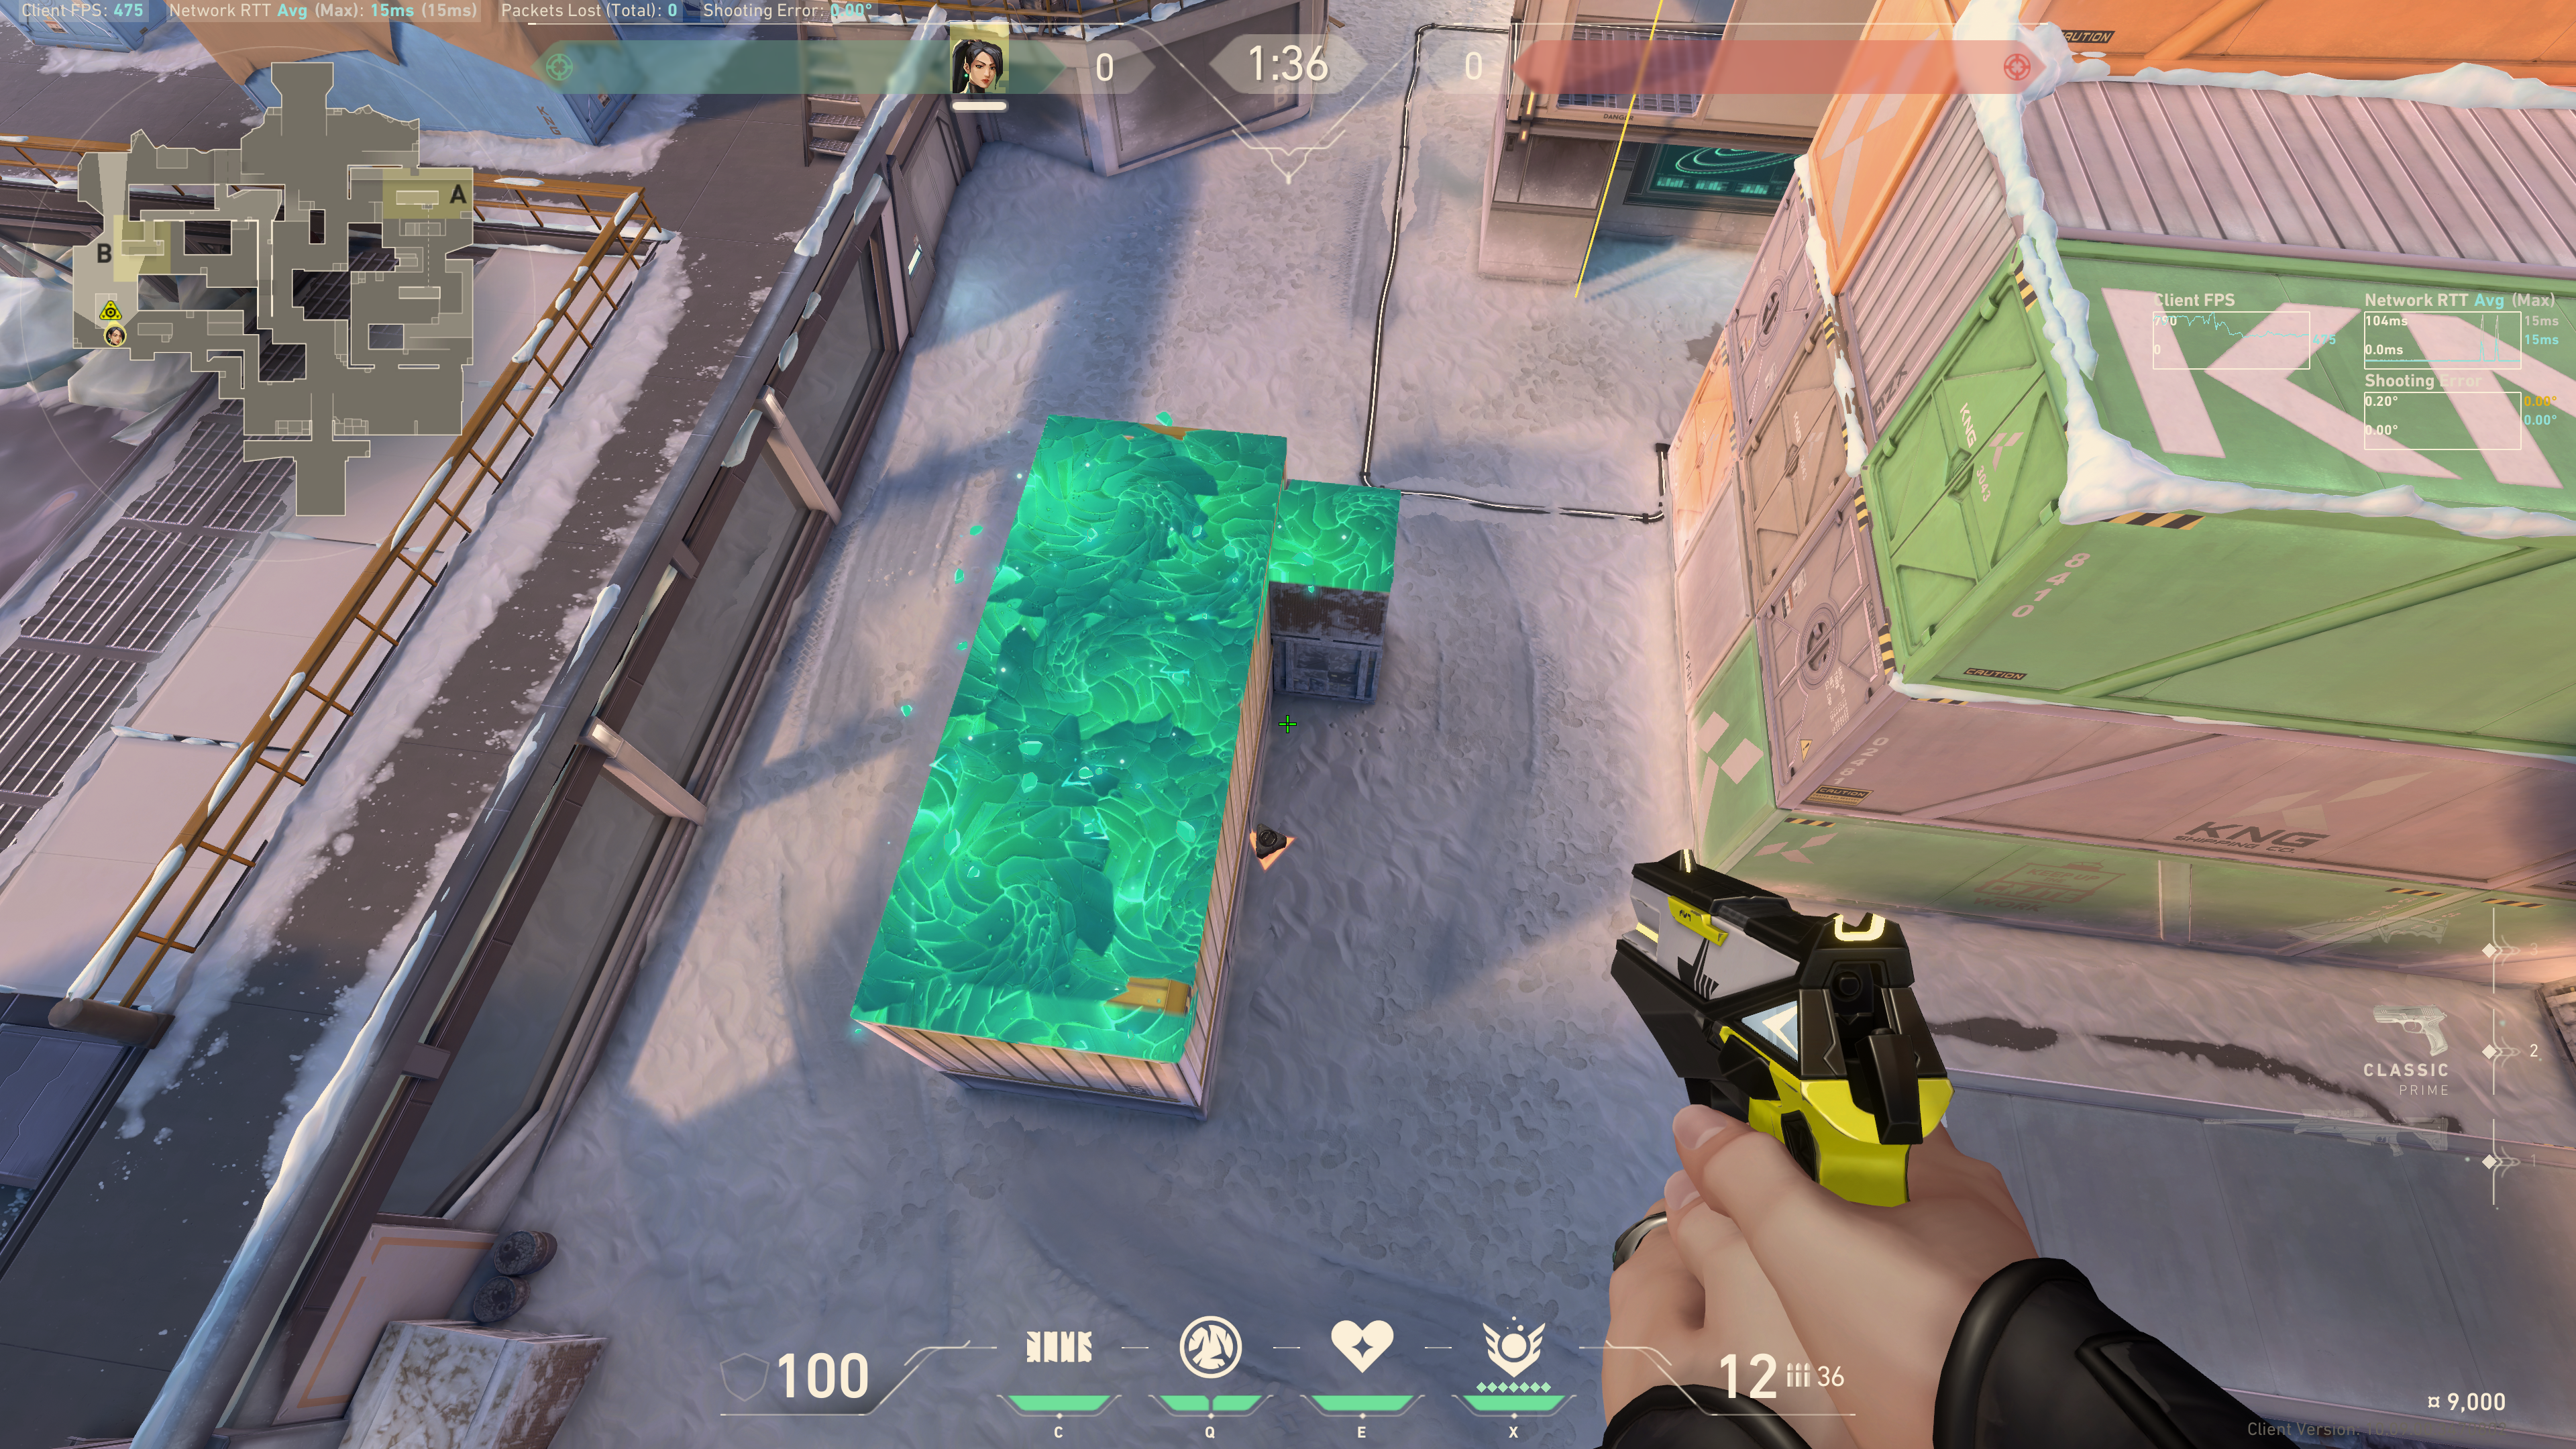
Result:
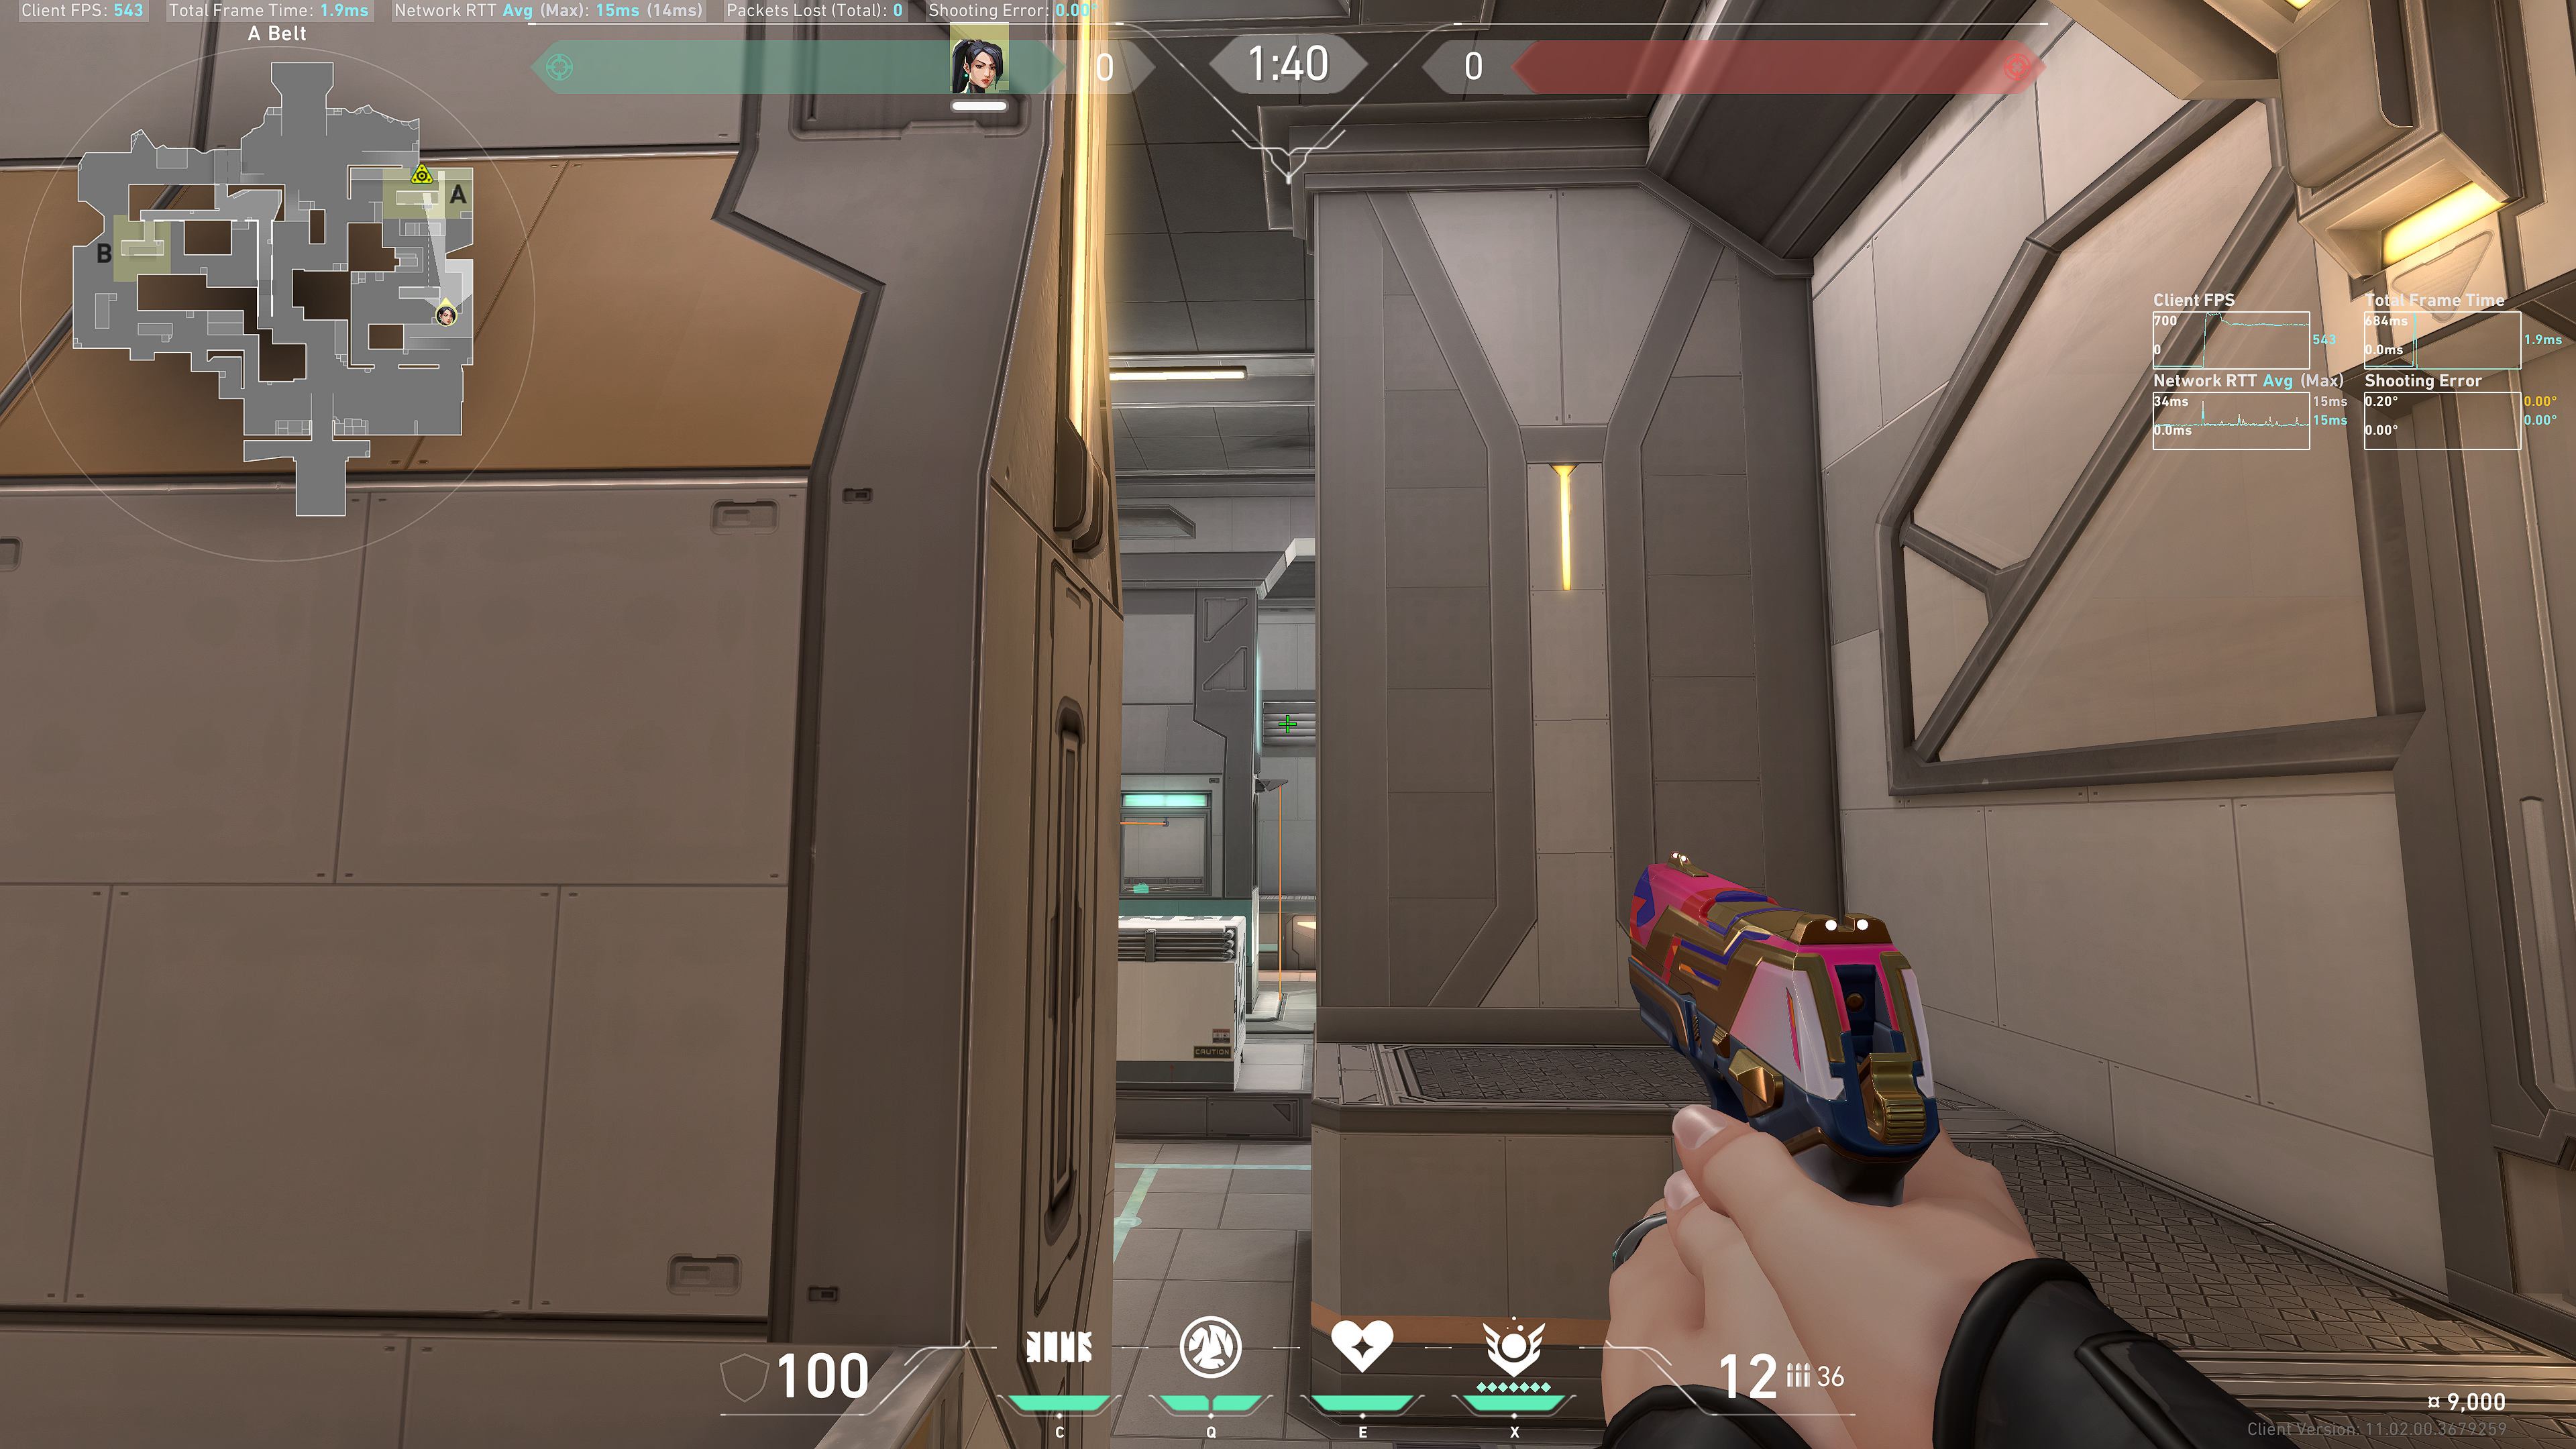
From Pipes
Stand on pipes, and take note of this light strip:
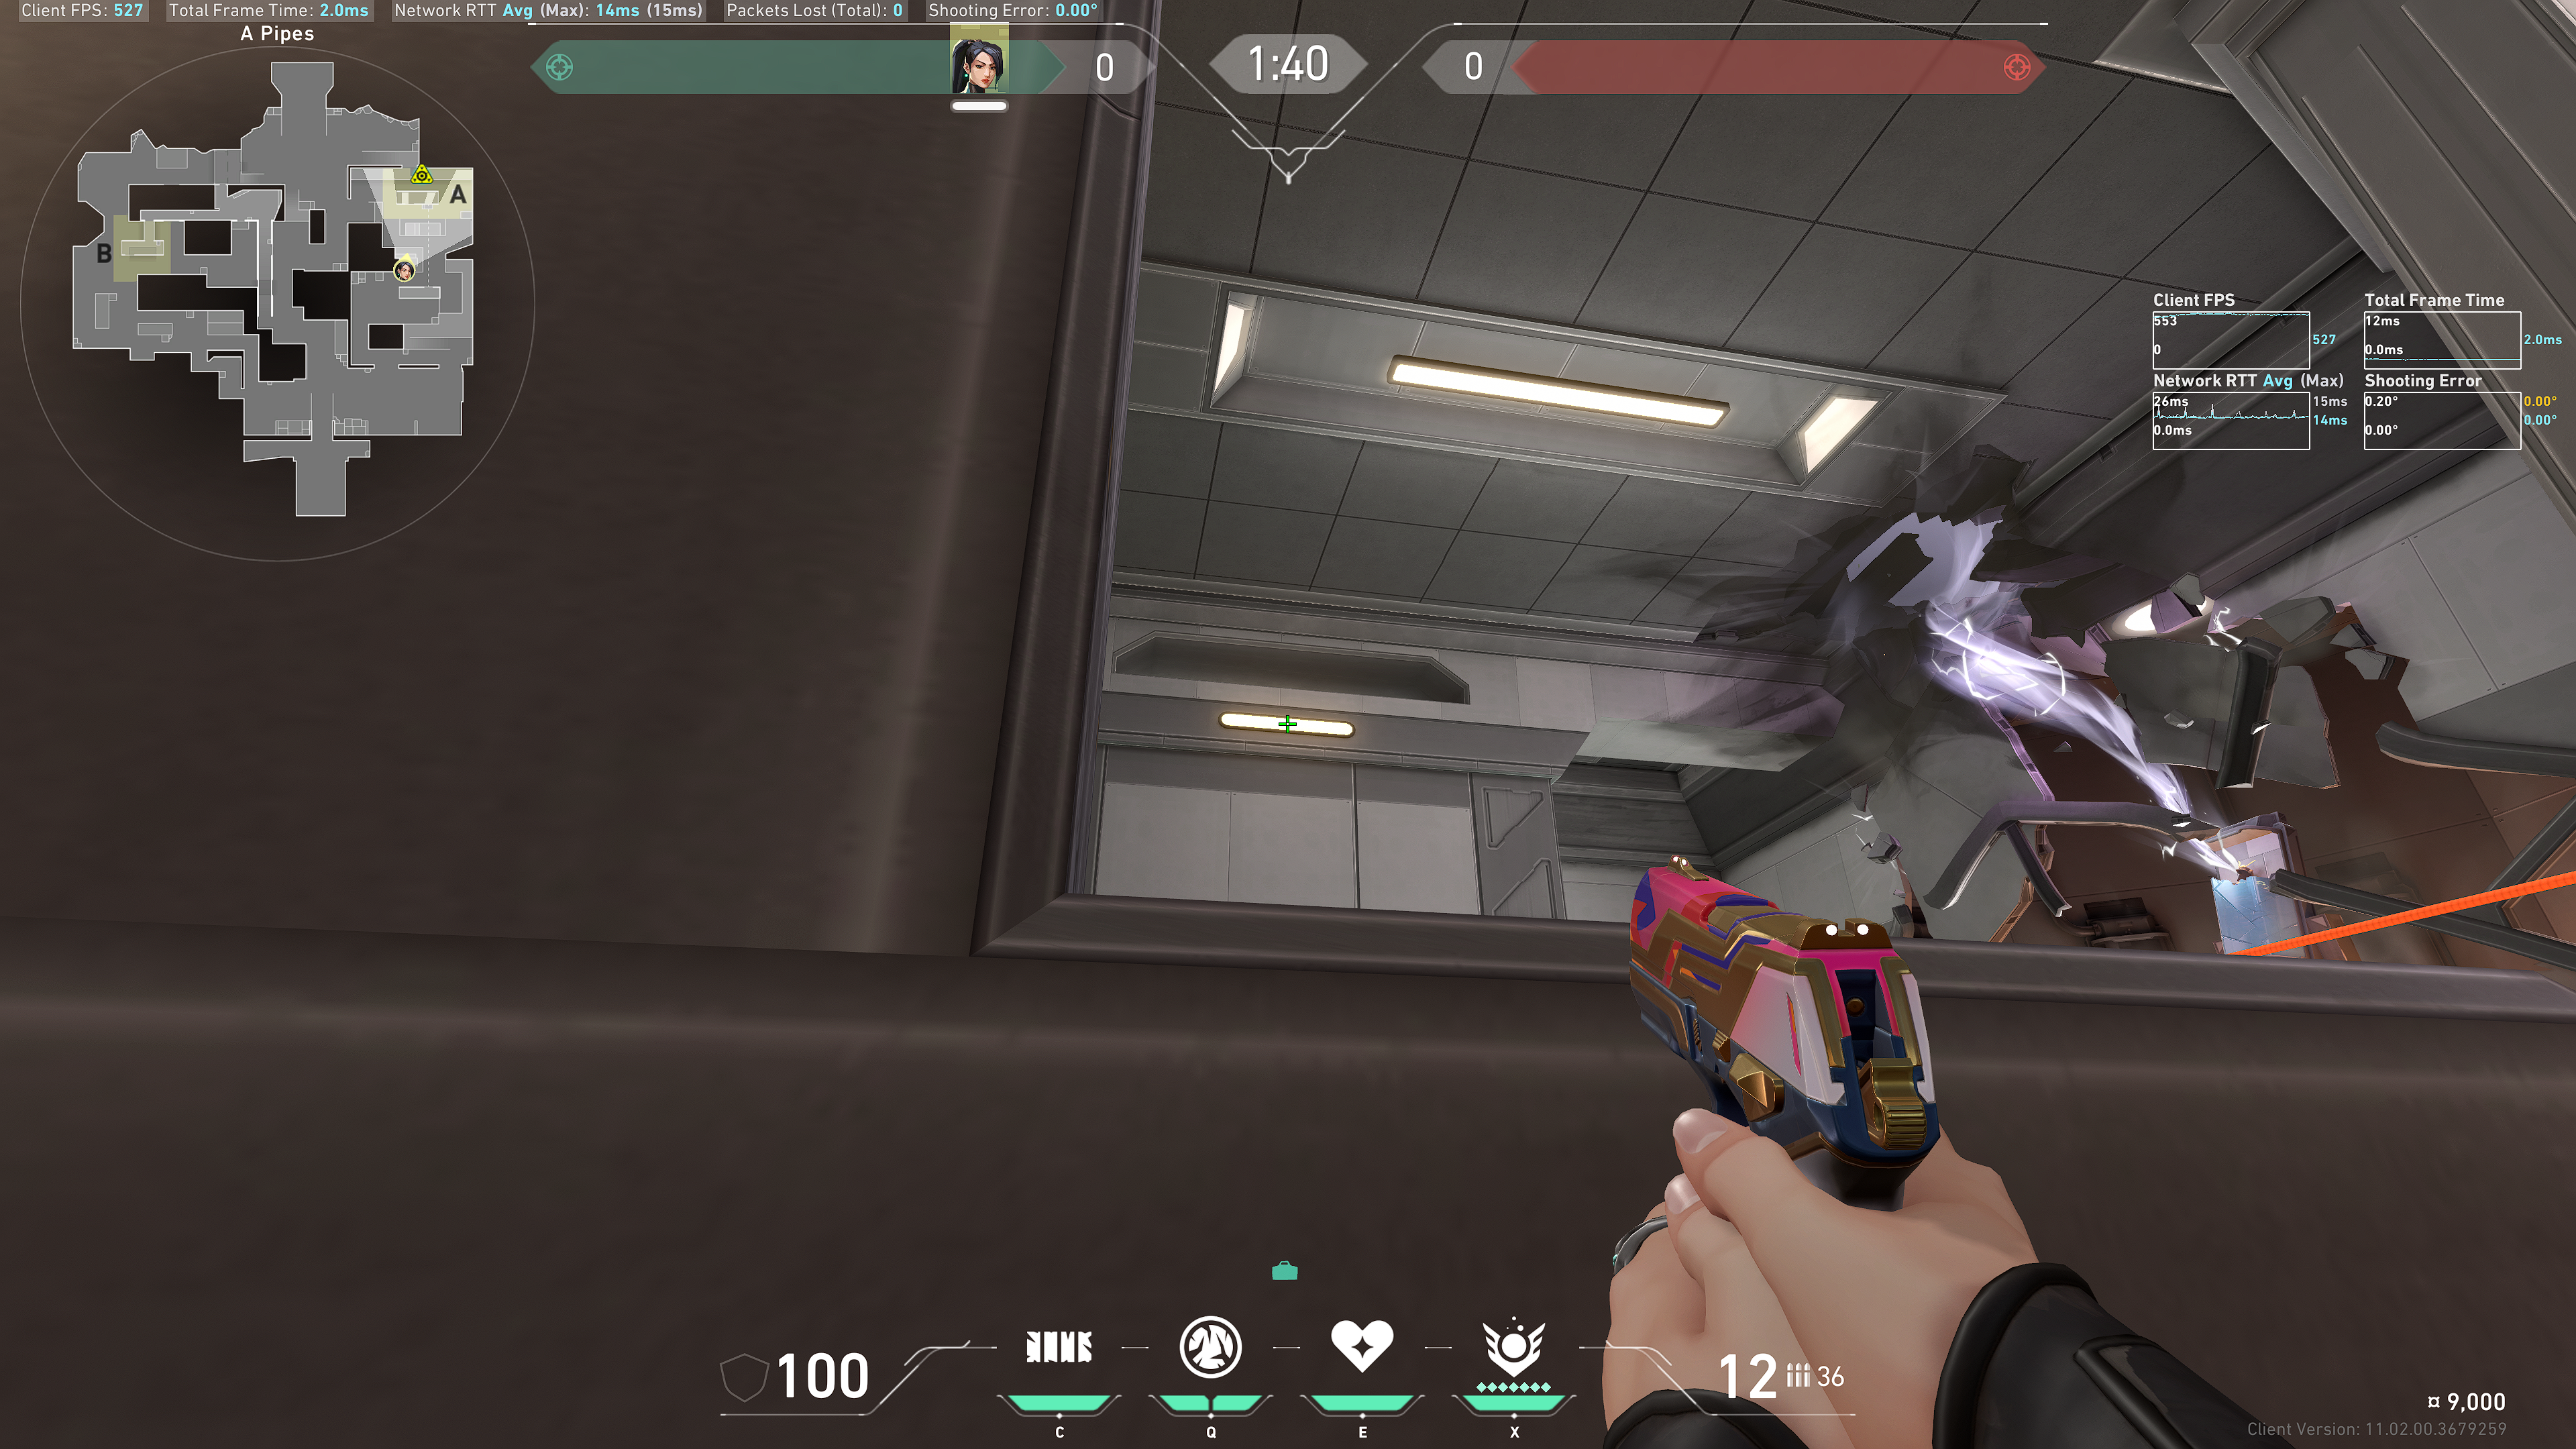
Aim at the dark grey above the gap in the wall, lined up with the middle of the light strip:
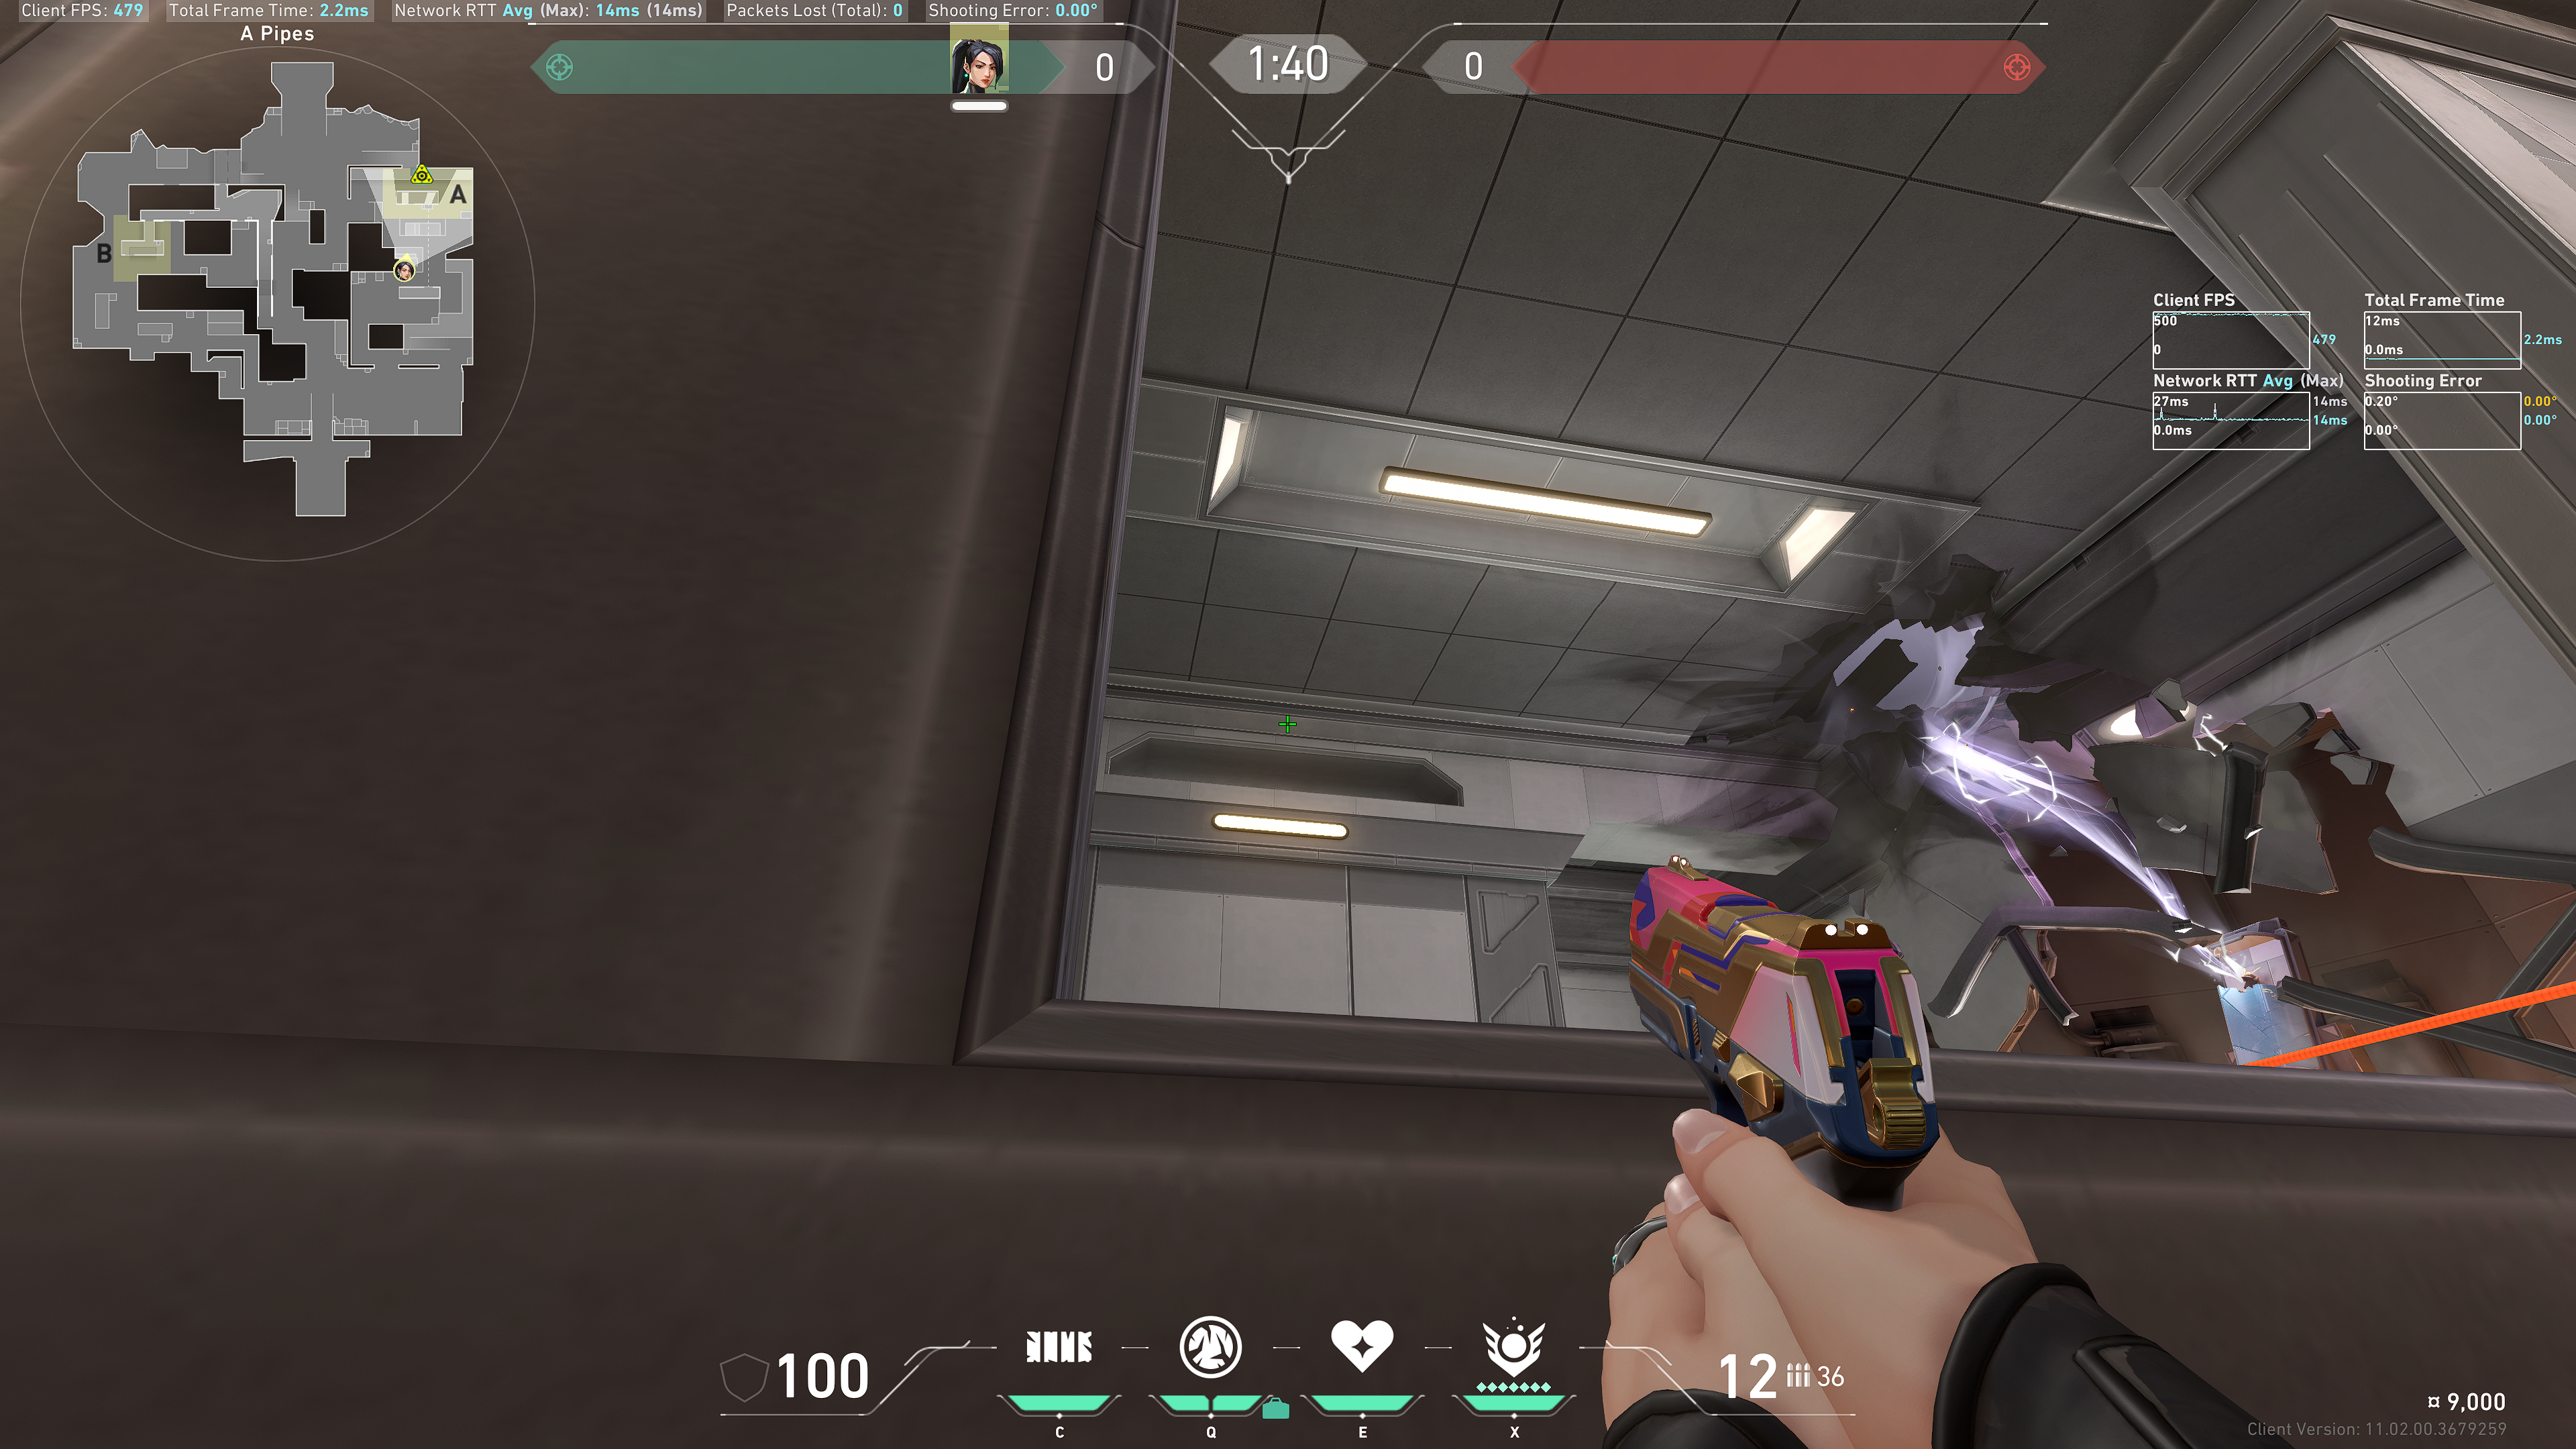
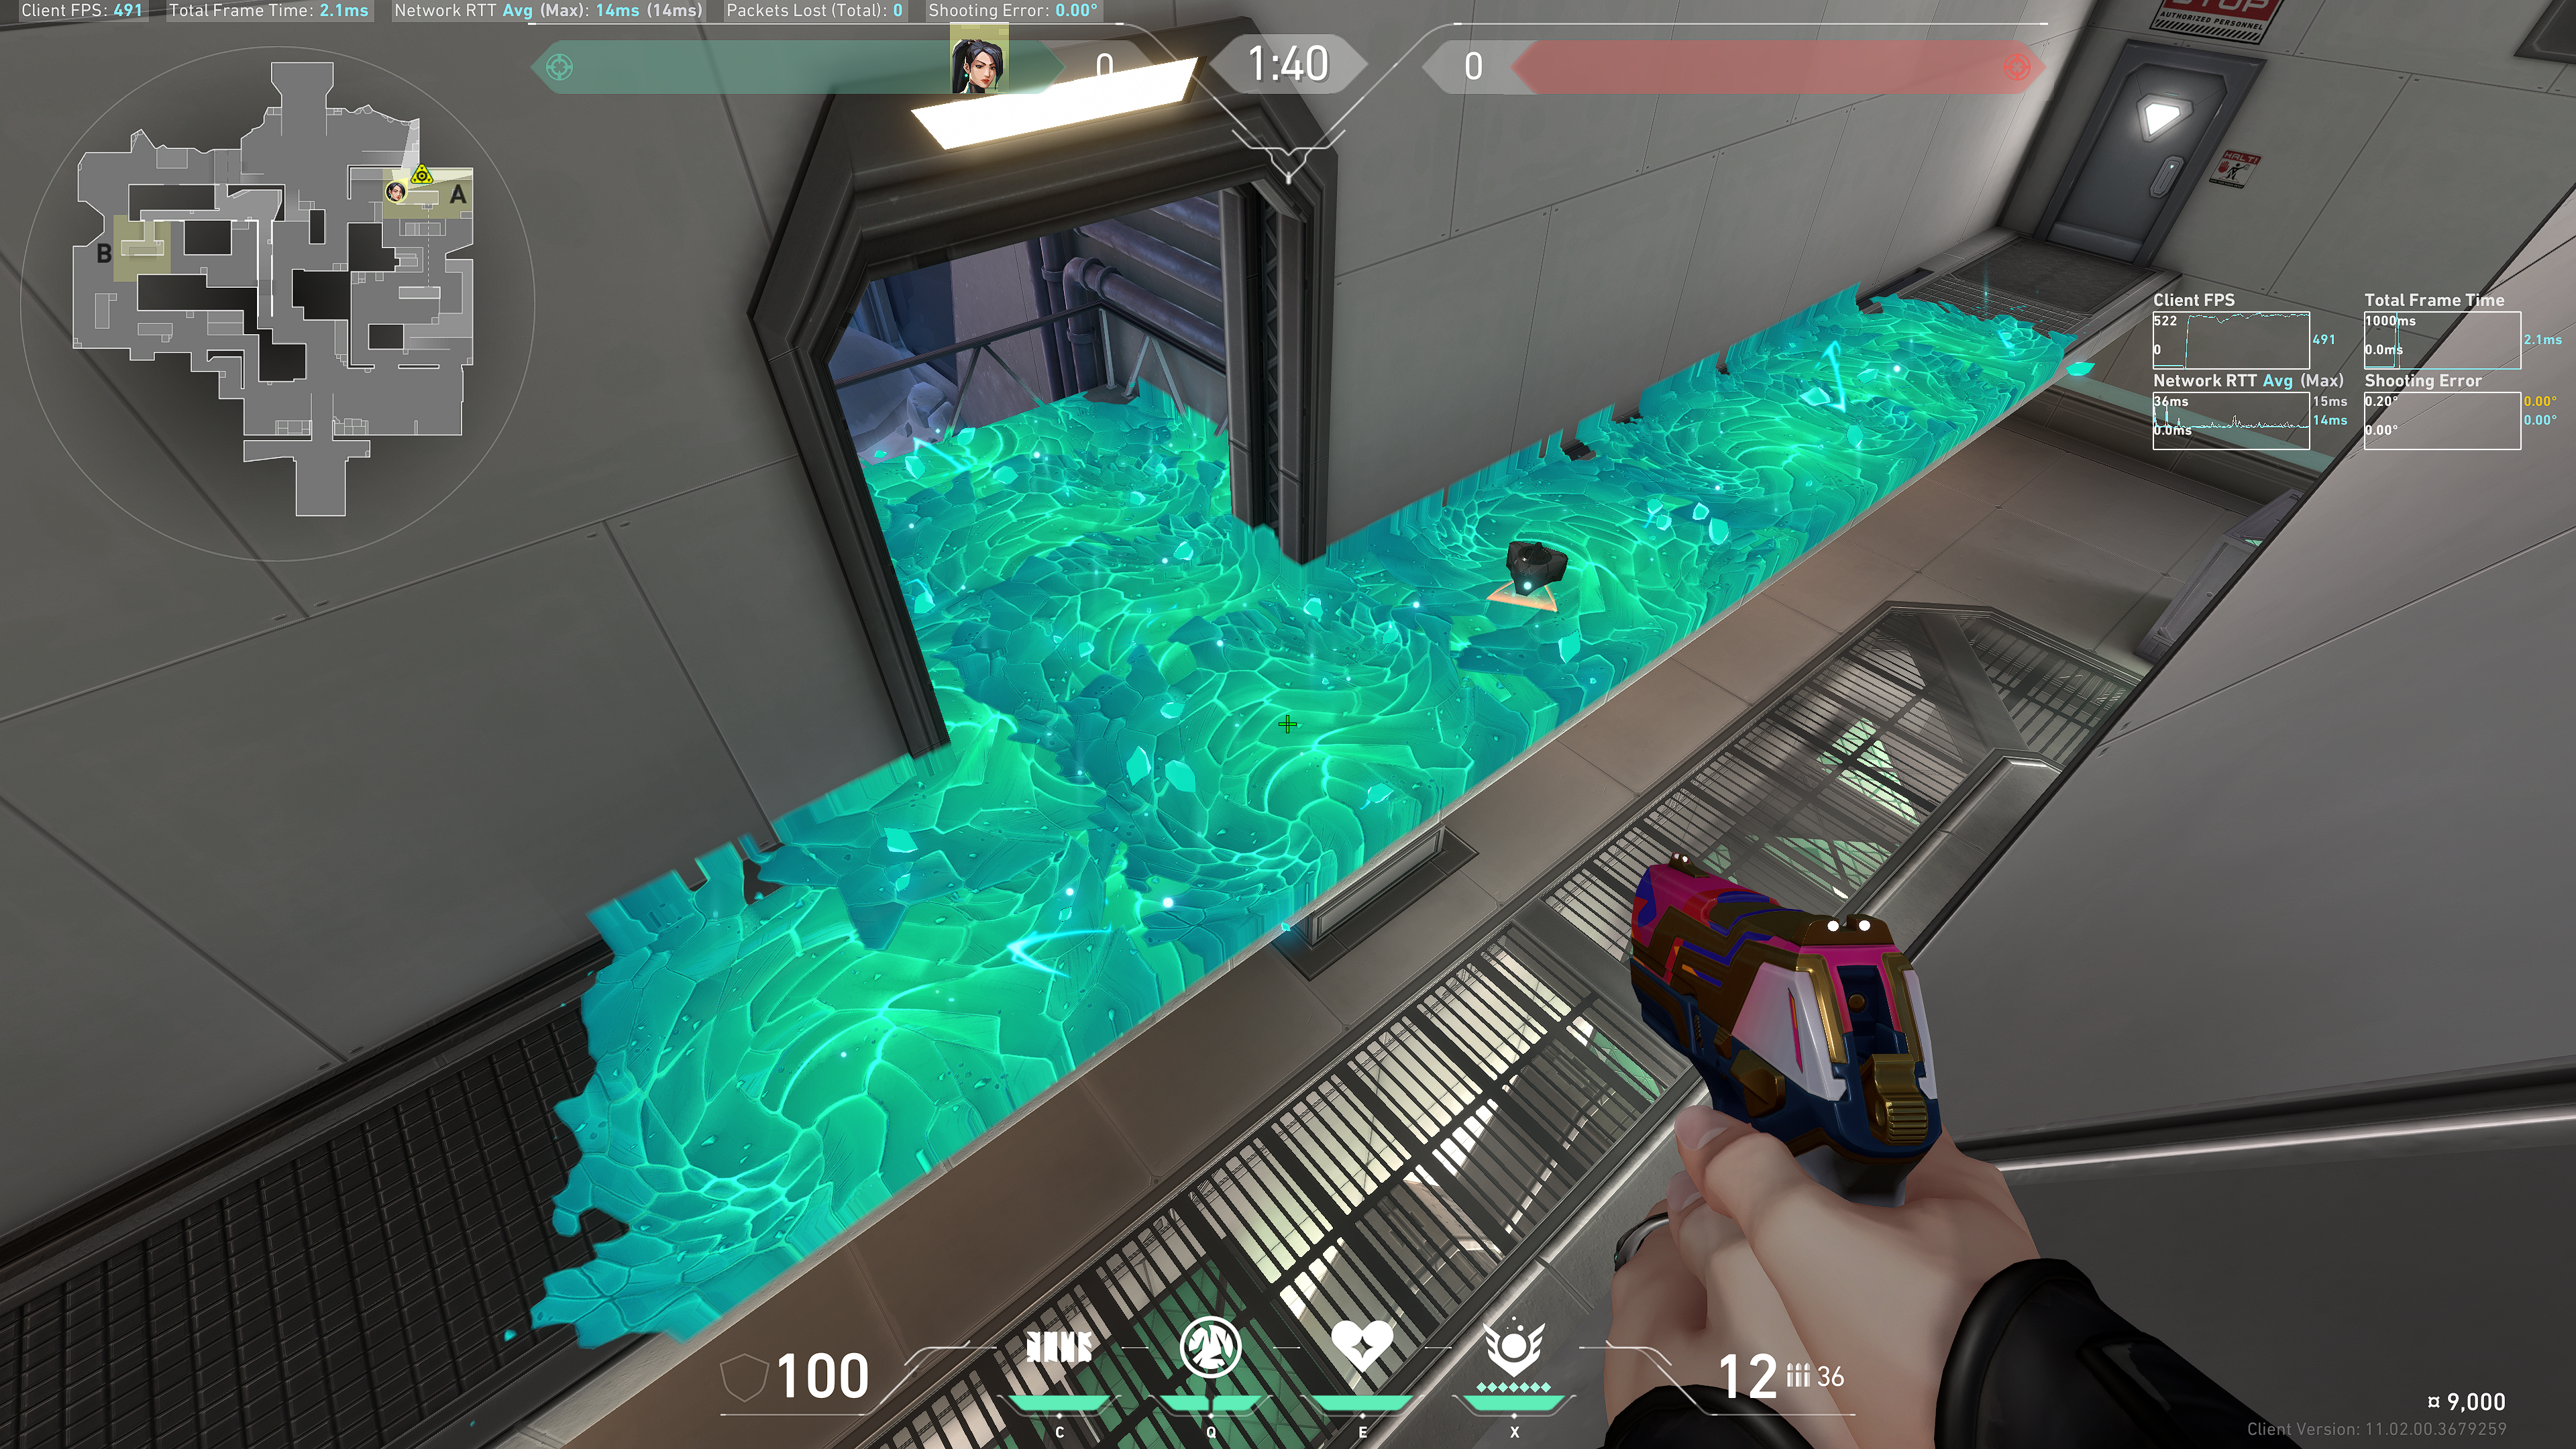
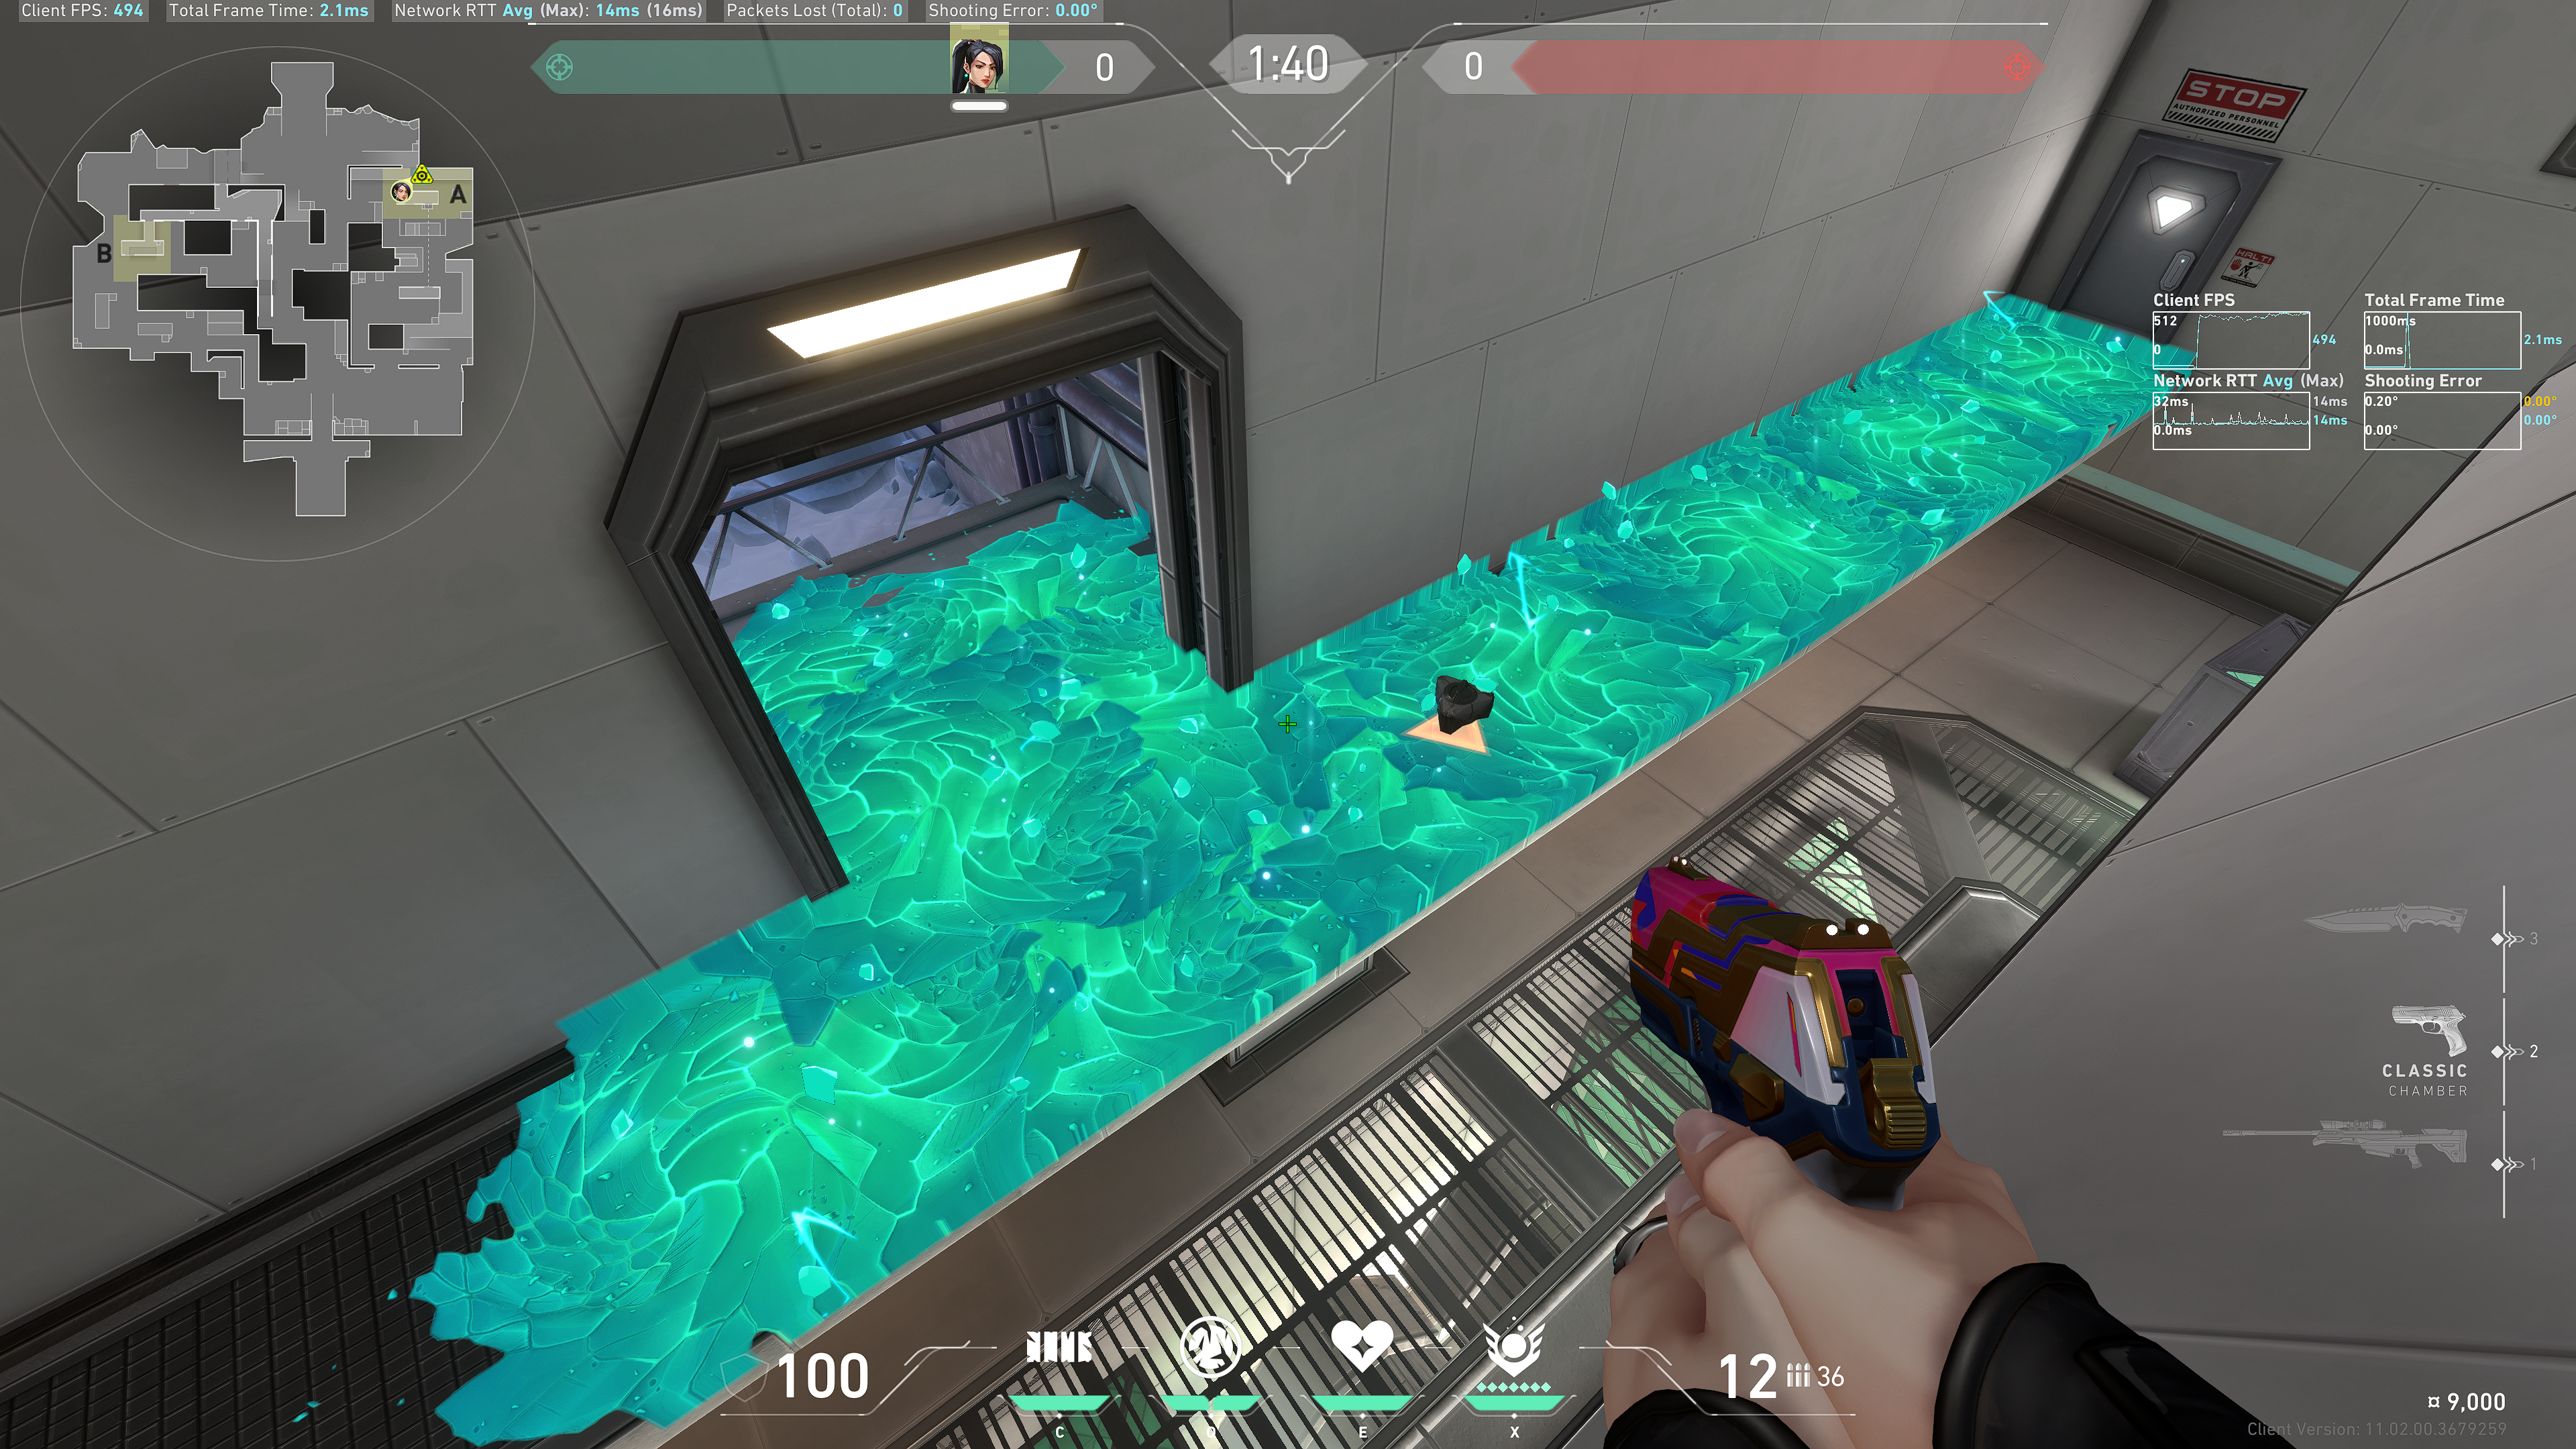
Example result:
From Belt (back)
Aim above the black strip:
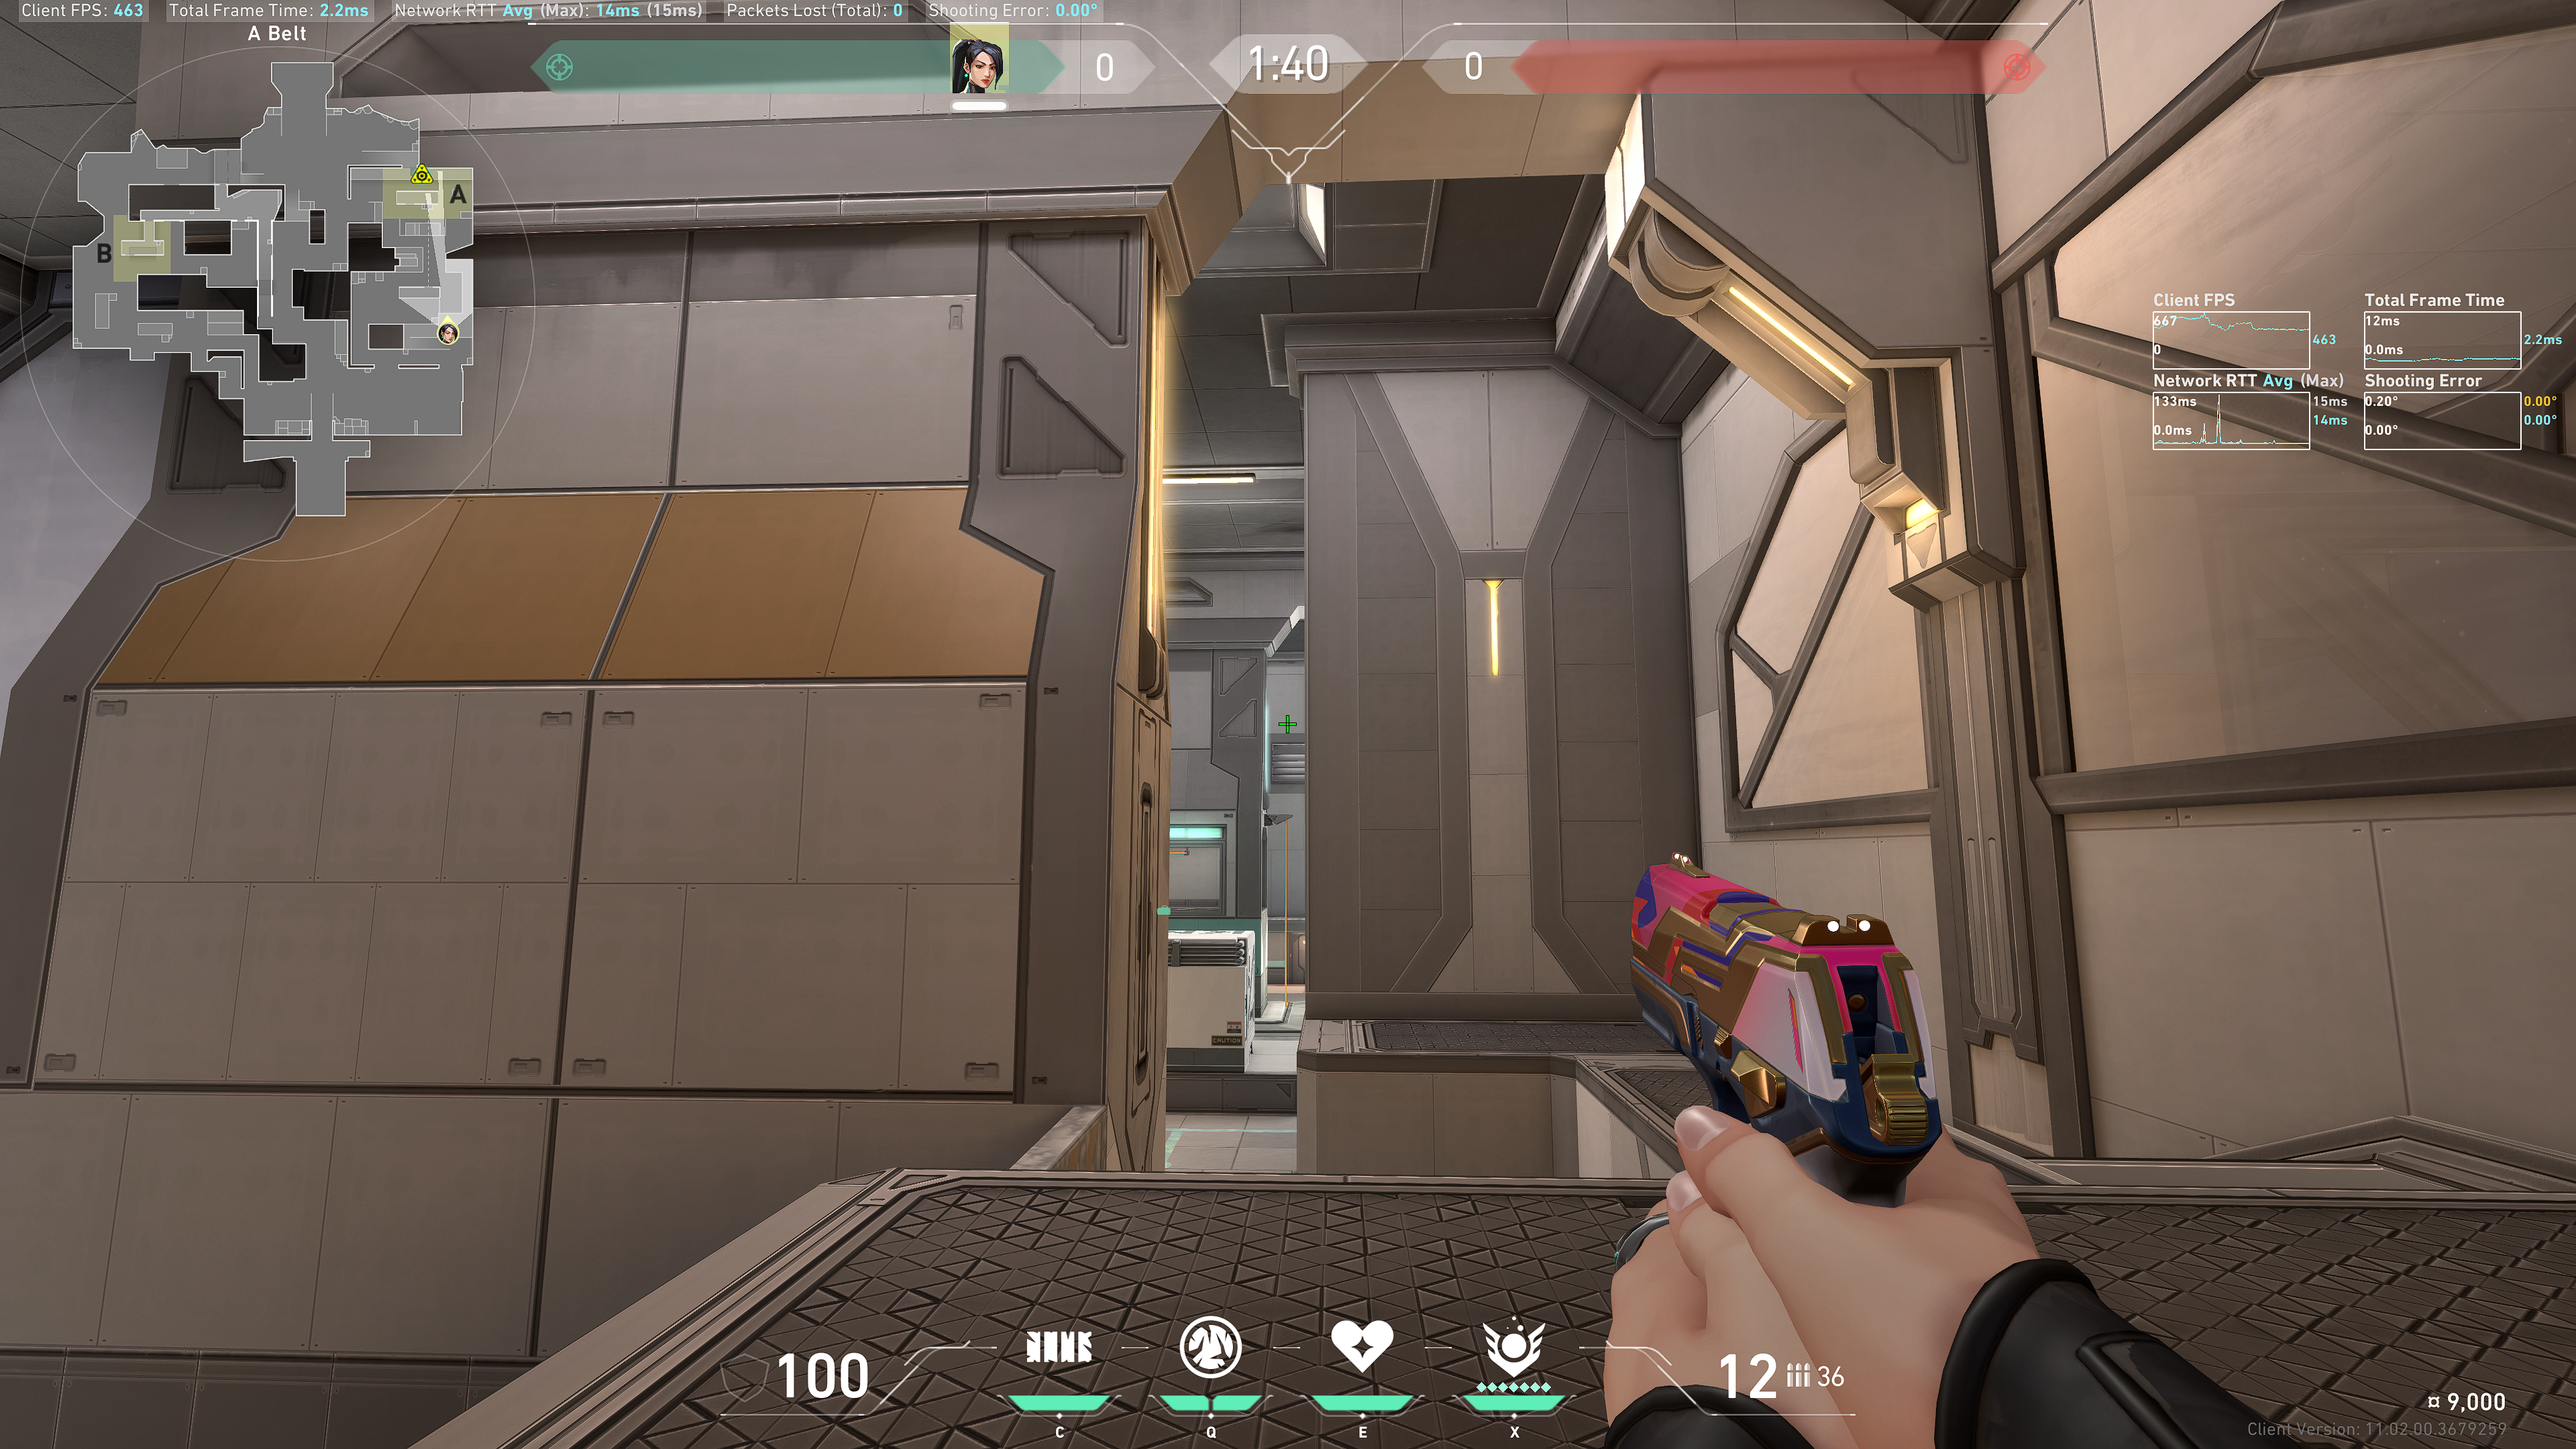
Example result:
Note: somehow the ice spreads more optimally when standing back Belt instead of front Belt.
From Belt (front)
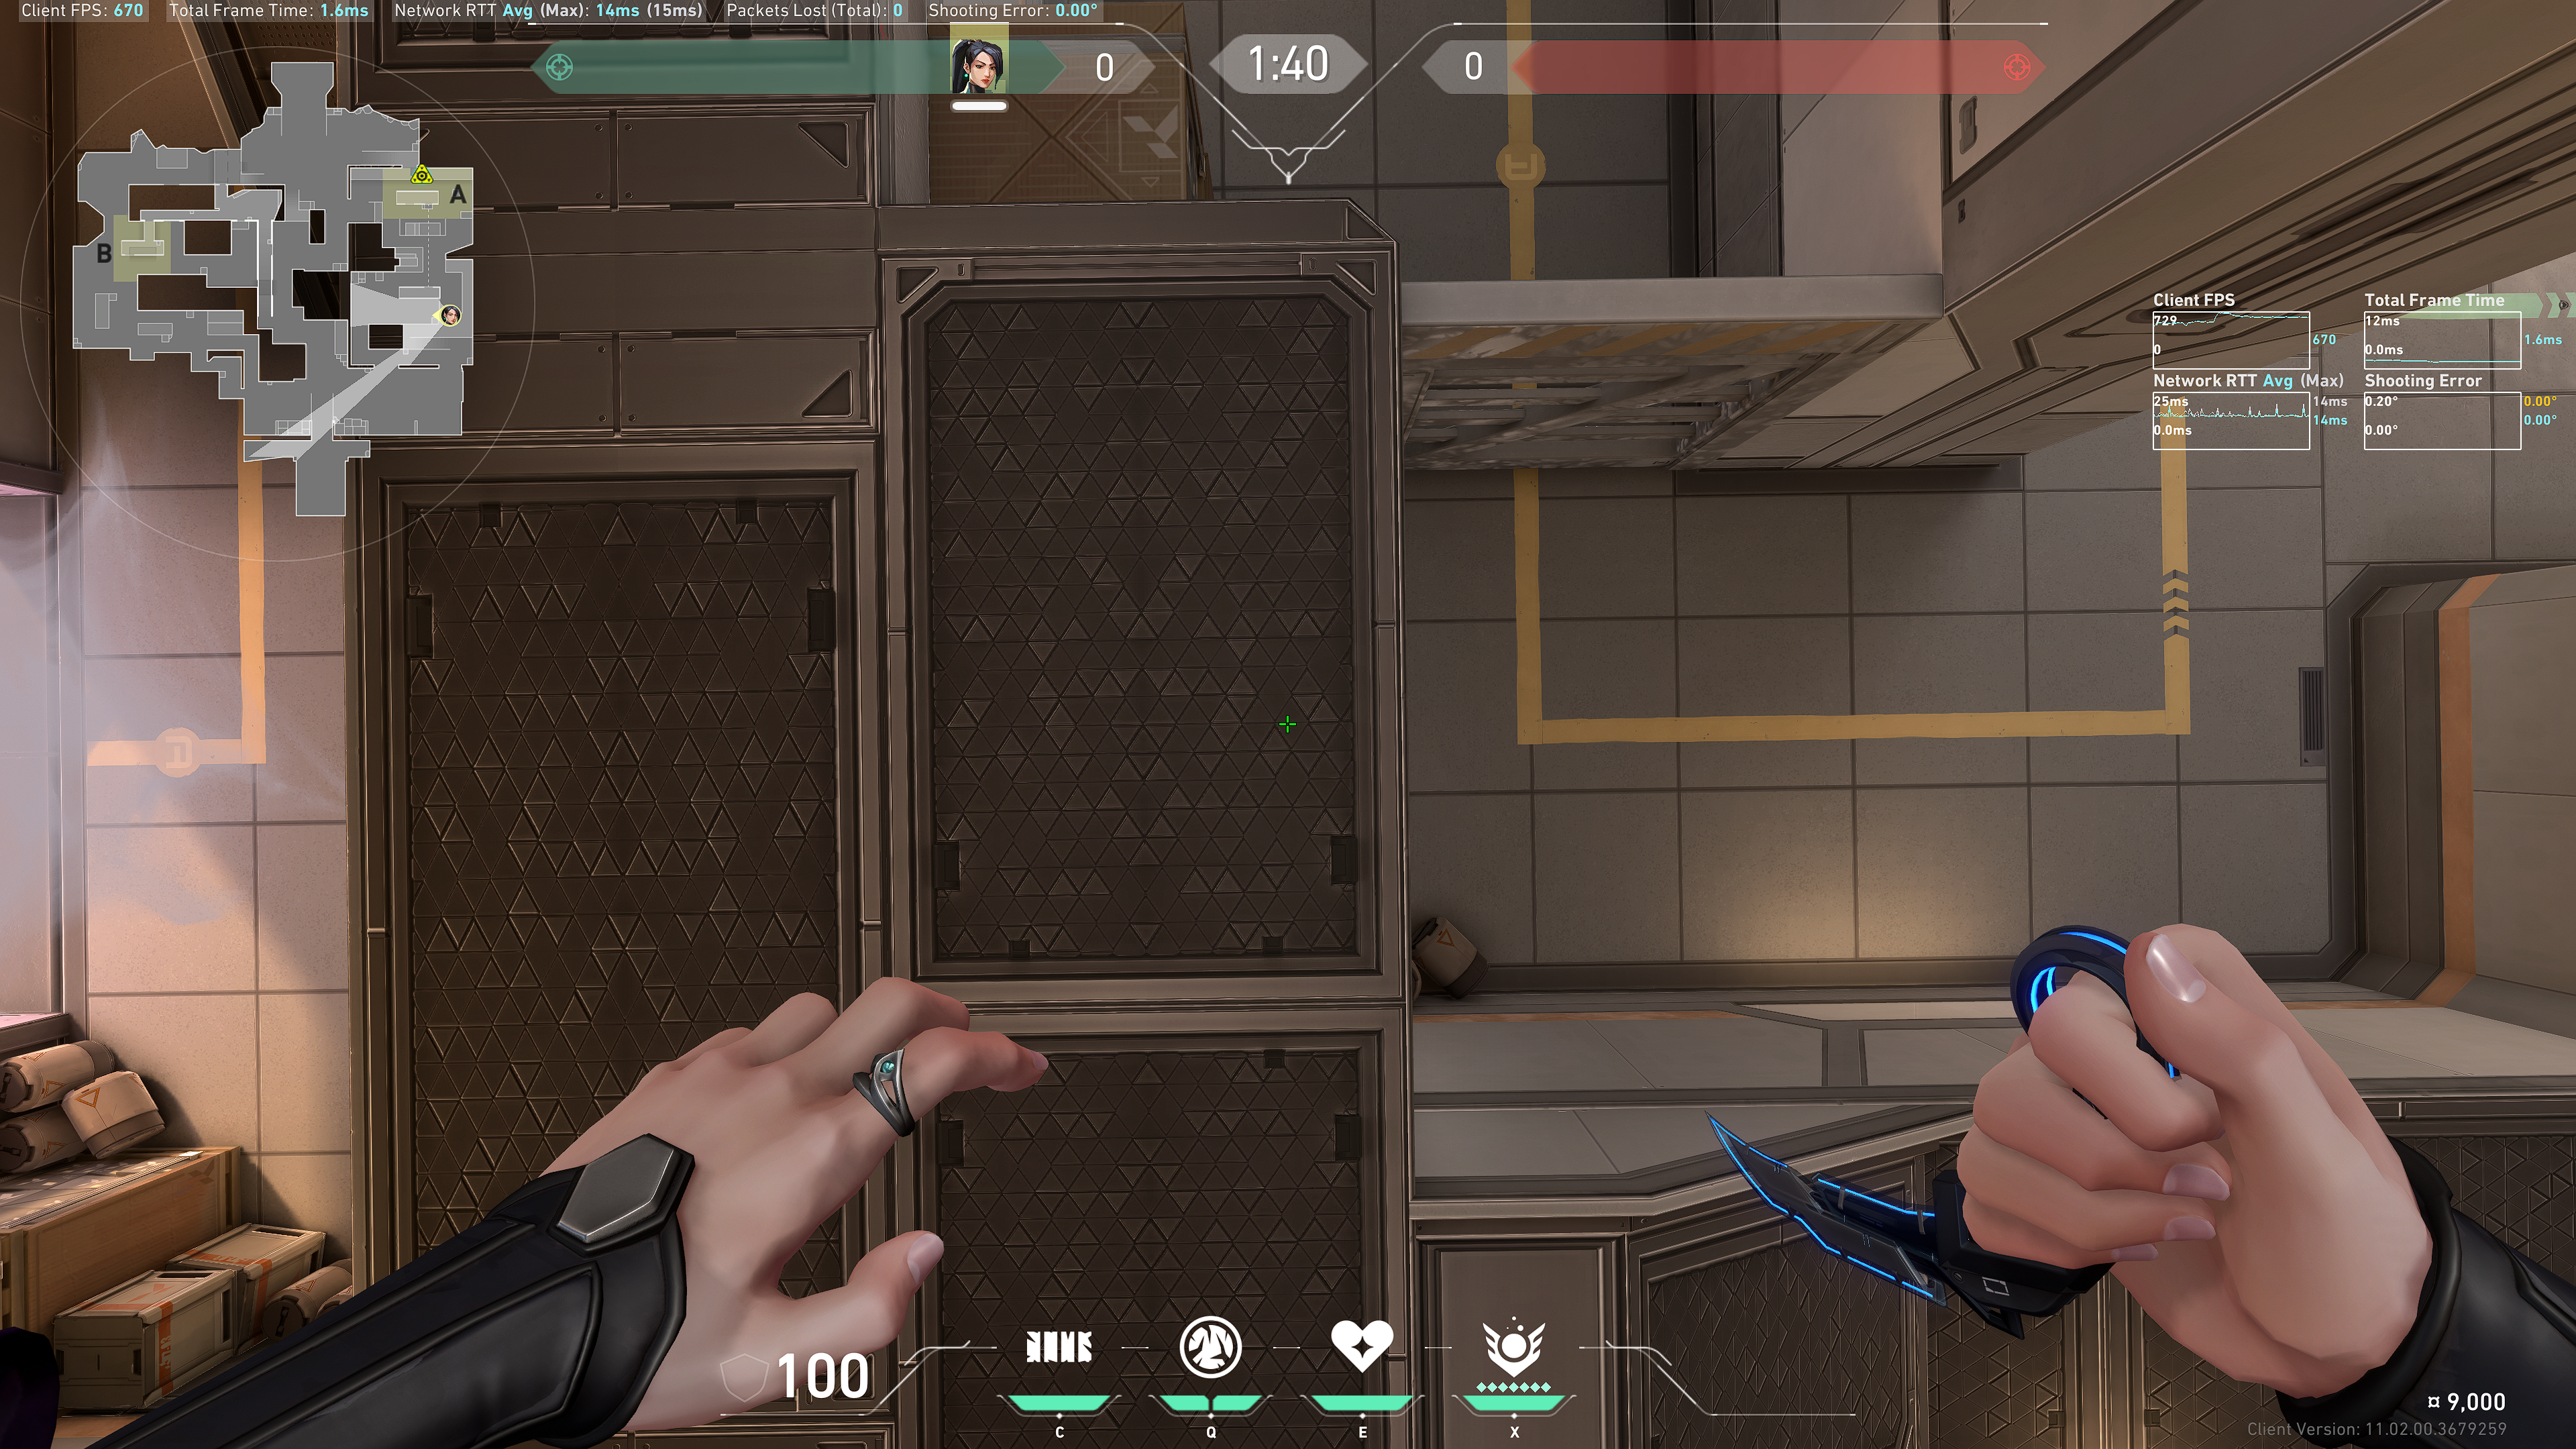
Aim at the grill:
Example result:
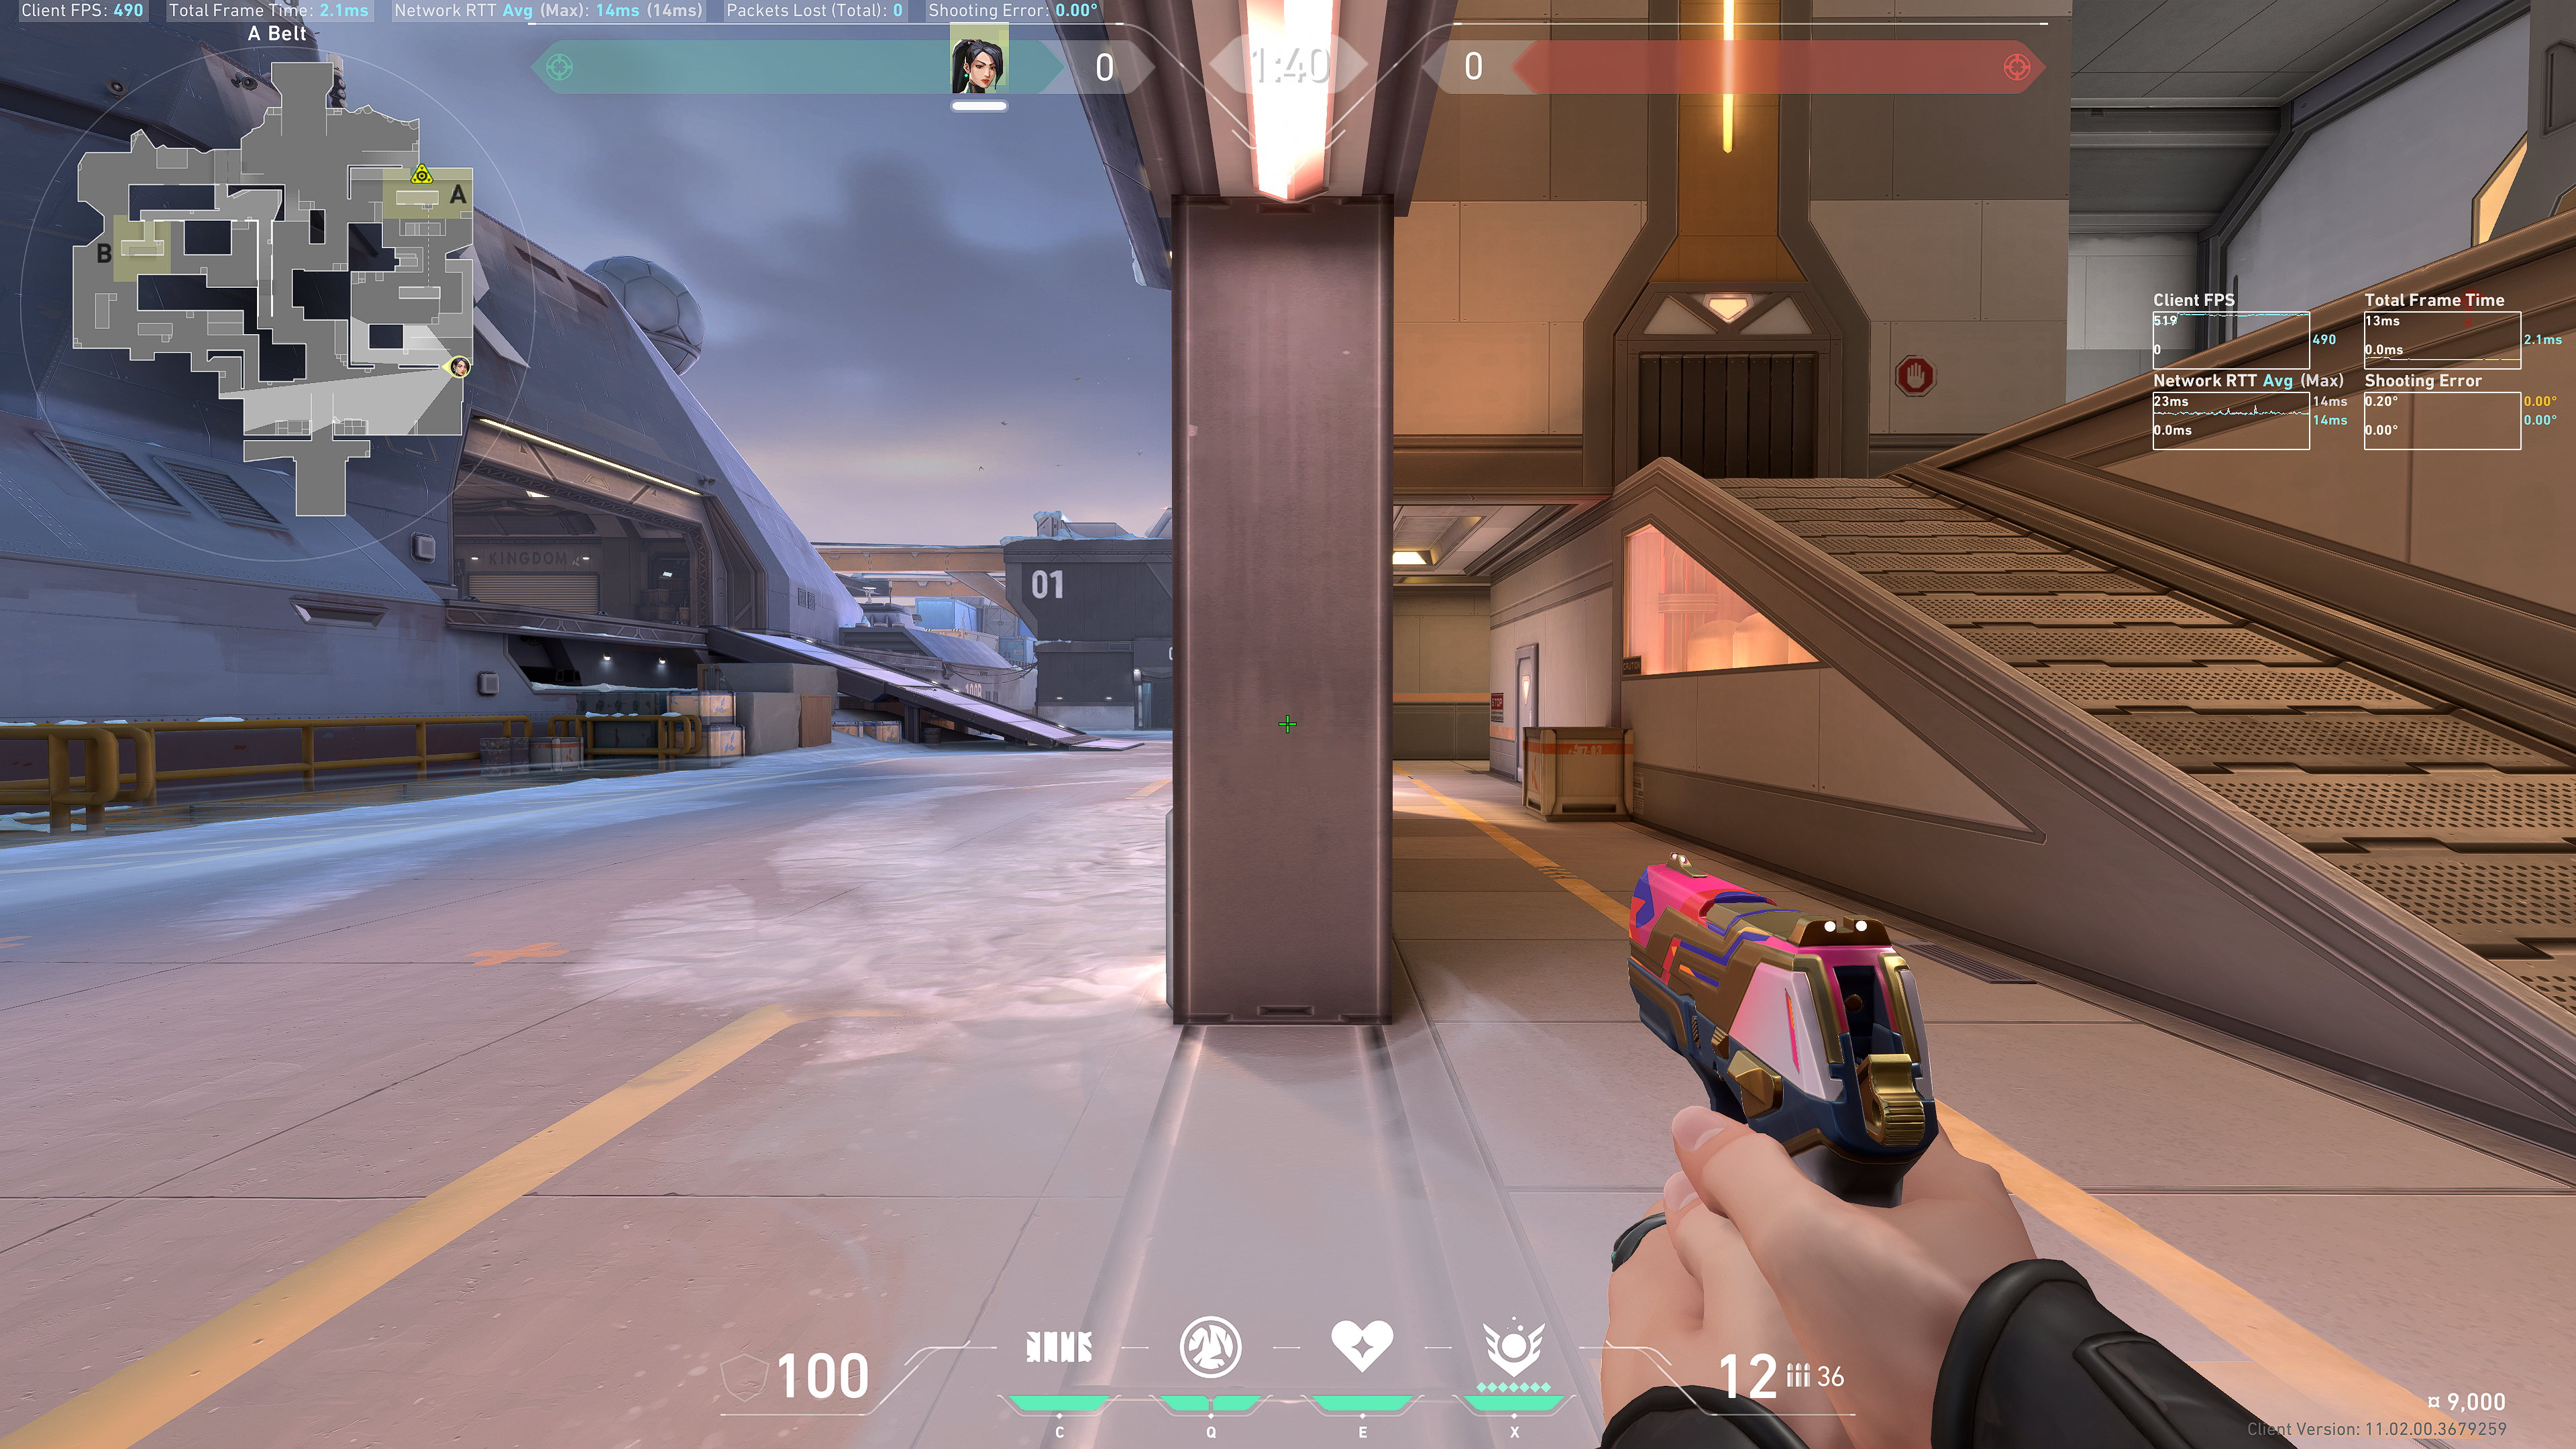
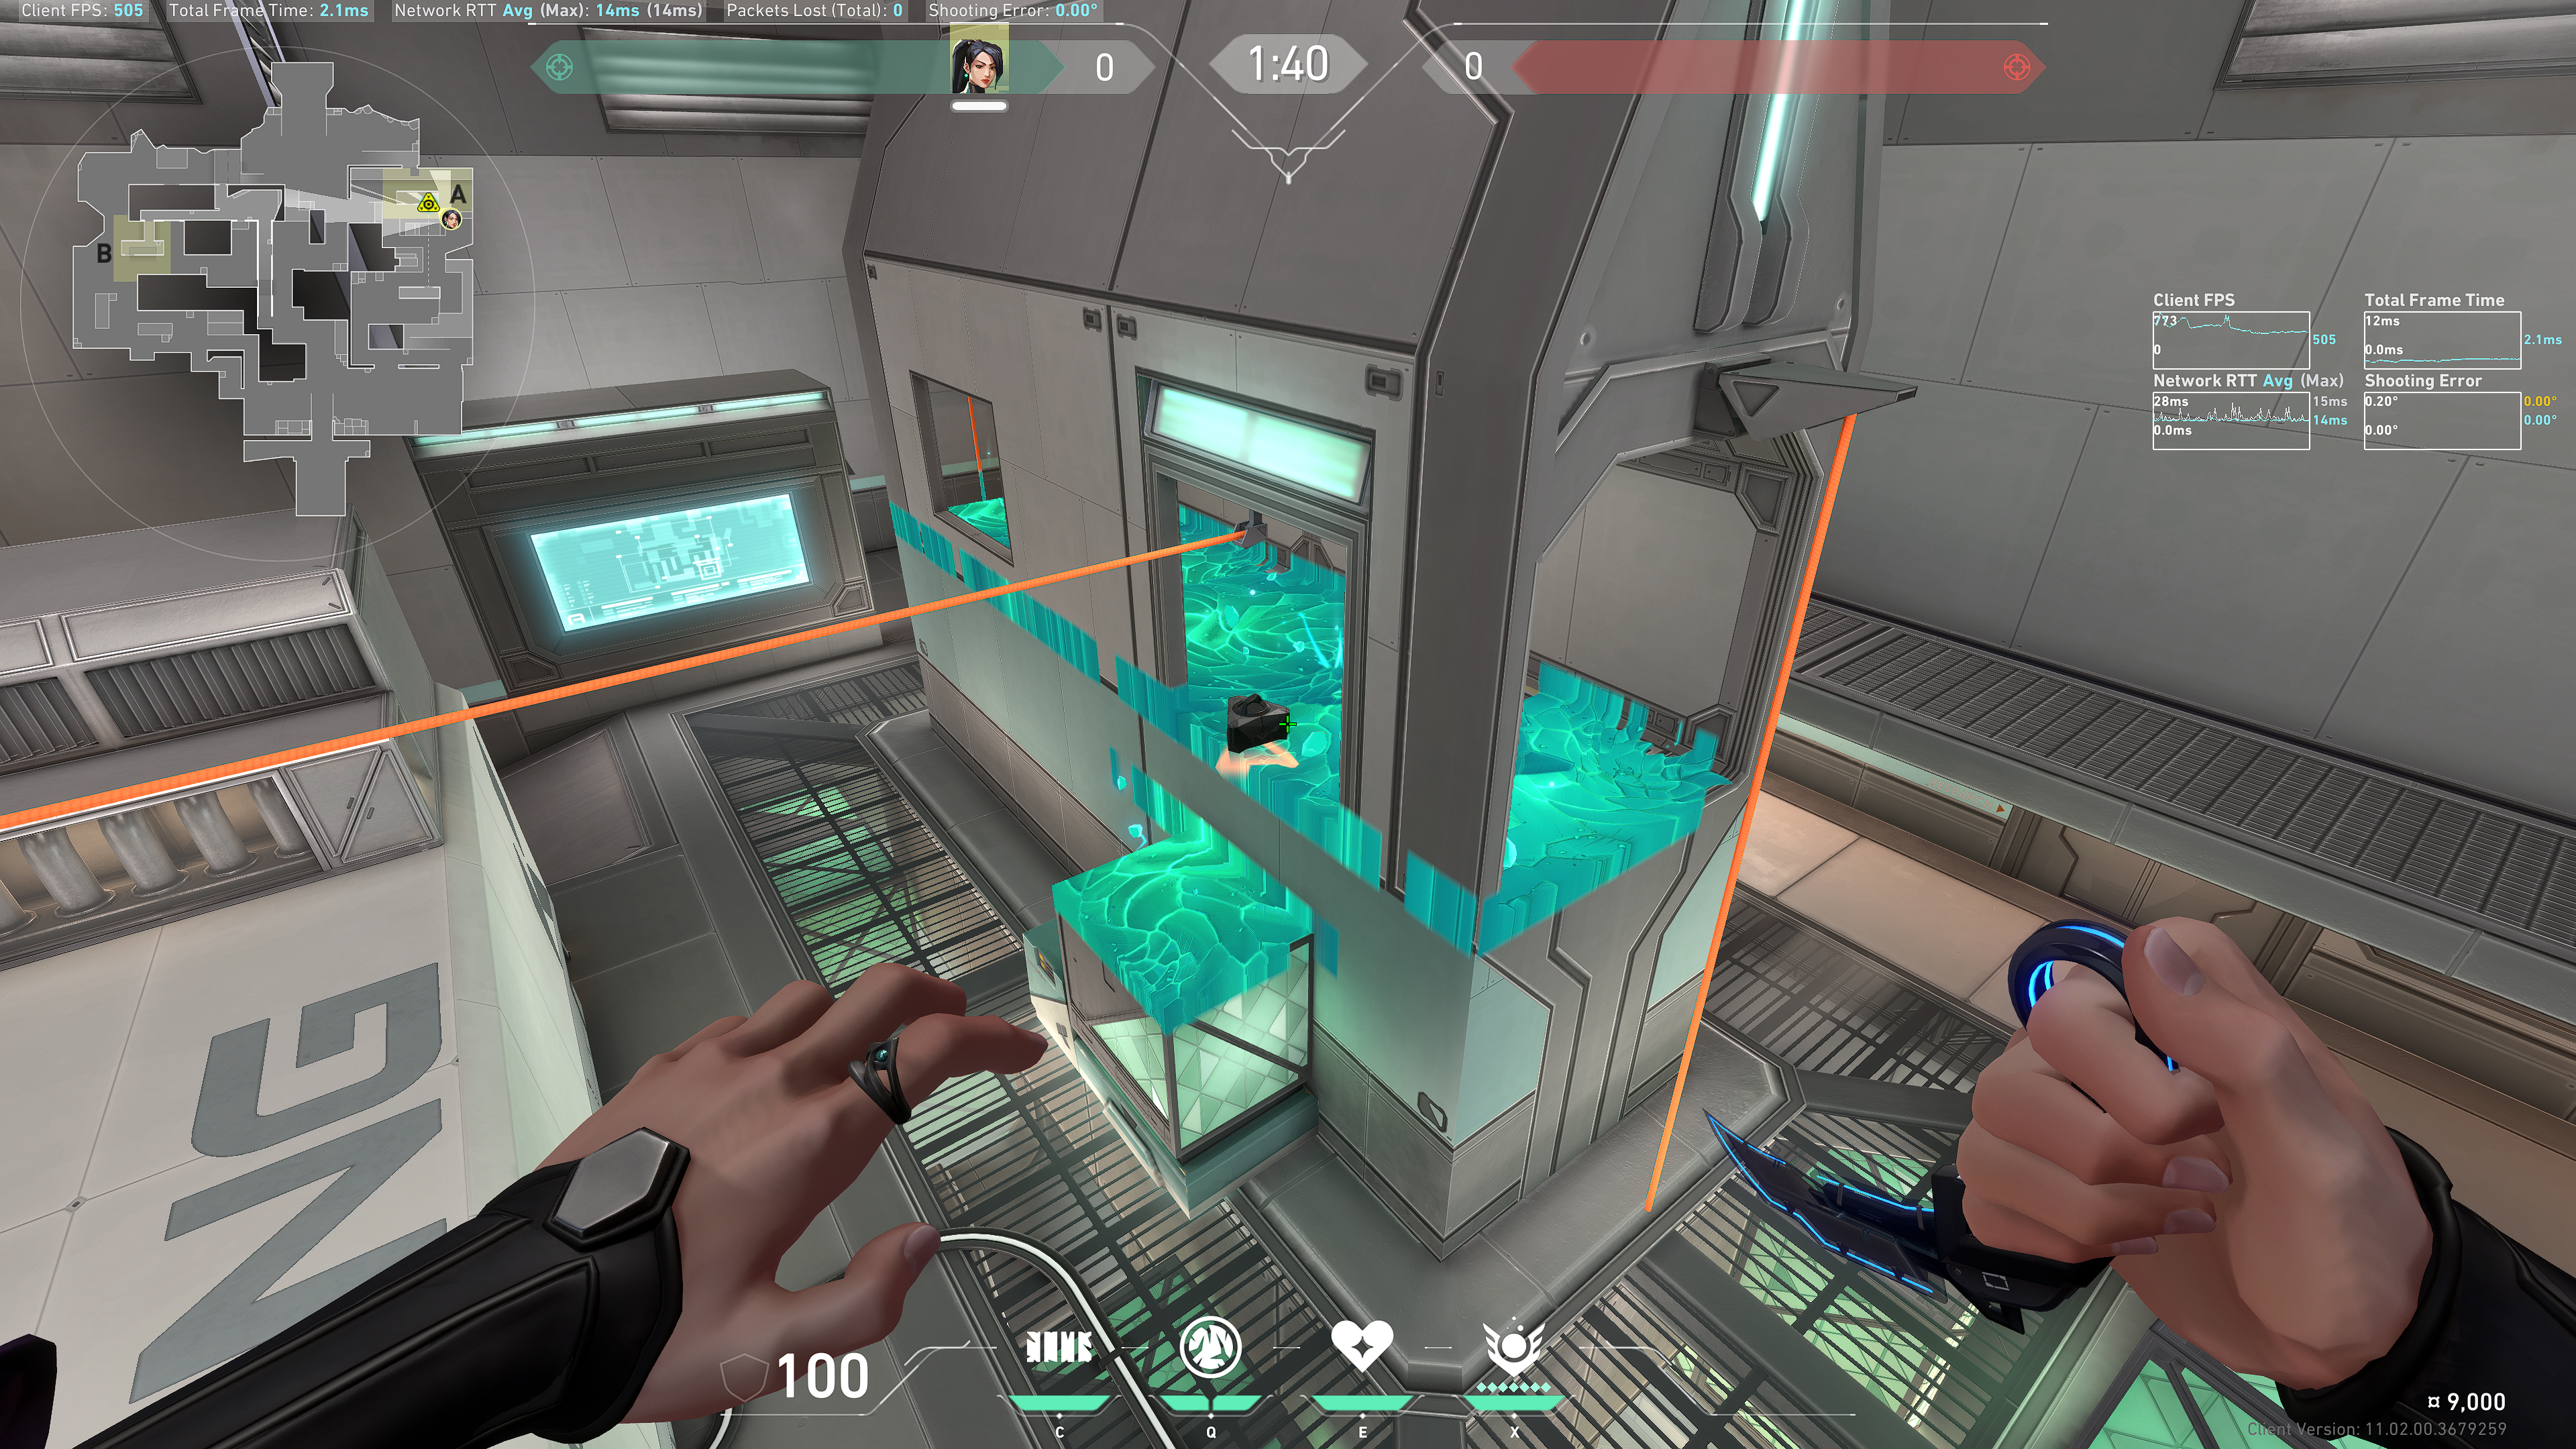
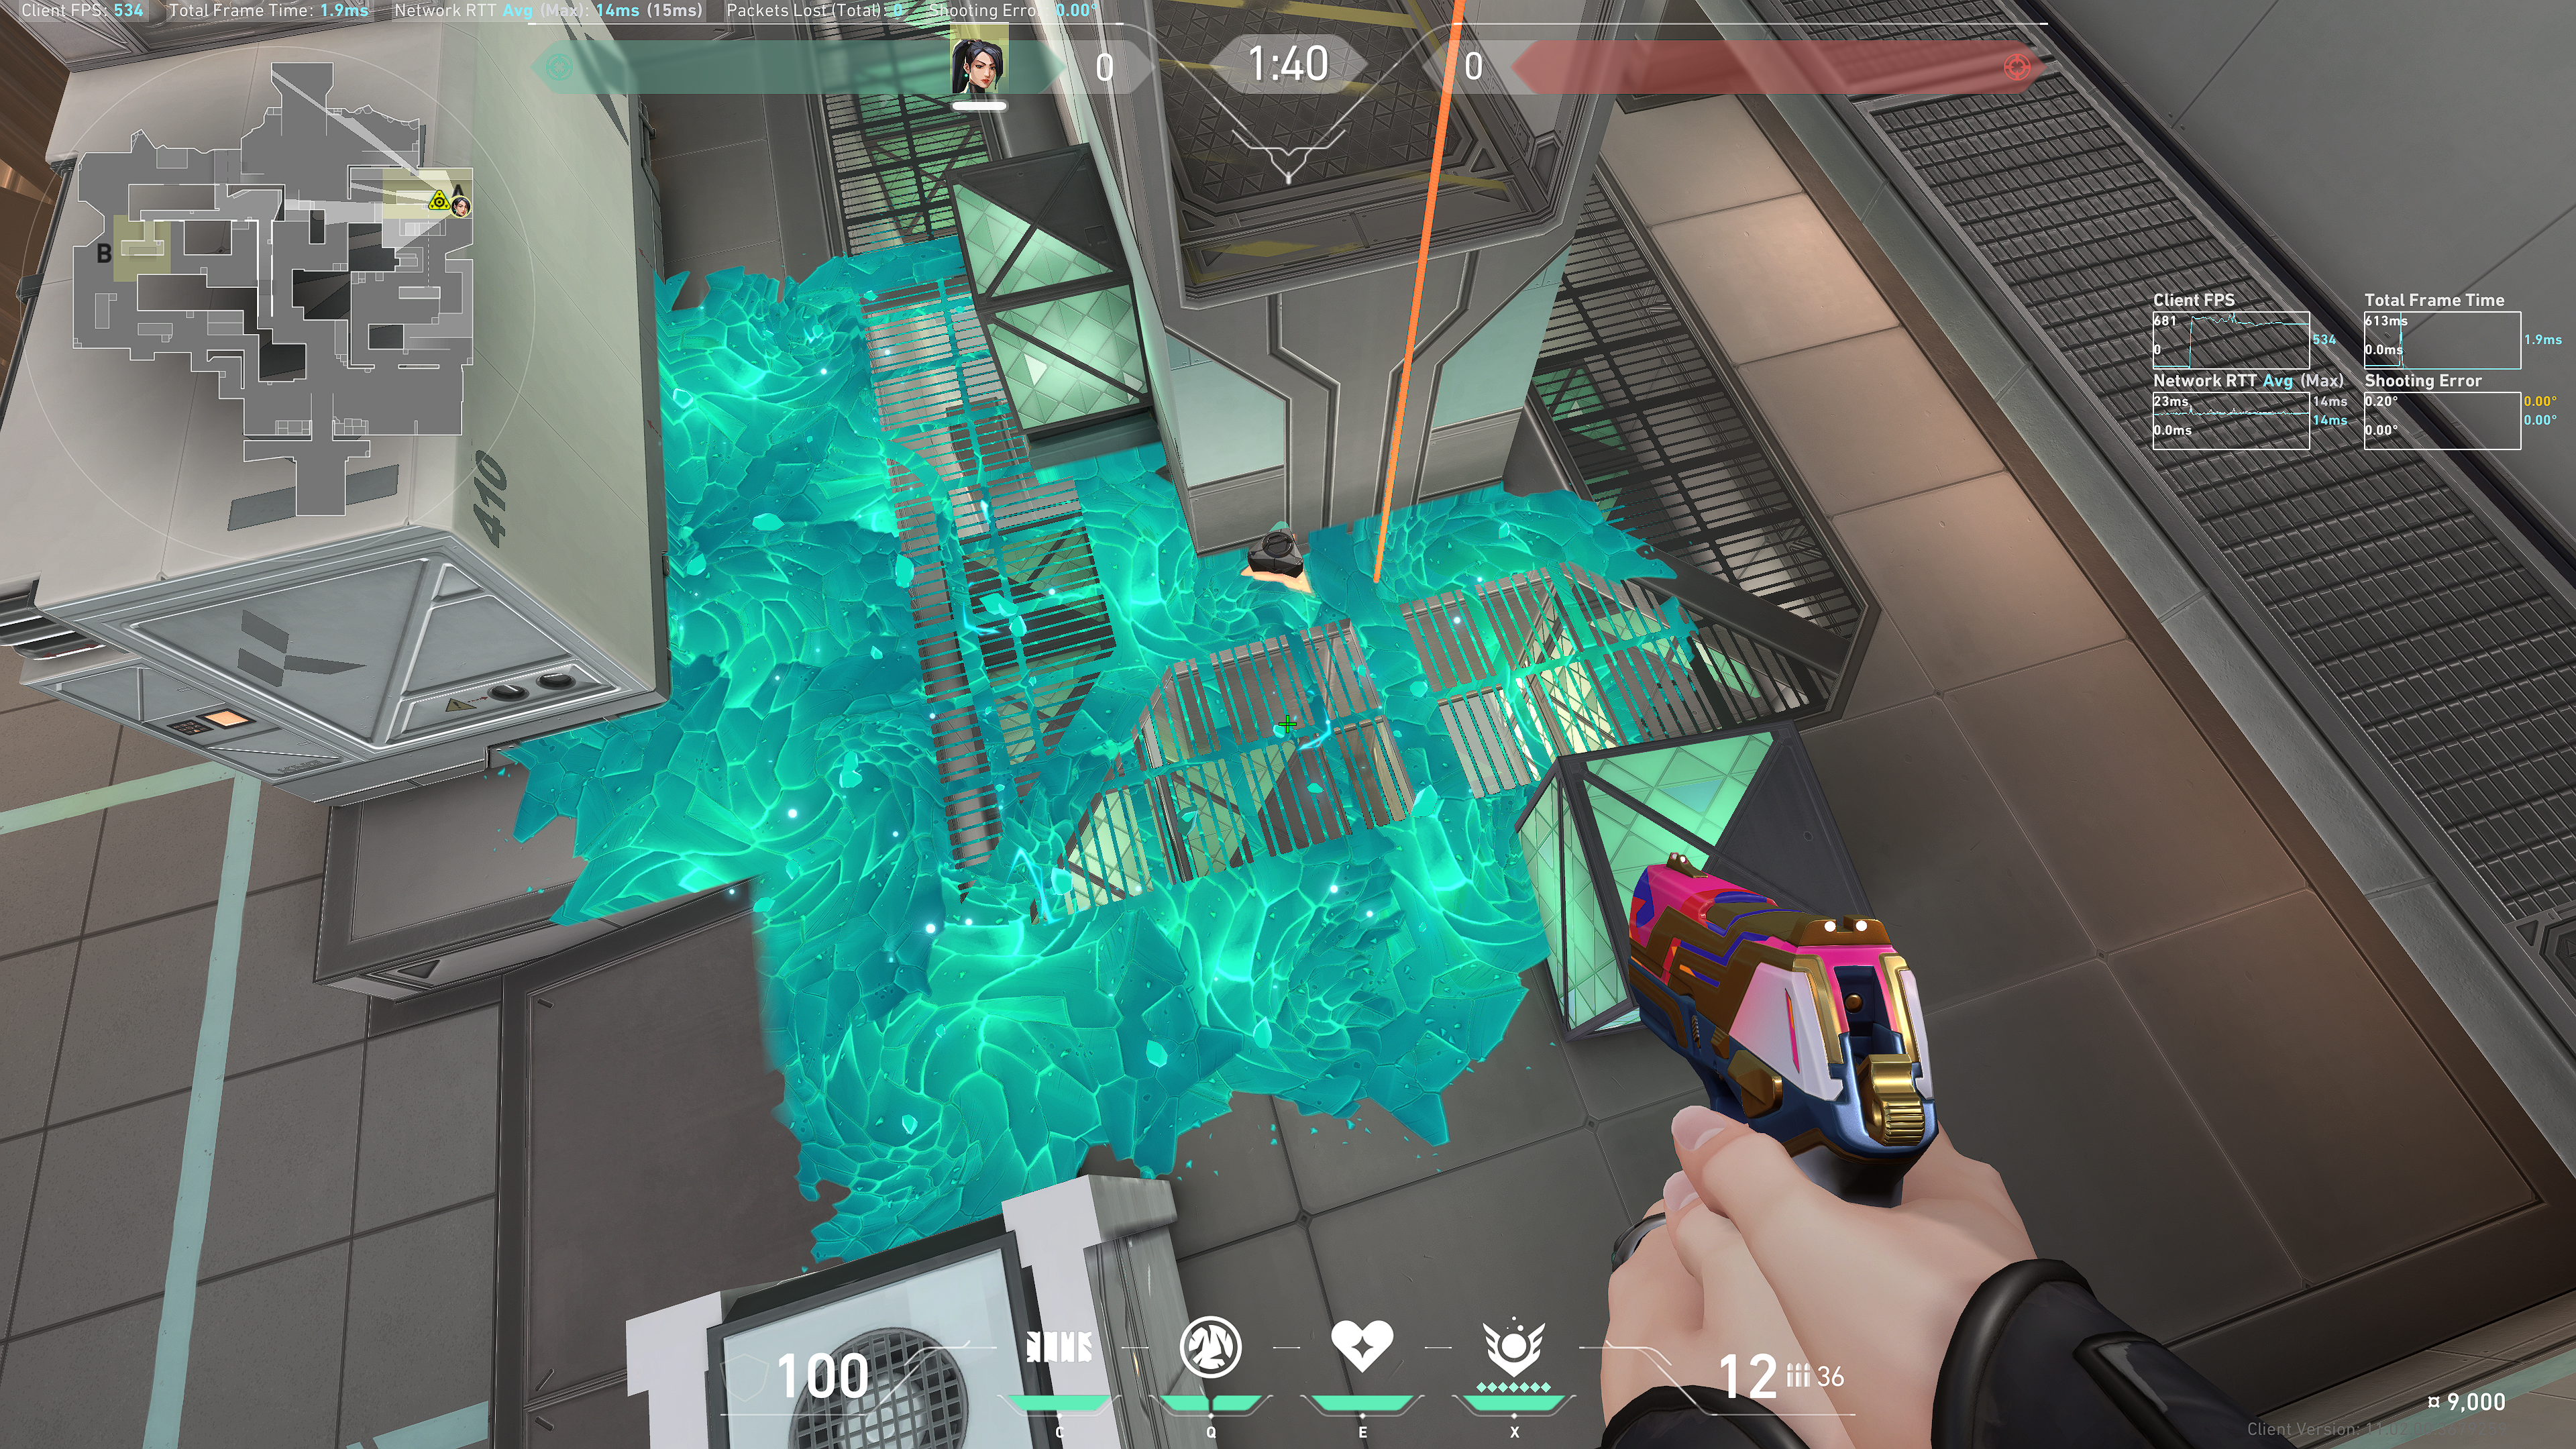
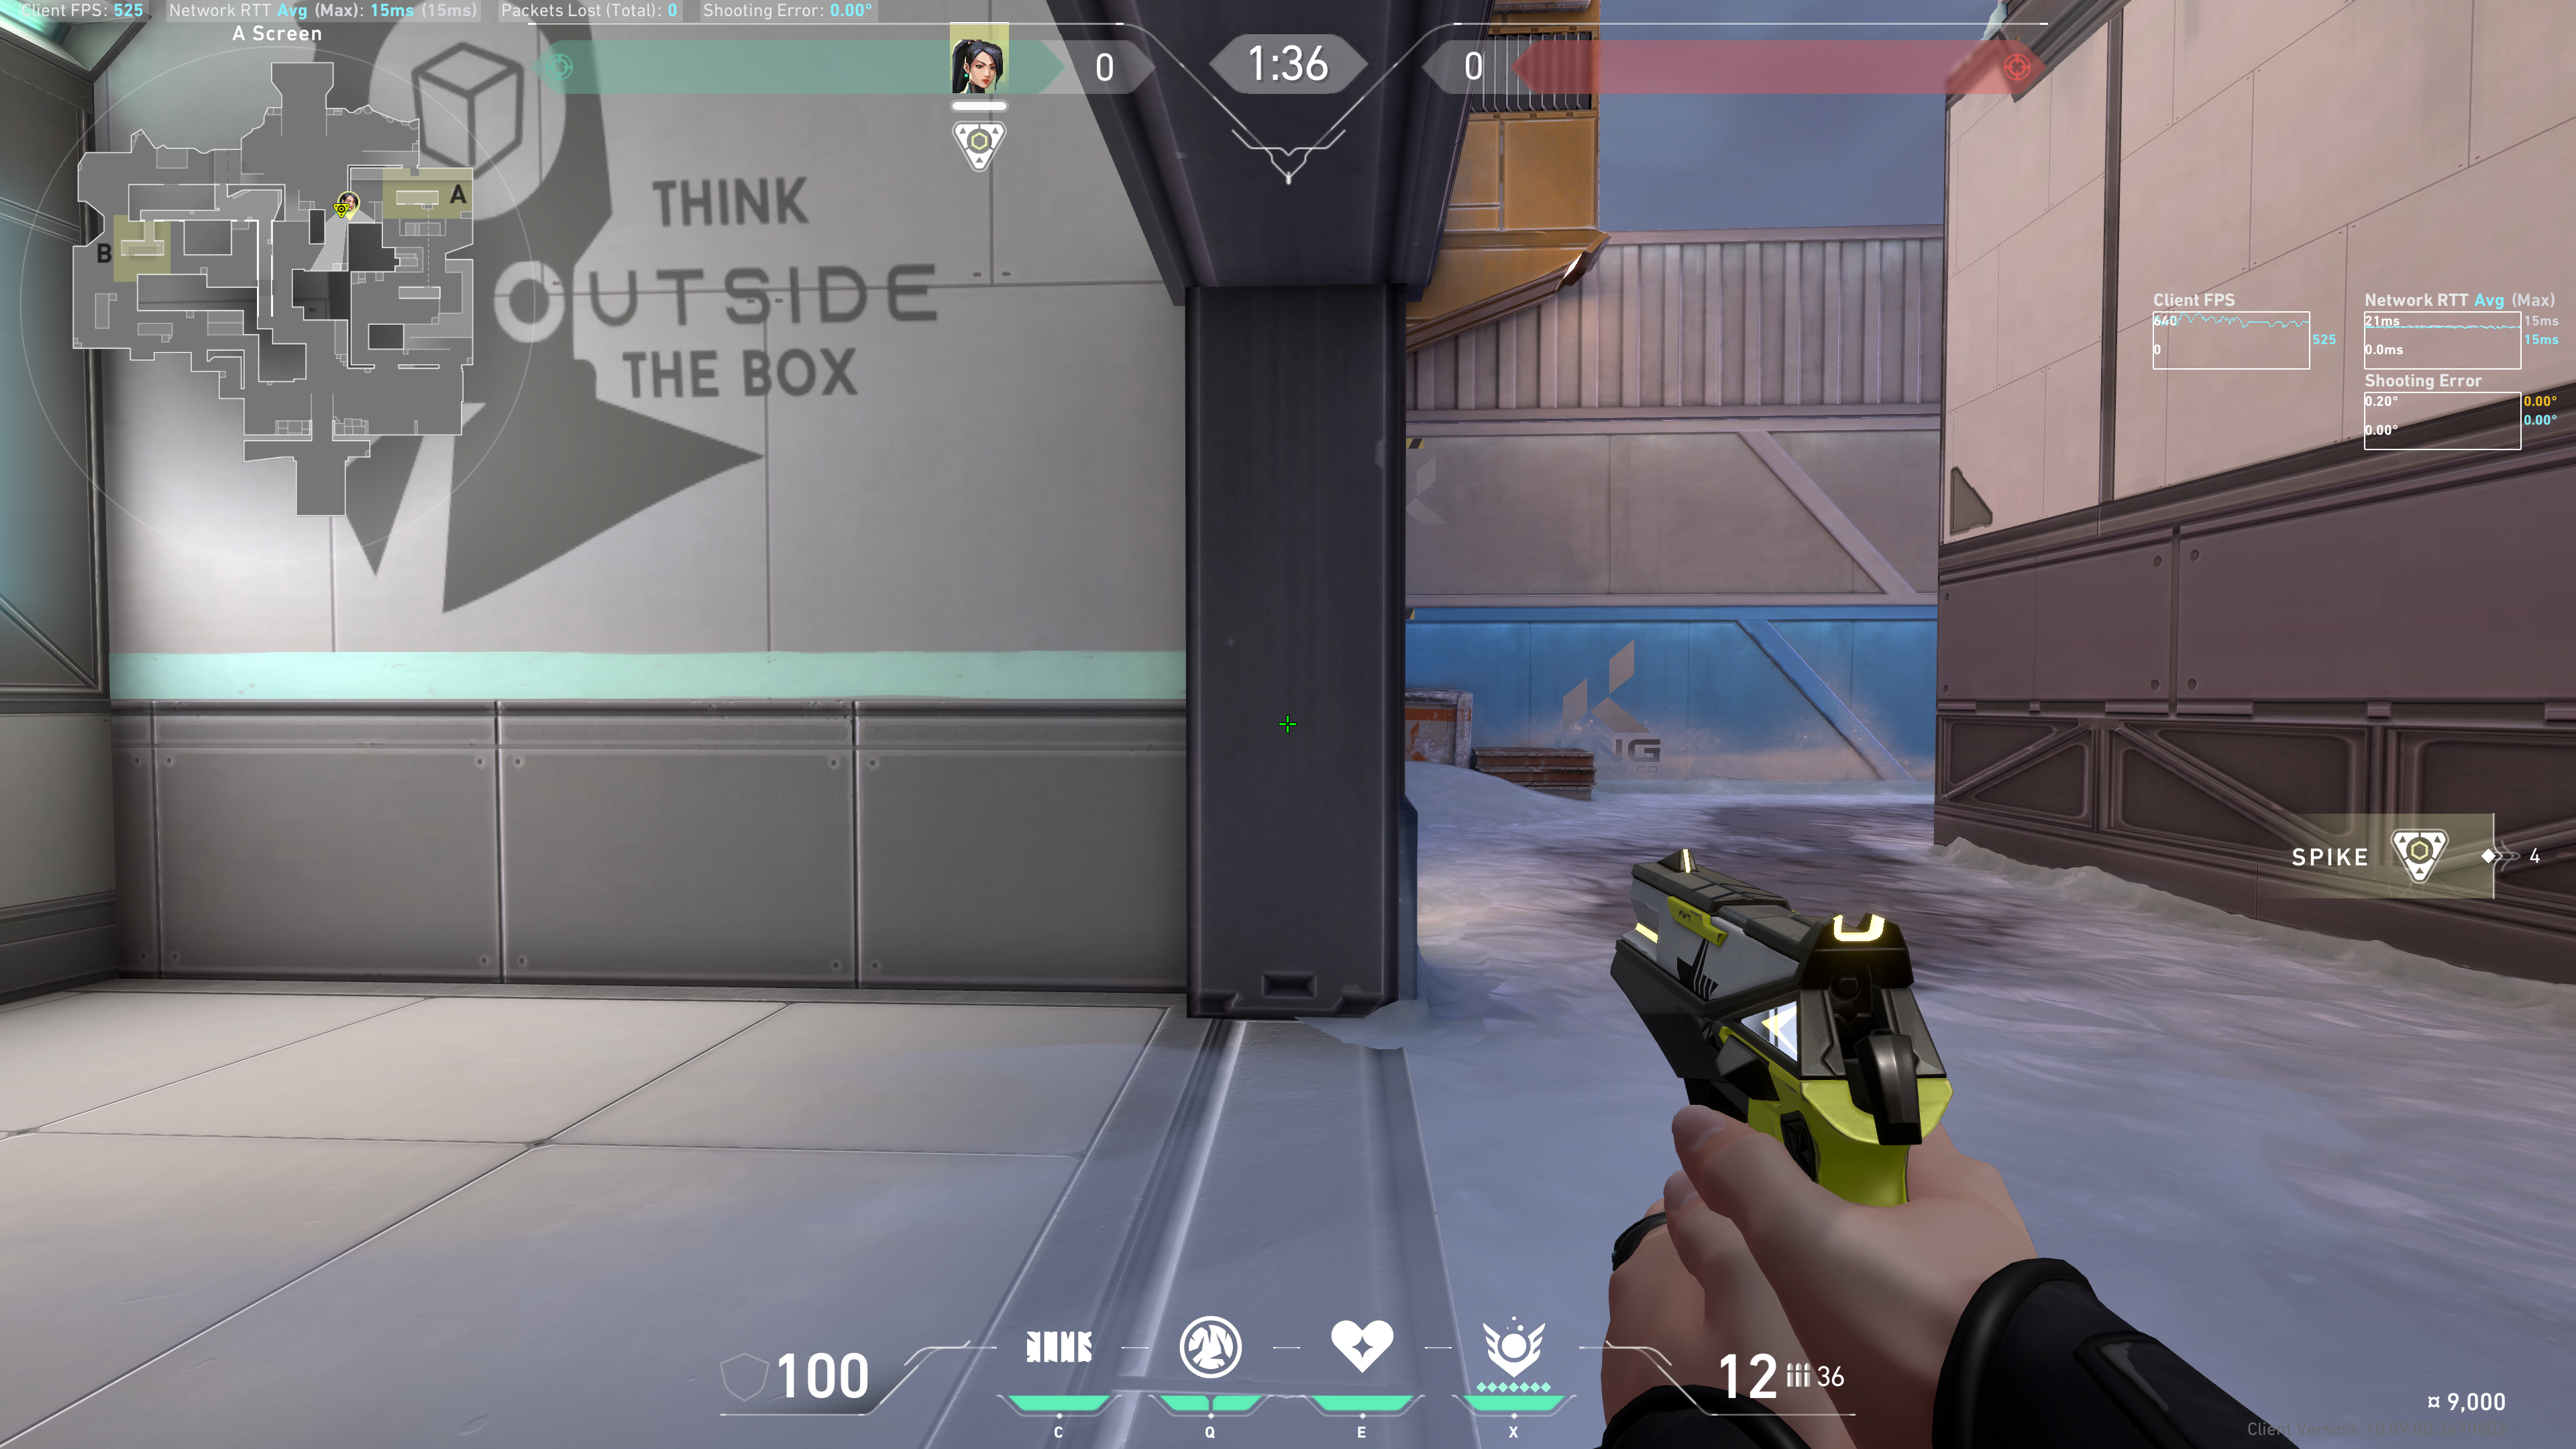
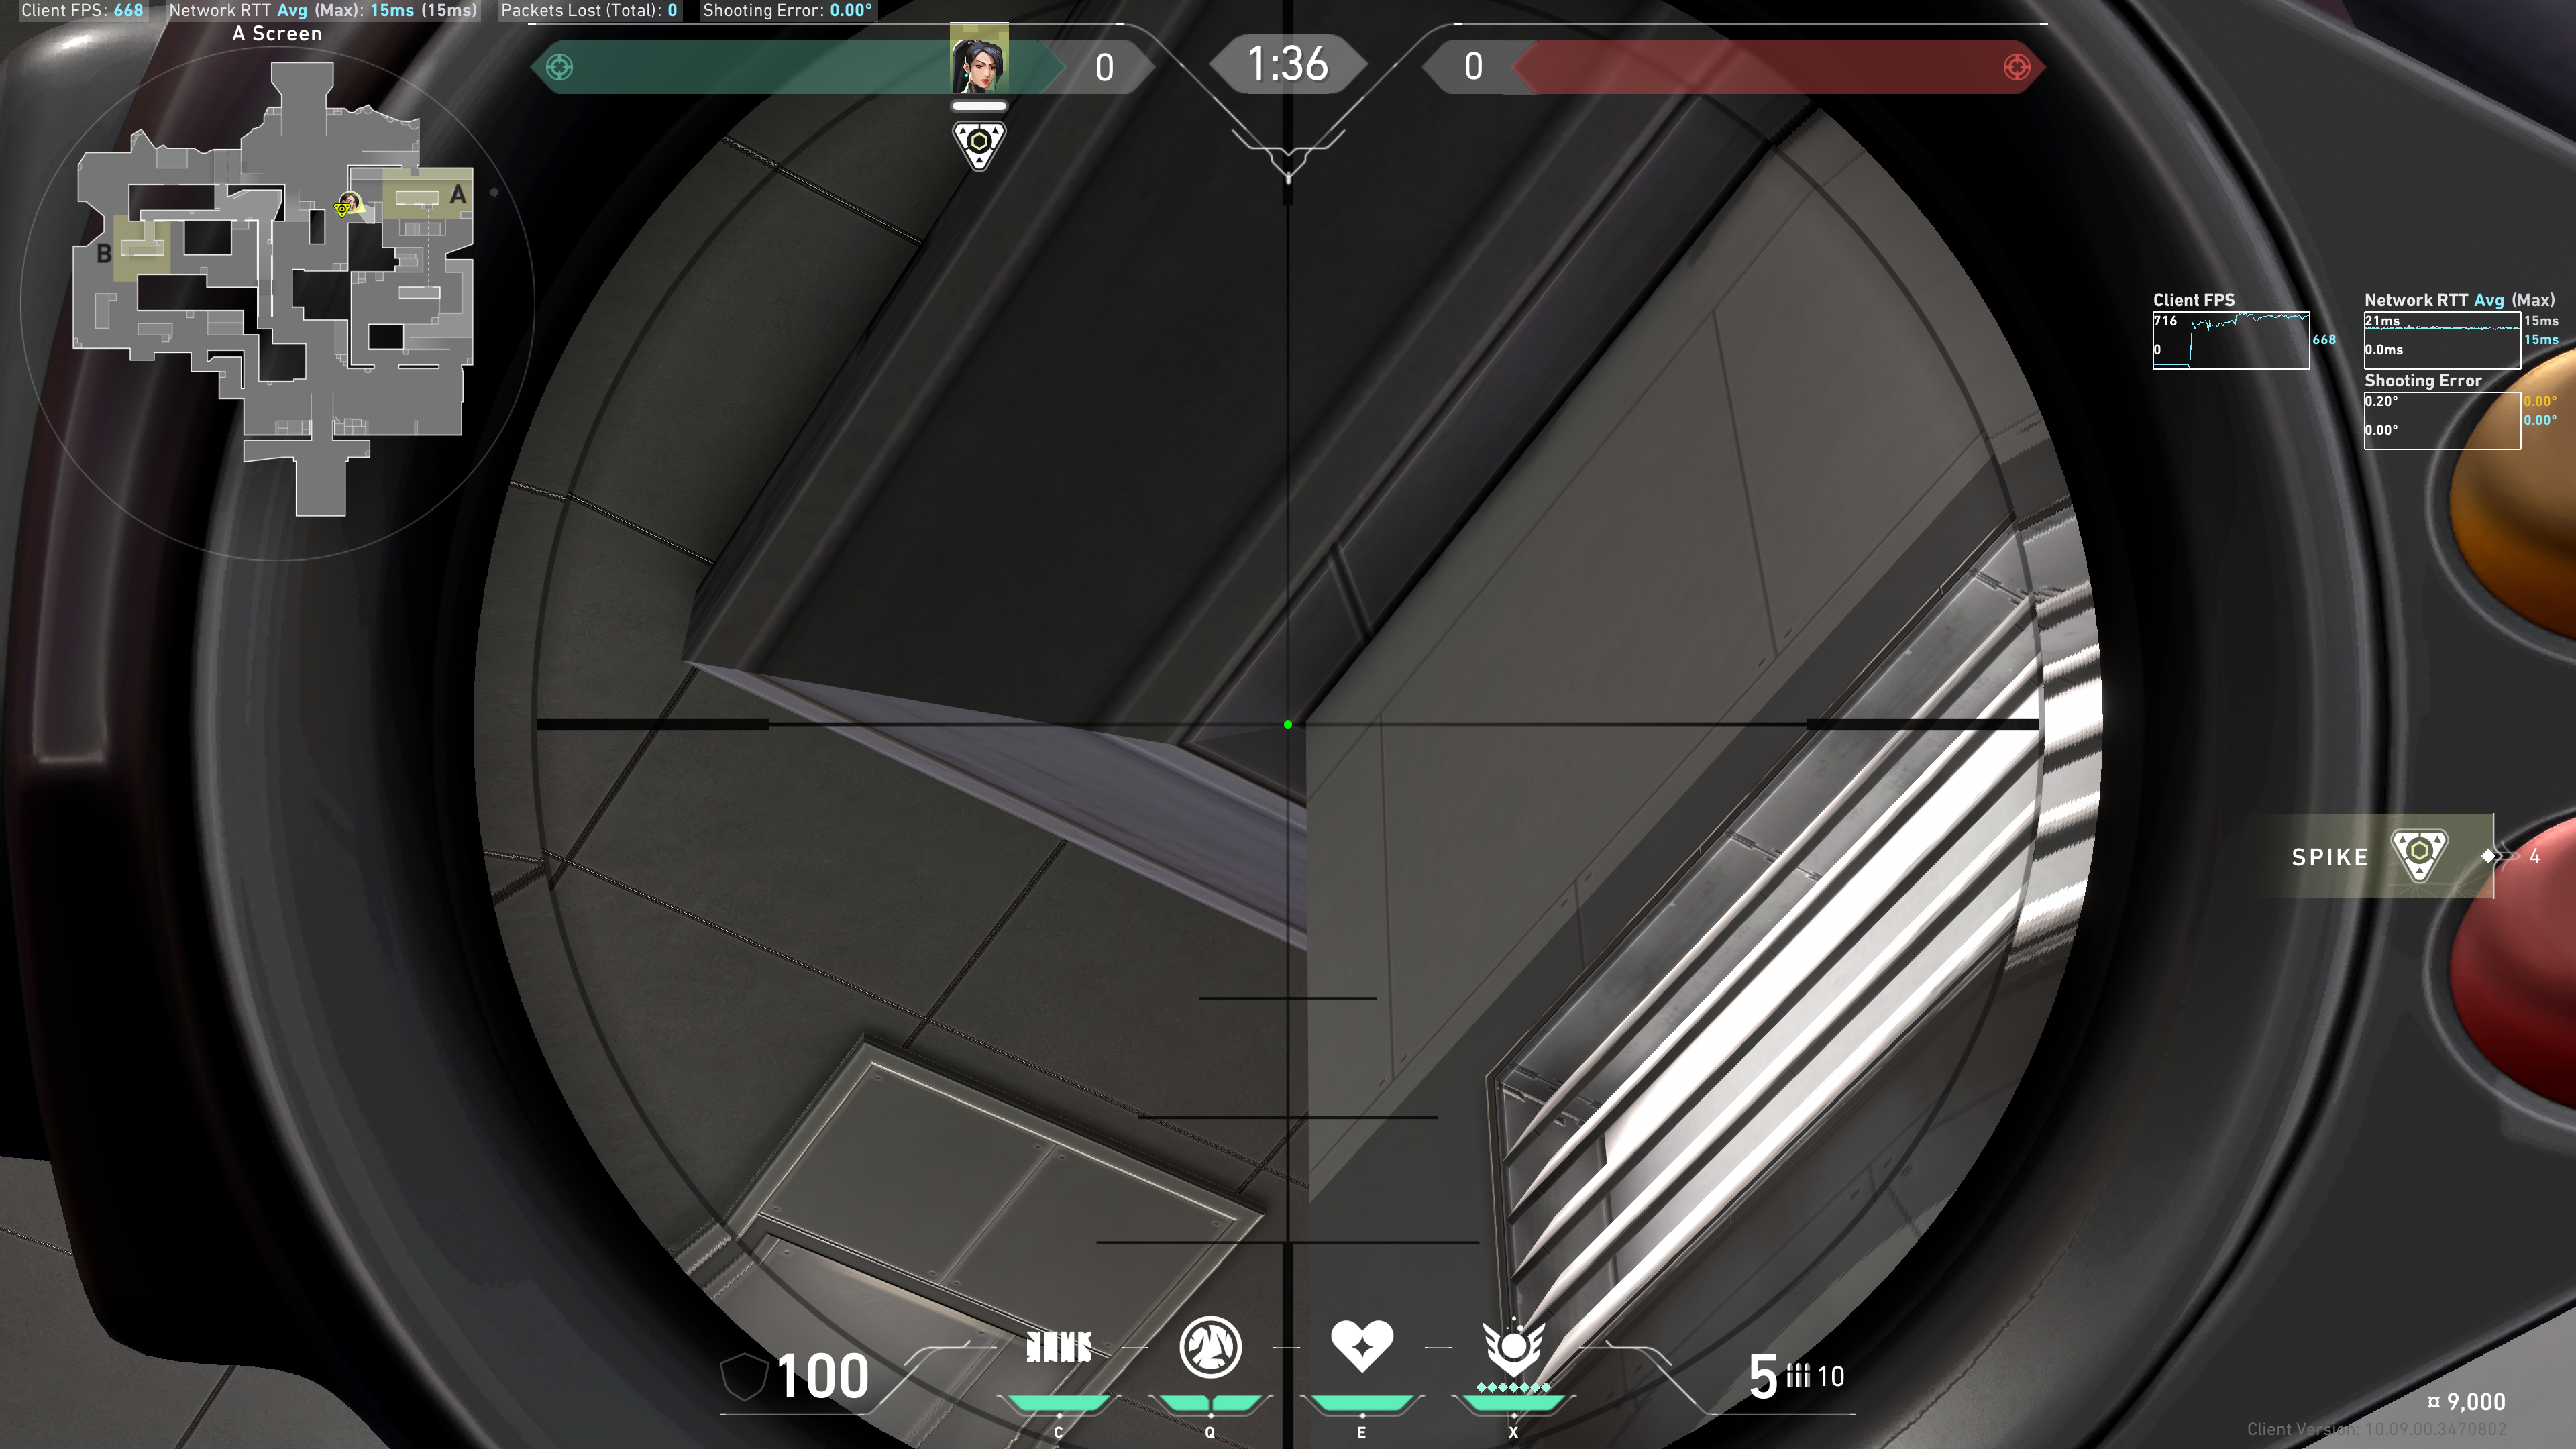
Top Site
Note the orange zipline, as well as the vertical line in this wall. We can use this to help aim our lineups.
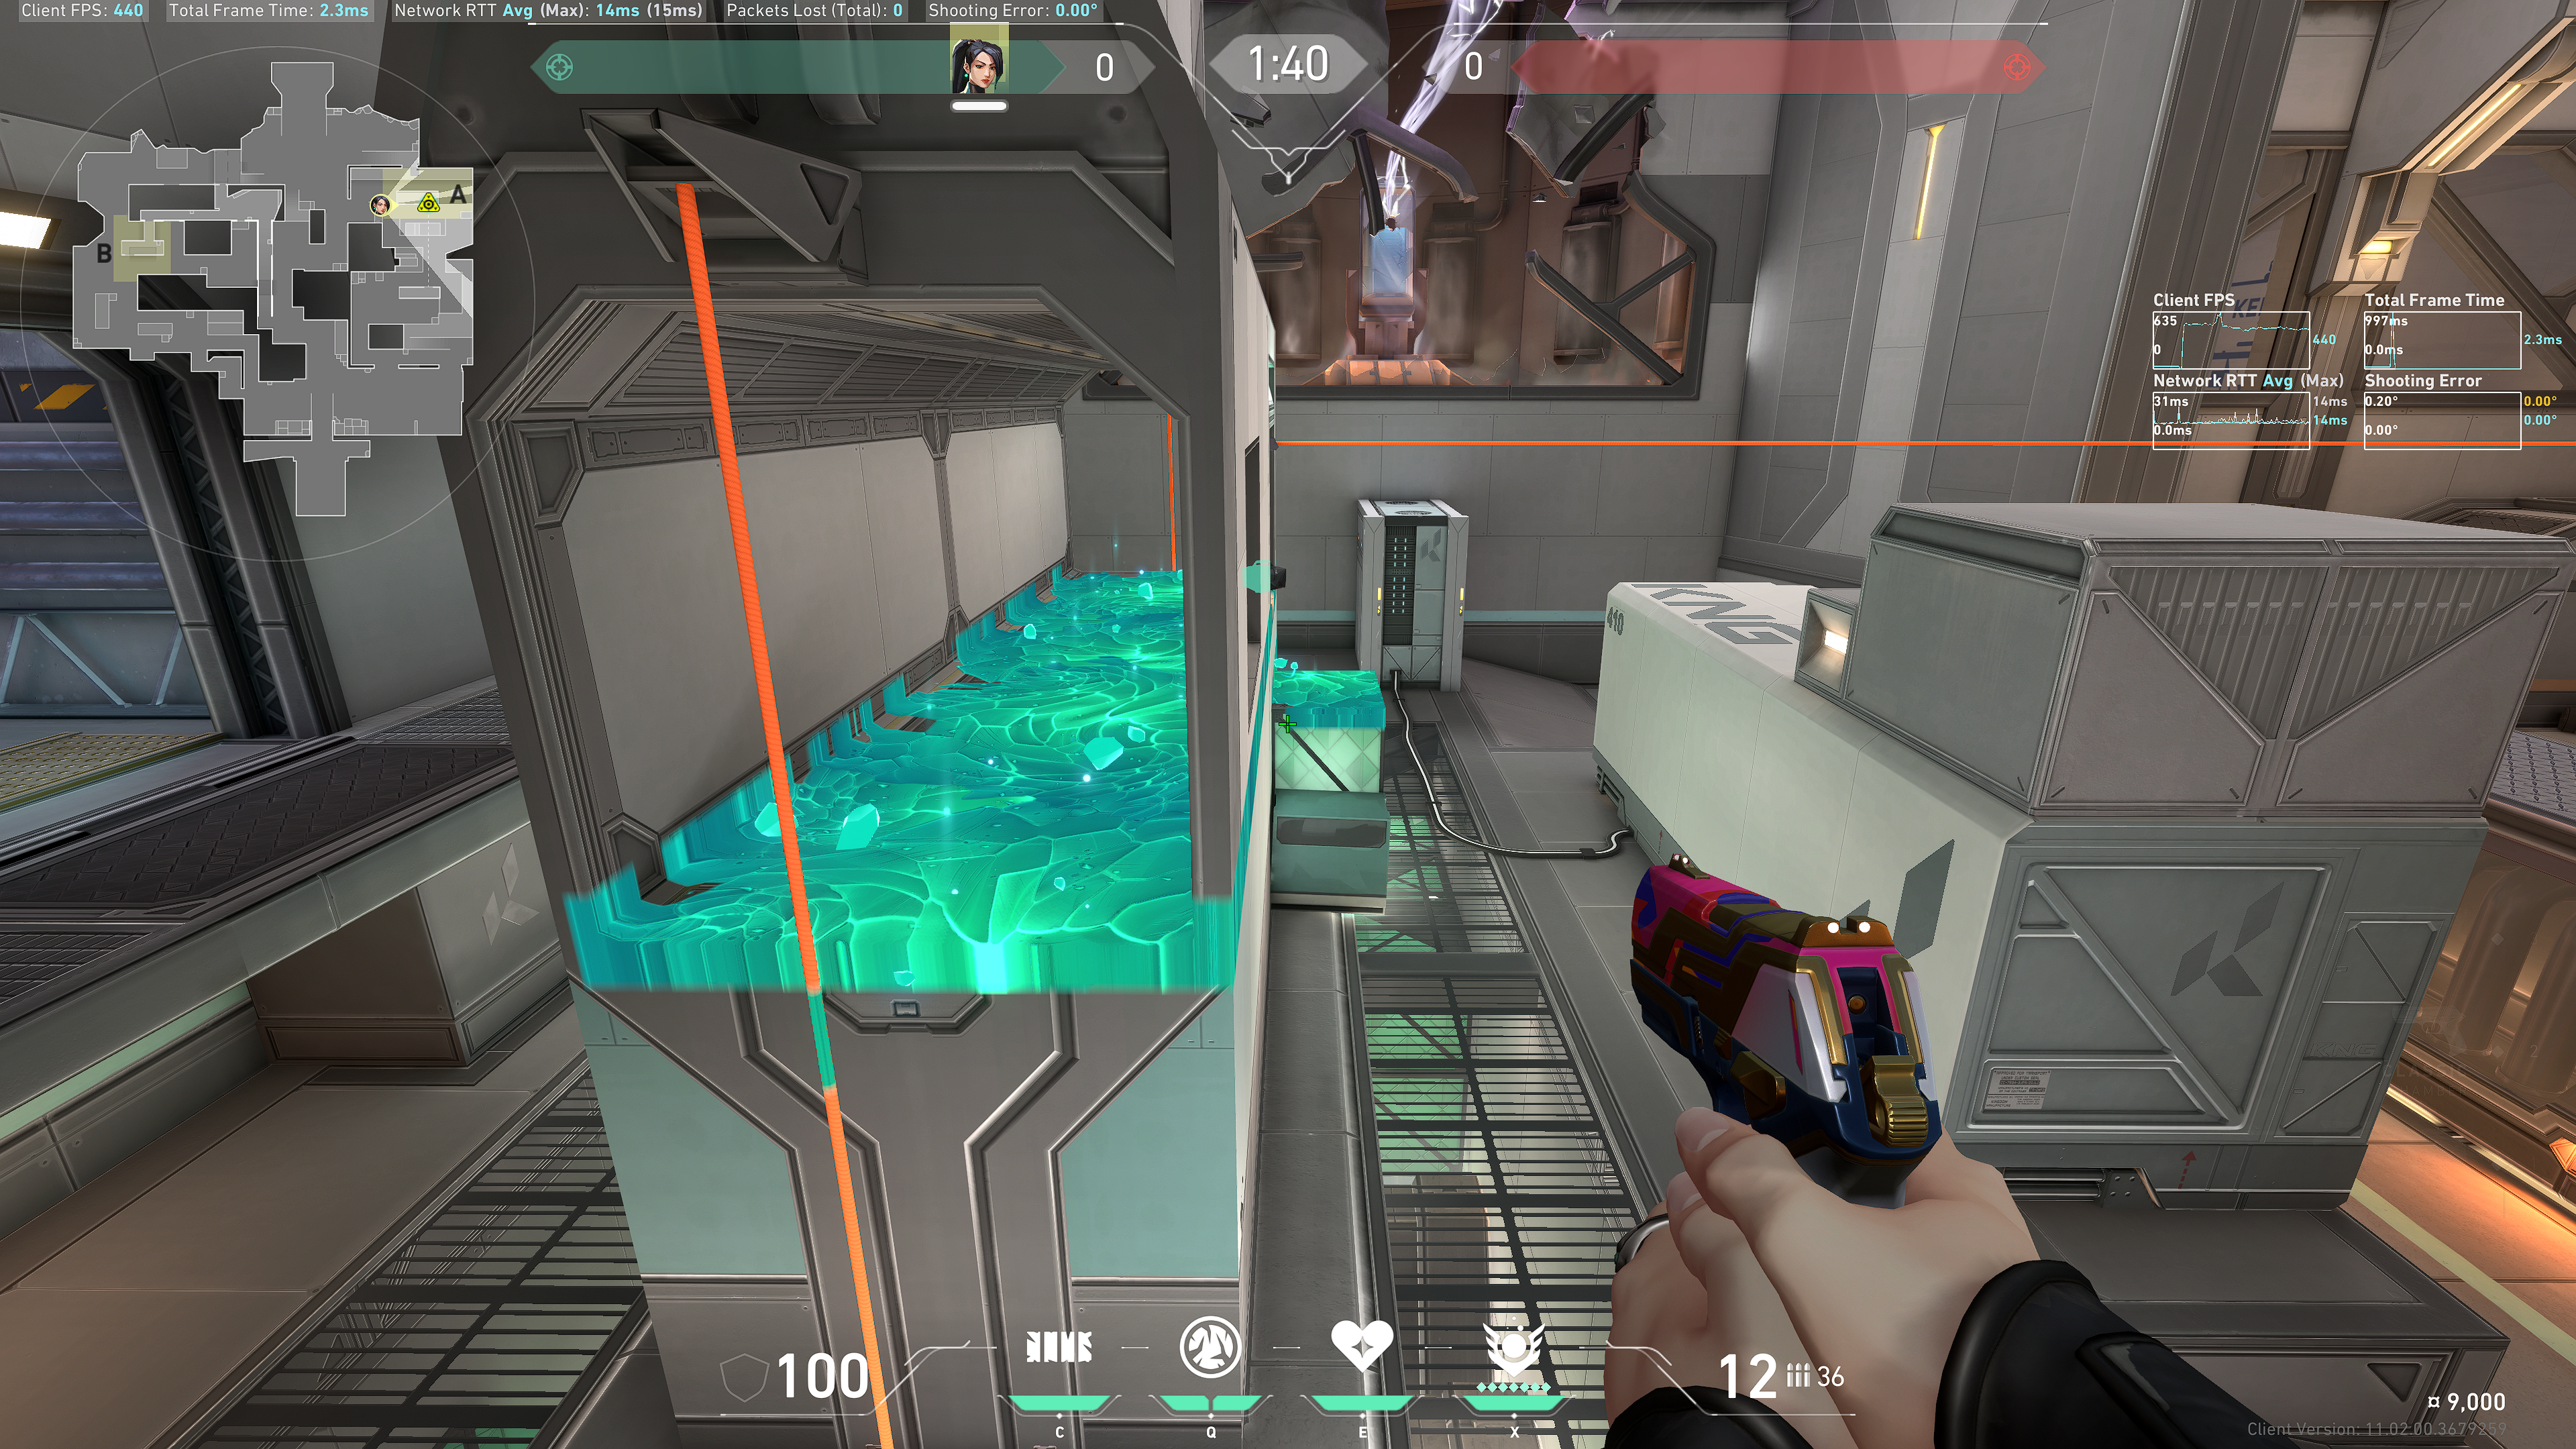
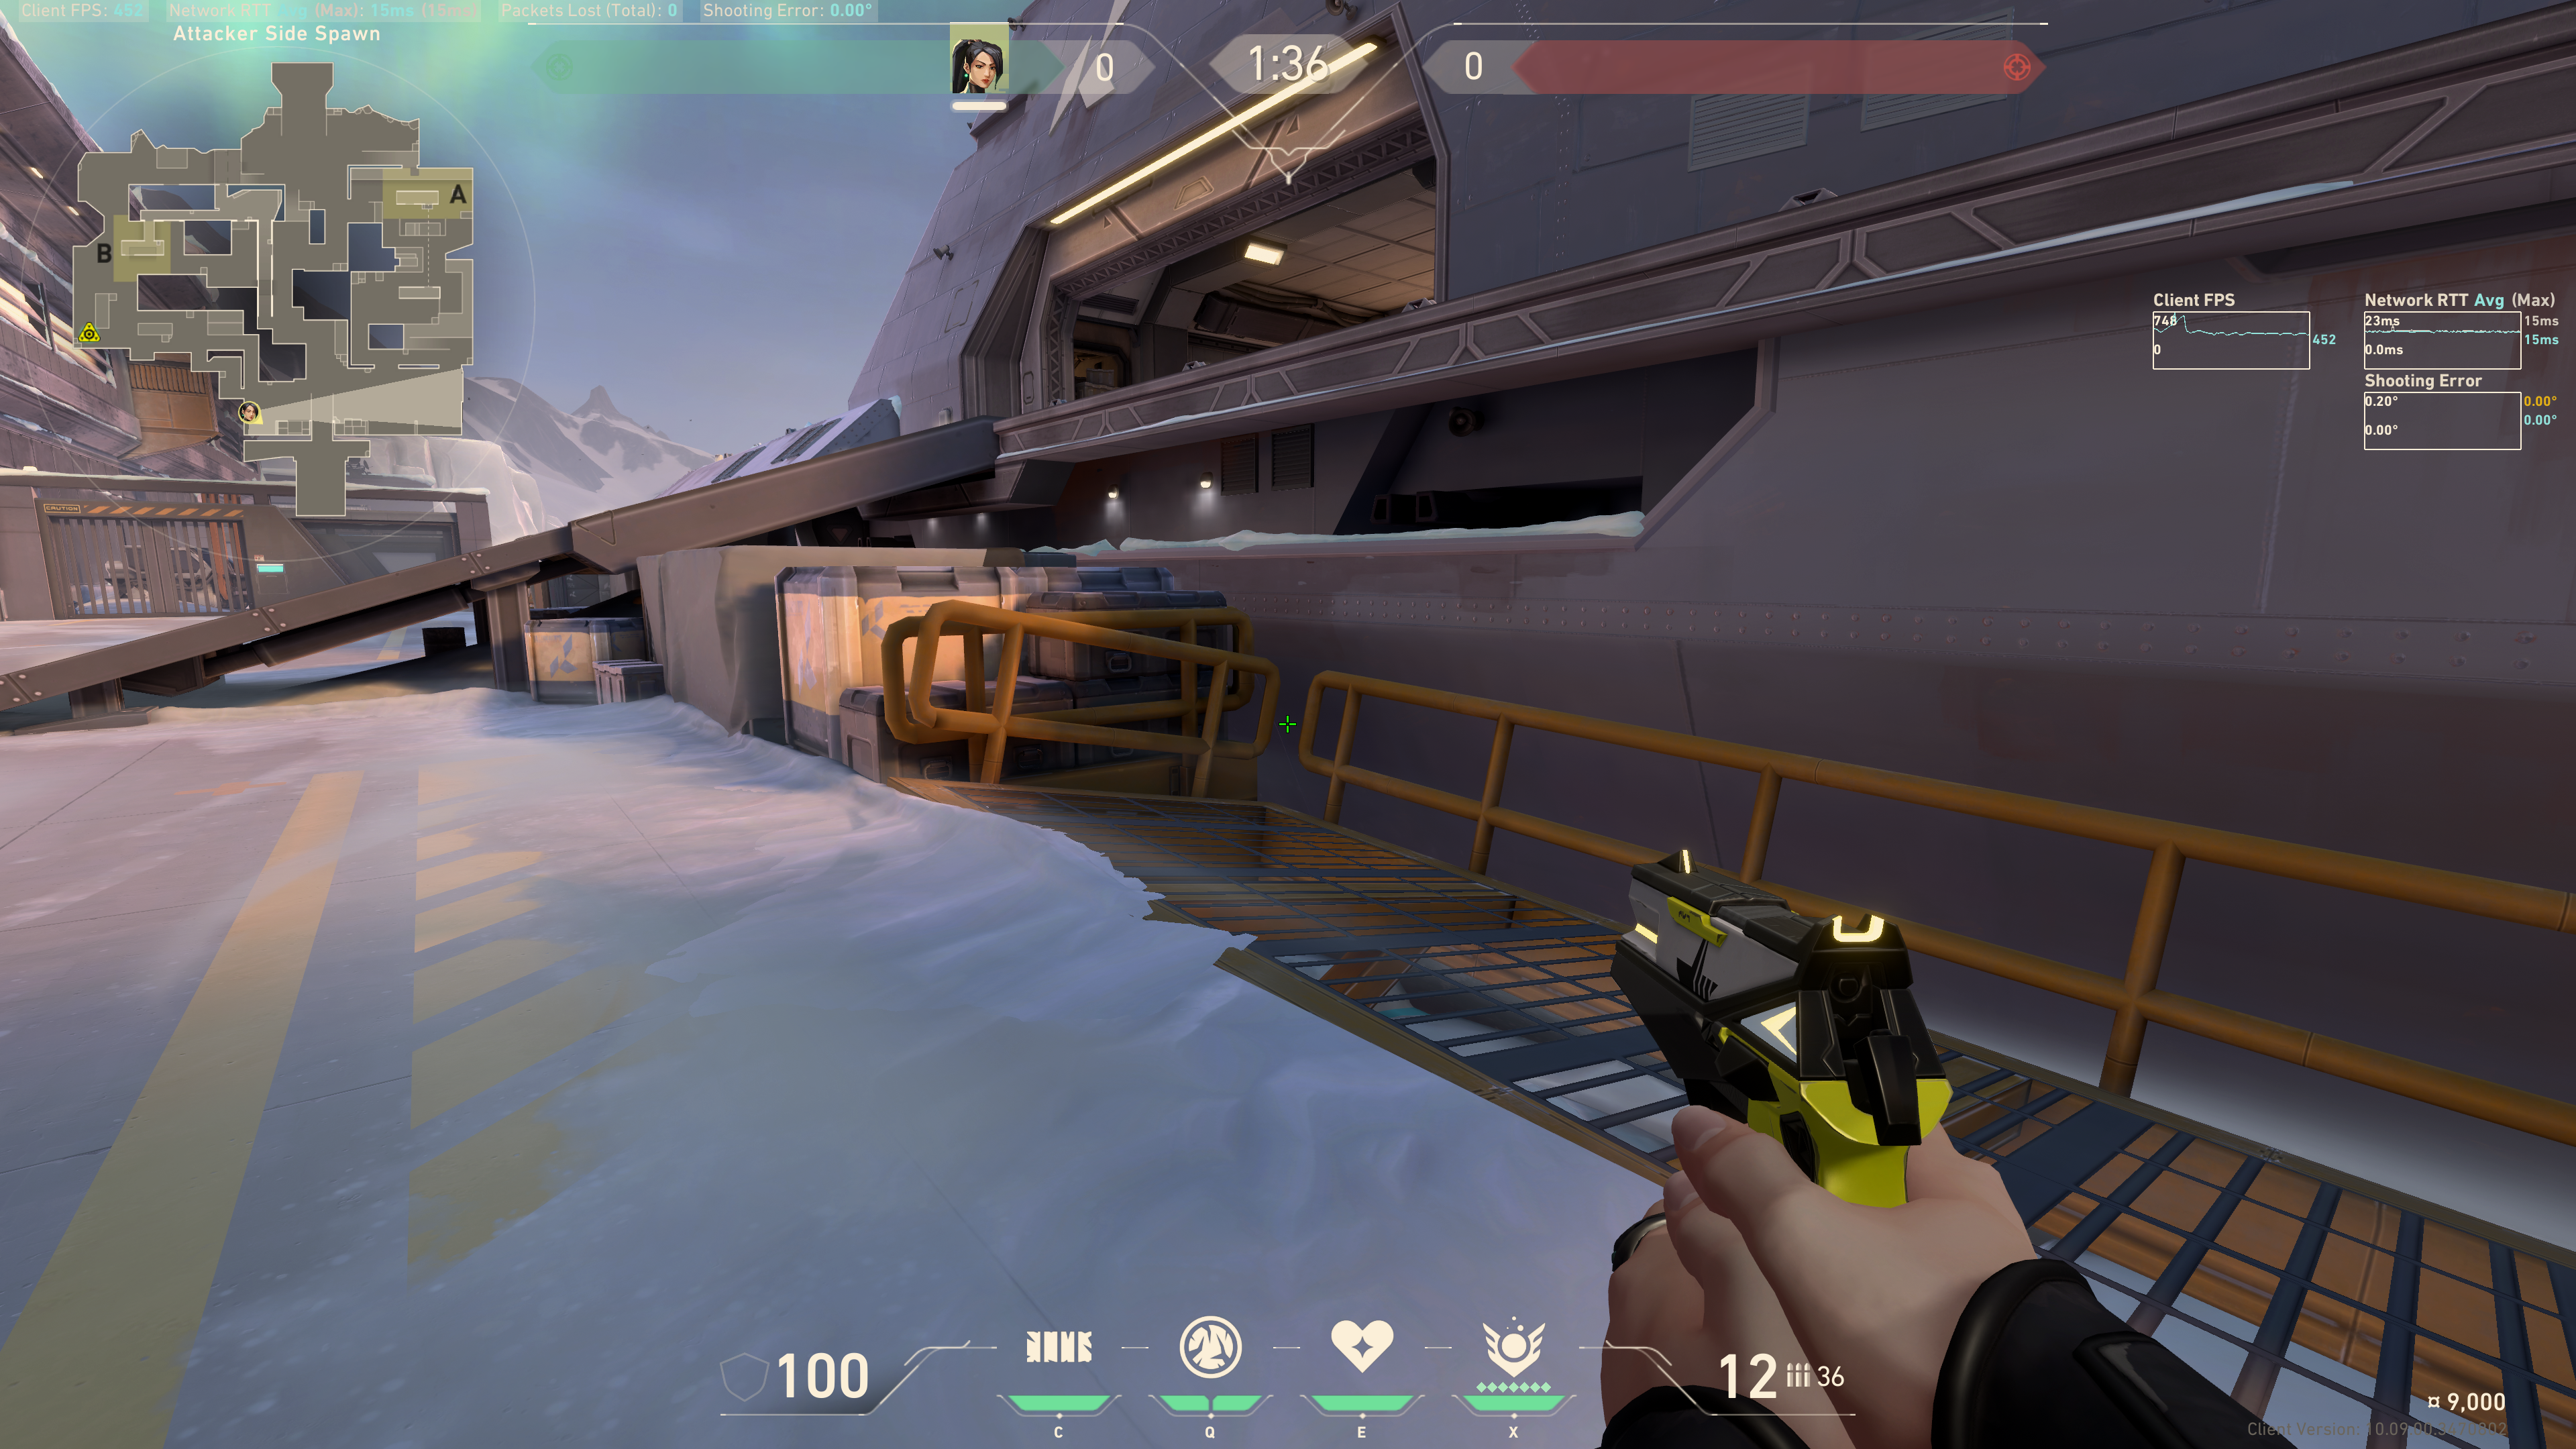
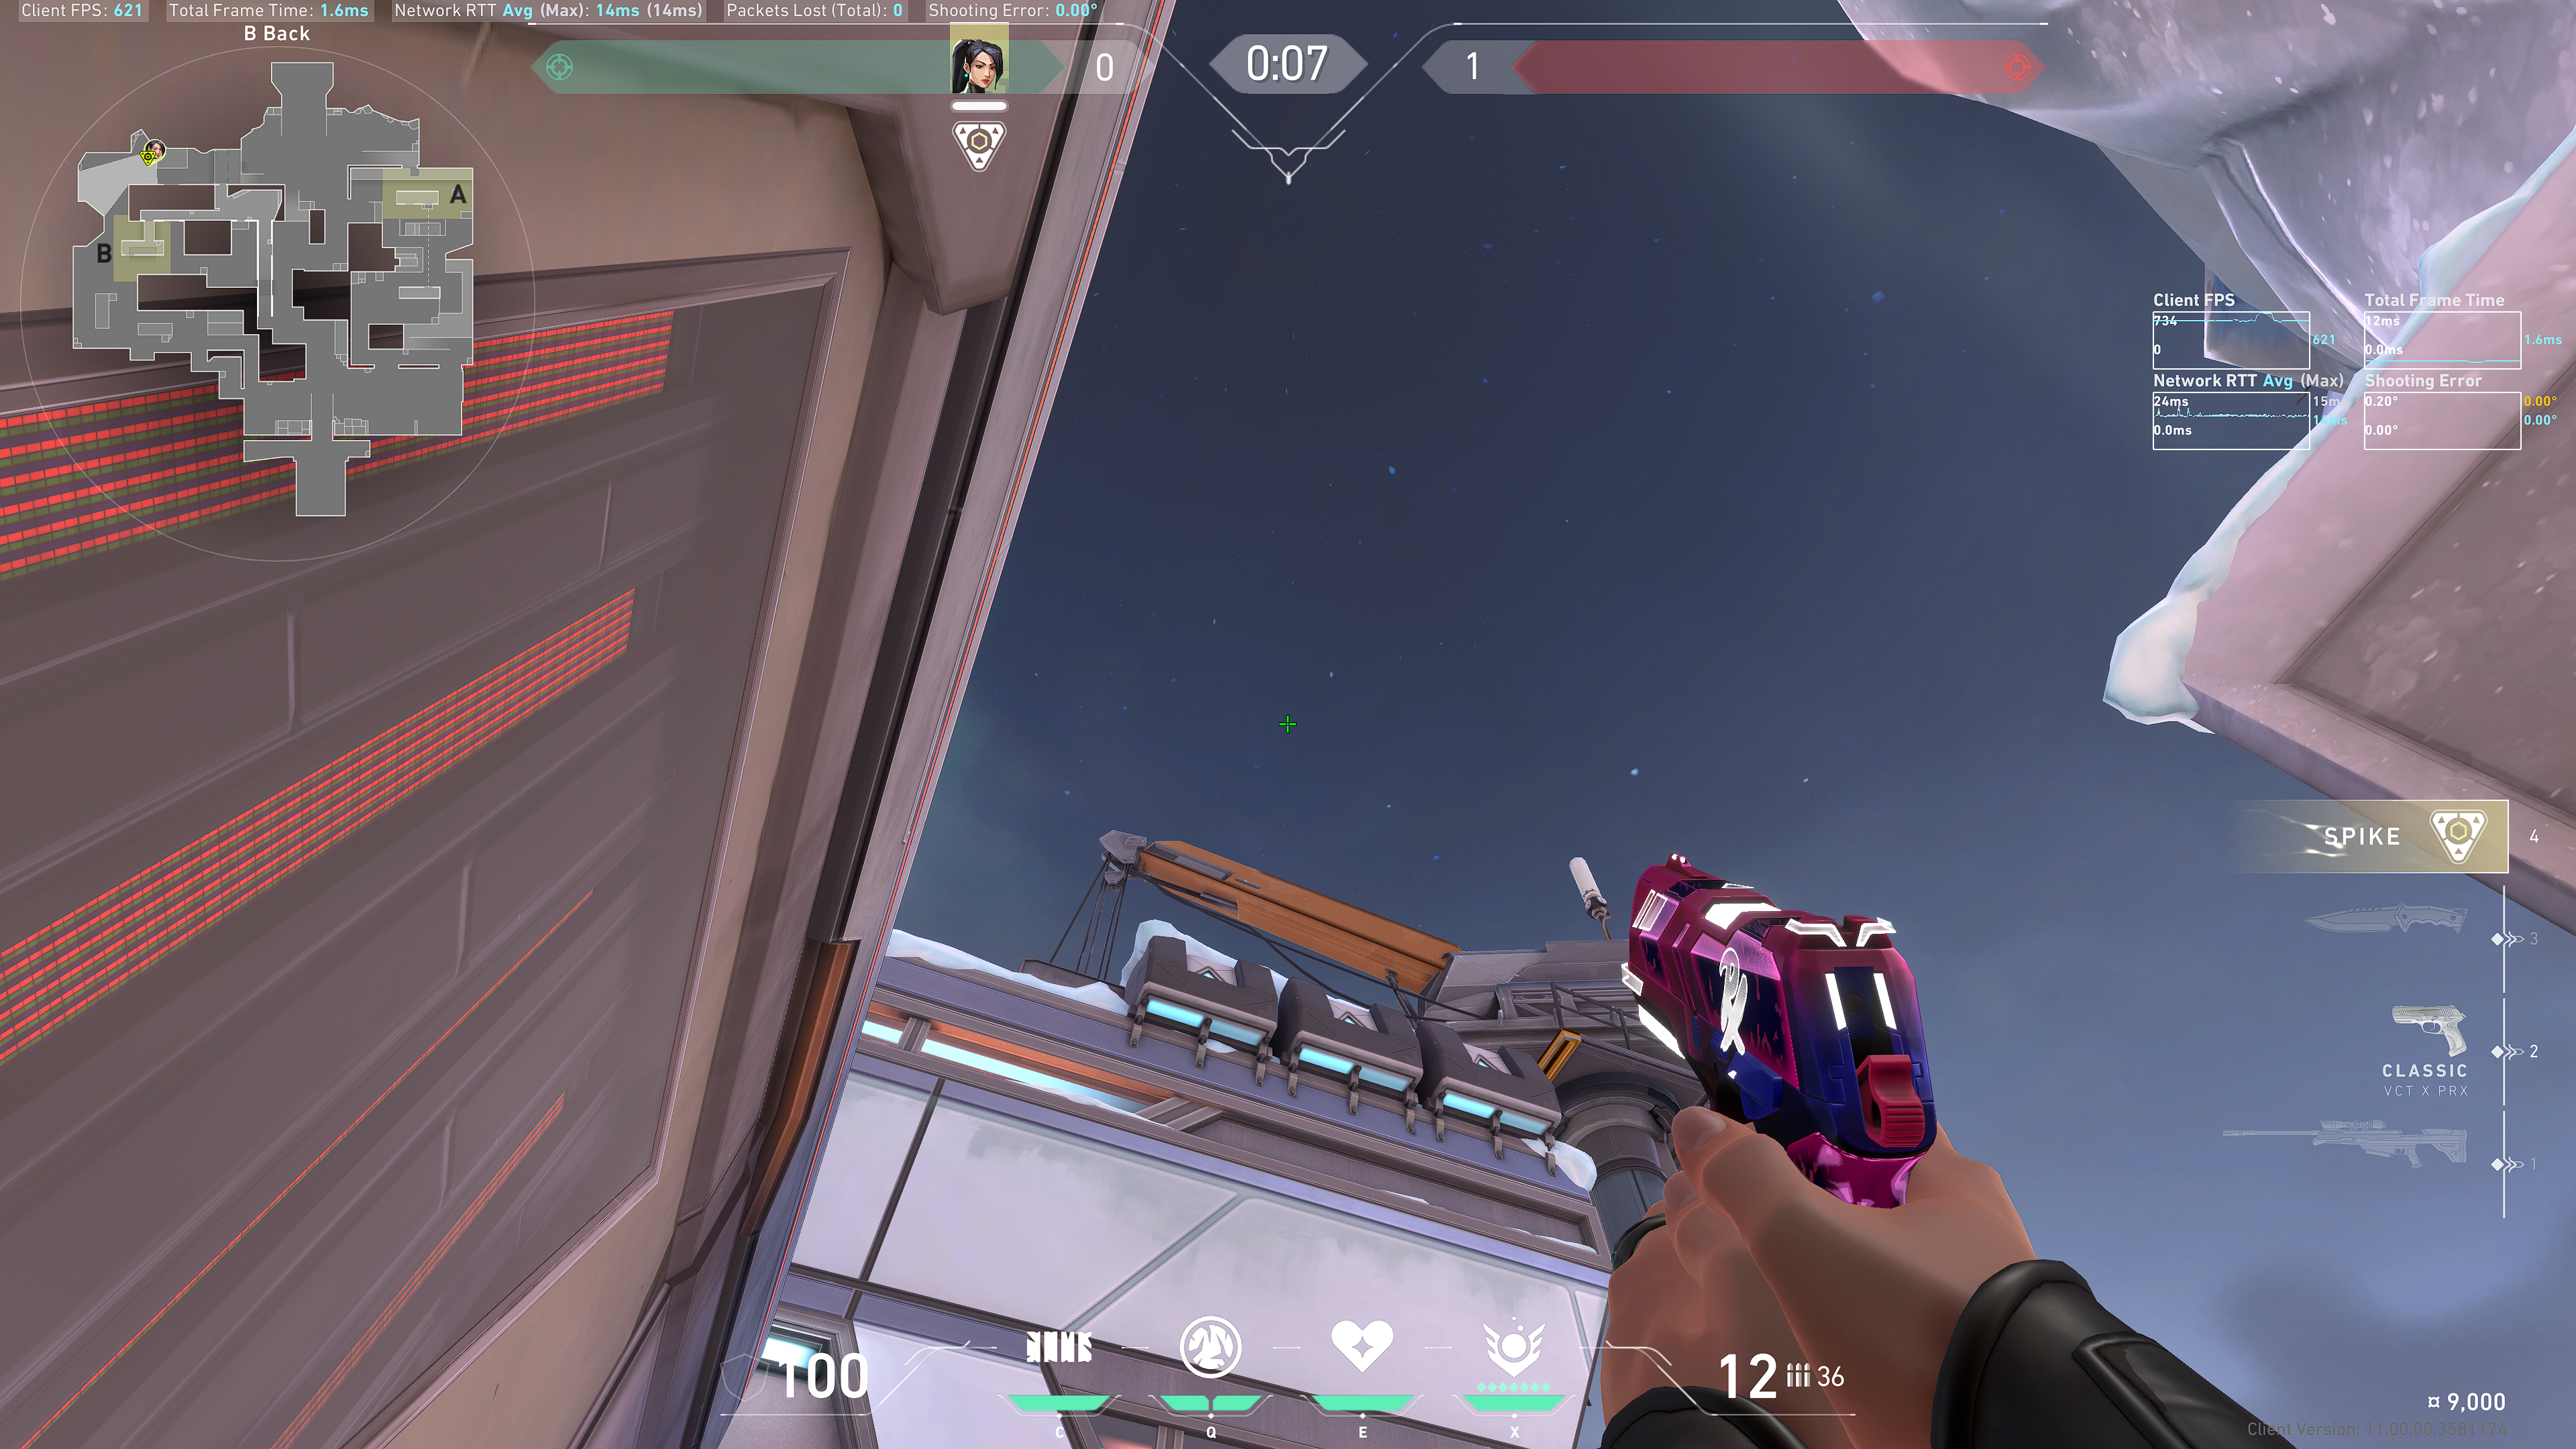
From T Spawn
Hug this wall:
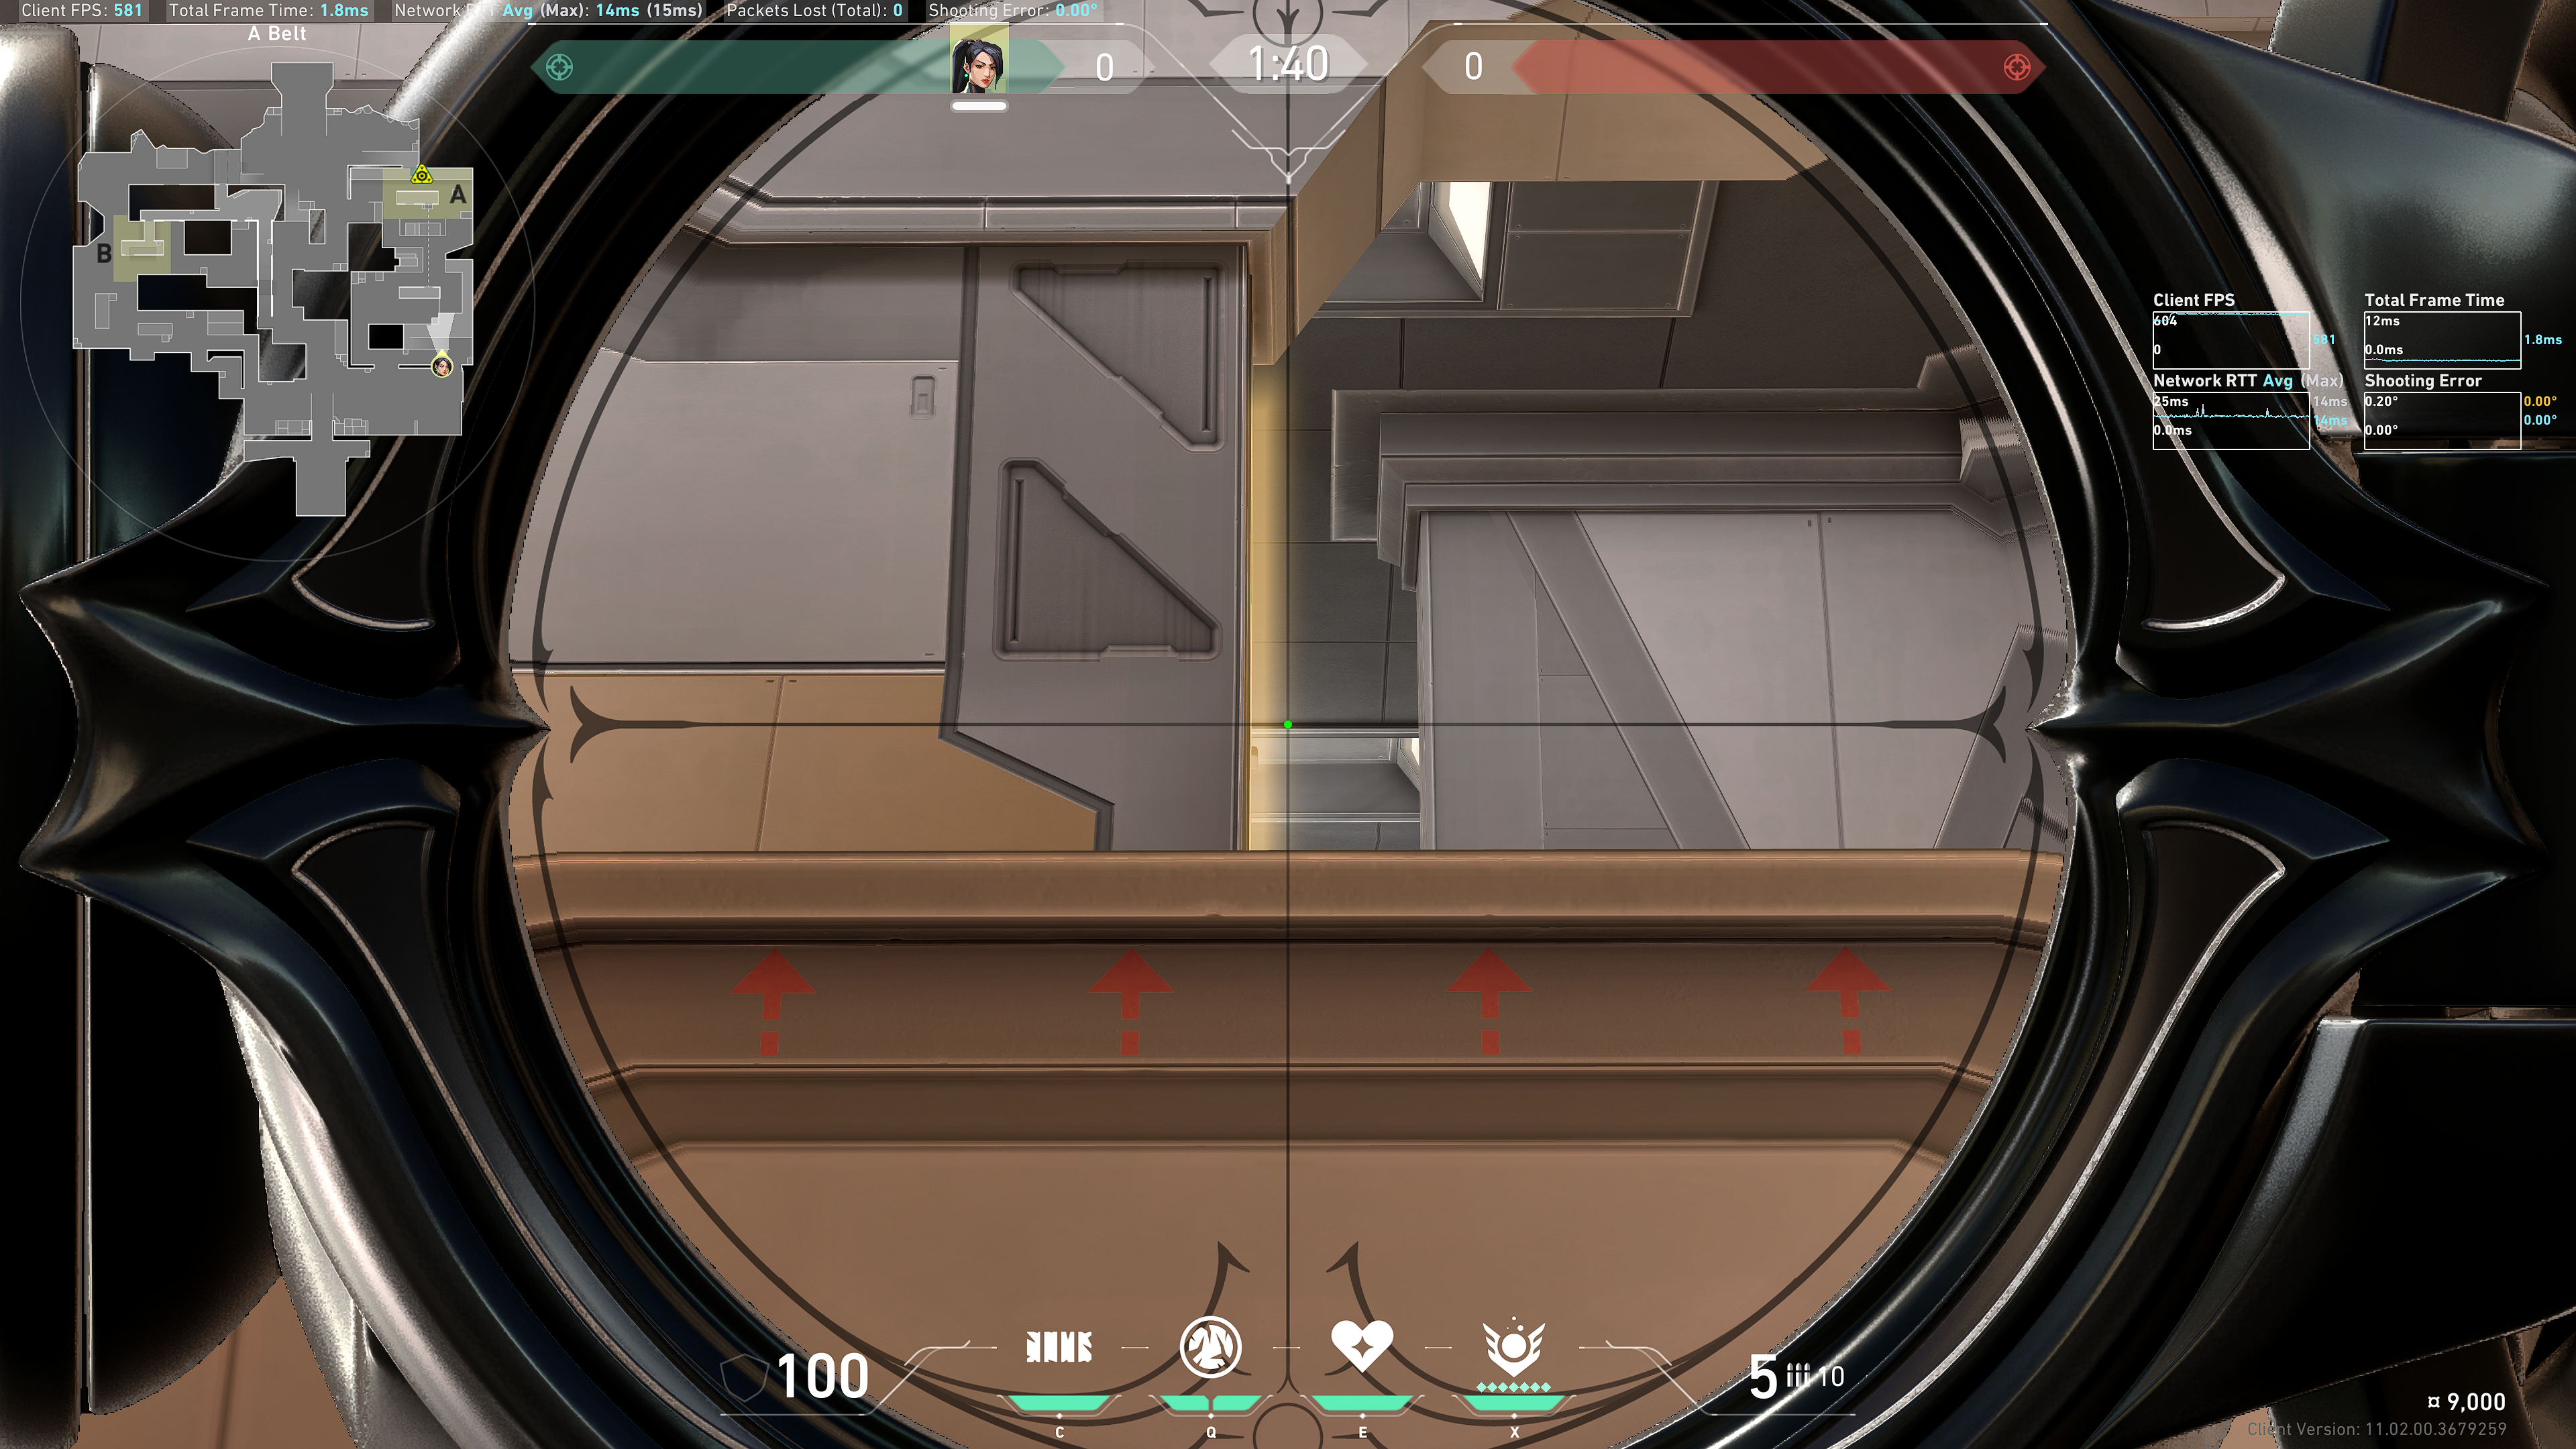
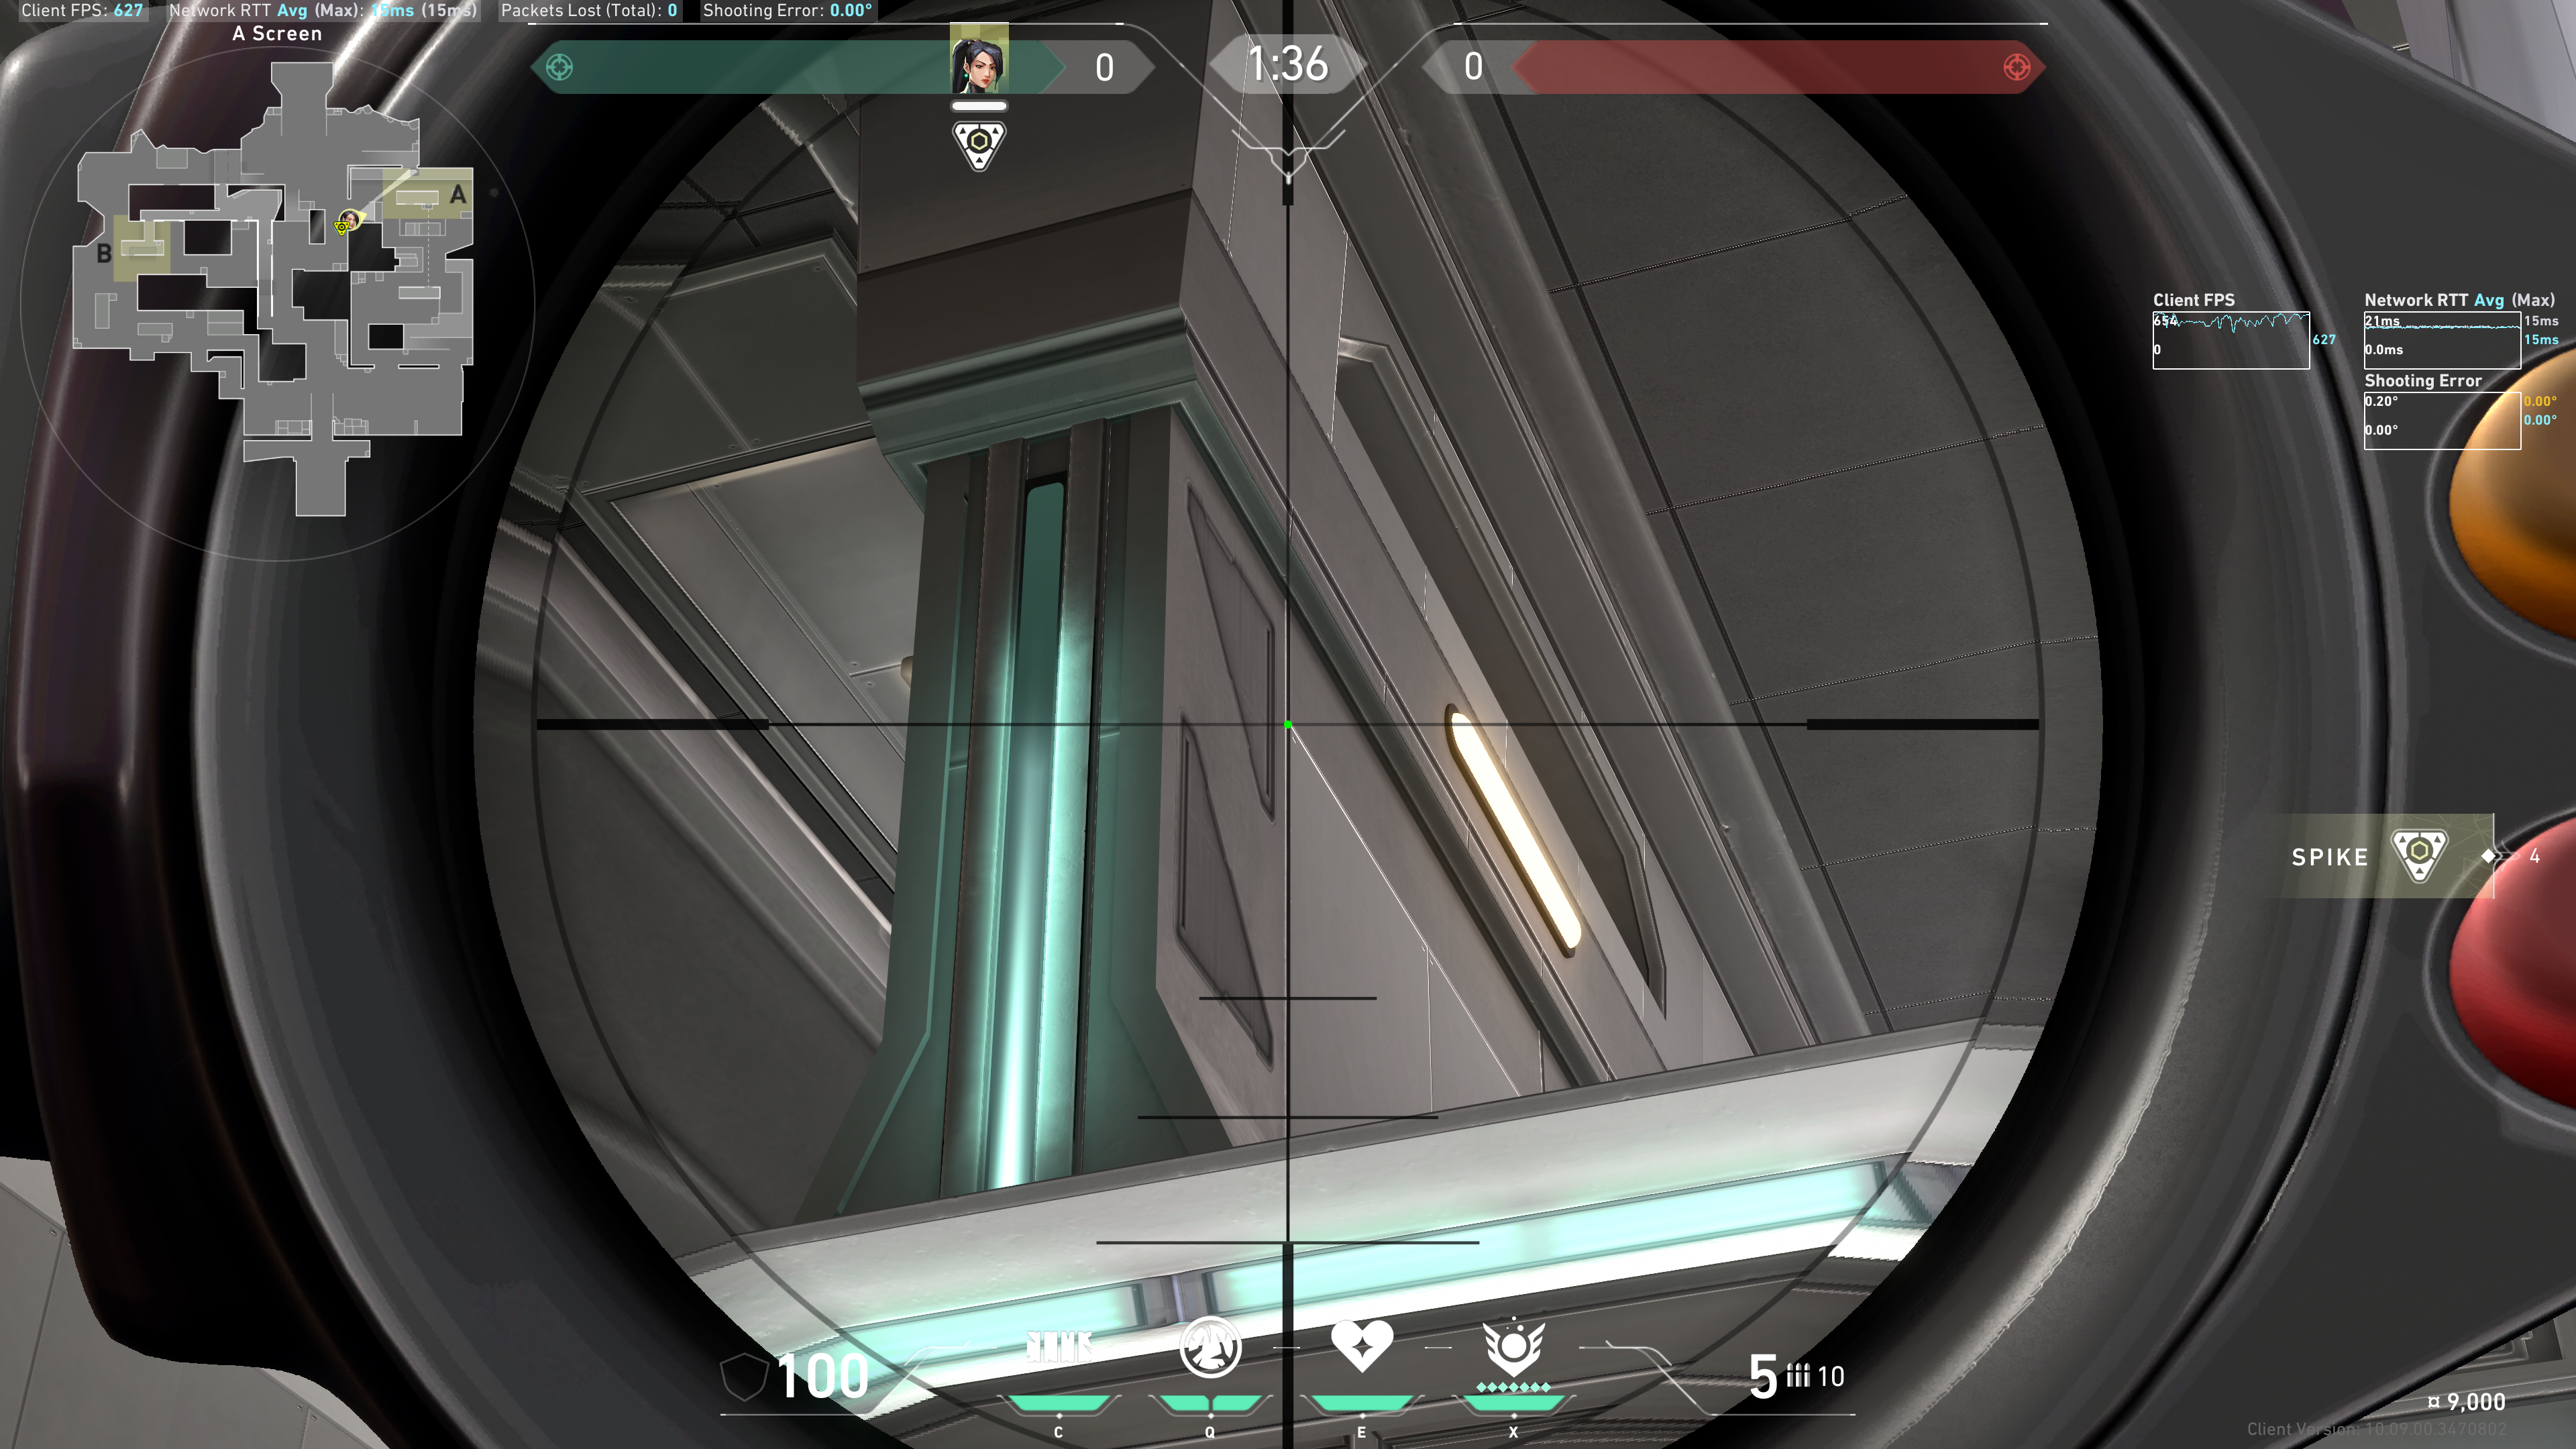
Aim along this amber strip, to the right of this red arrow:
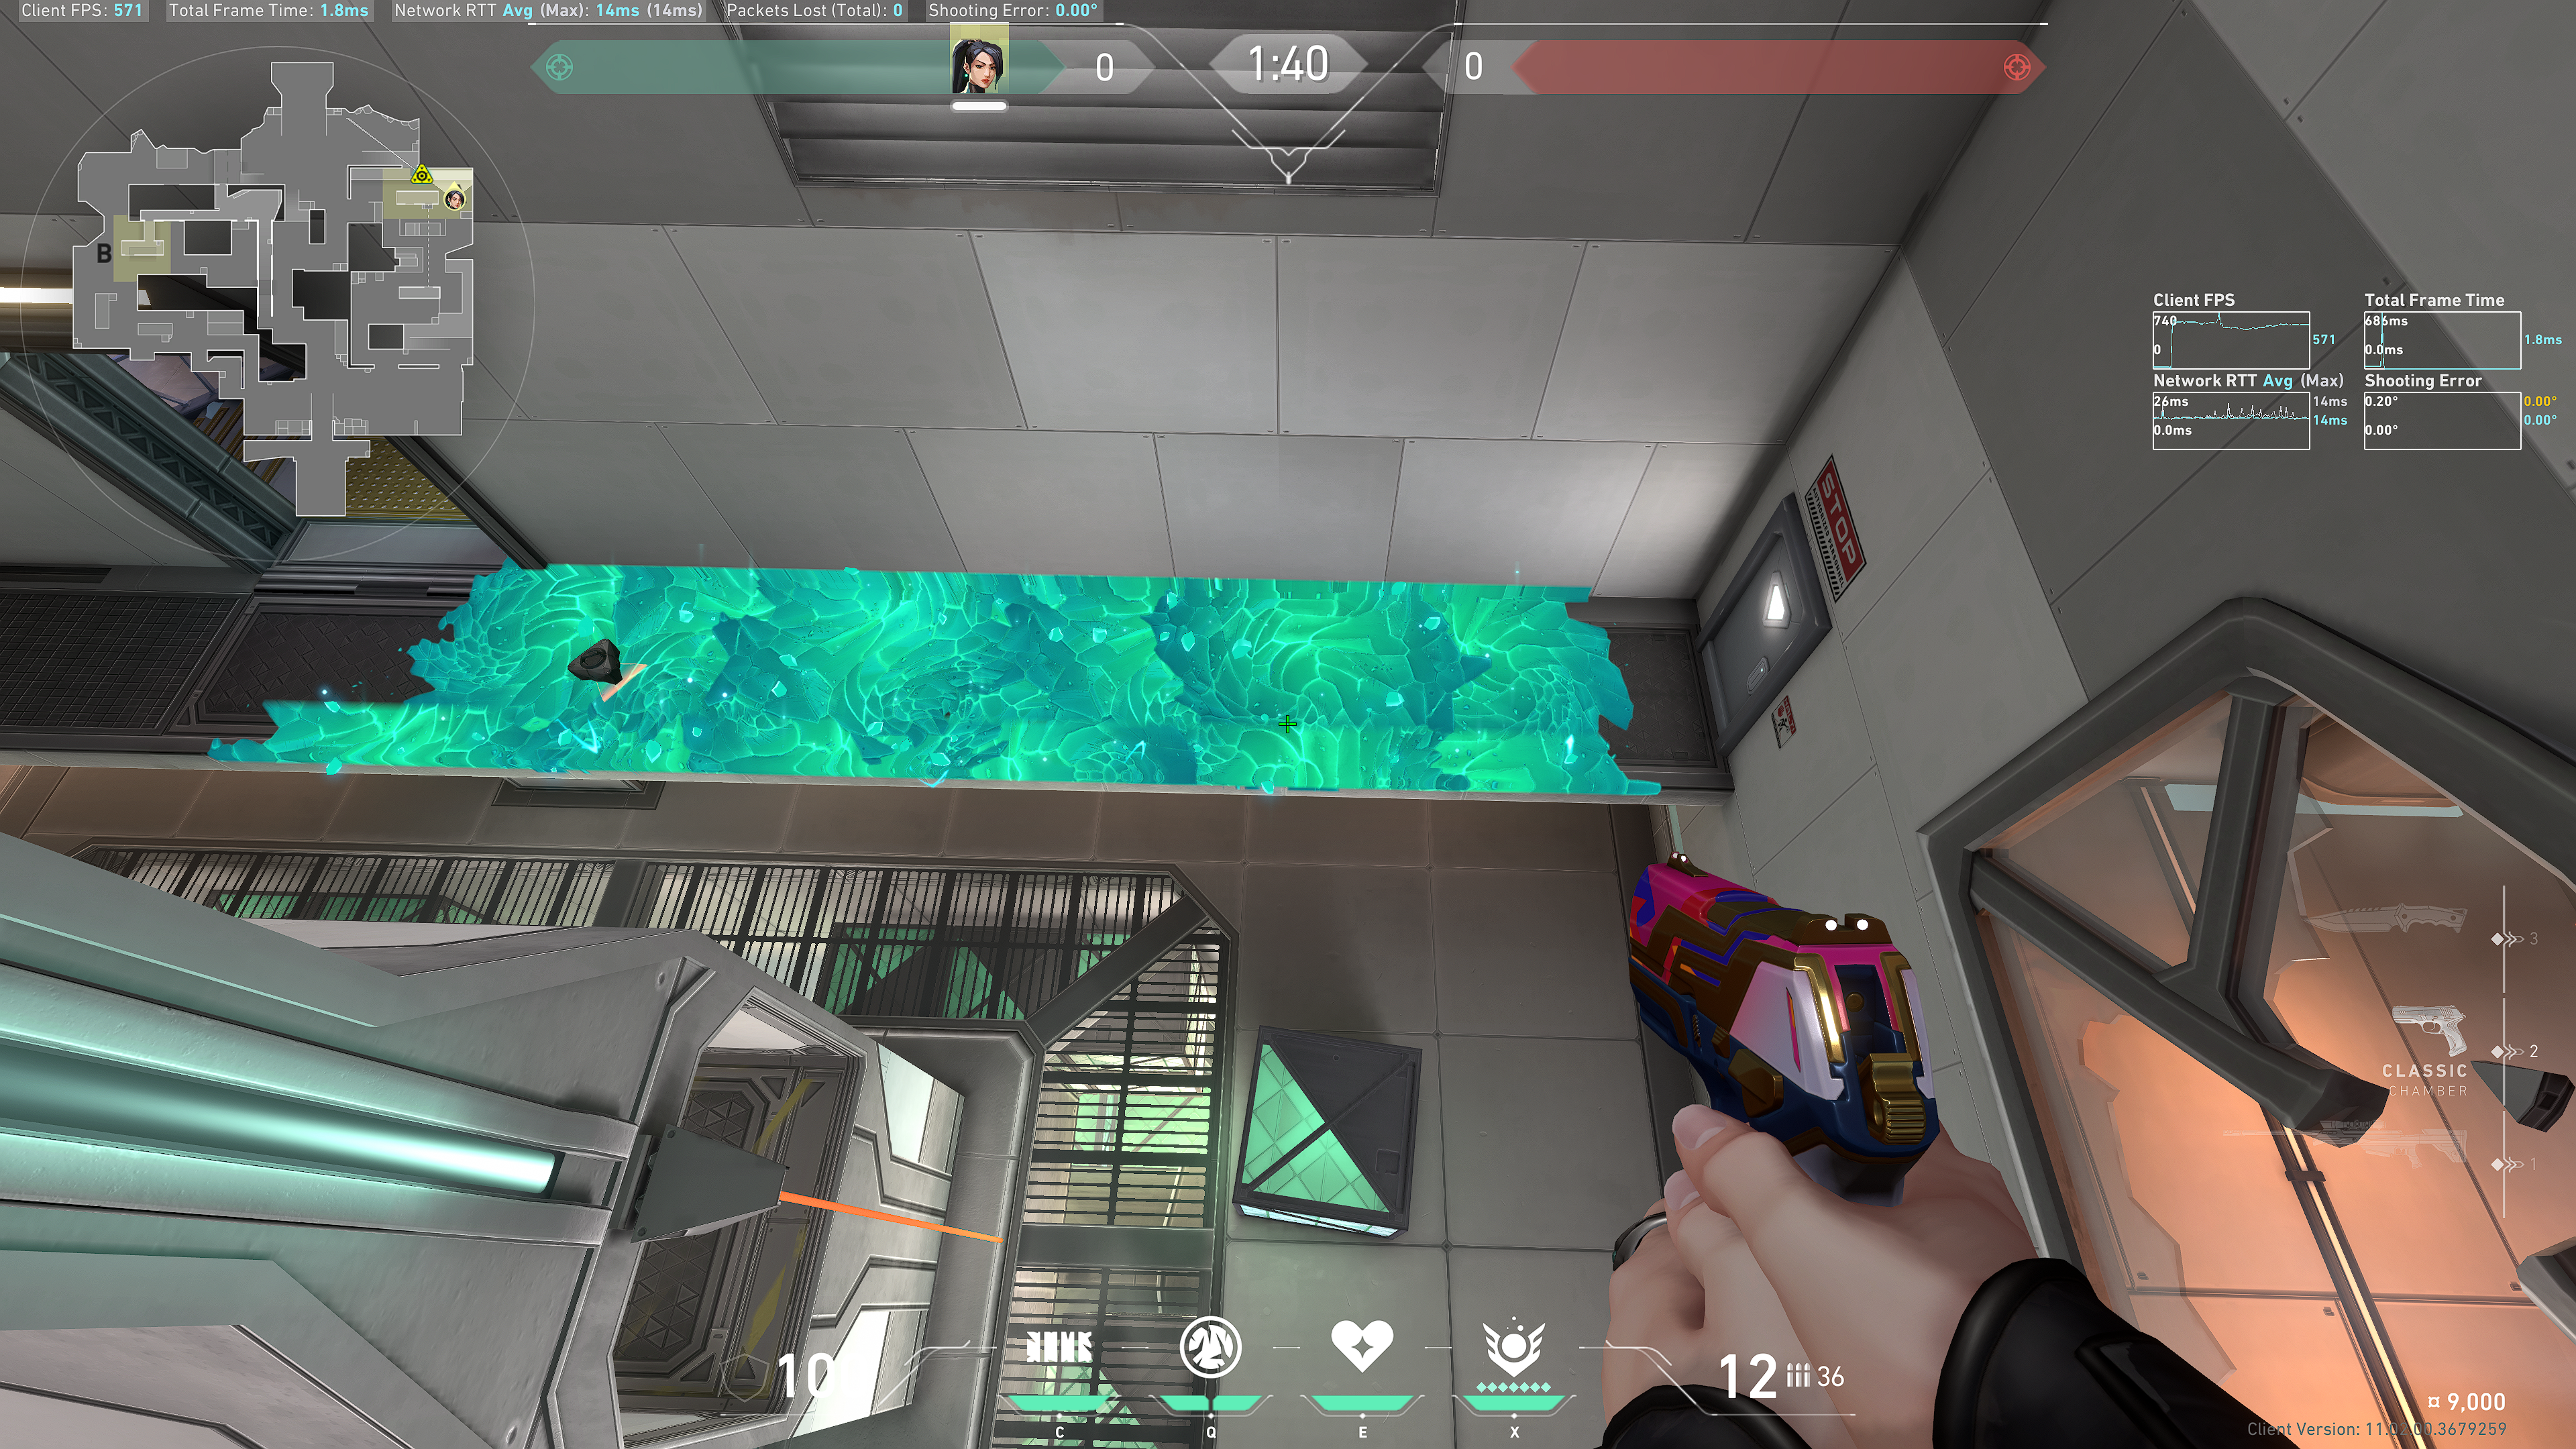
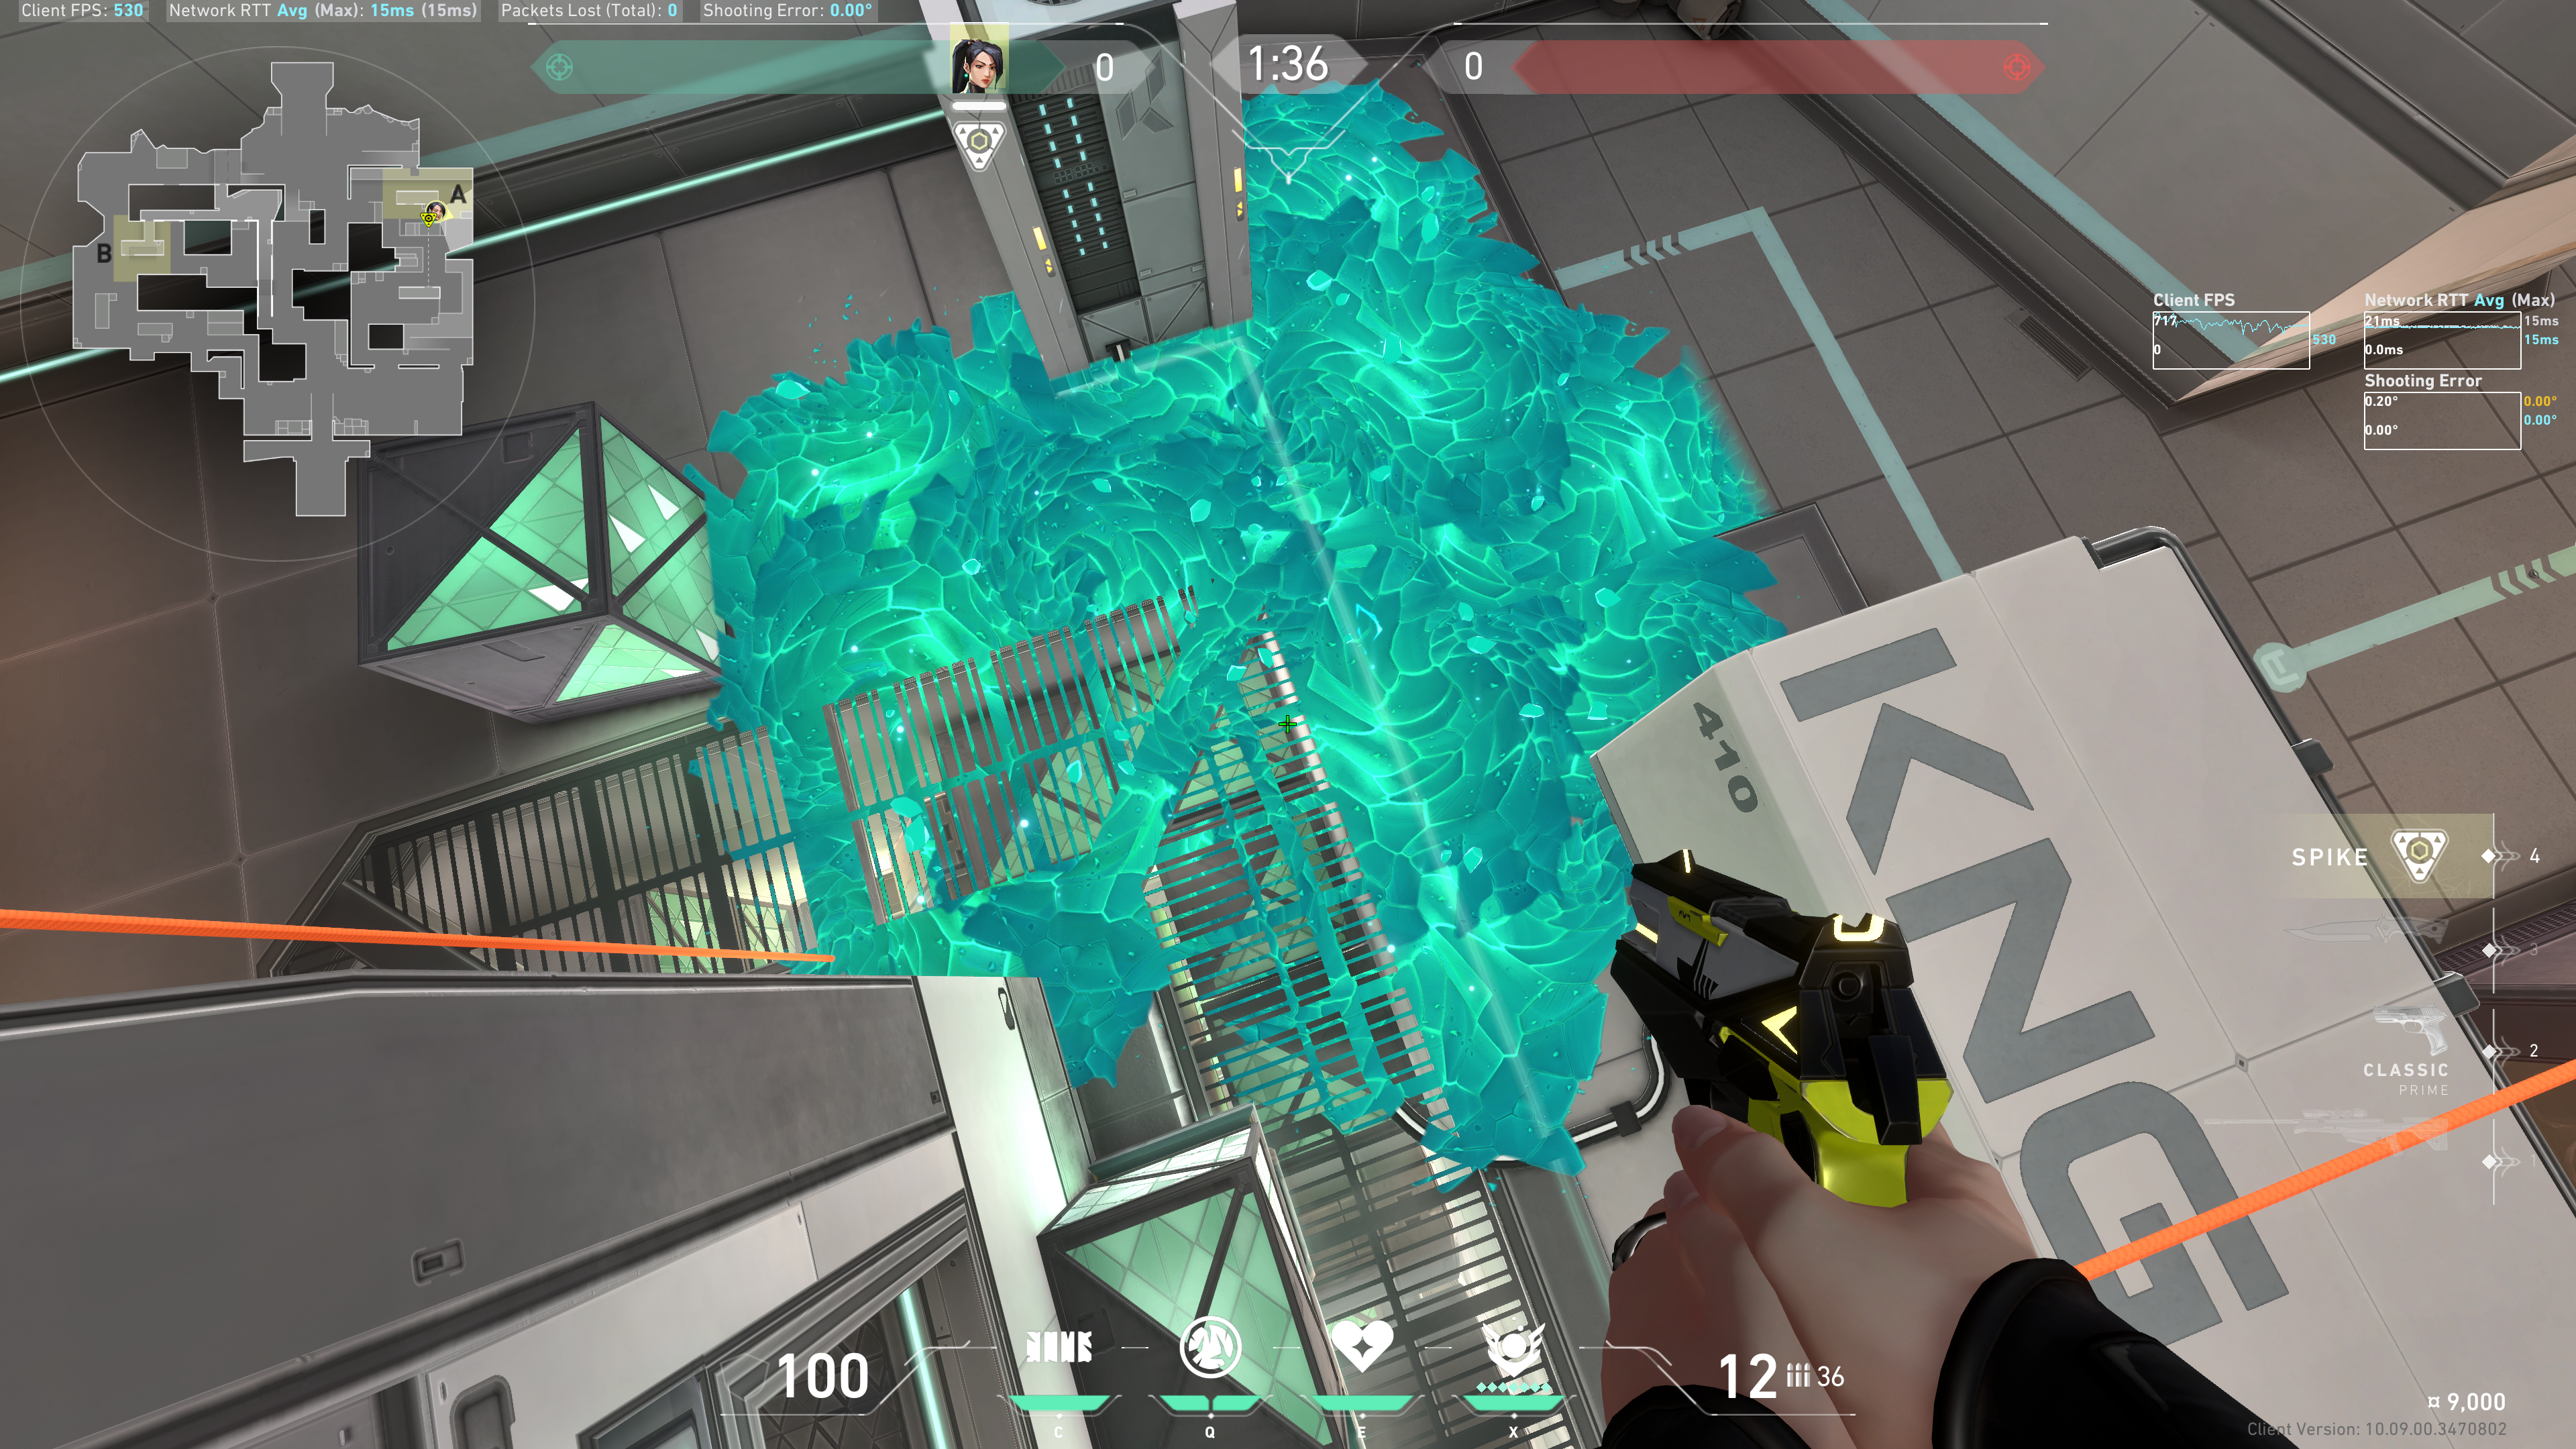
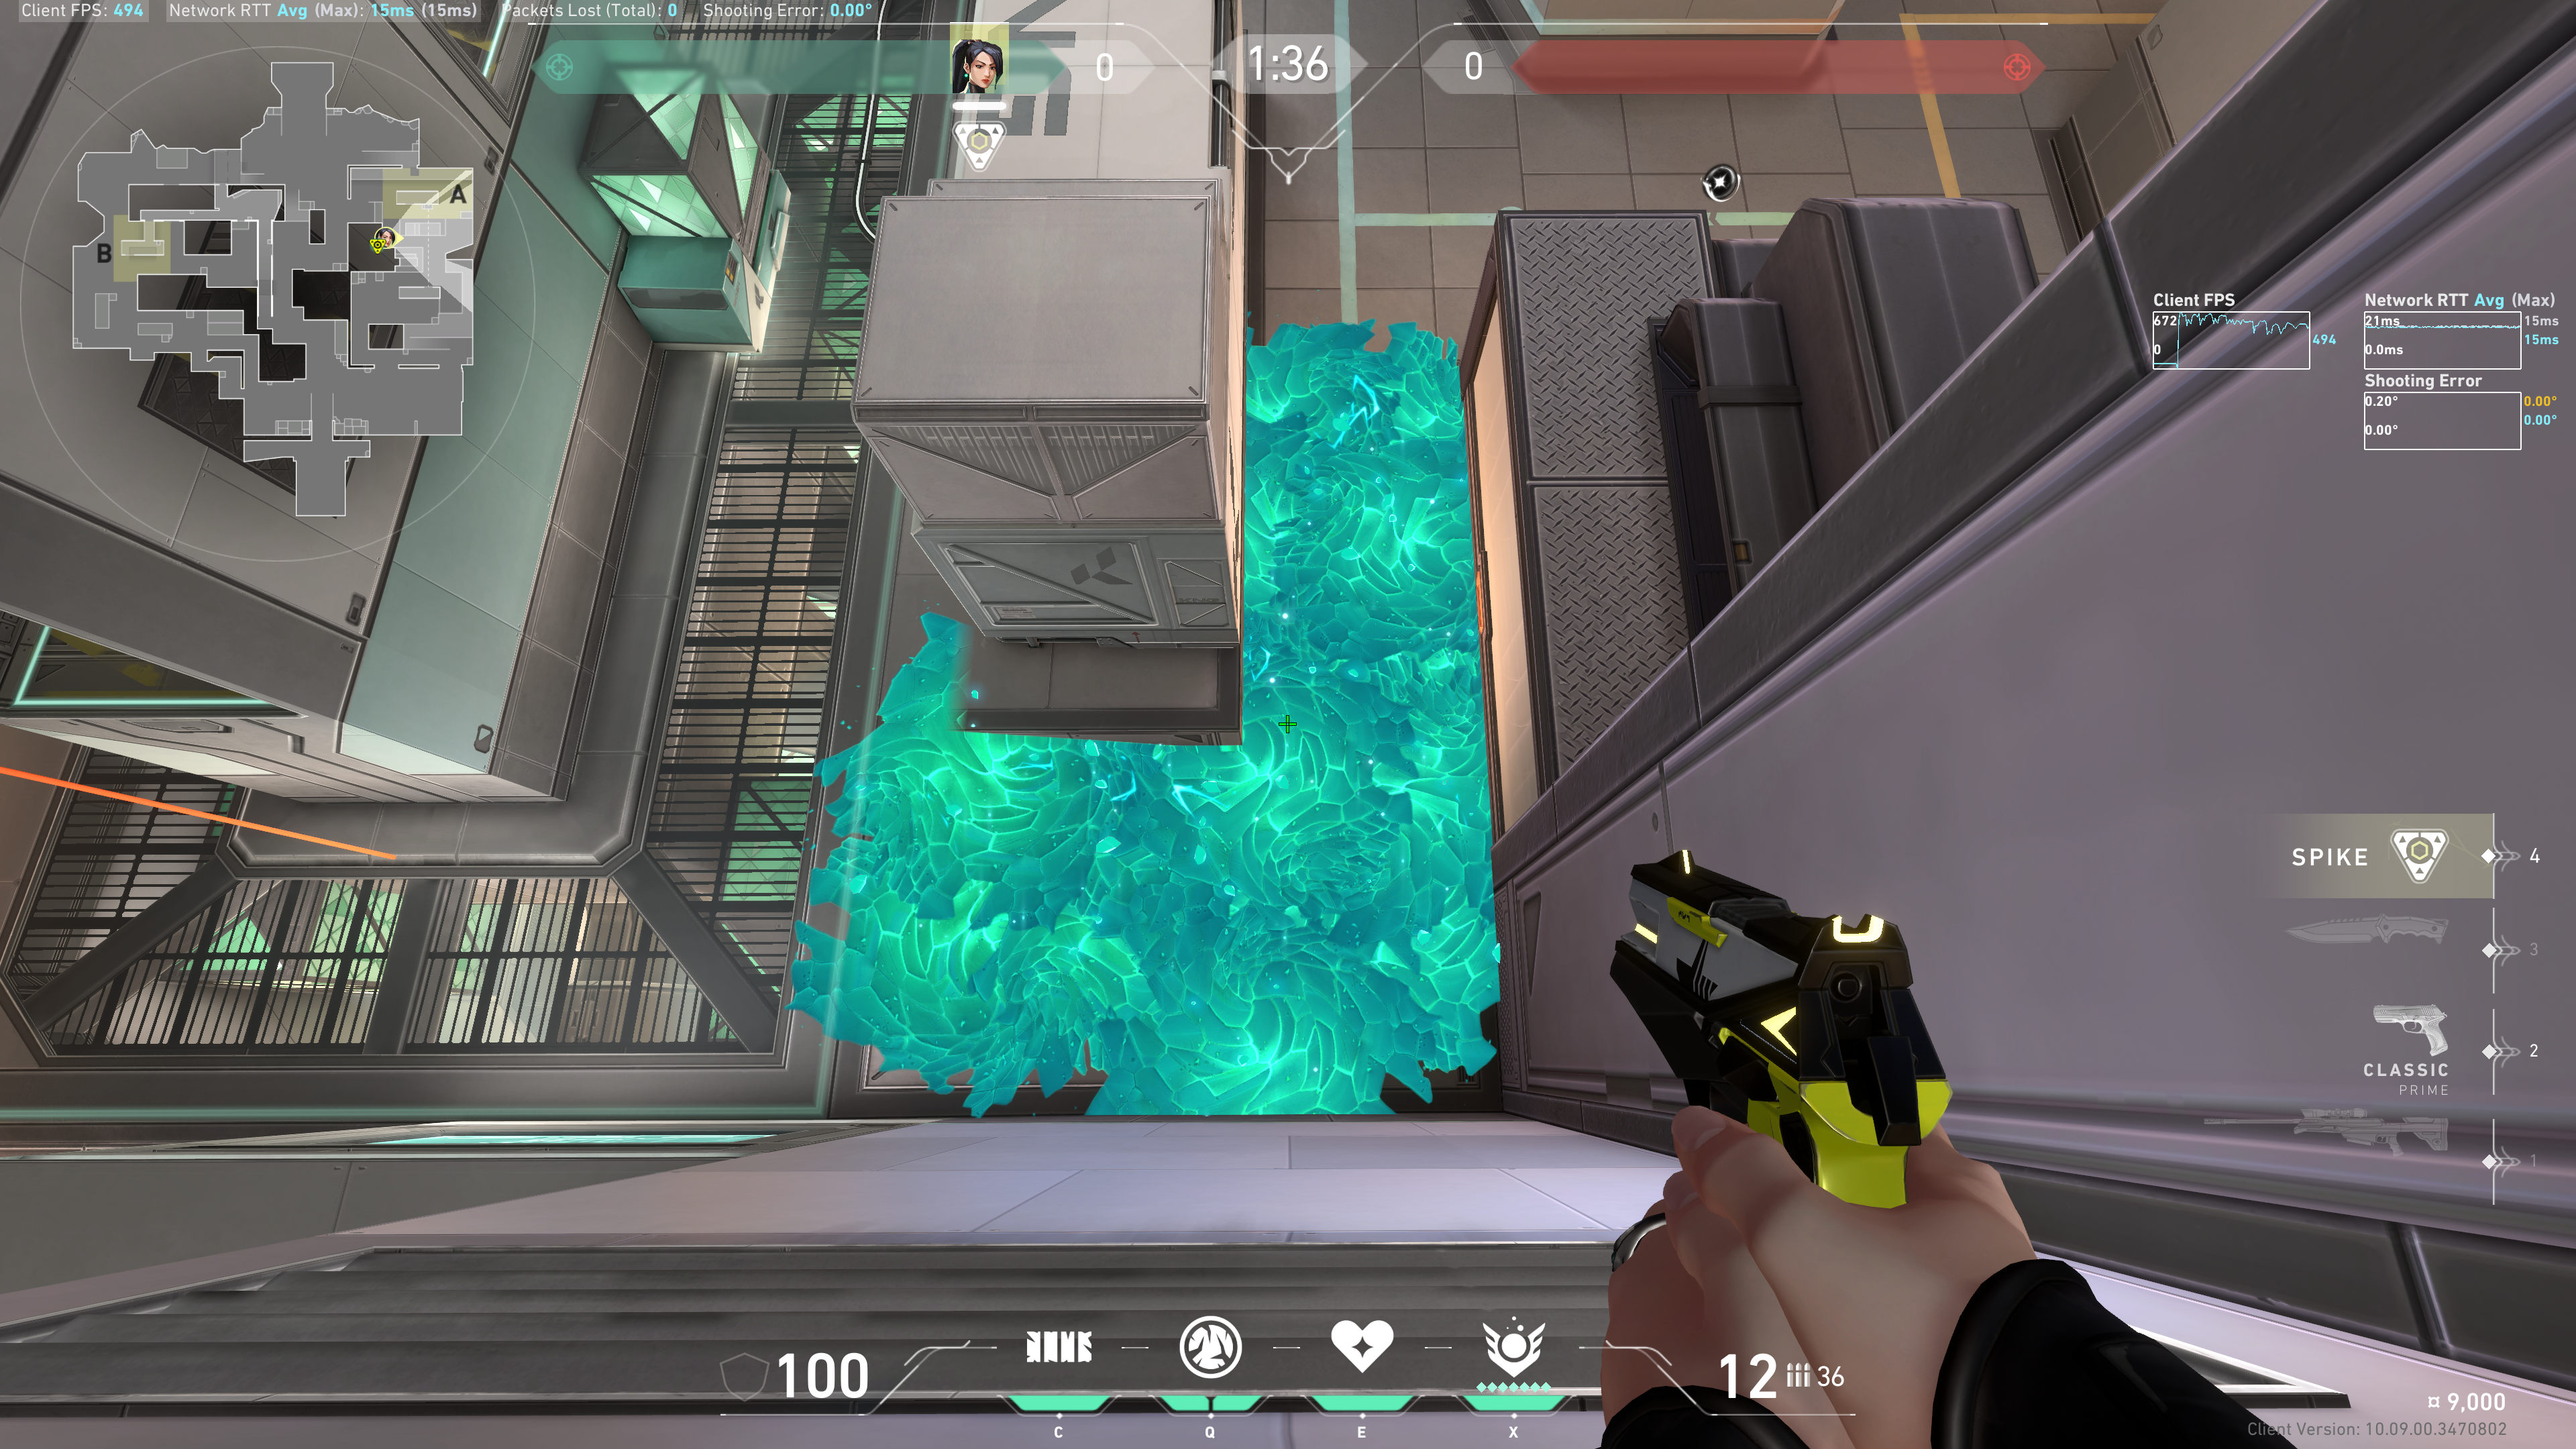
Result:
Note: this lineup is also very strong for post plant.
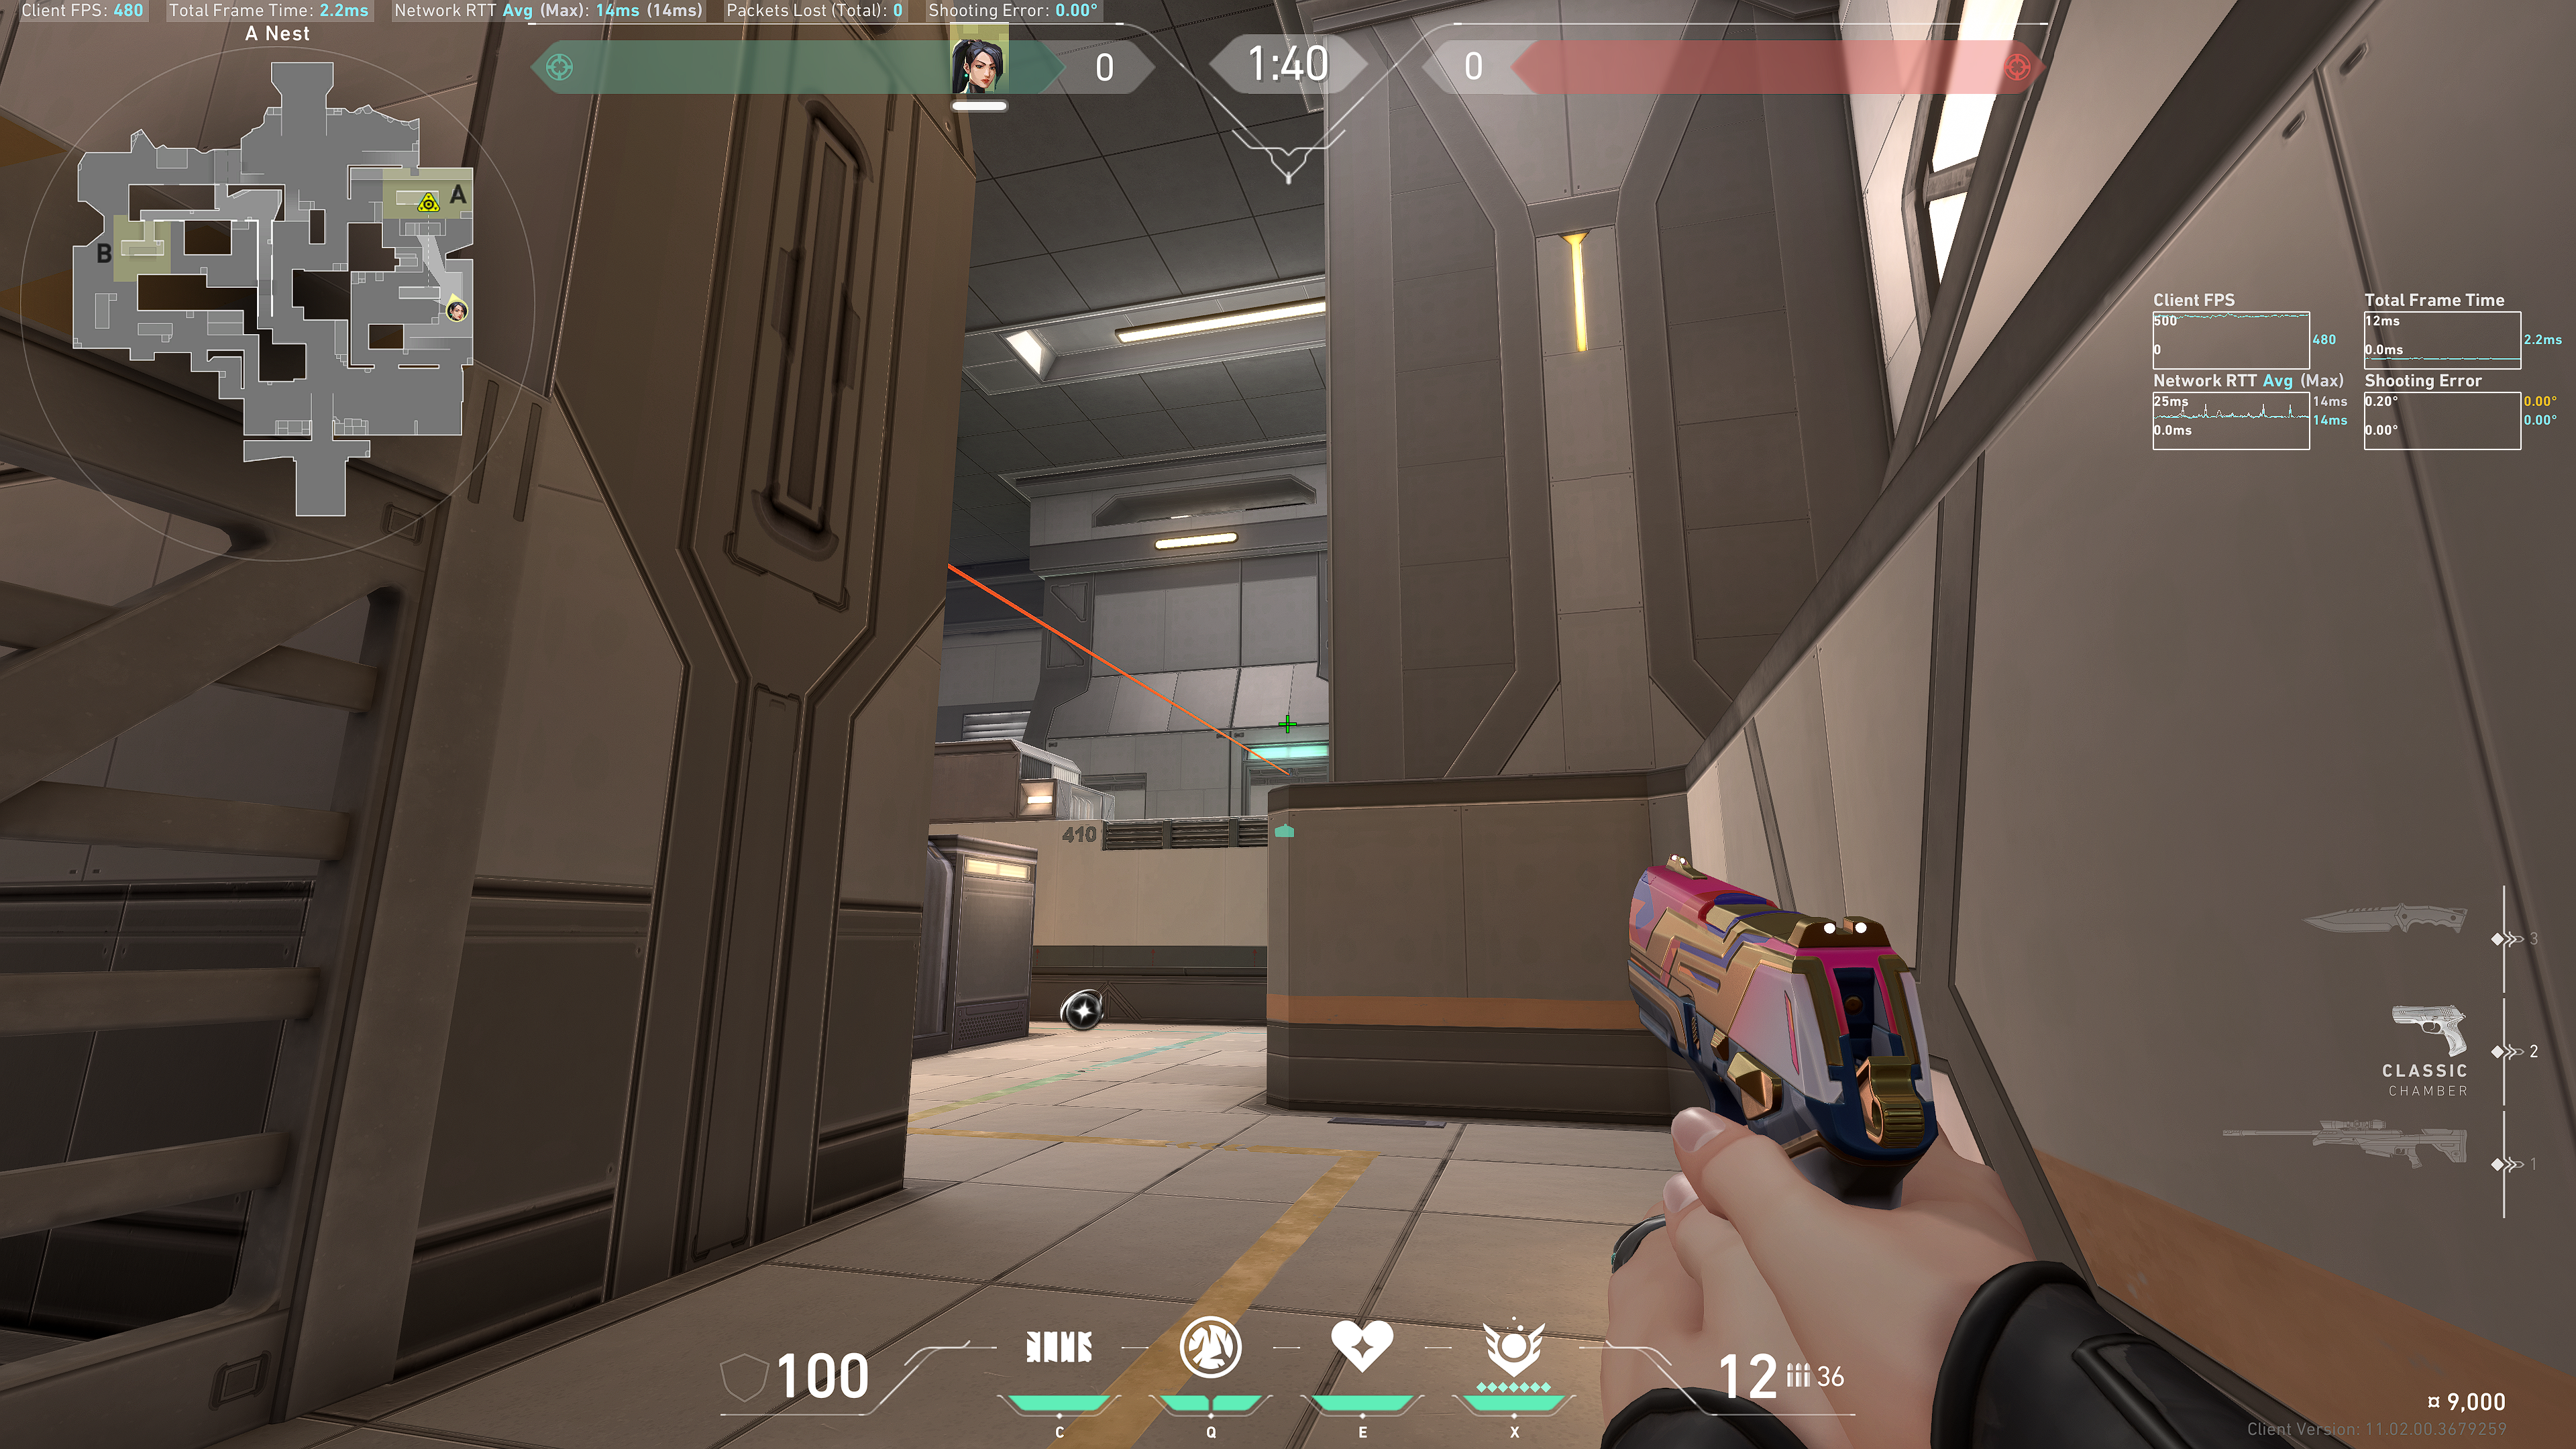
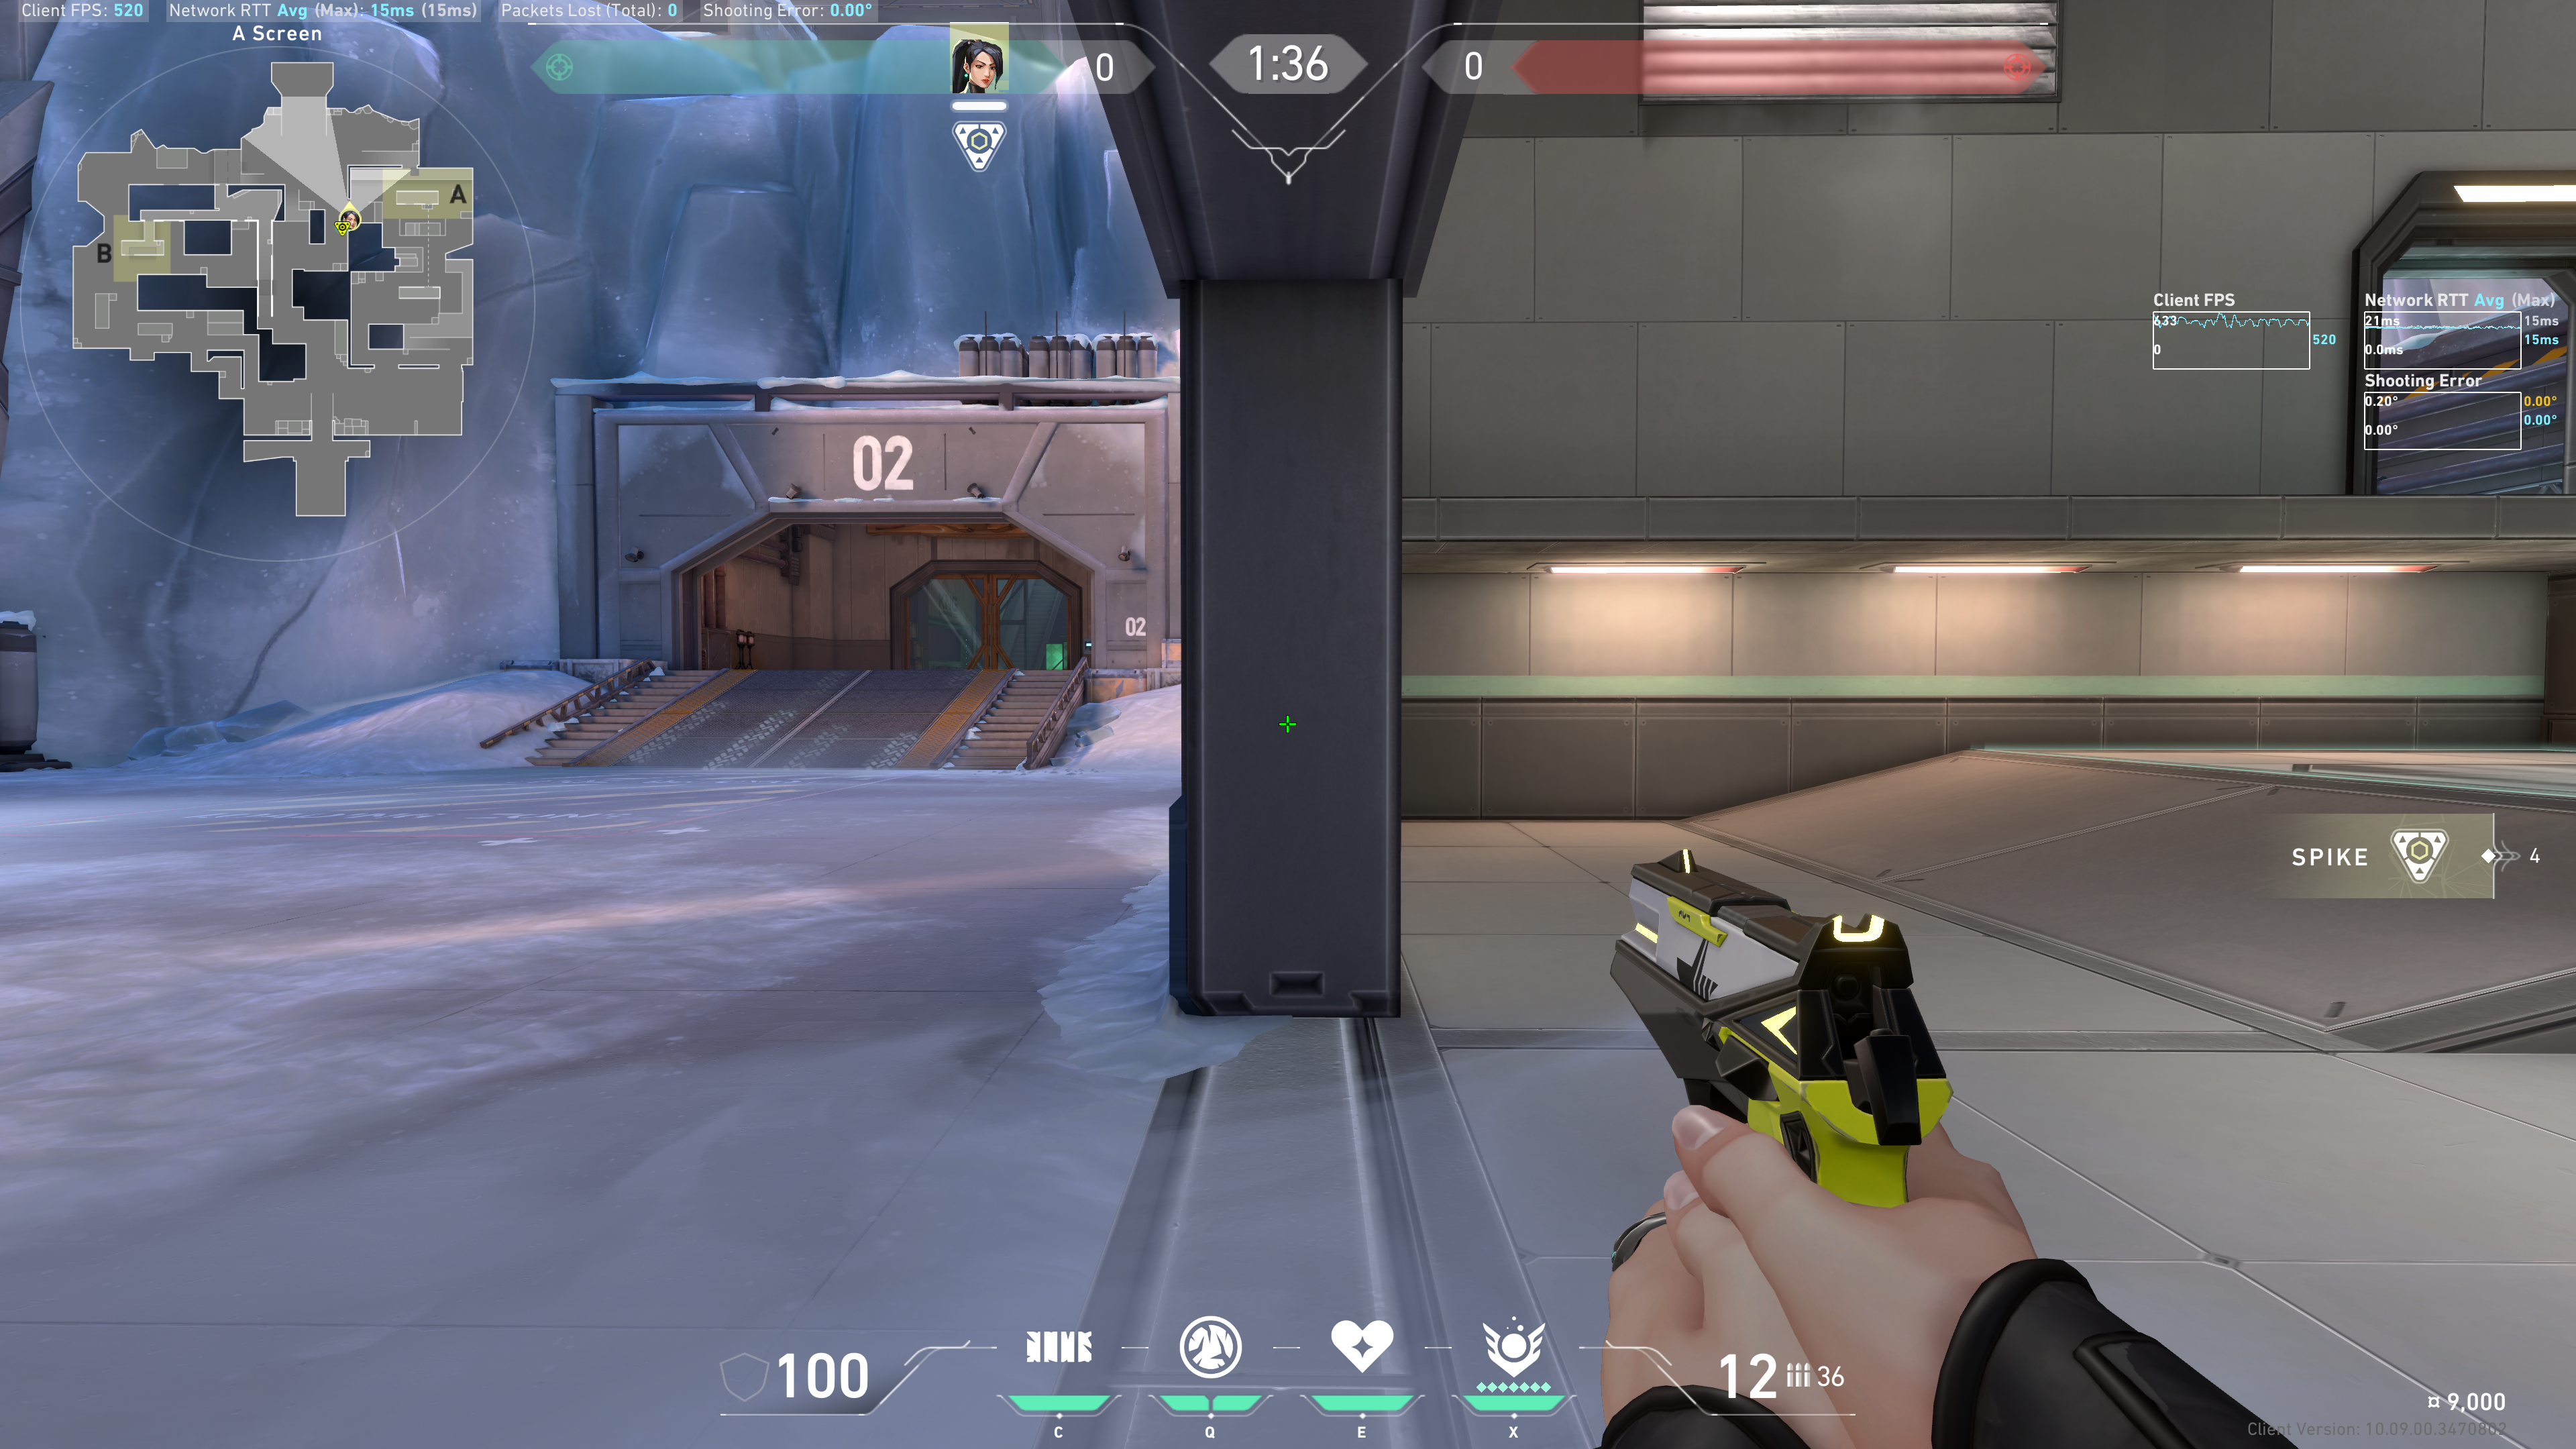
From Jail
Aim at the vertical line, the intersection:
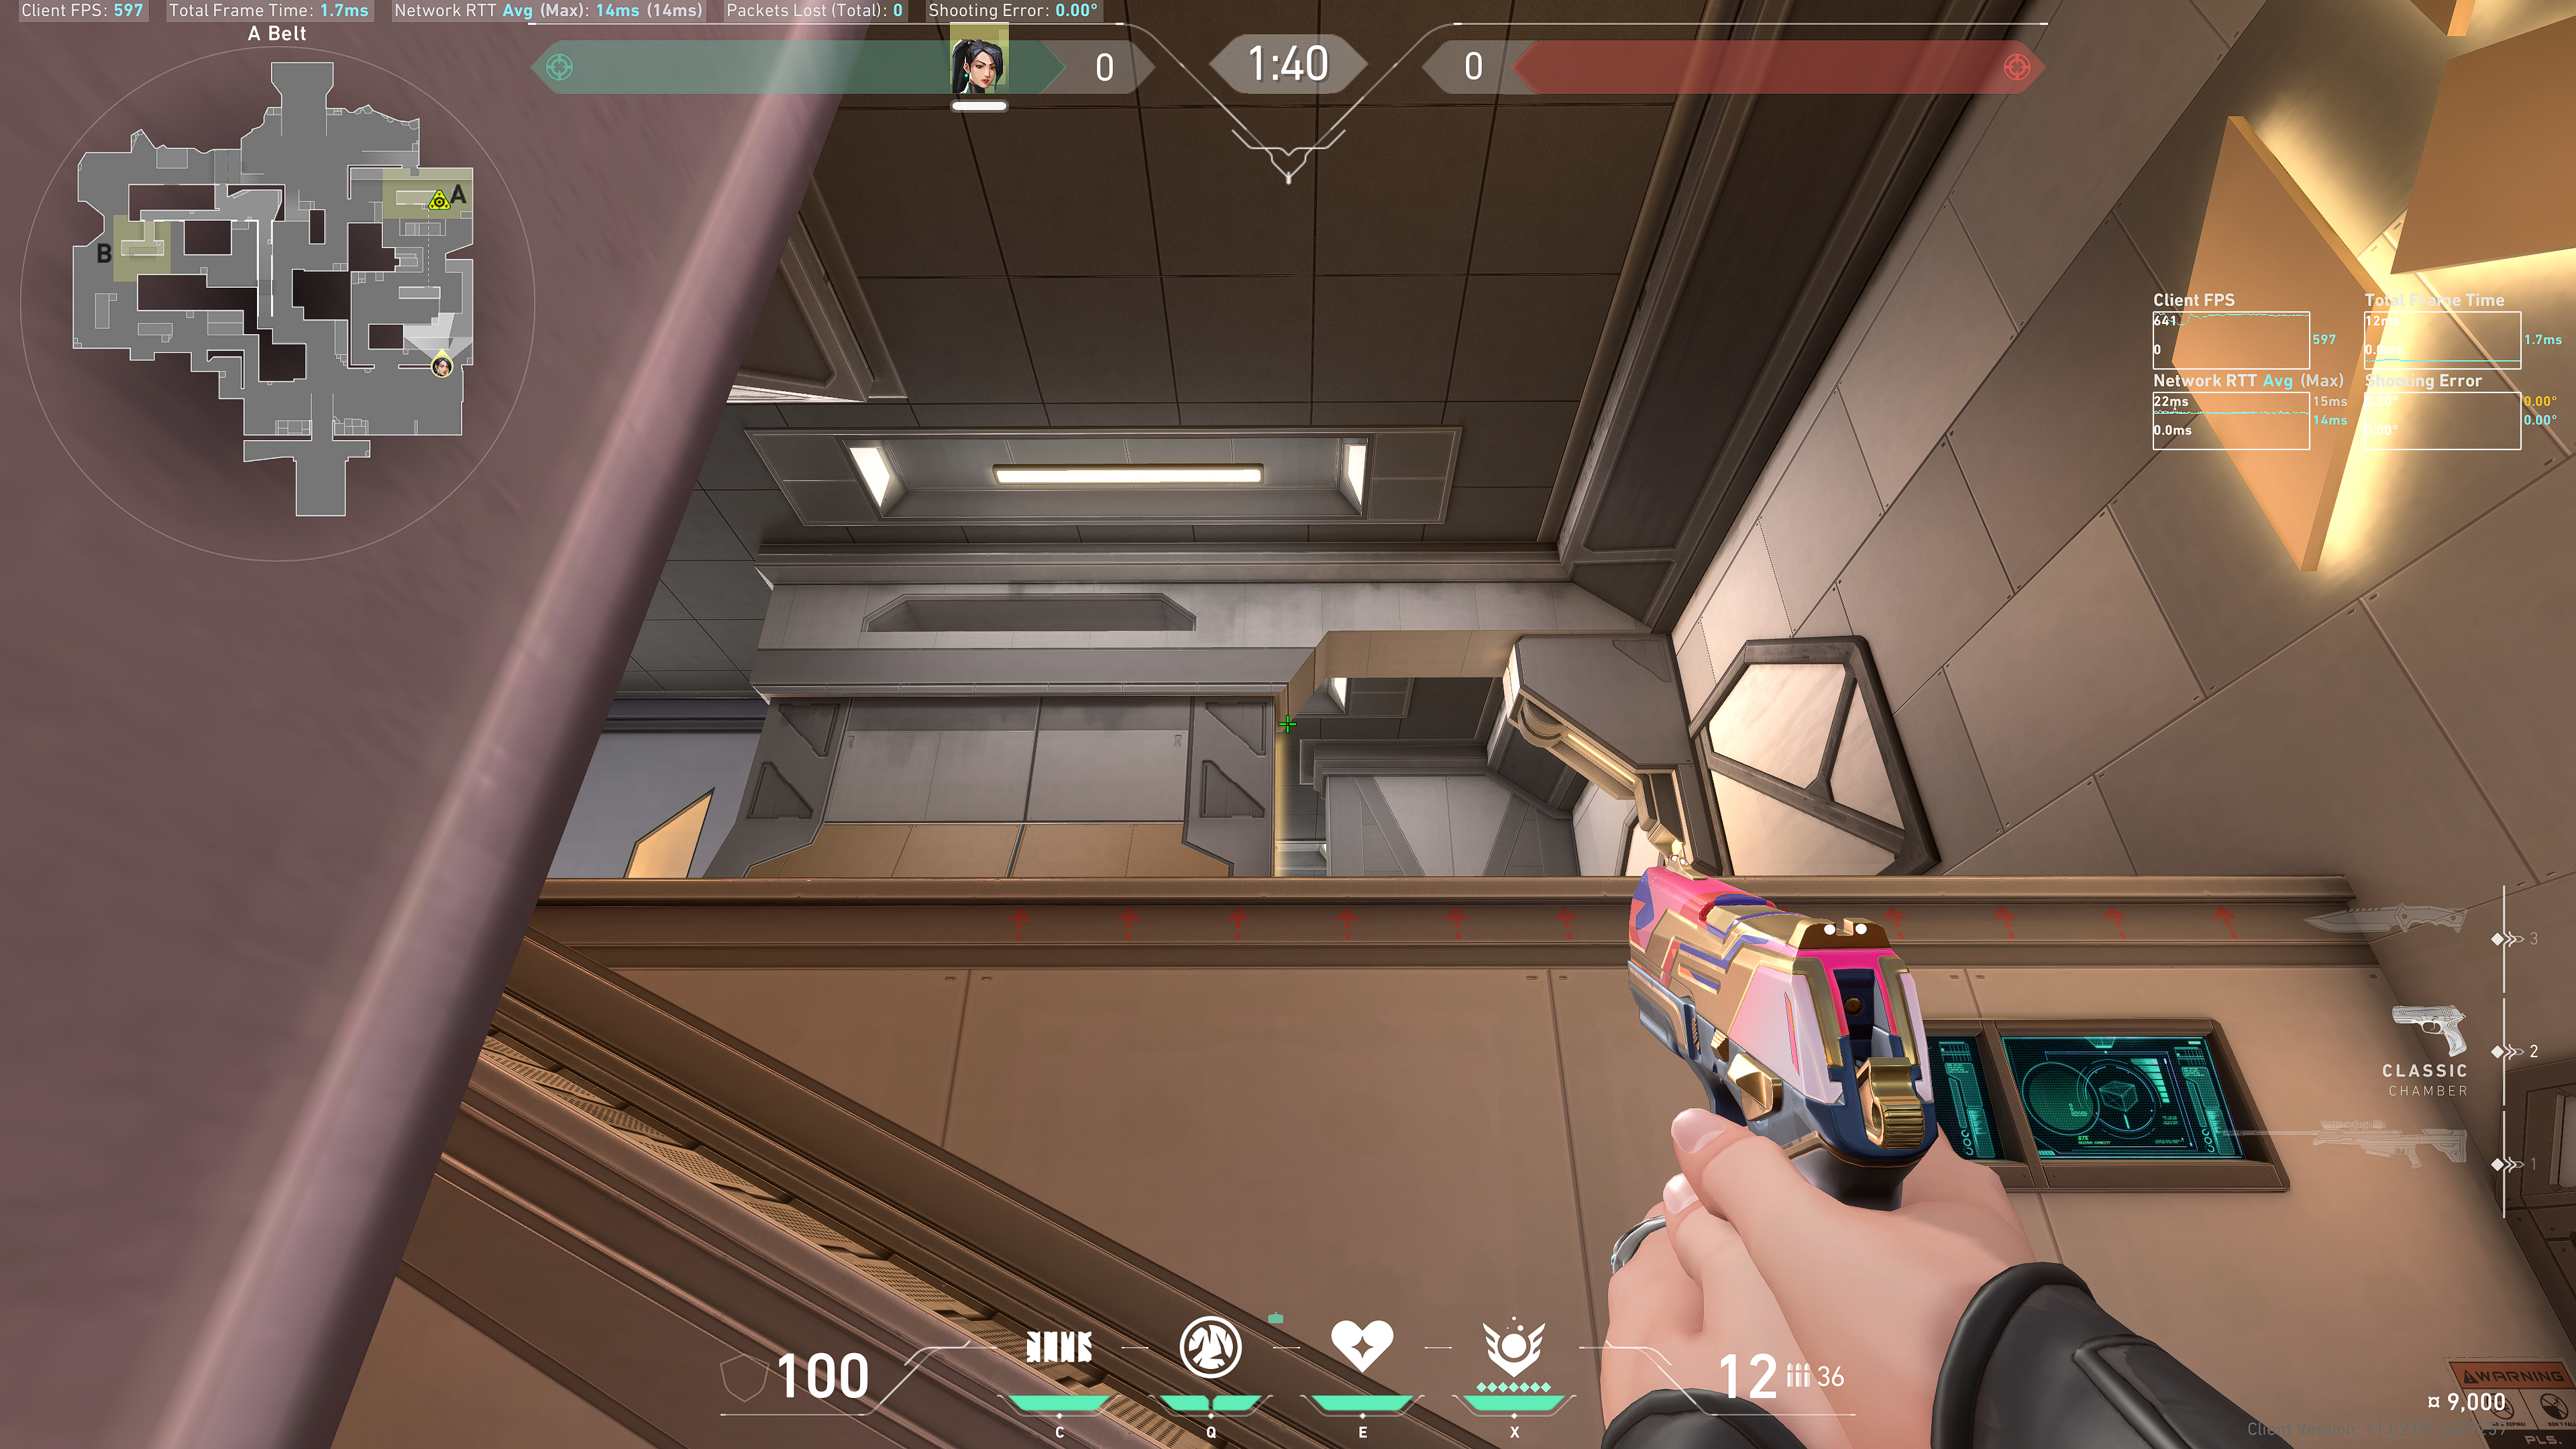
From A Main

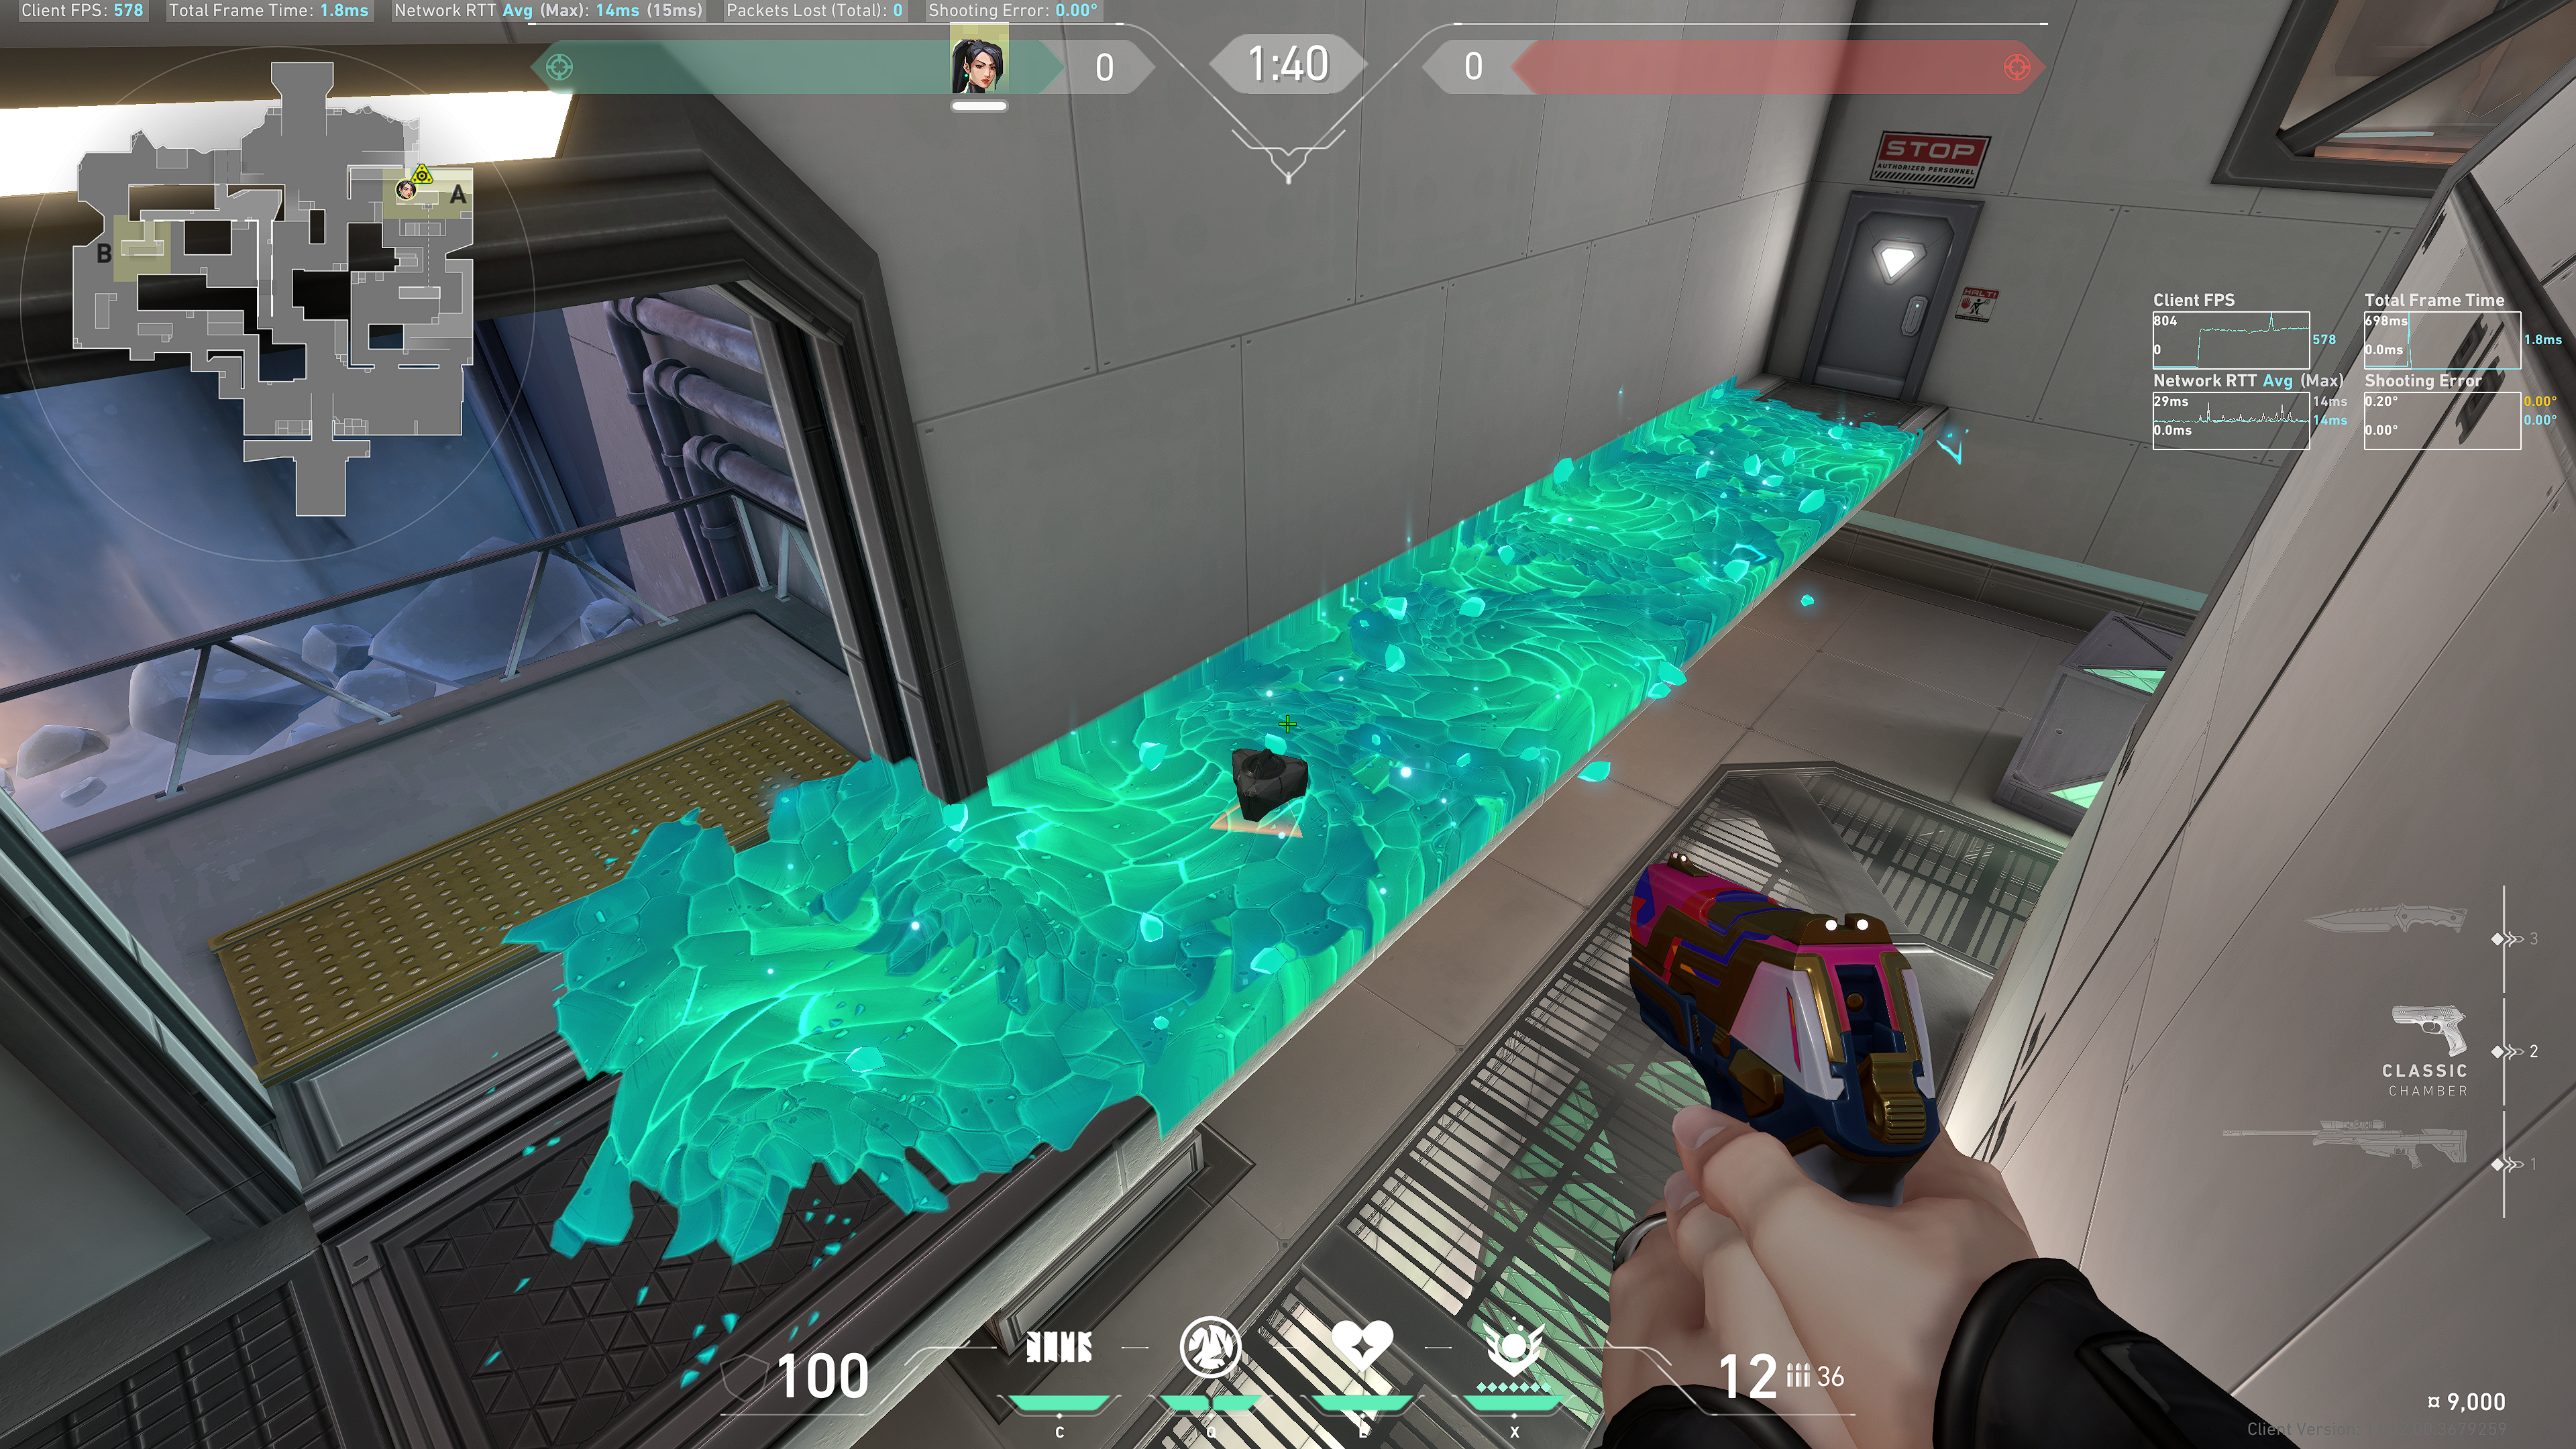
Default Post Plant
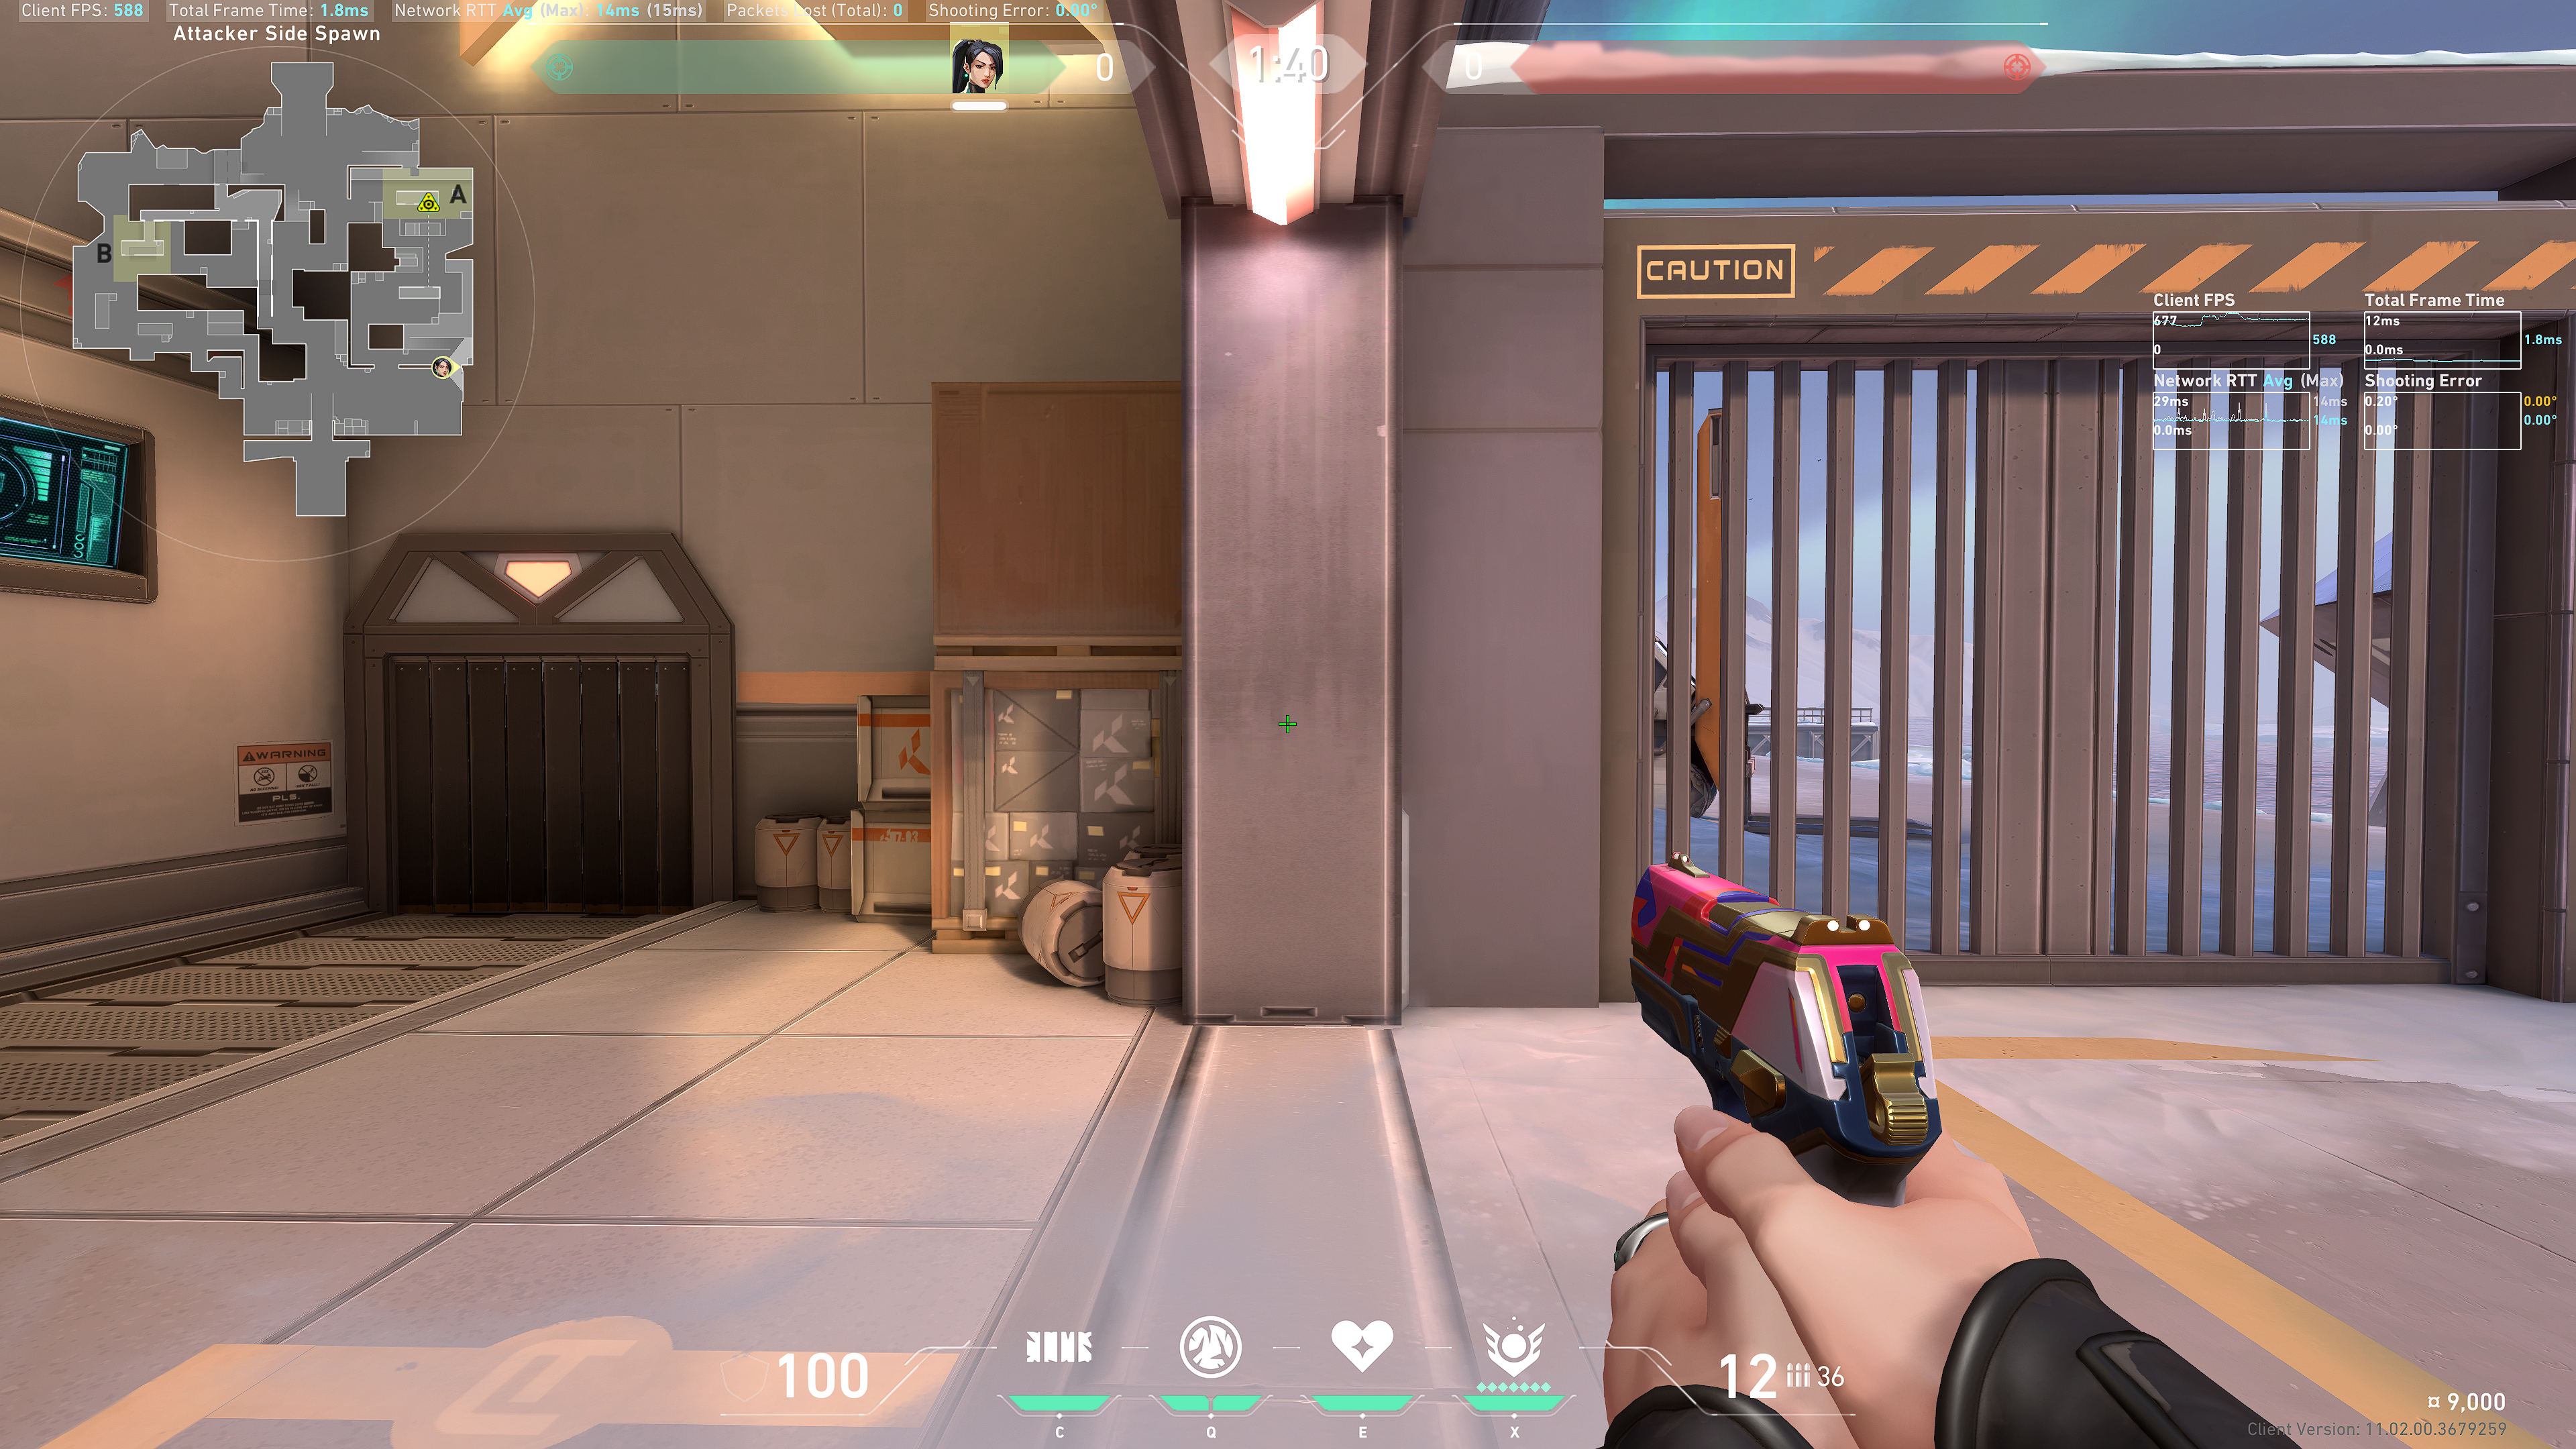
From T Spawn
Hug this wall:
Aim at this intersection in this wall:
Result:
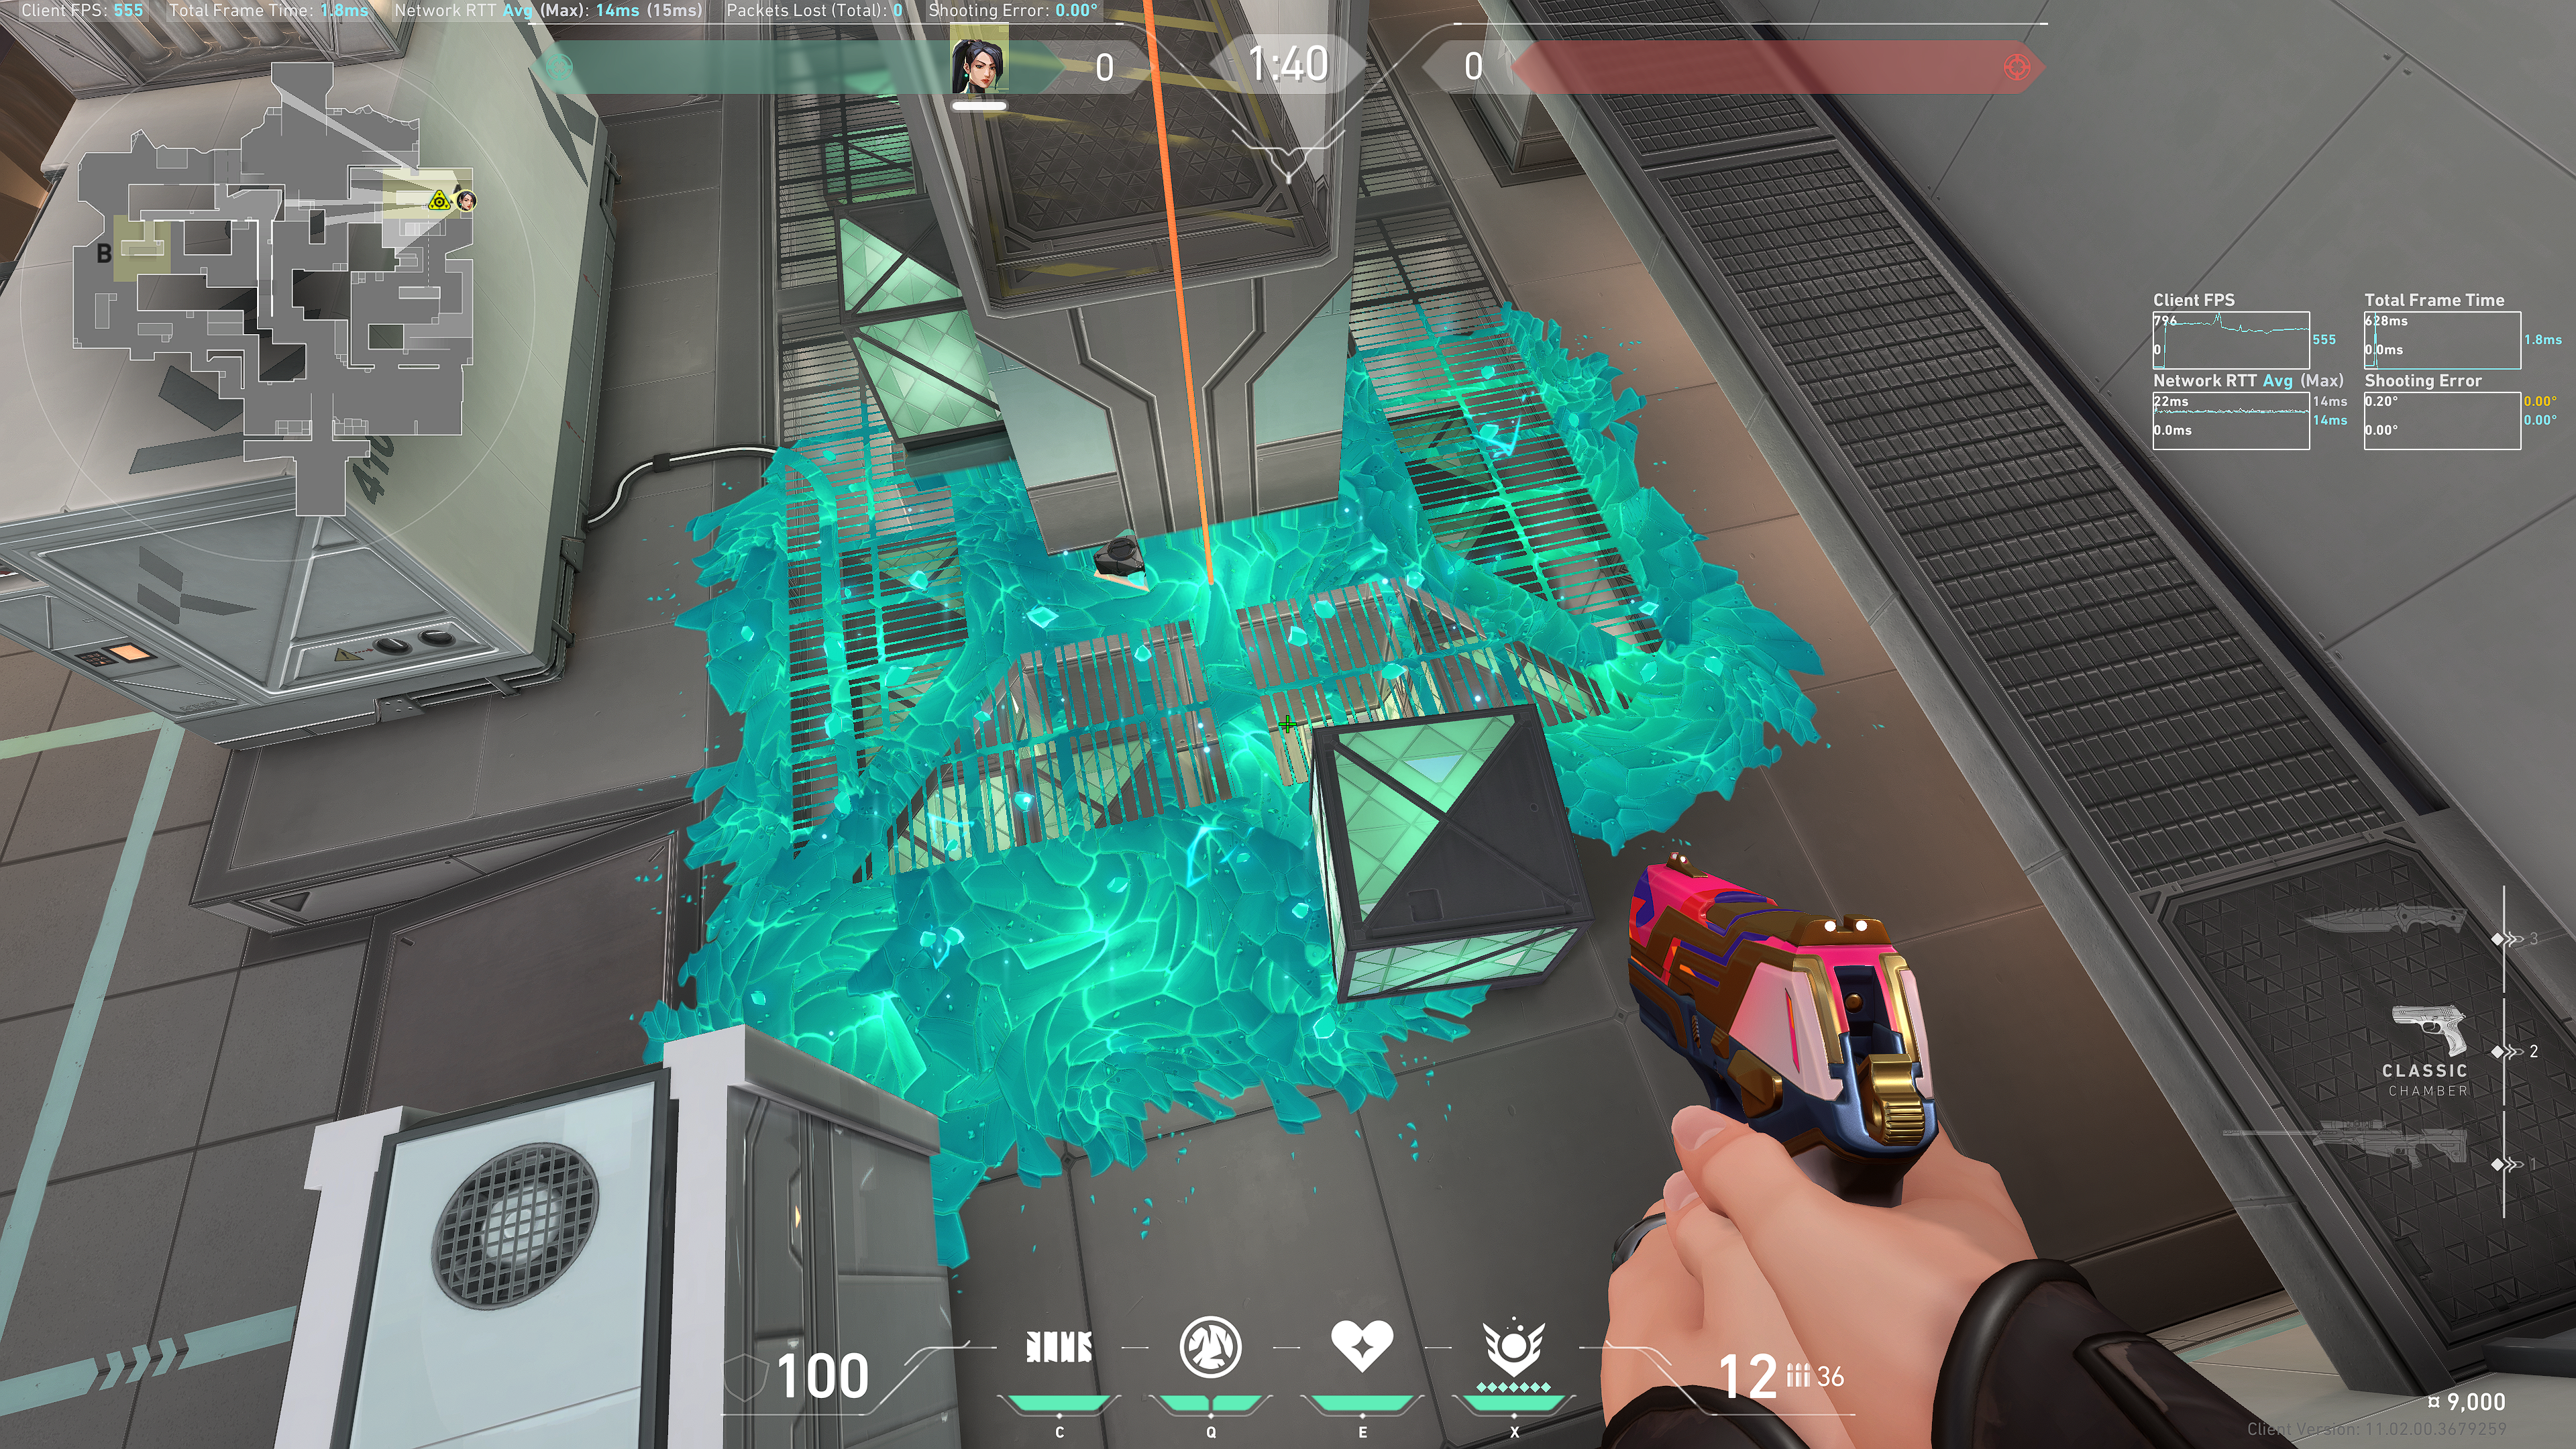
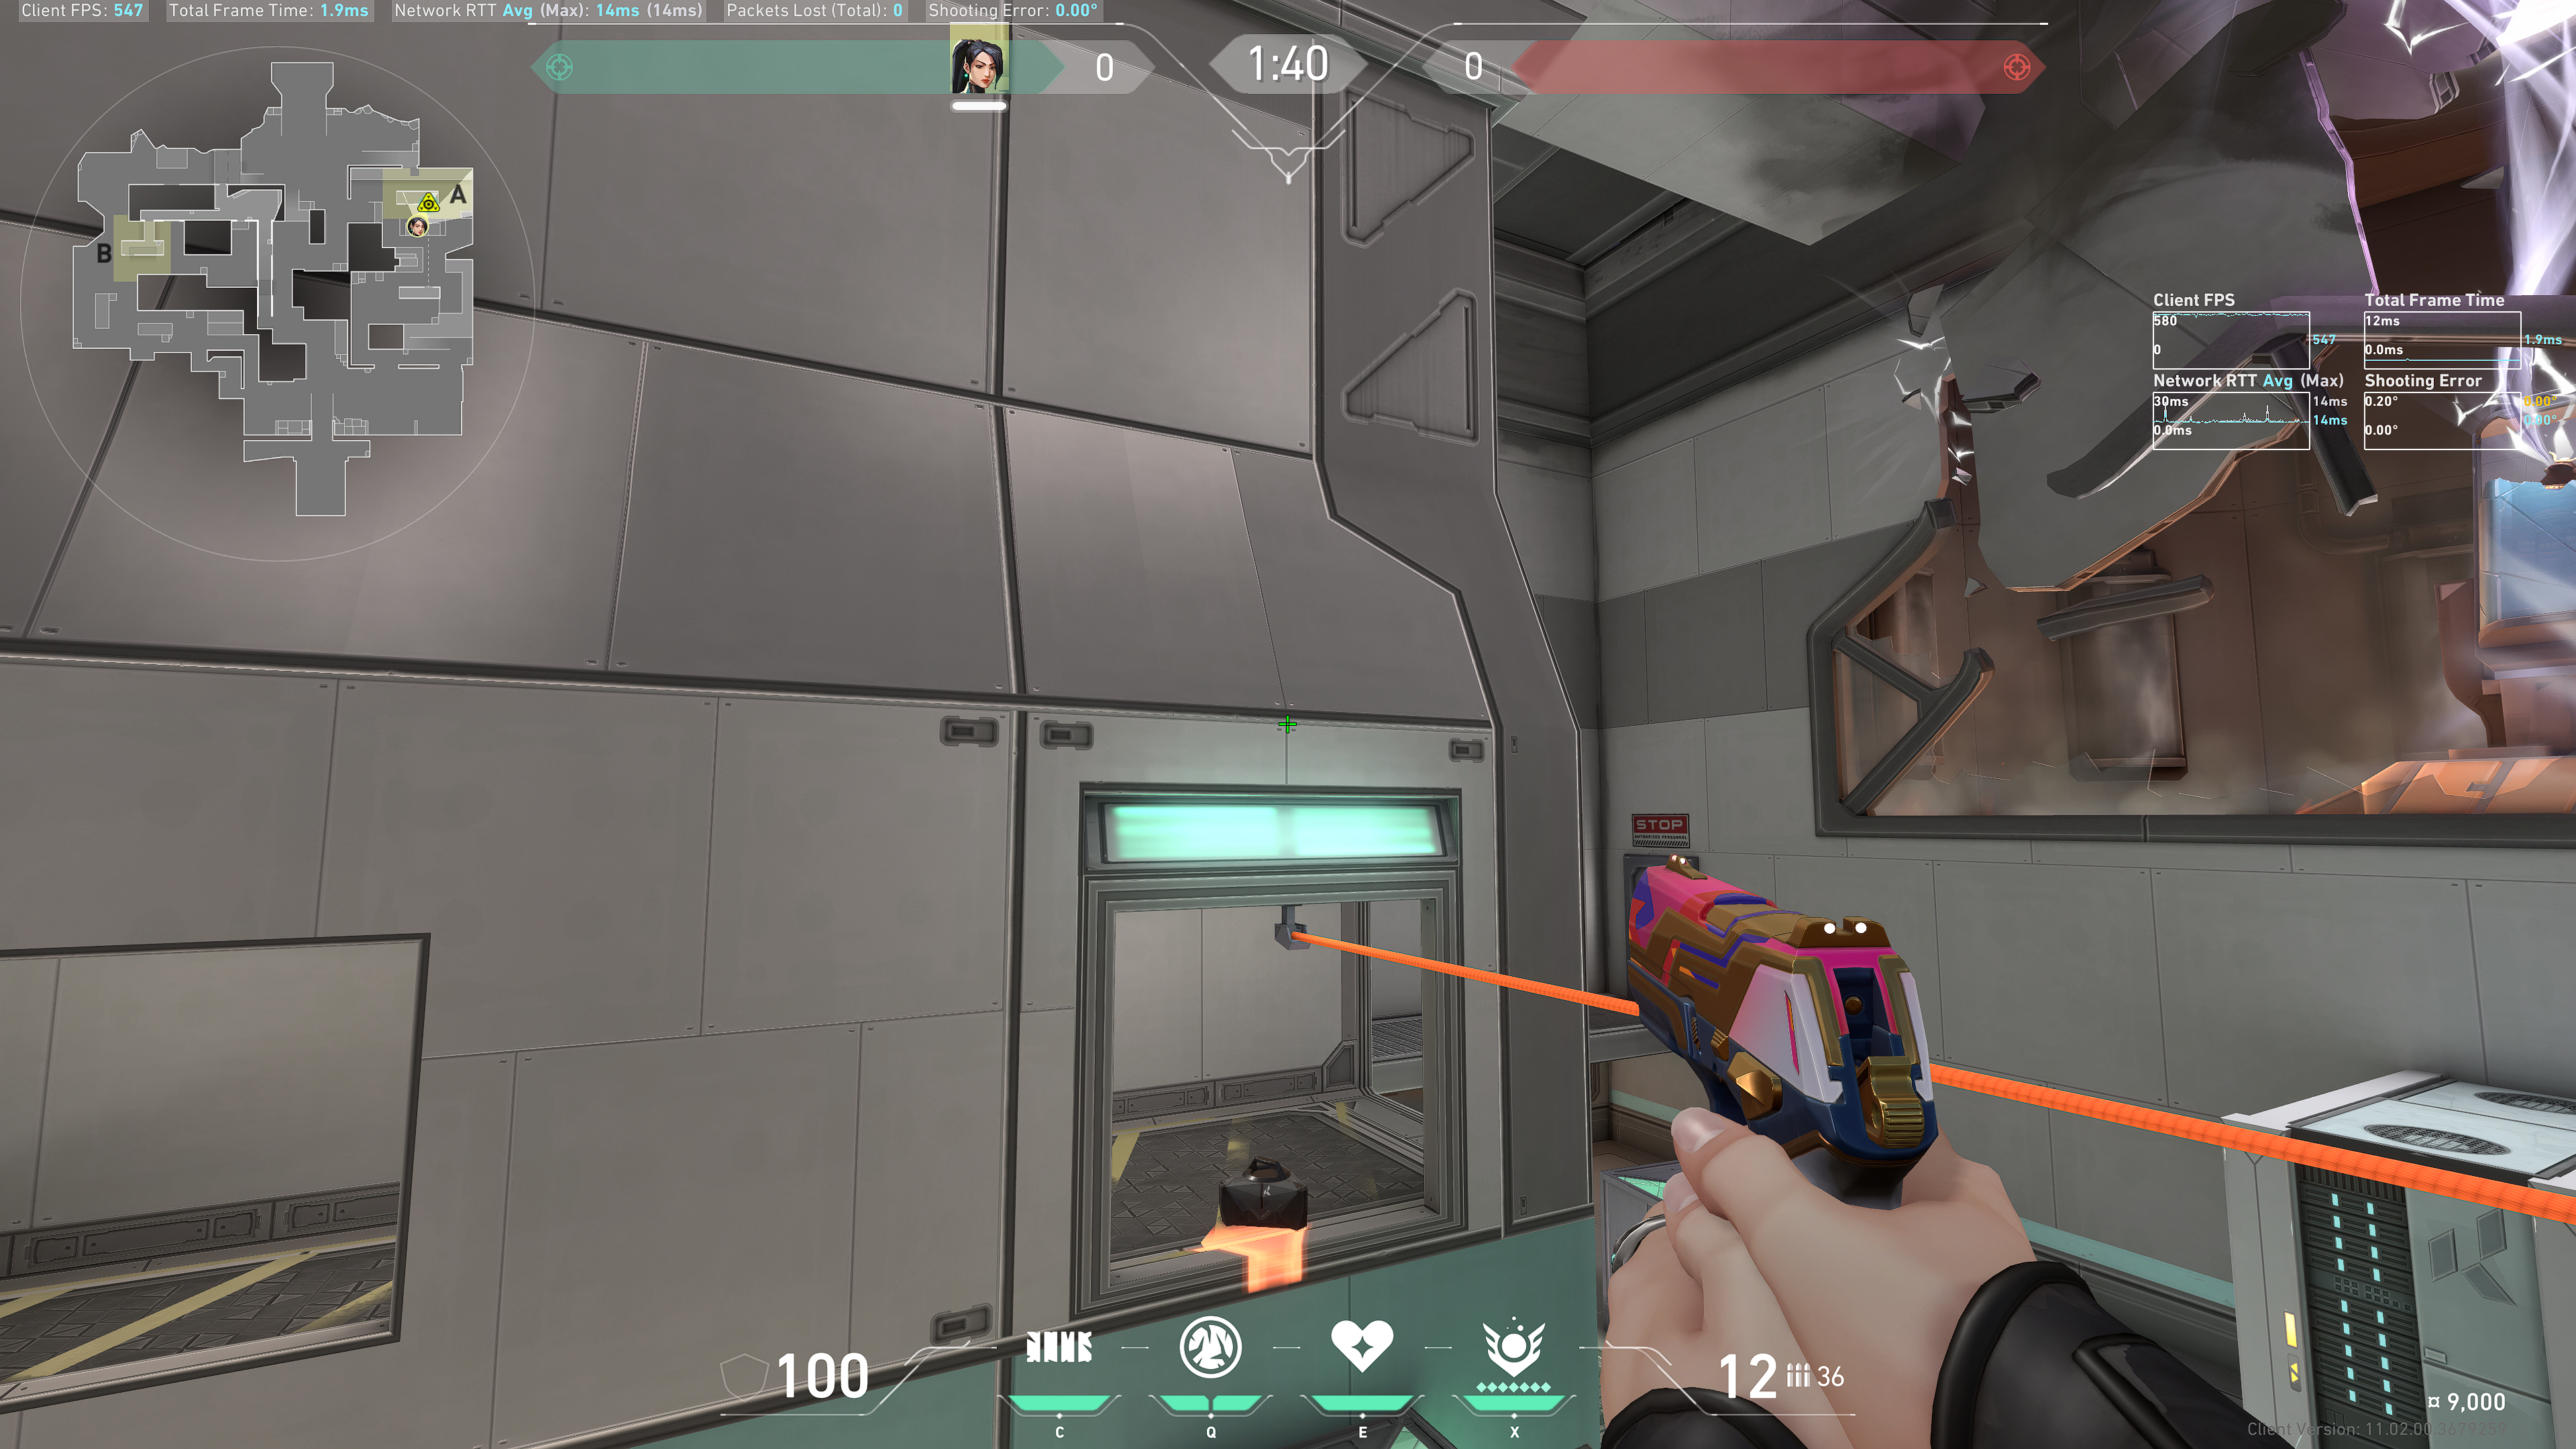
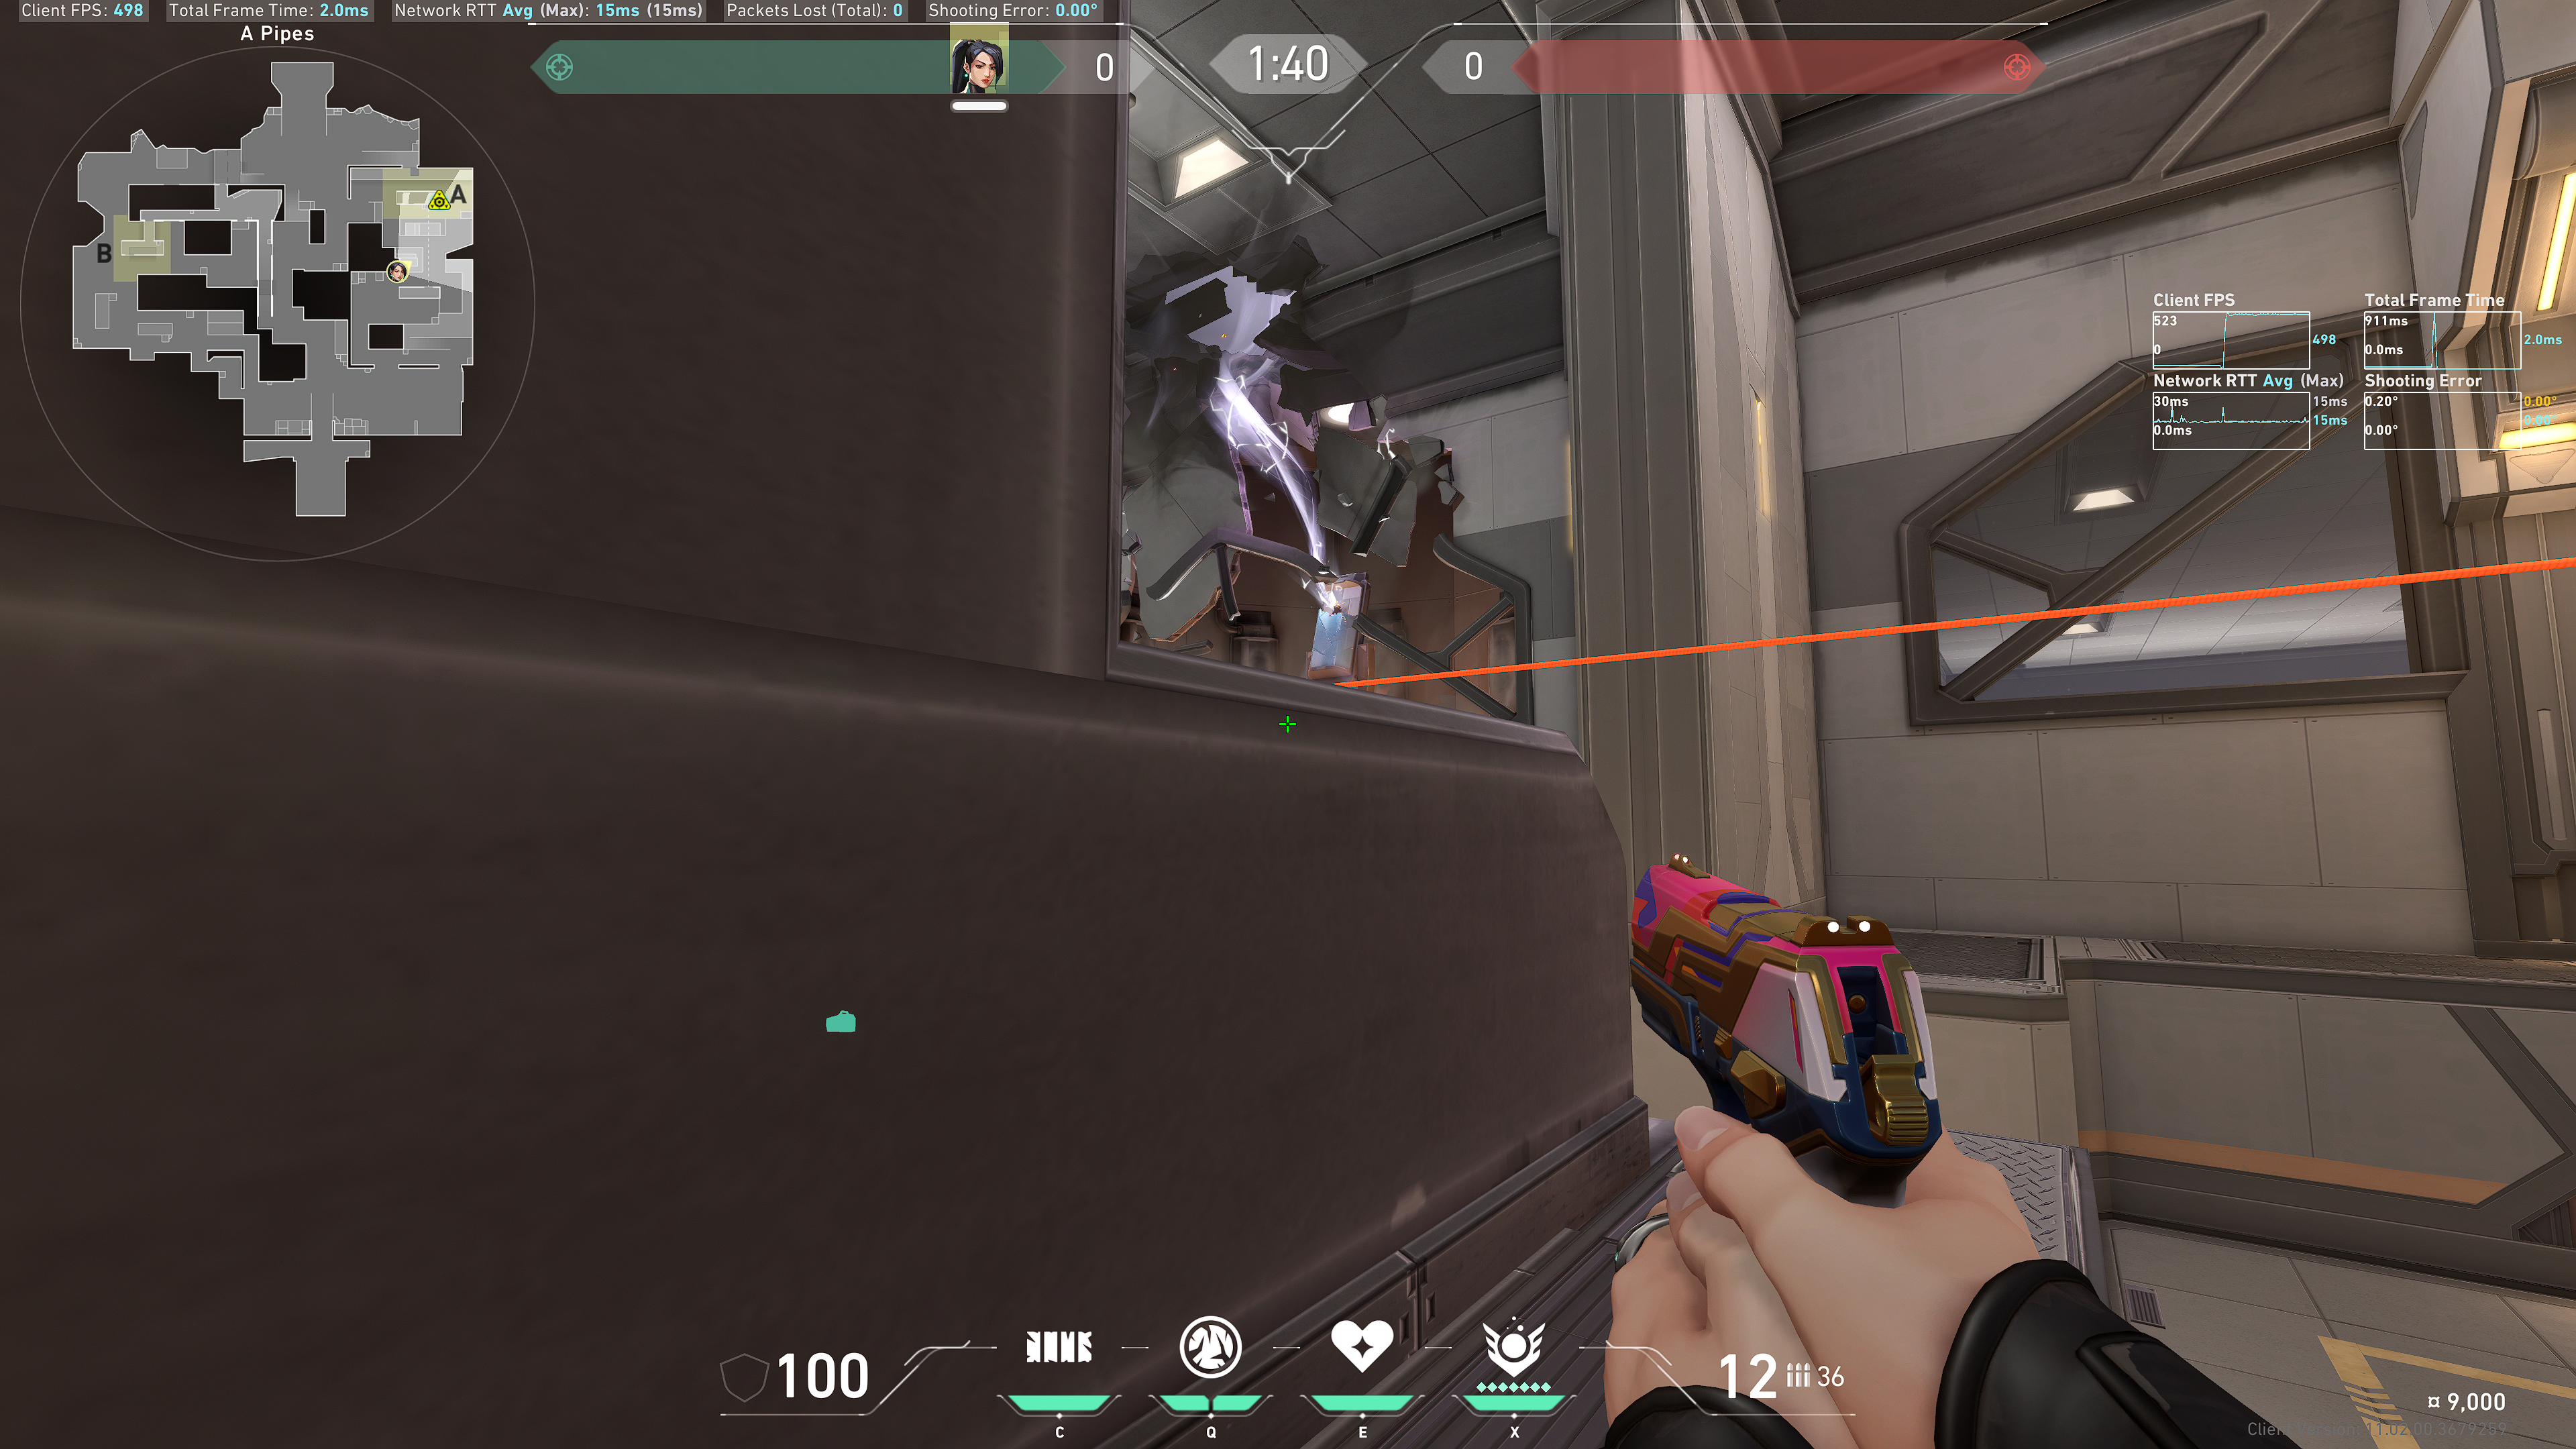
From Pipes
Note these two objects in the destruction in the wall:
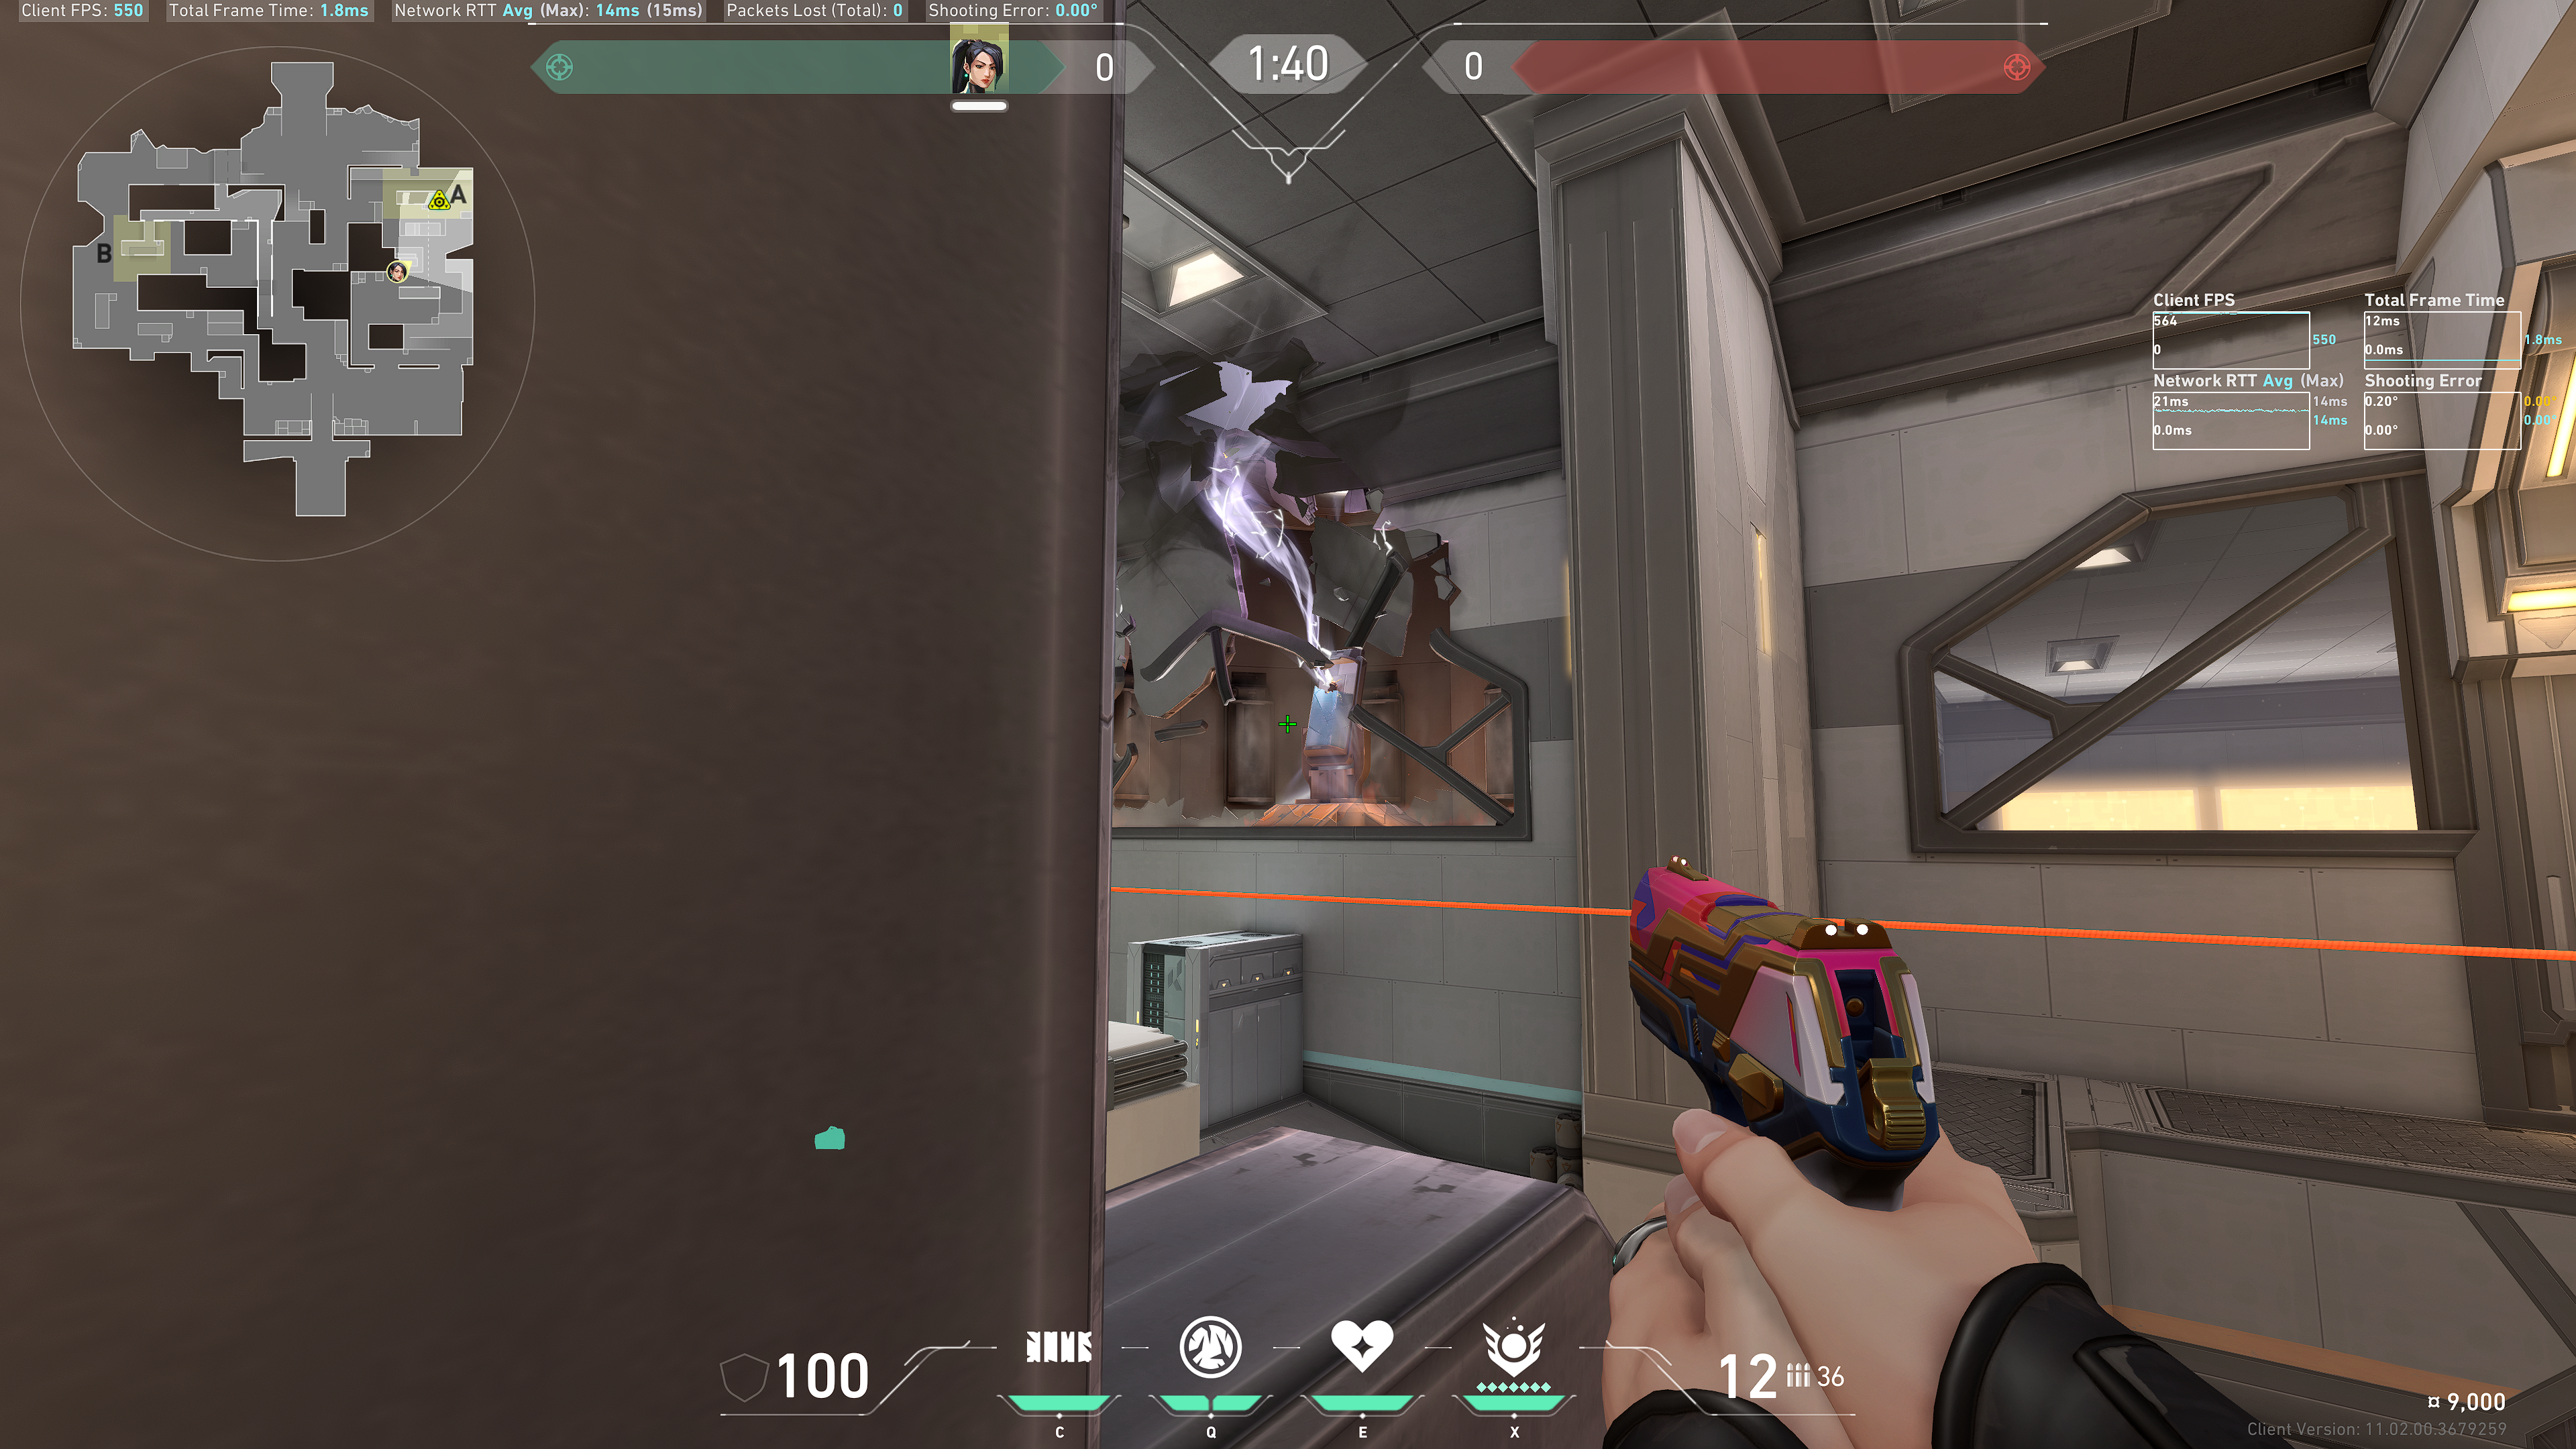
Aim between them, but also below this light colored horizontal strip on pipes:
Example result:

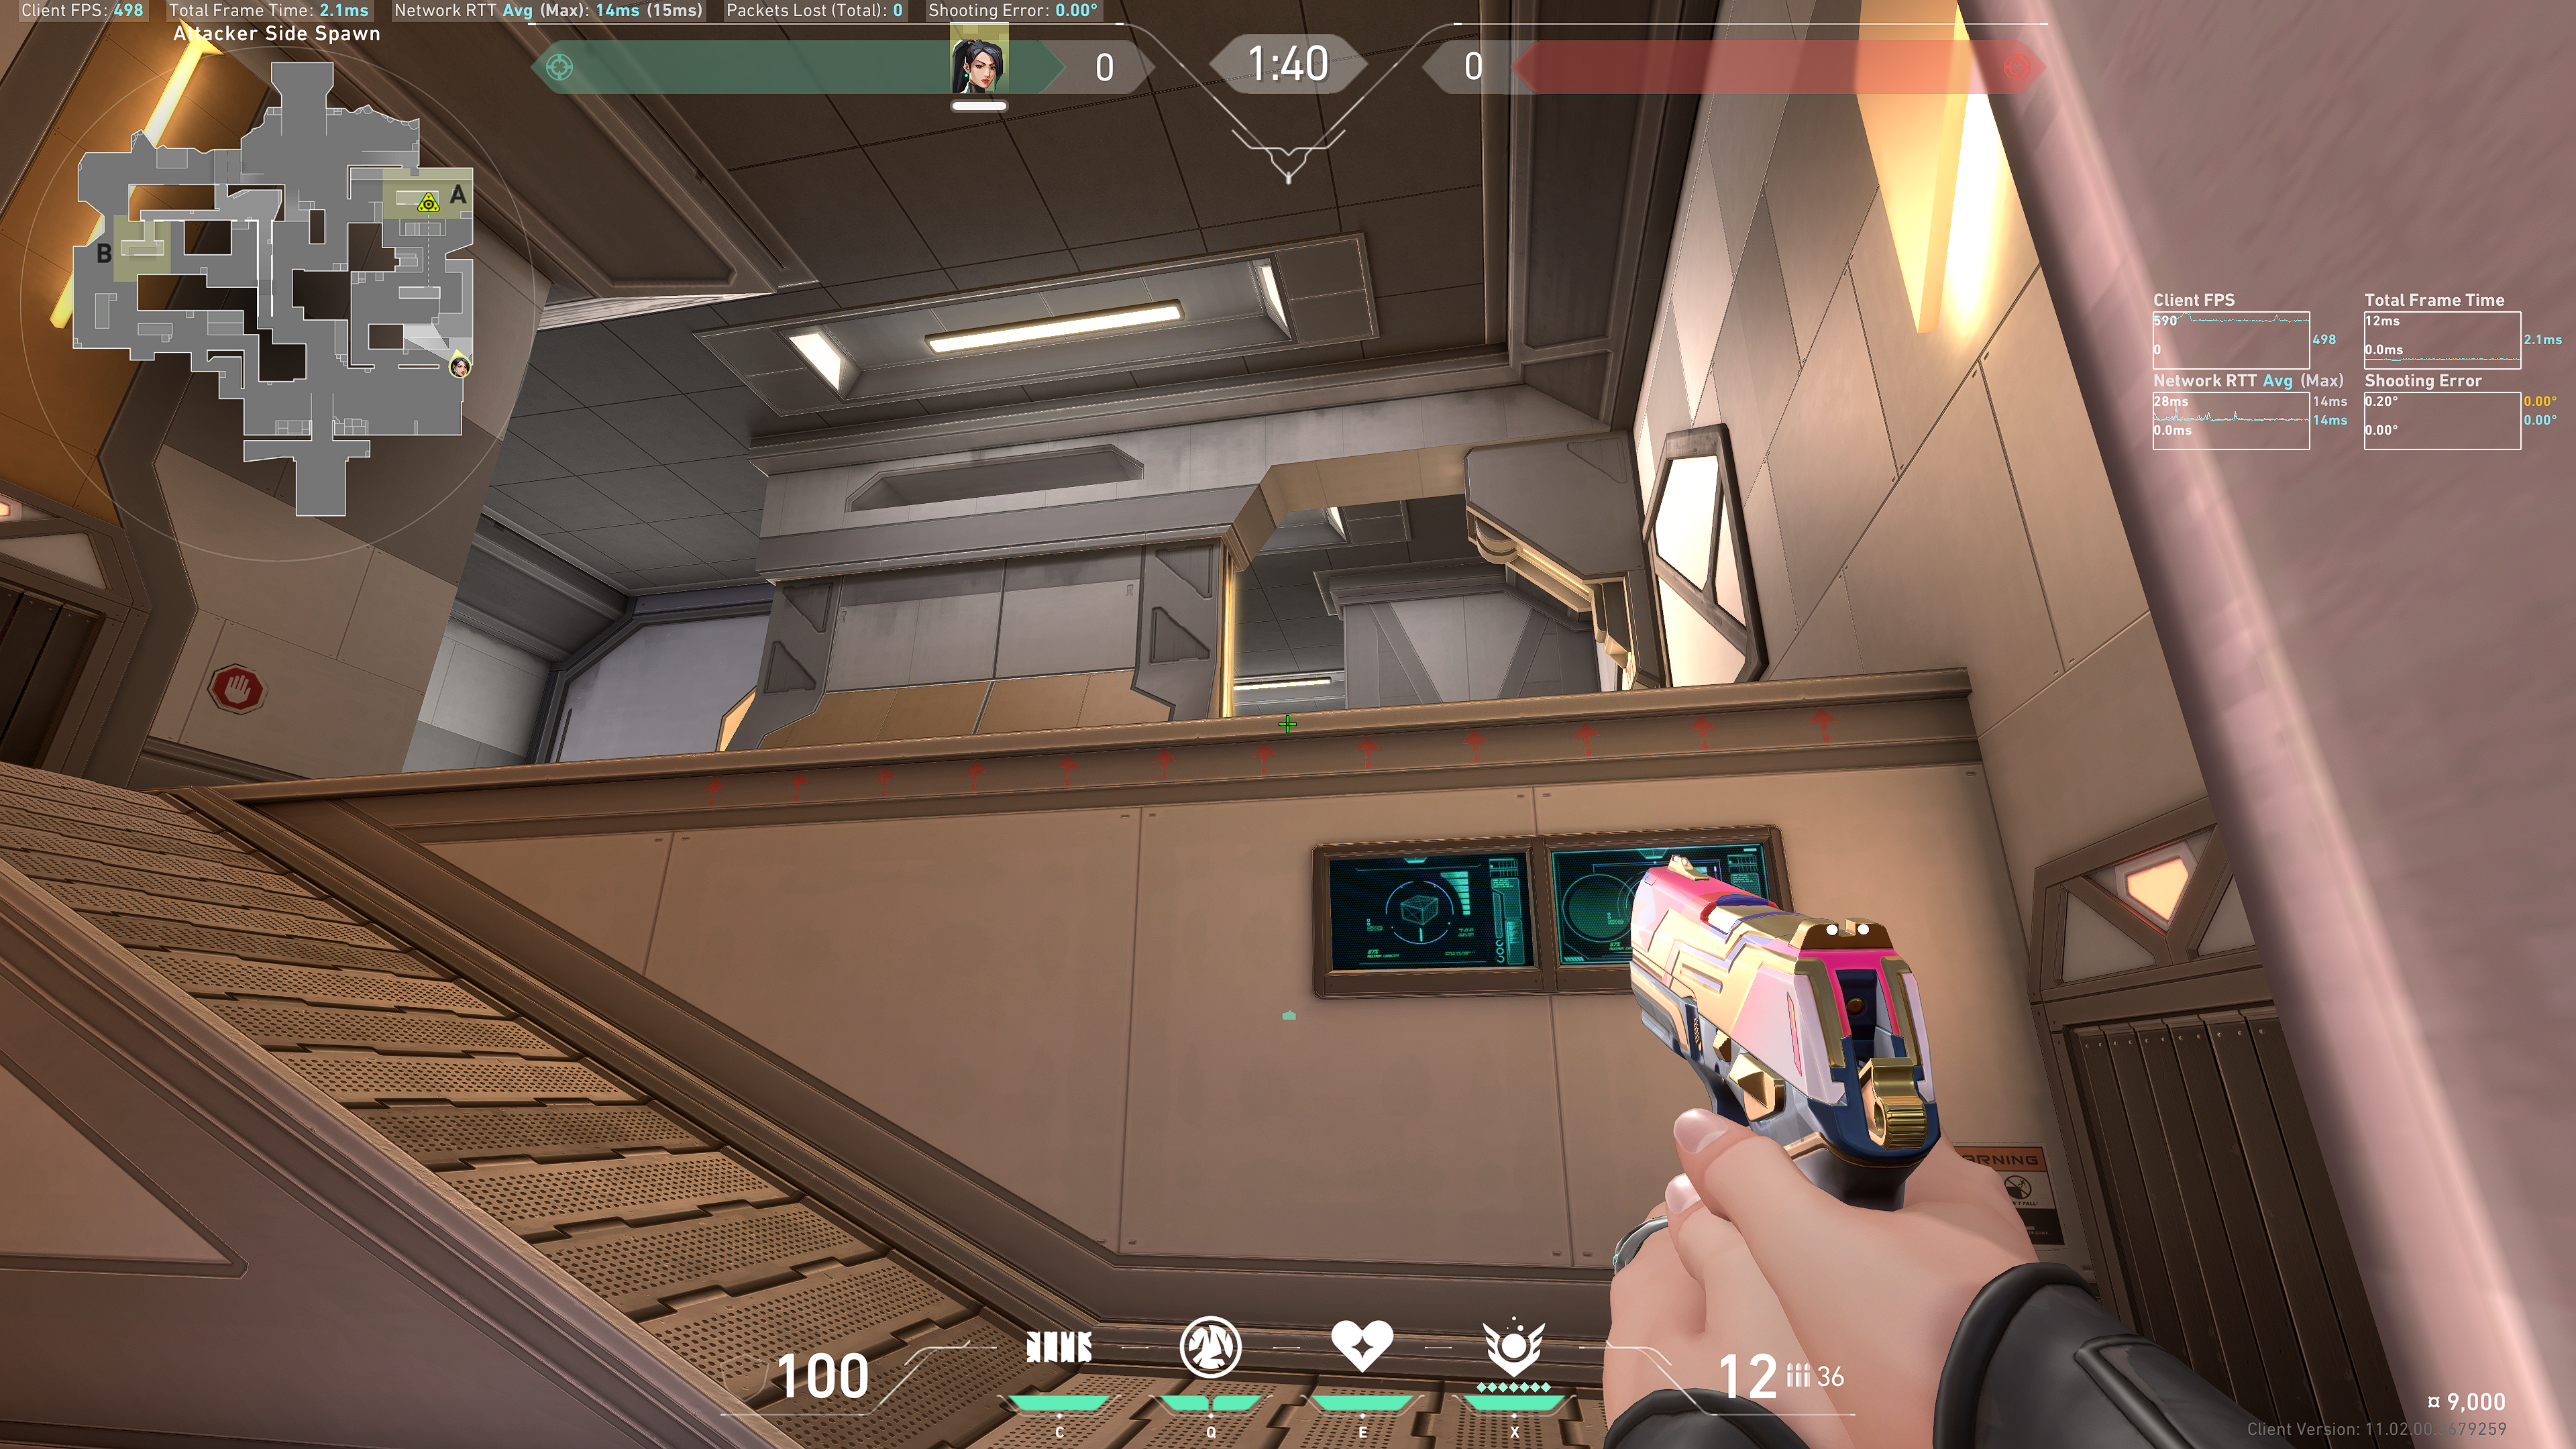
From Jail
Aim at this intersection in the ceiling:
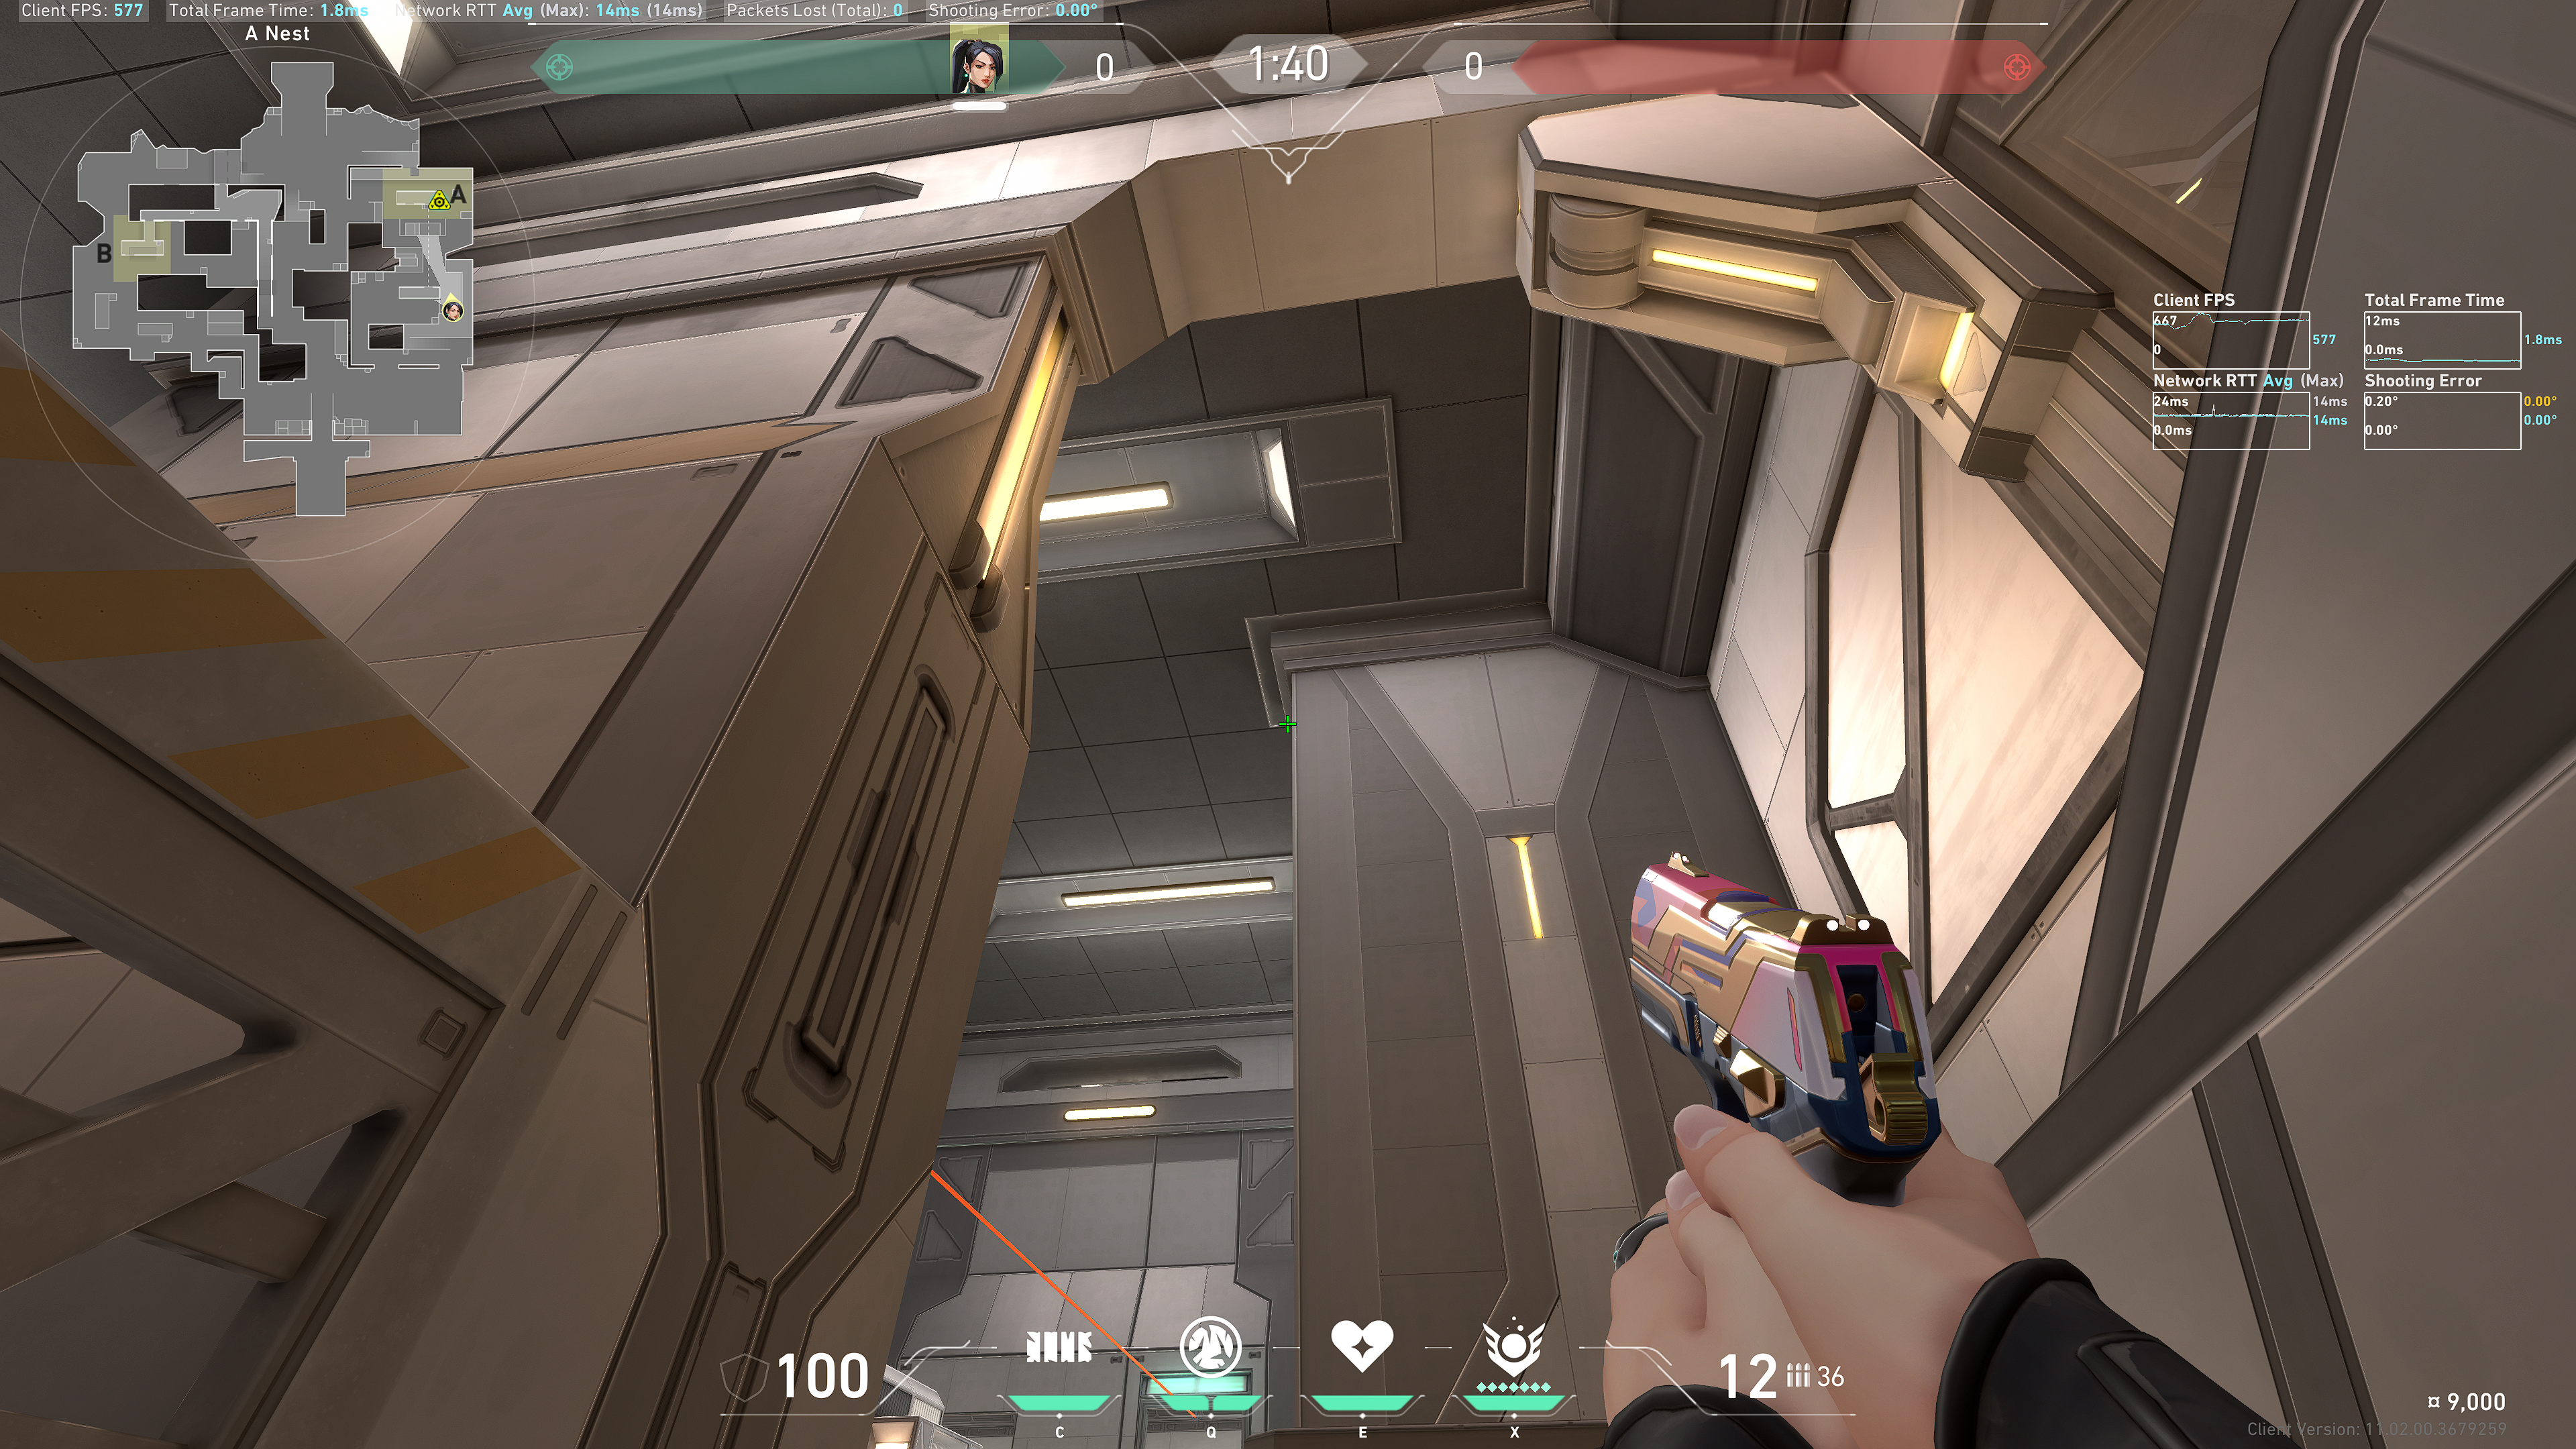 Note: careful not to peek too far left and accidentally expose yourself to the defuser while performing the lineup.
Example result:
B Site
Tuck into this railing in T Spawn:
Yellow (version 1, faster execute)
Aim at this star, slightly below:
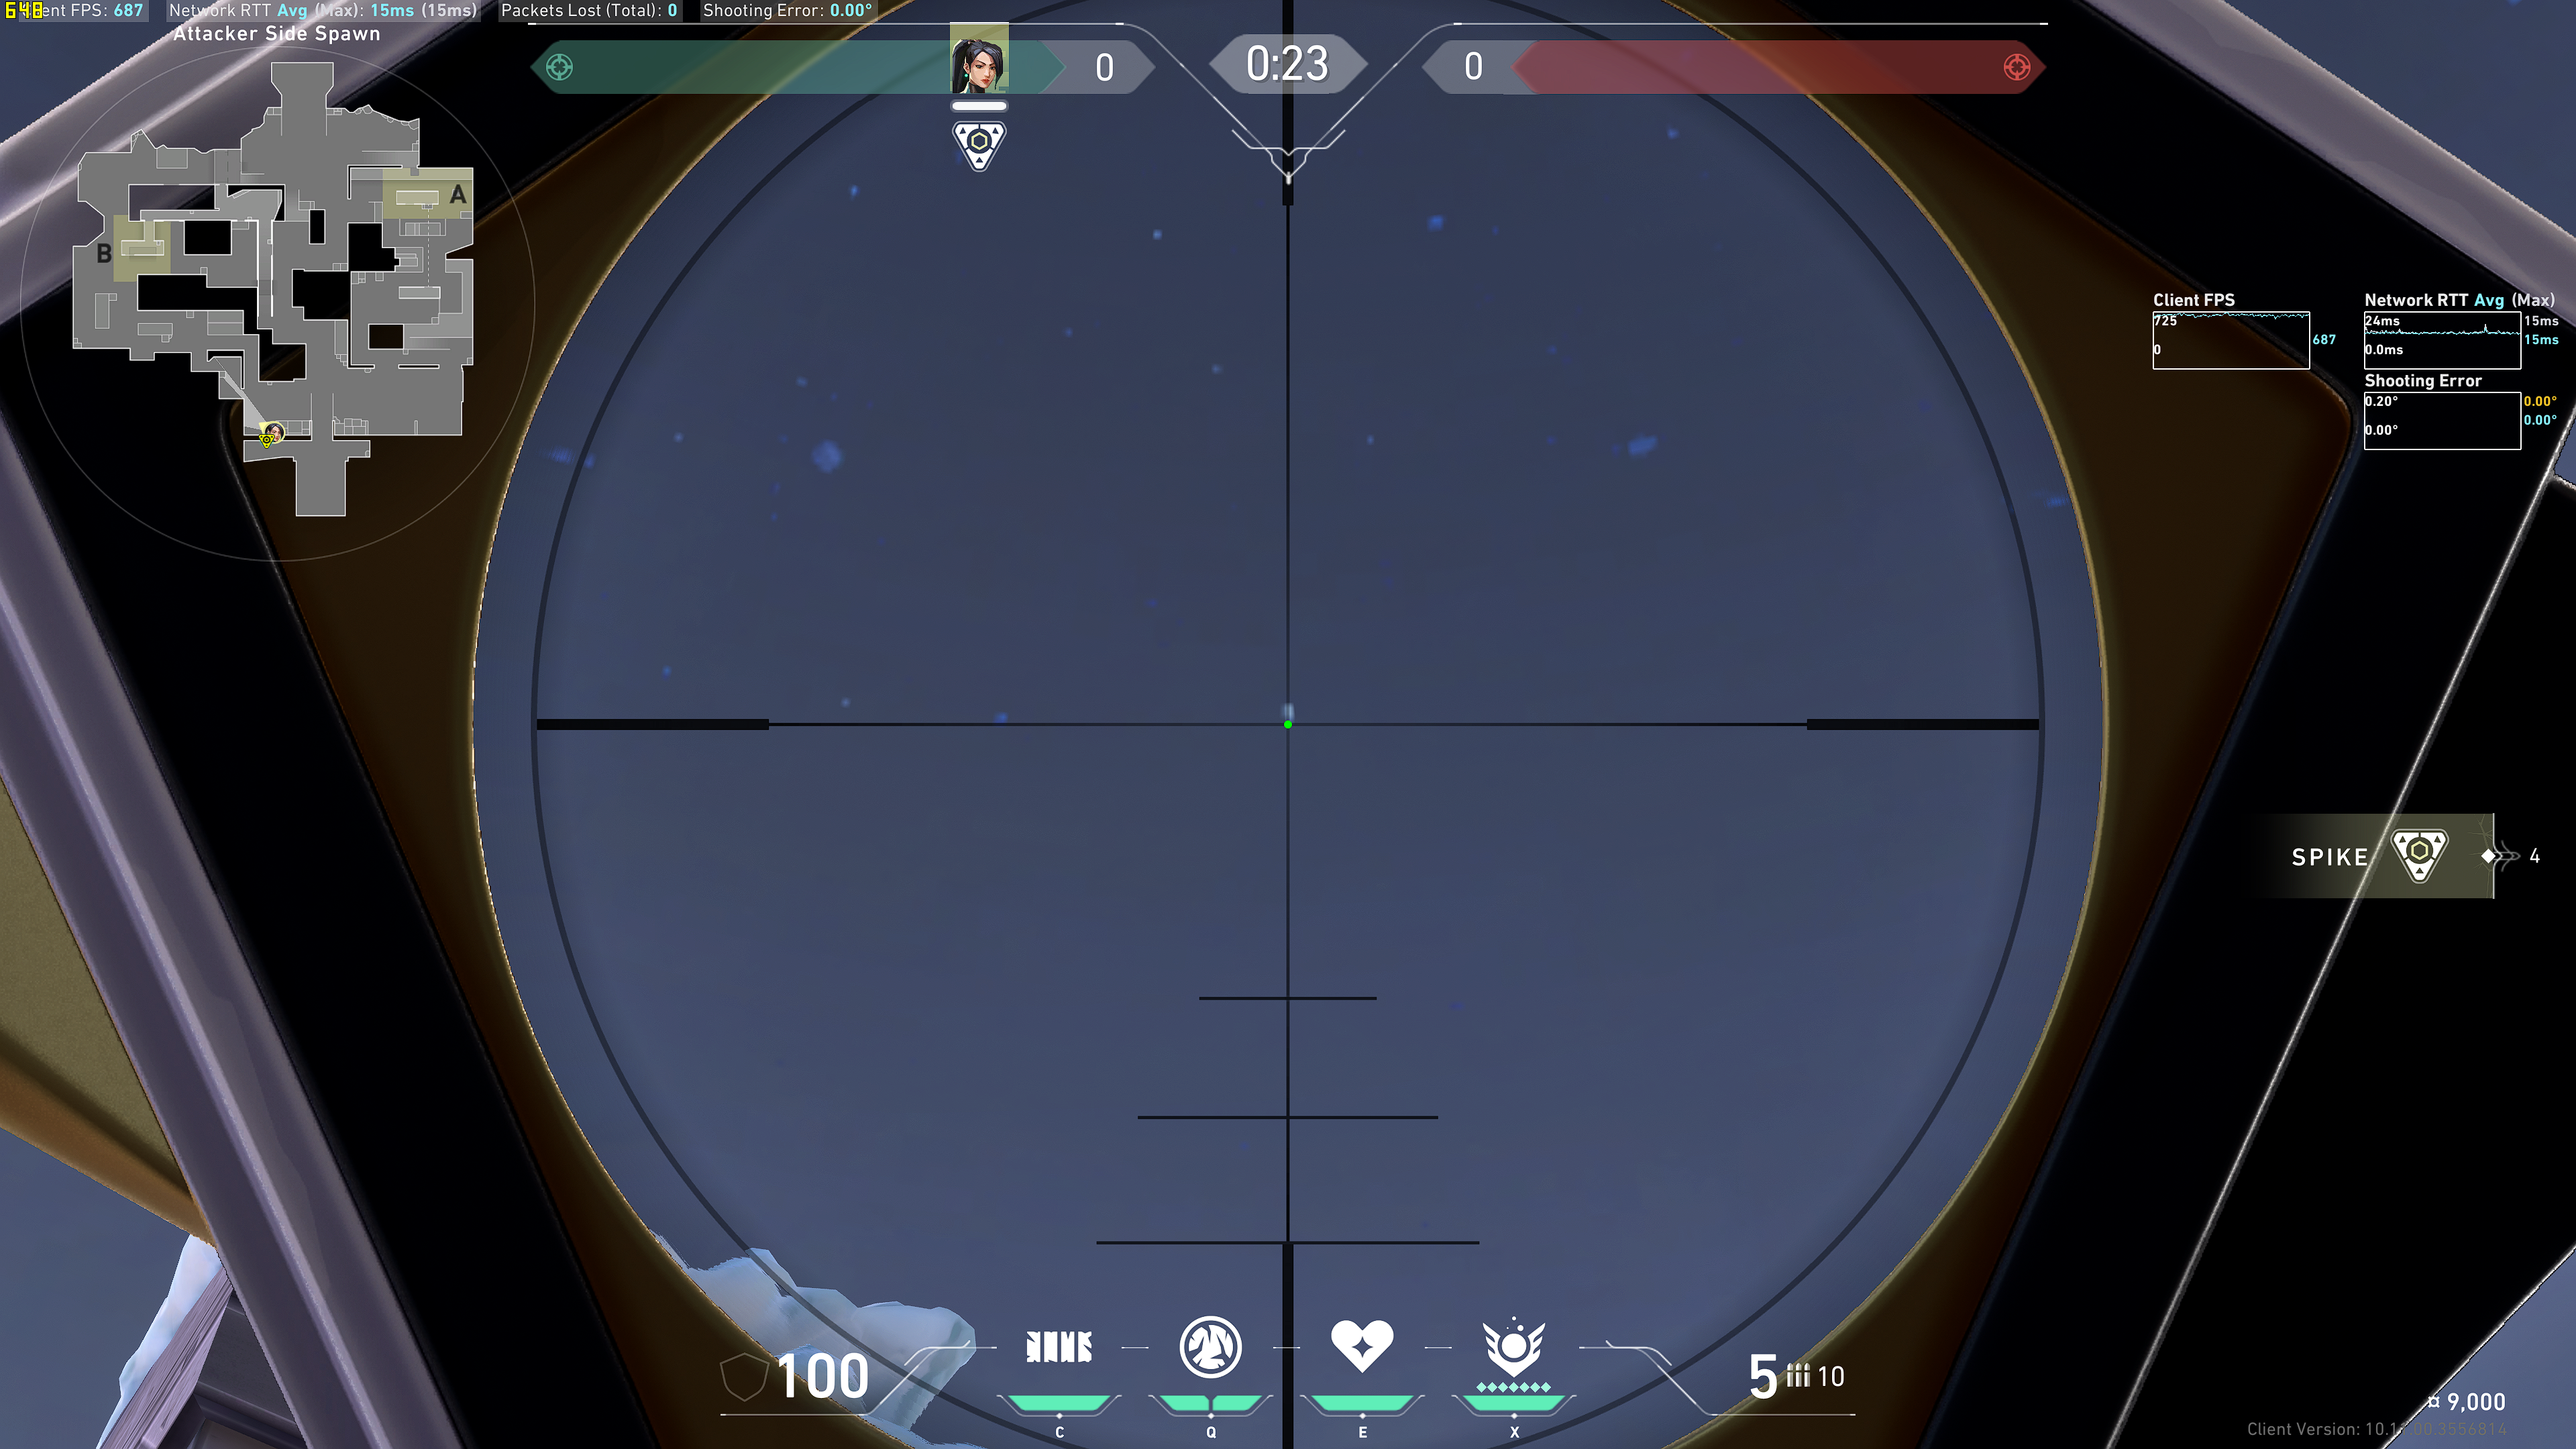 Note: sometimes depending on crosshair, I accidentally aim too high, resulting in it landing on top of Yellow. So I err on the side of a slight pixel below the star.
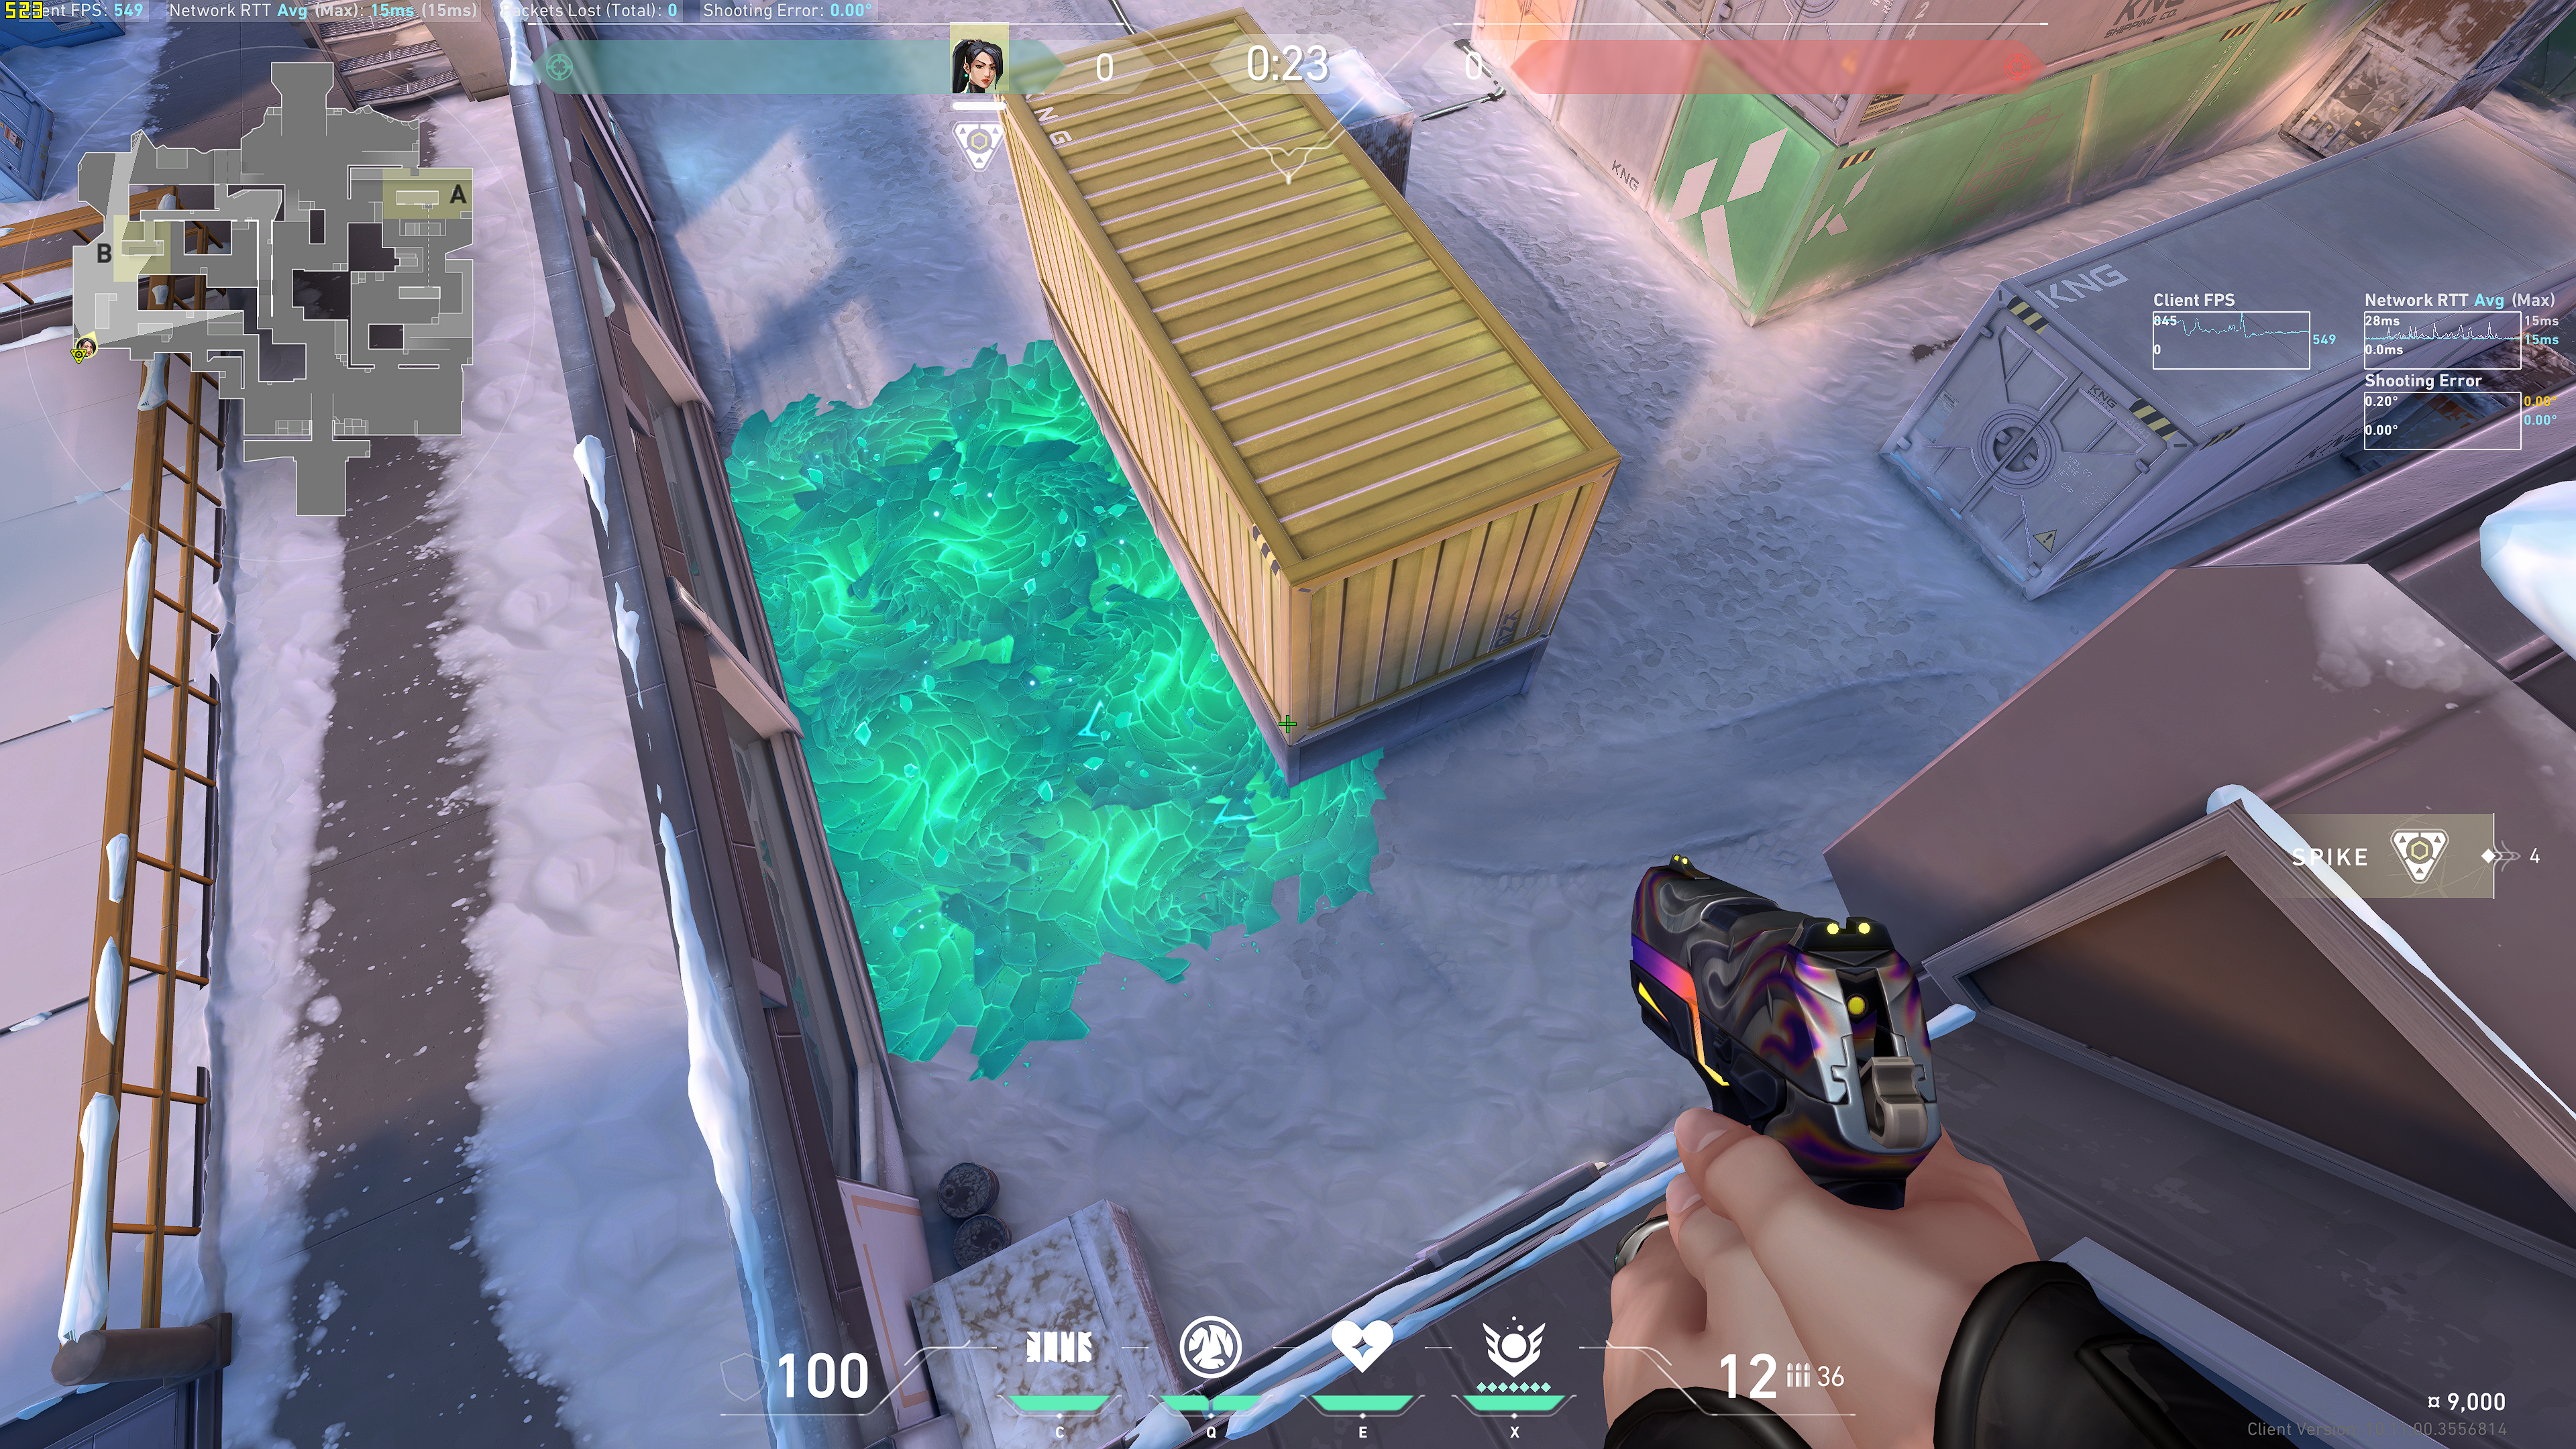
Result:
Yellow (version 2, slower execute)
If you are worried about Yellow while scaling B Long (e.g. enemy team has been playing up close B Long), then you can shift the Ice Slow slightly left, as illustrated below. This slows down your team's scale onto site (i.e. slower to take Yellow control), in exchange for an easier scale up B Long.
Aim in between these two stars:
 Result:
On top of Yellow
Aim to the right of this star:
 Result:
Defense
A Site retake / stall
Screens to Generator
Hug this doorway frame:
 Aim at this intersection:
 Result:
 In practice, this lineup is very lenient. Simply using the wall as a backboard is sufficient and will produce similar results.
Screens to Maze
Hug this doorway frame:
 Aim at this flat part of the ceiling:
 Result:
B Site stall from A
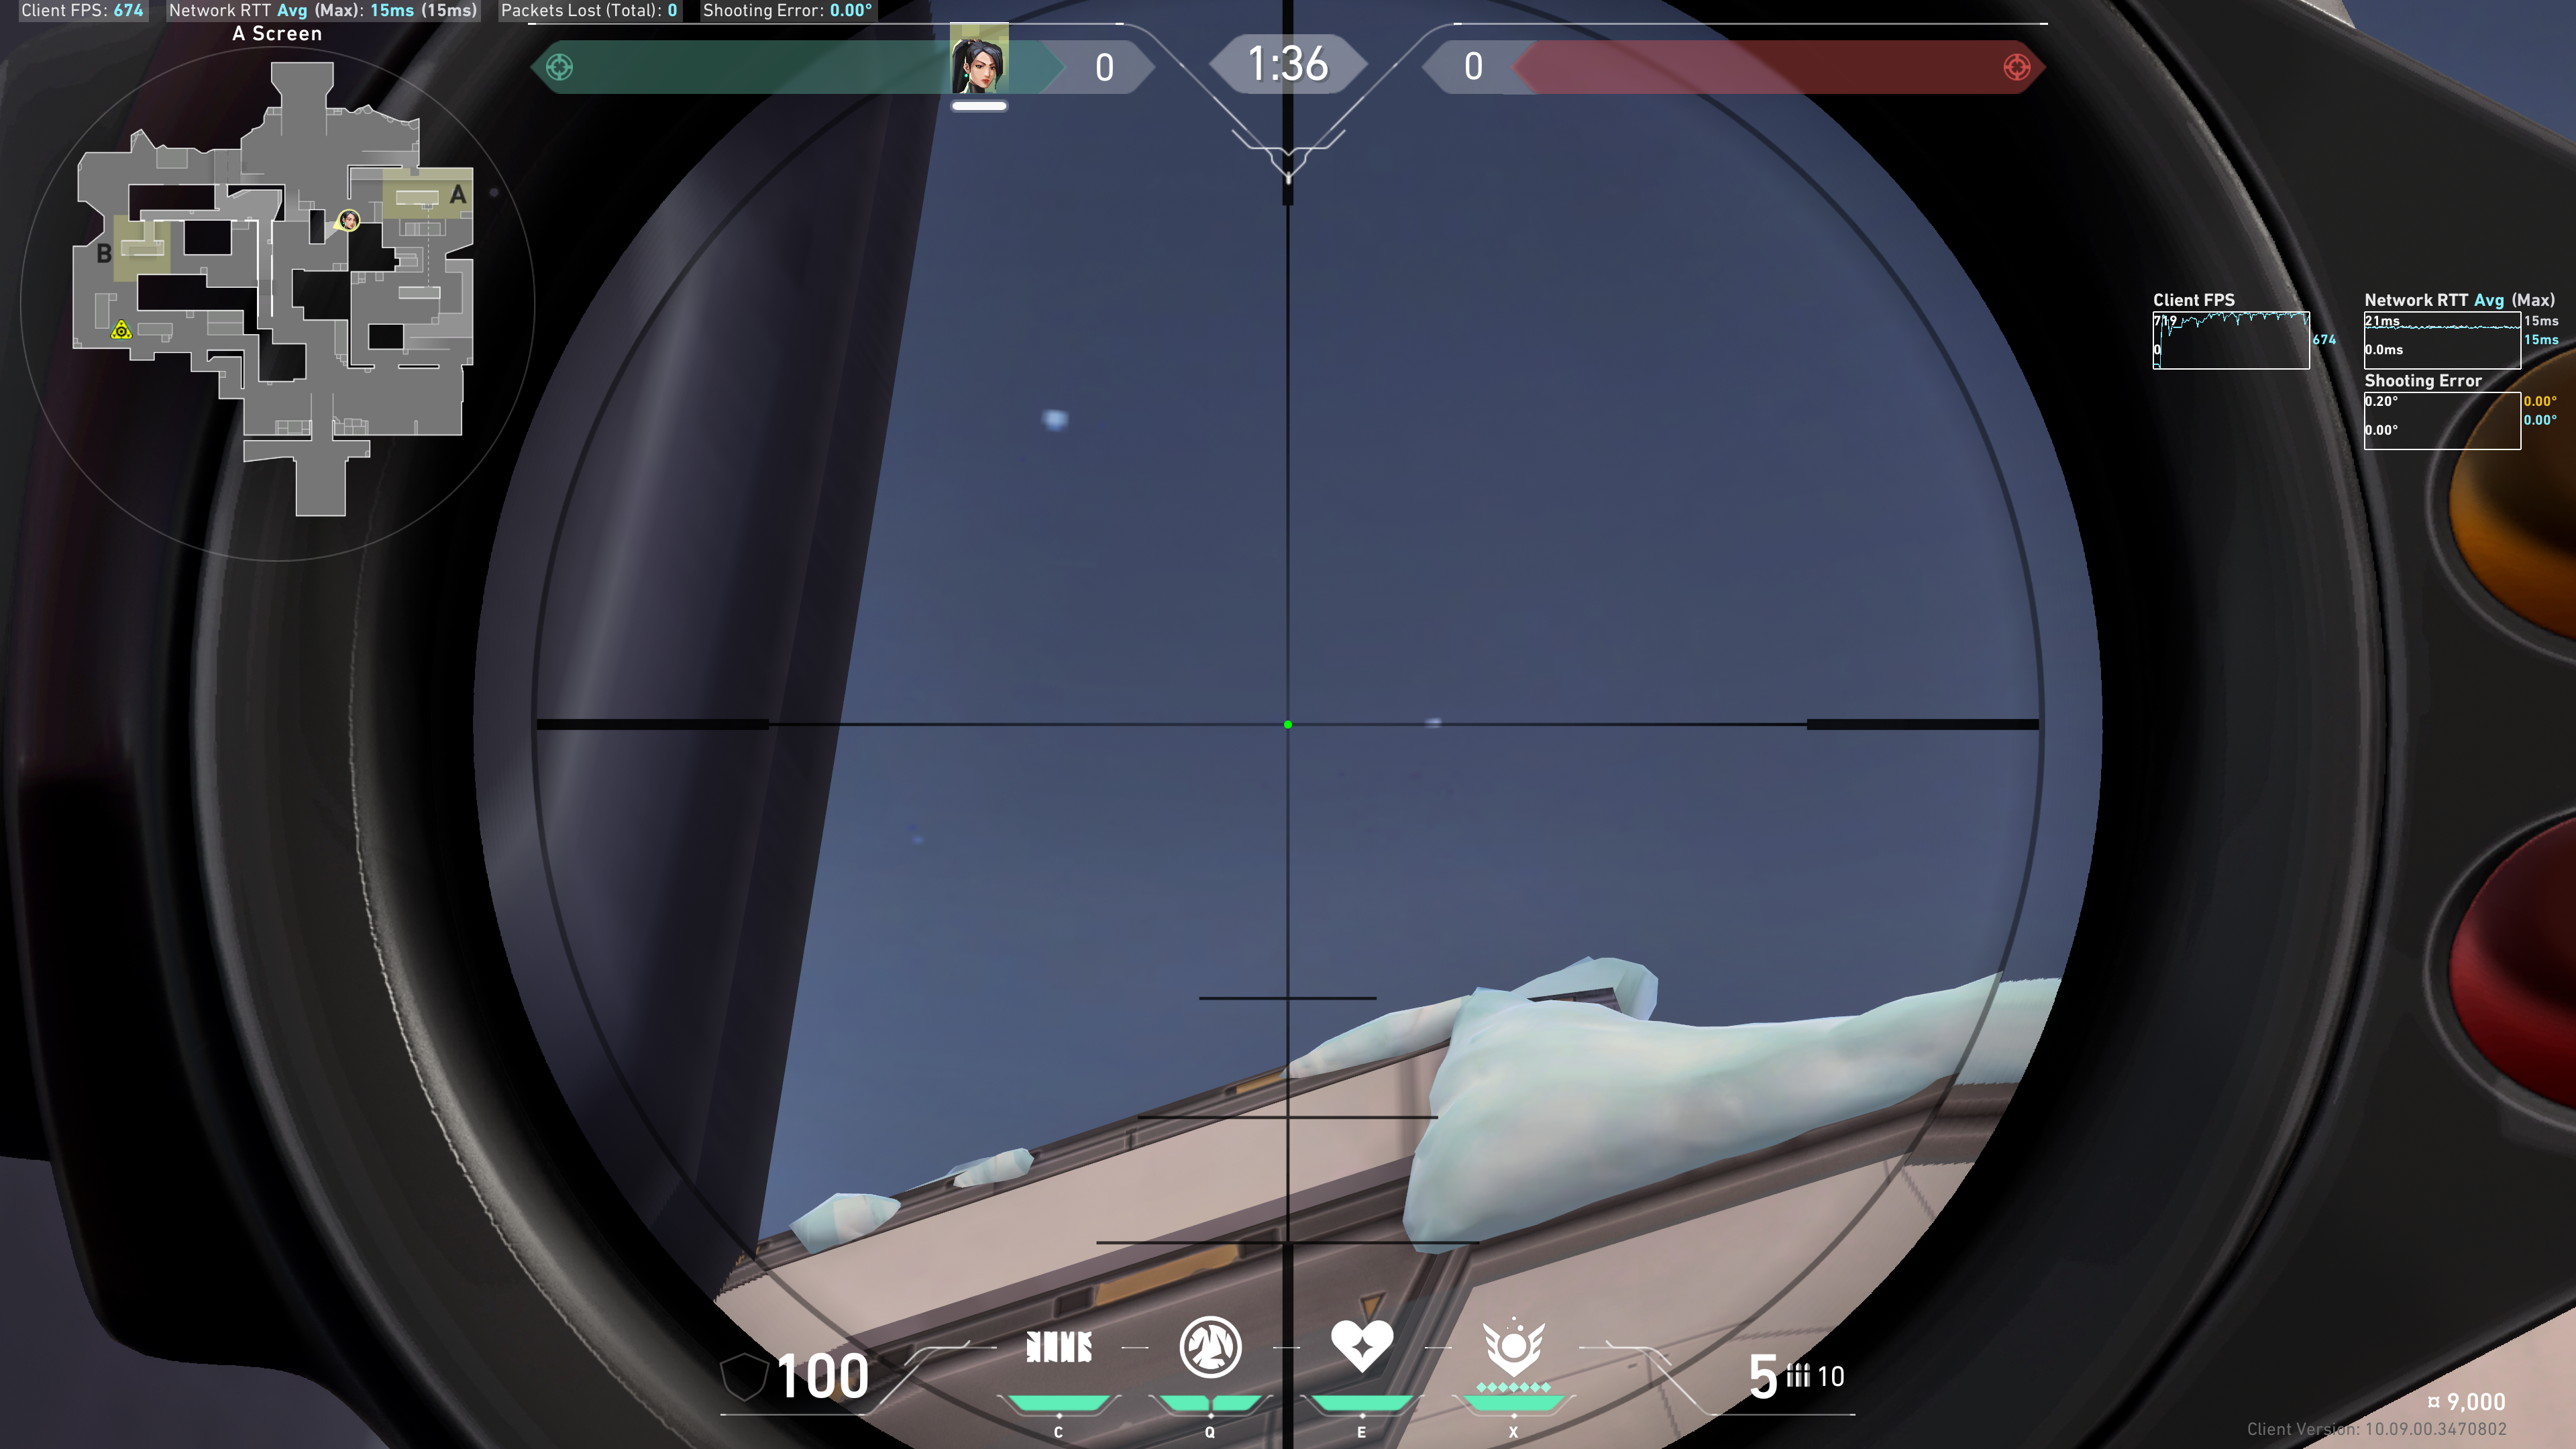
Screens to B Long
Hug this doorway frame:
Aim to the left of this star in the sky:
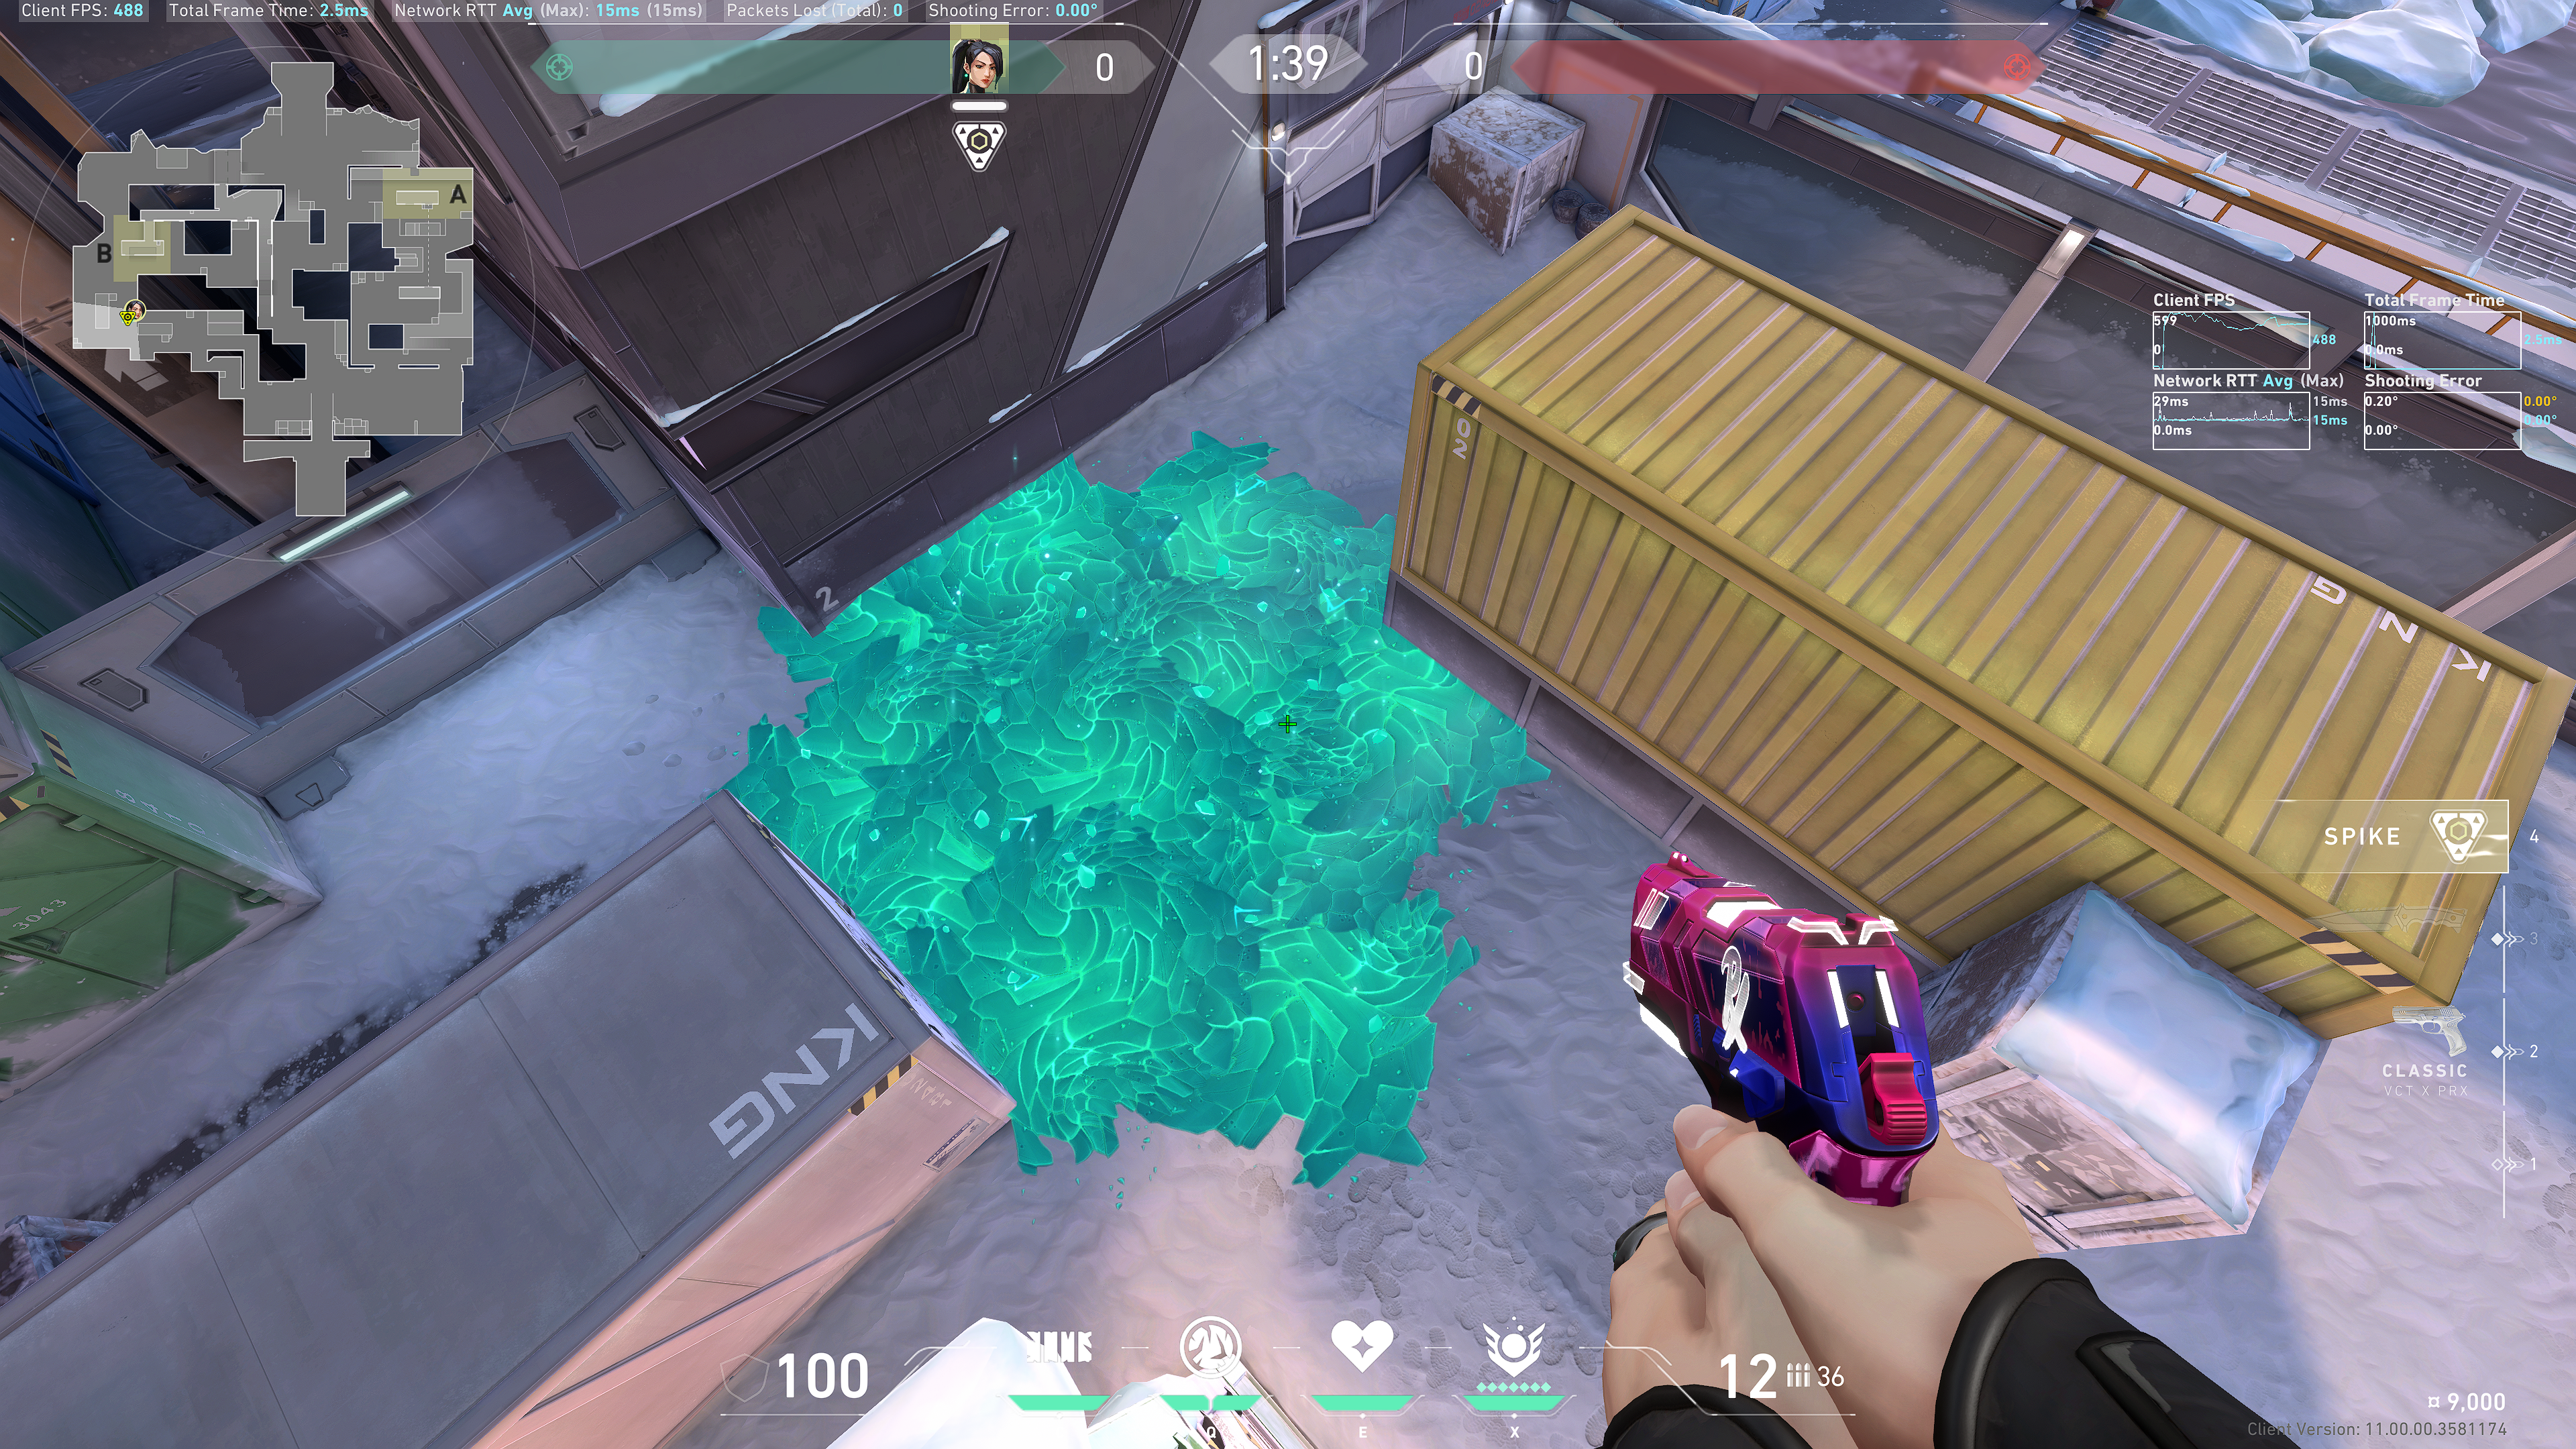
 Result:
B Site retake
Yellow
Tuck into this corner:
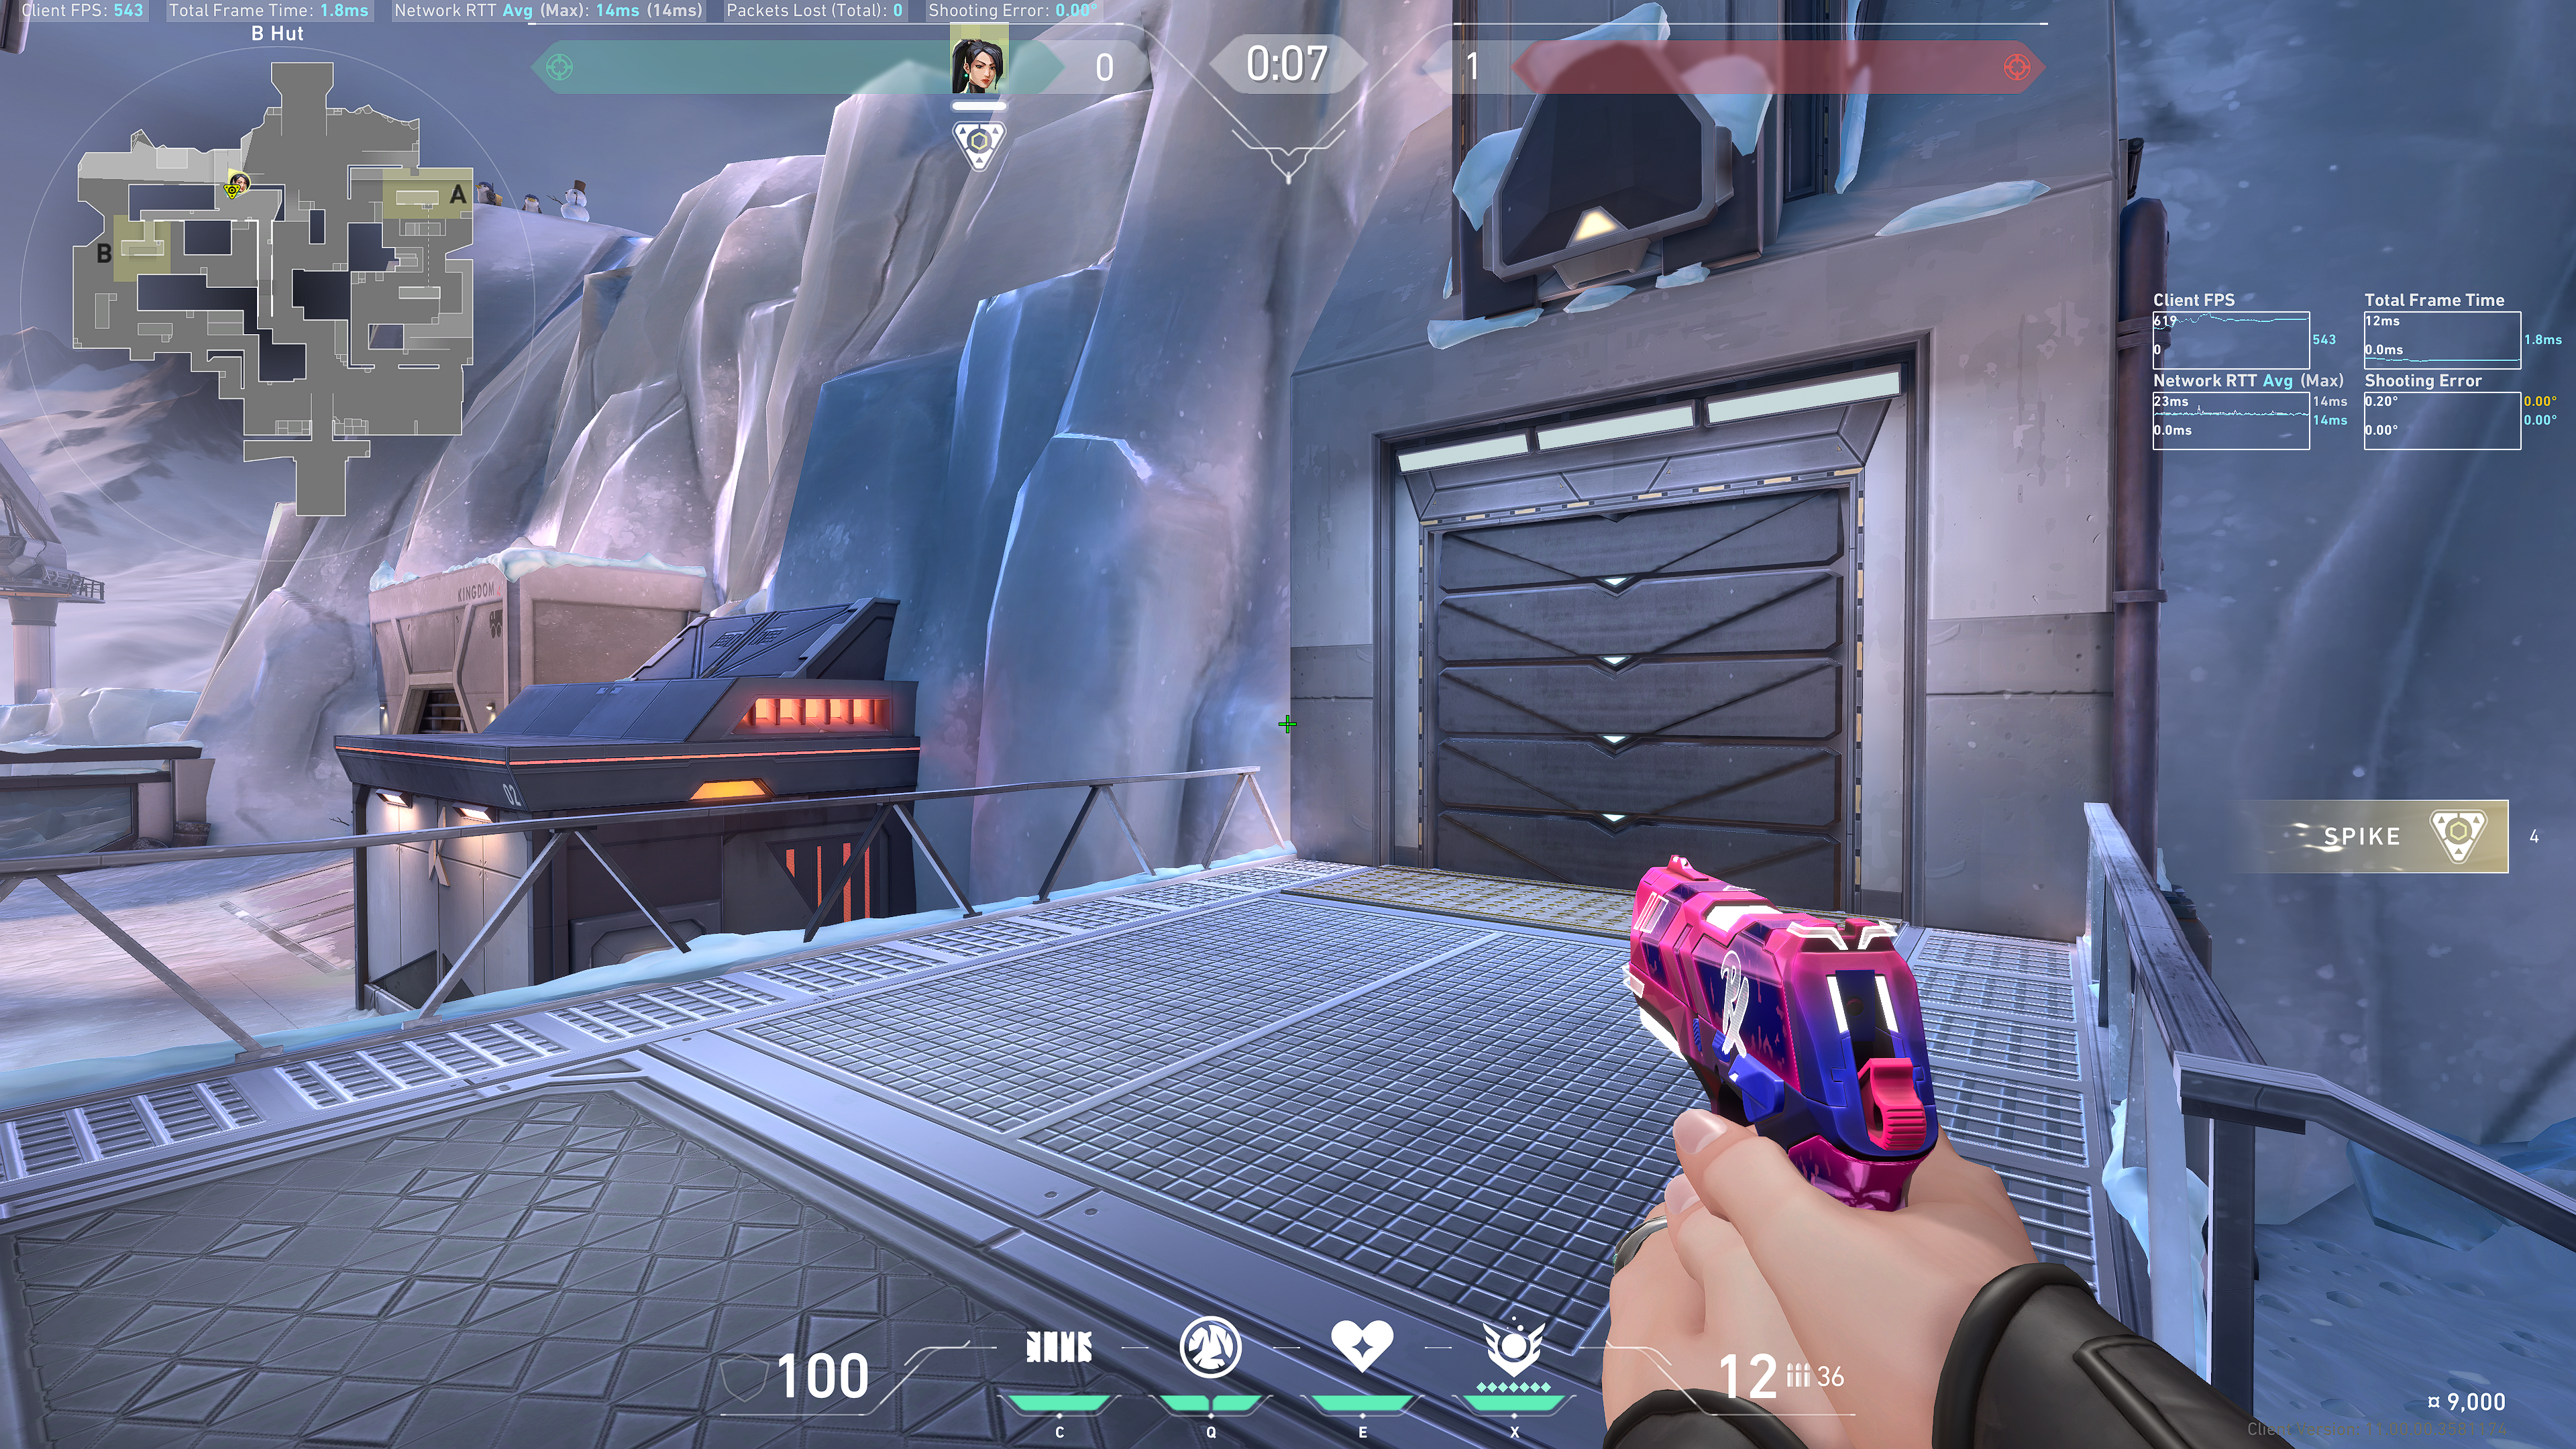
Hut Position
Aim at this star:
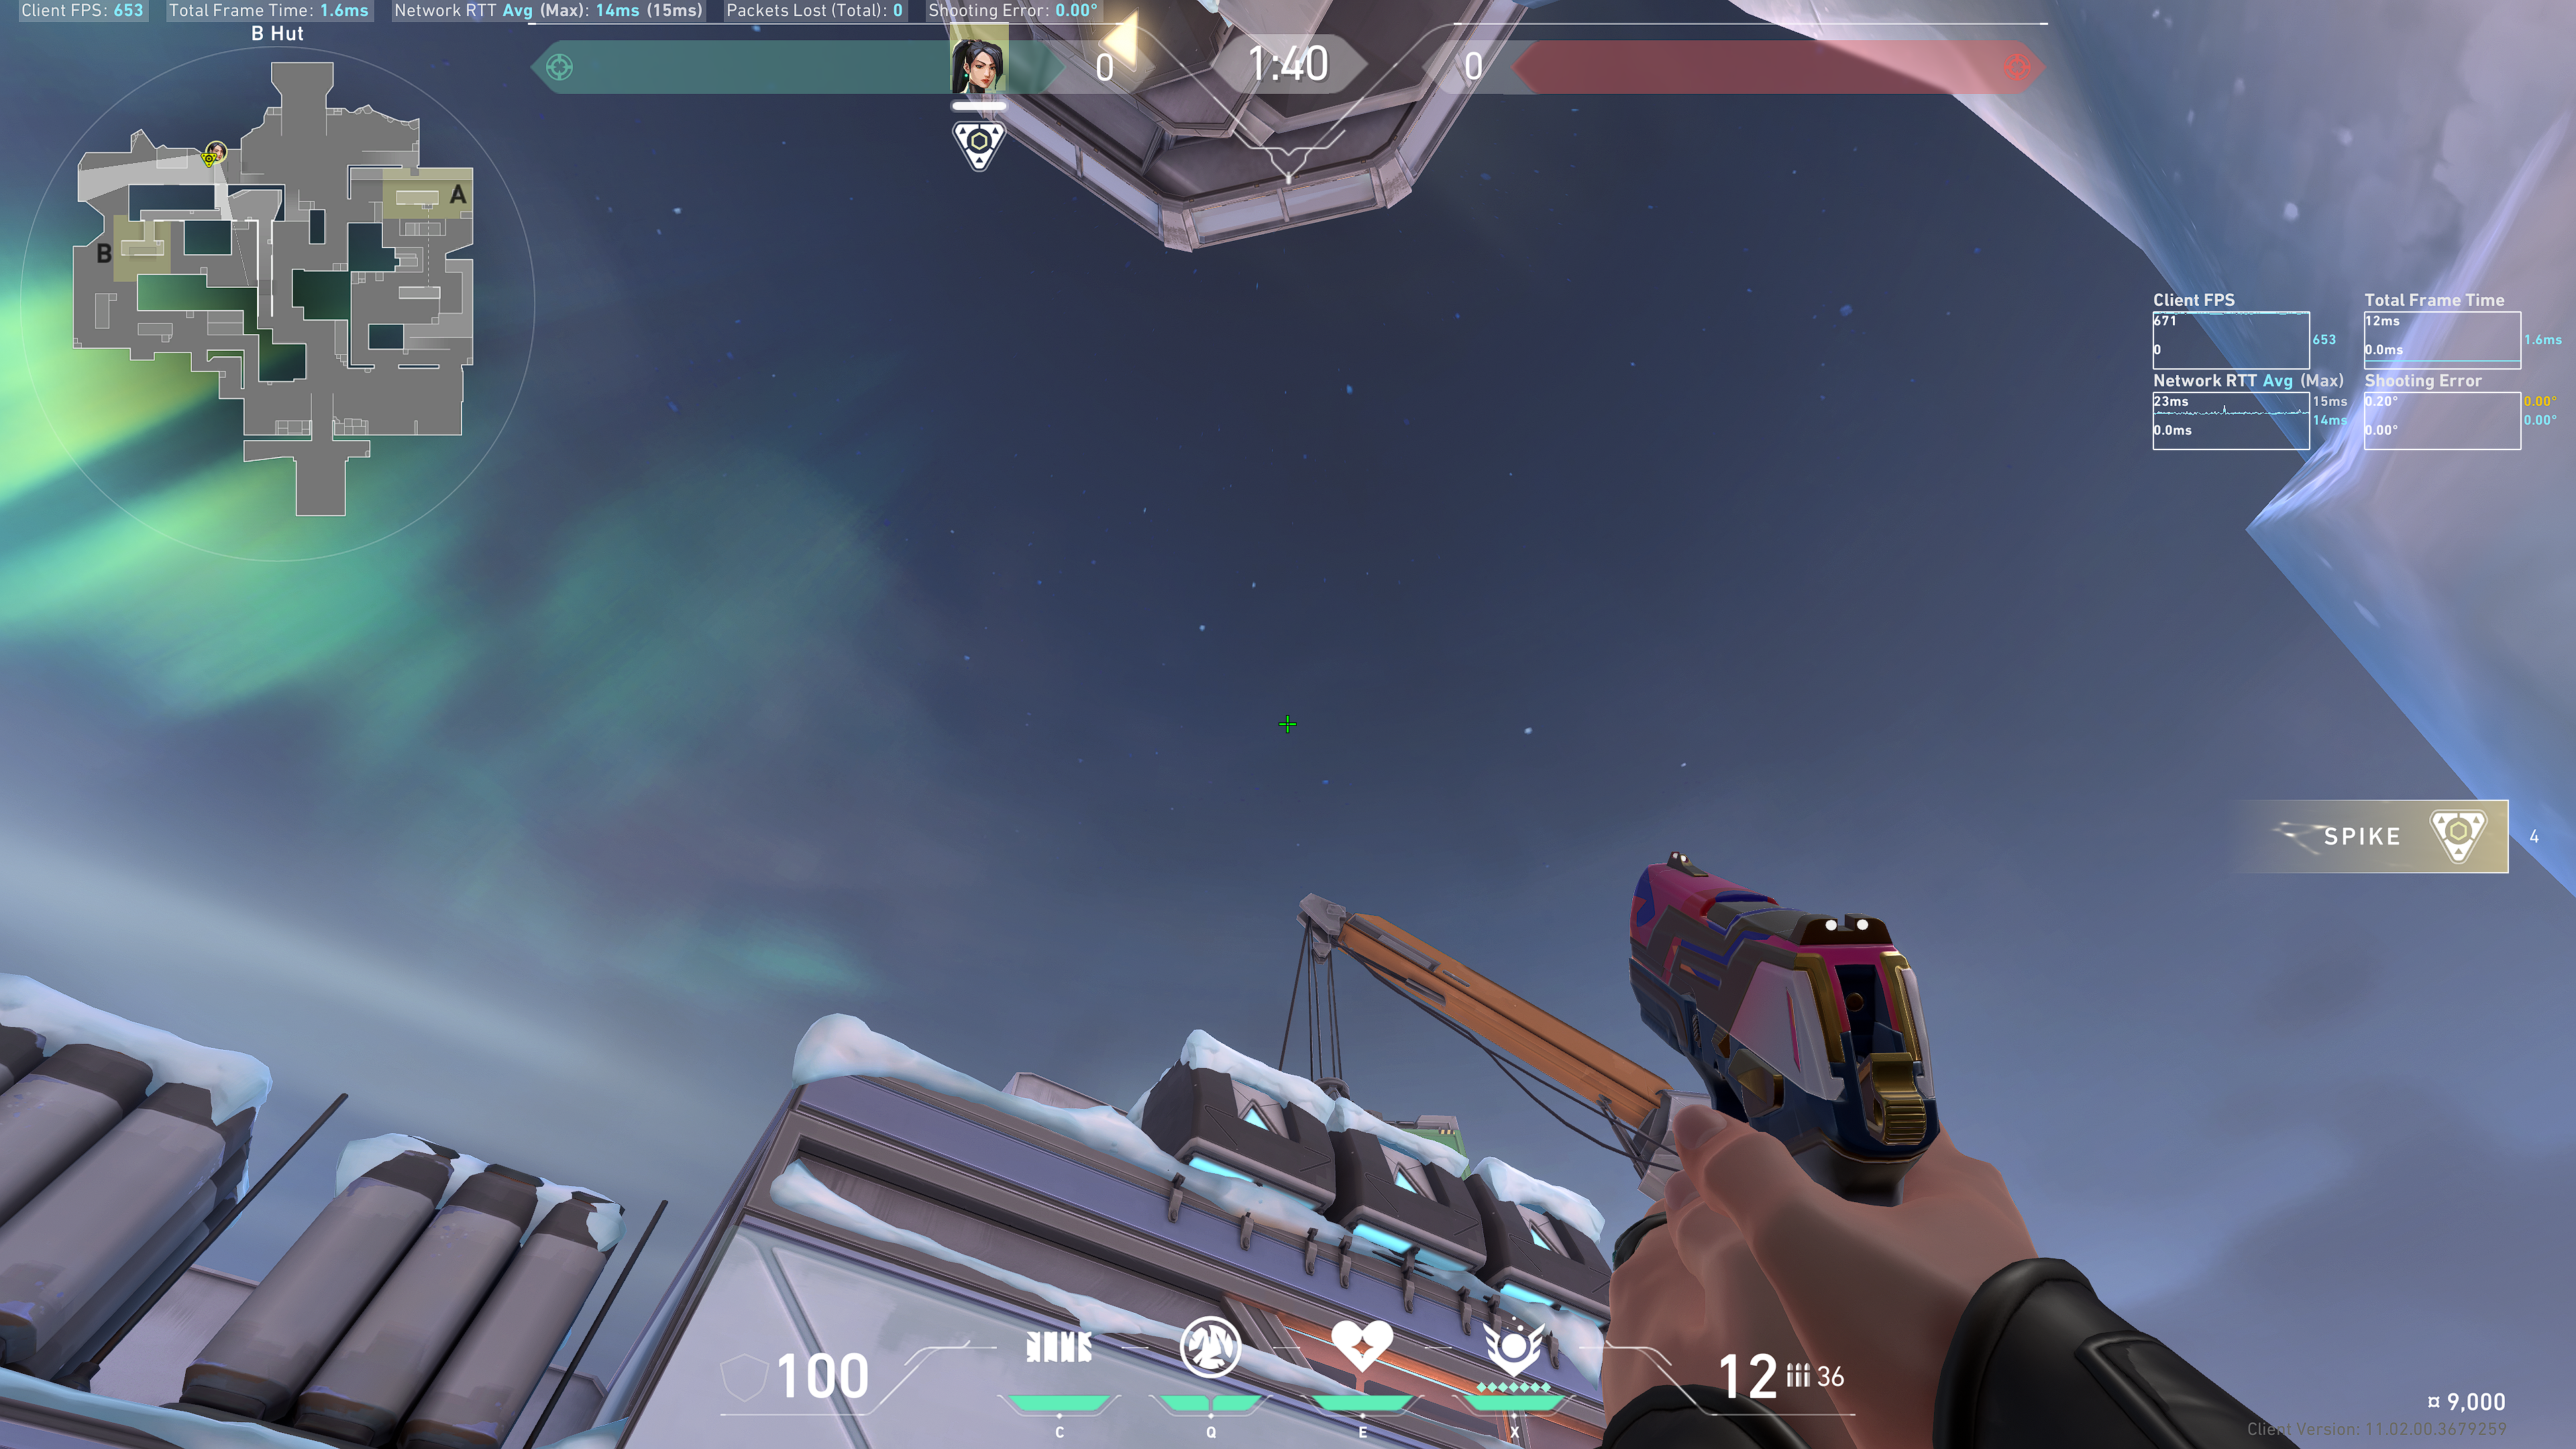
Result:
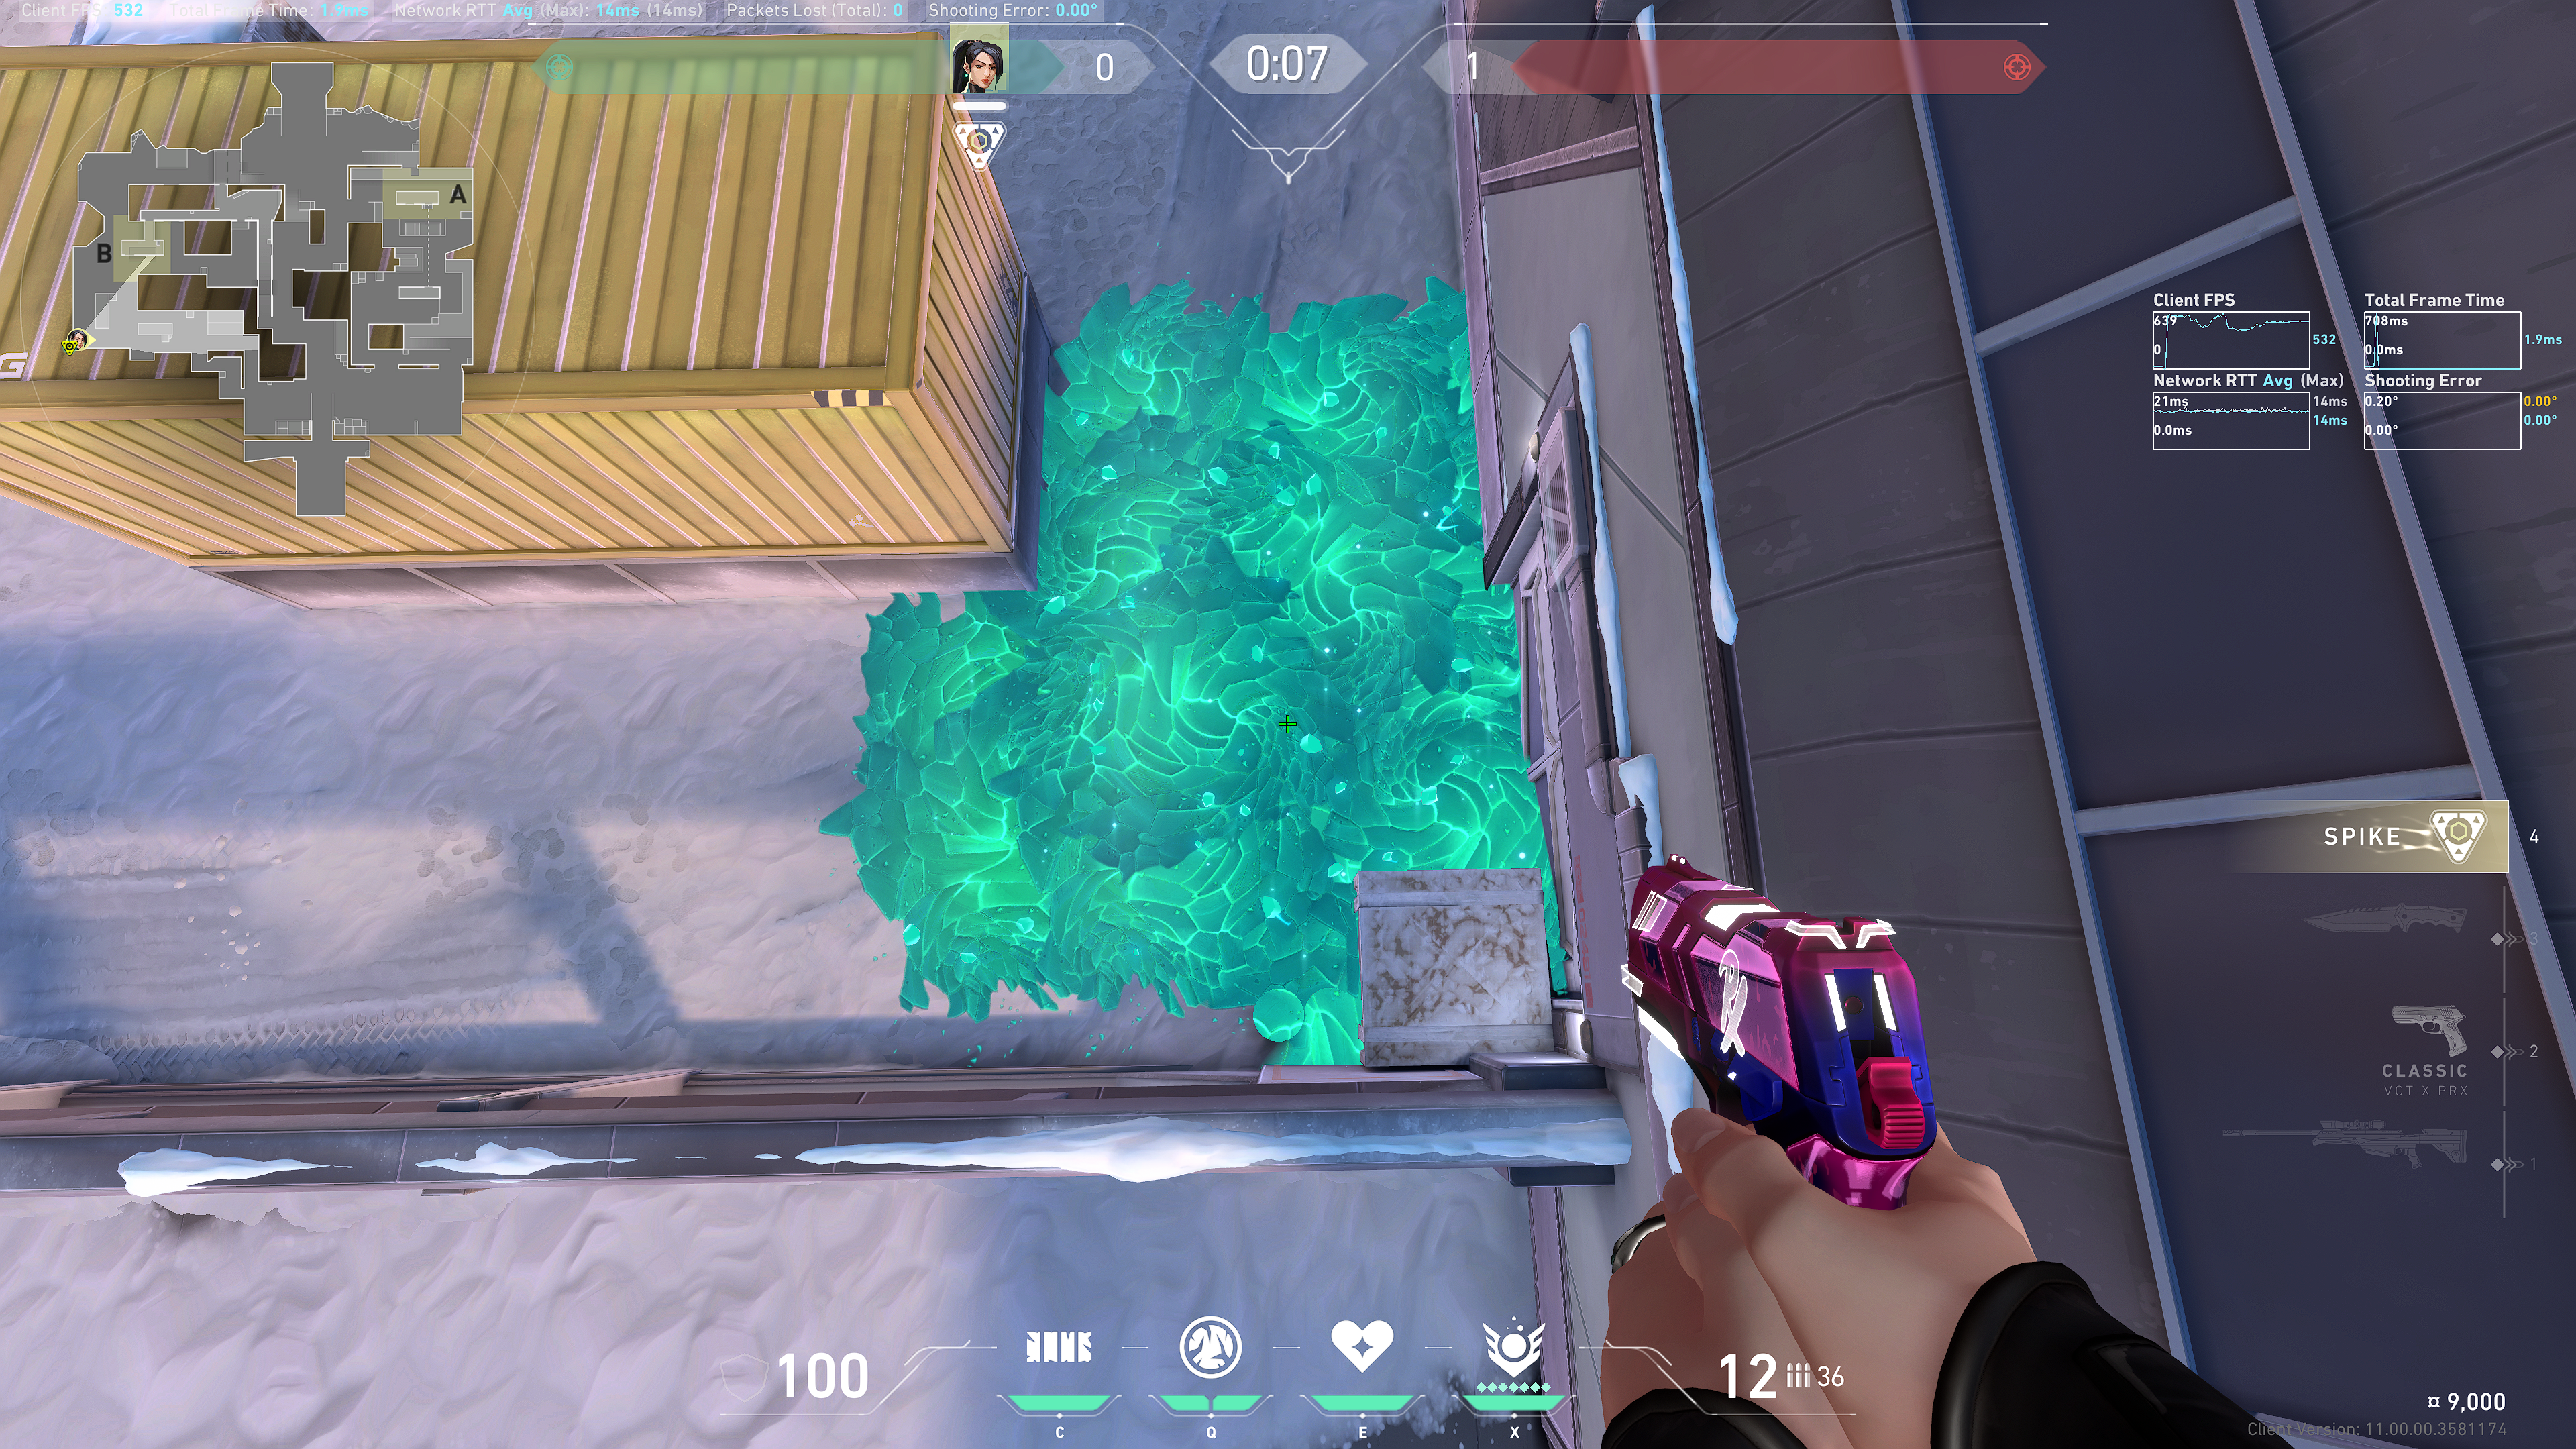
Snowman Position
Tuck into this corner:
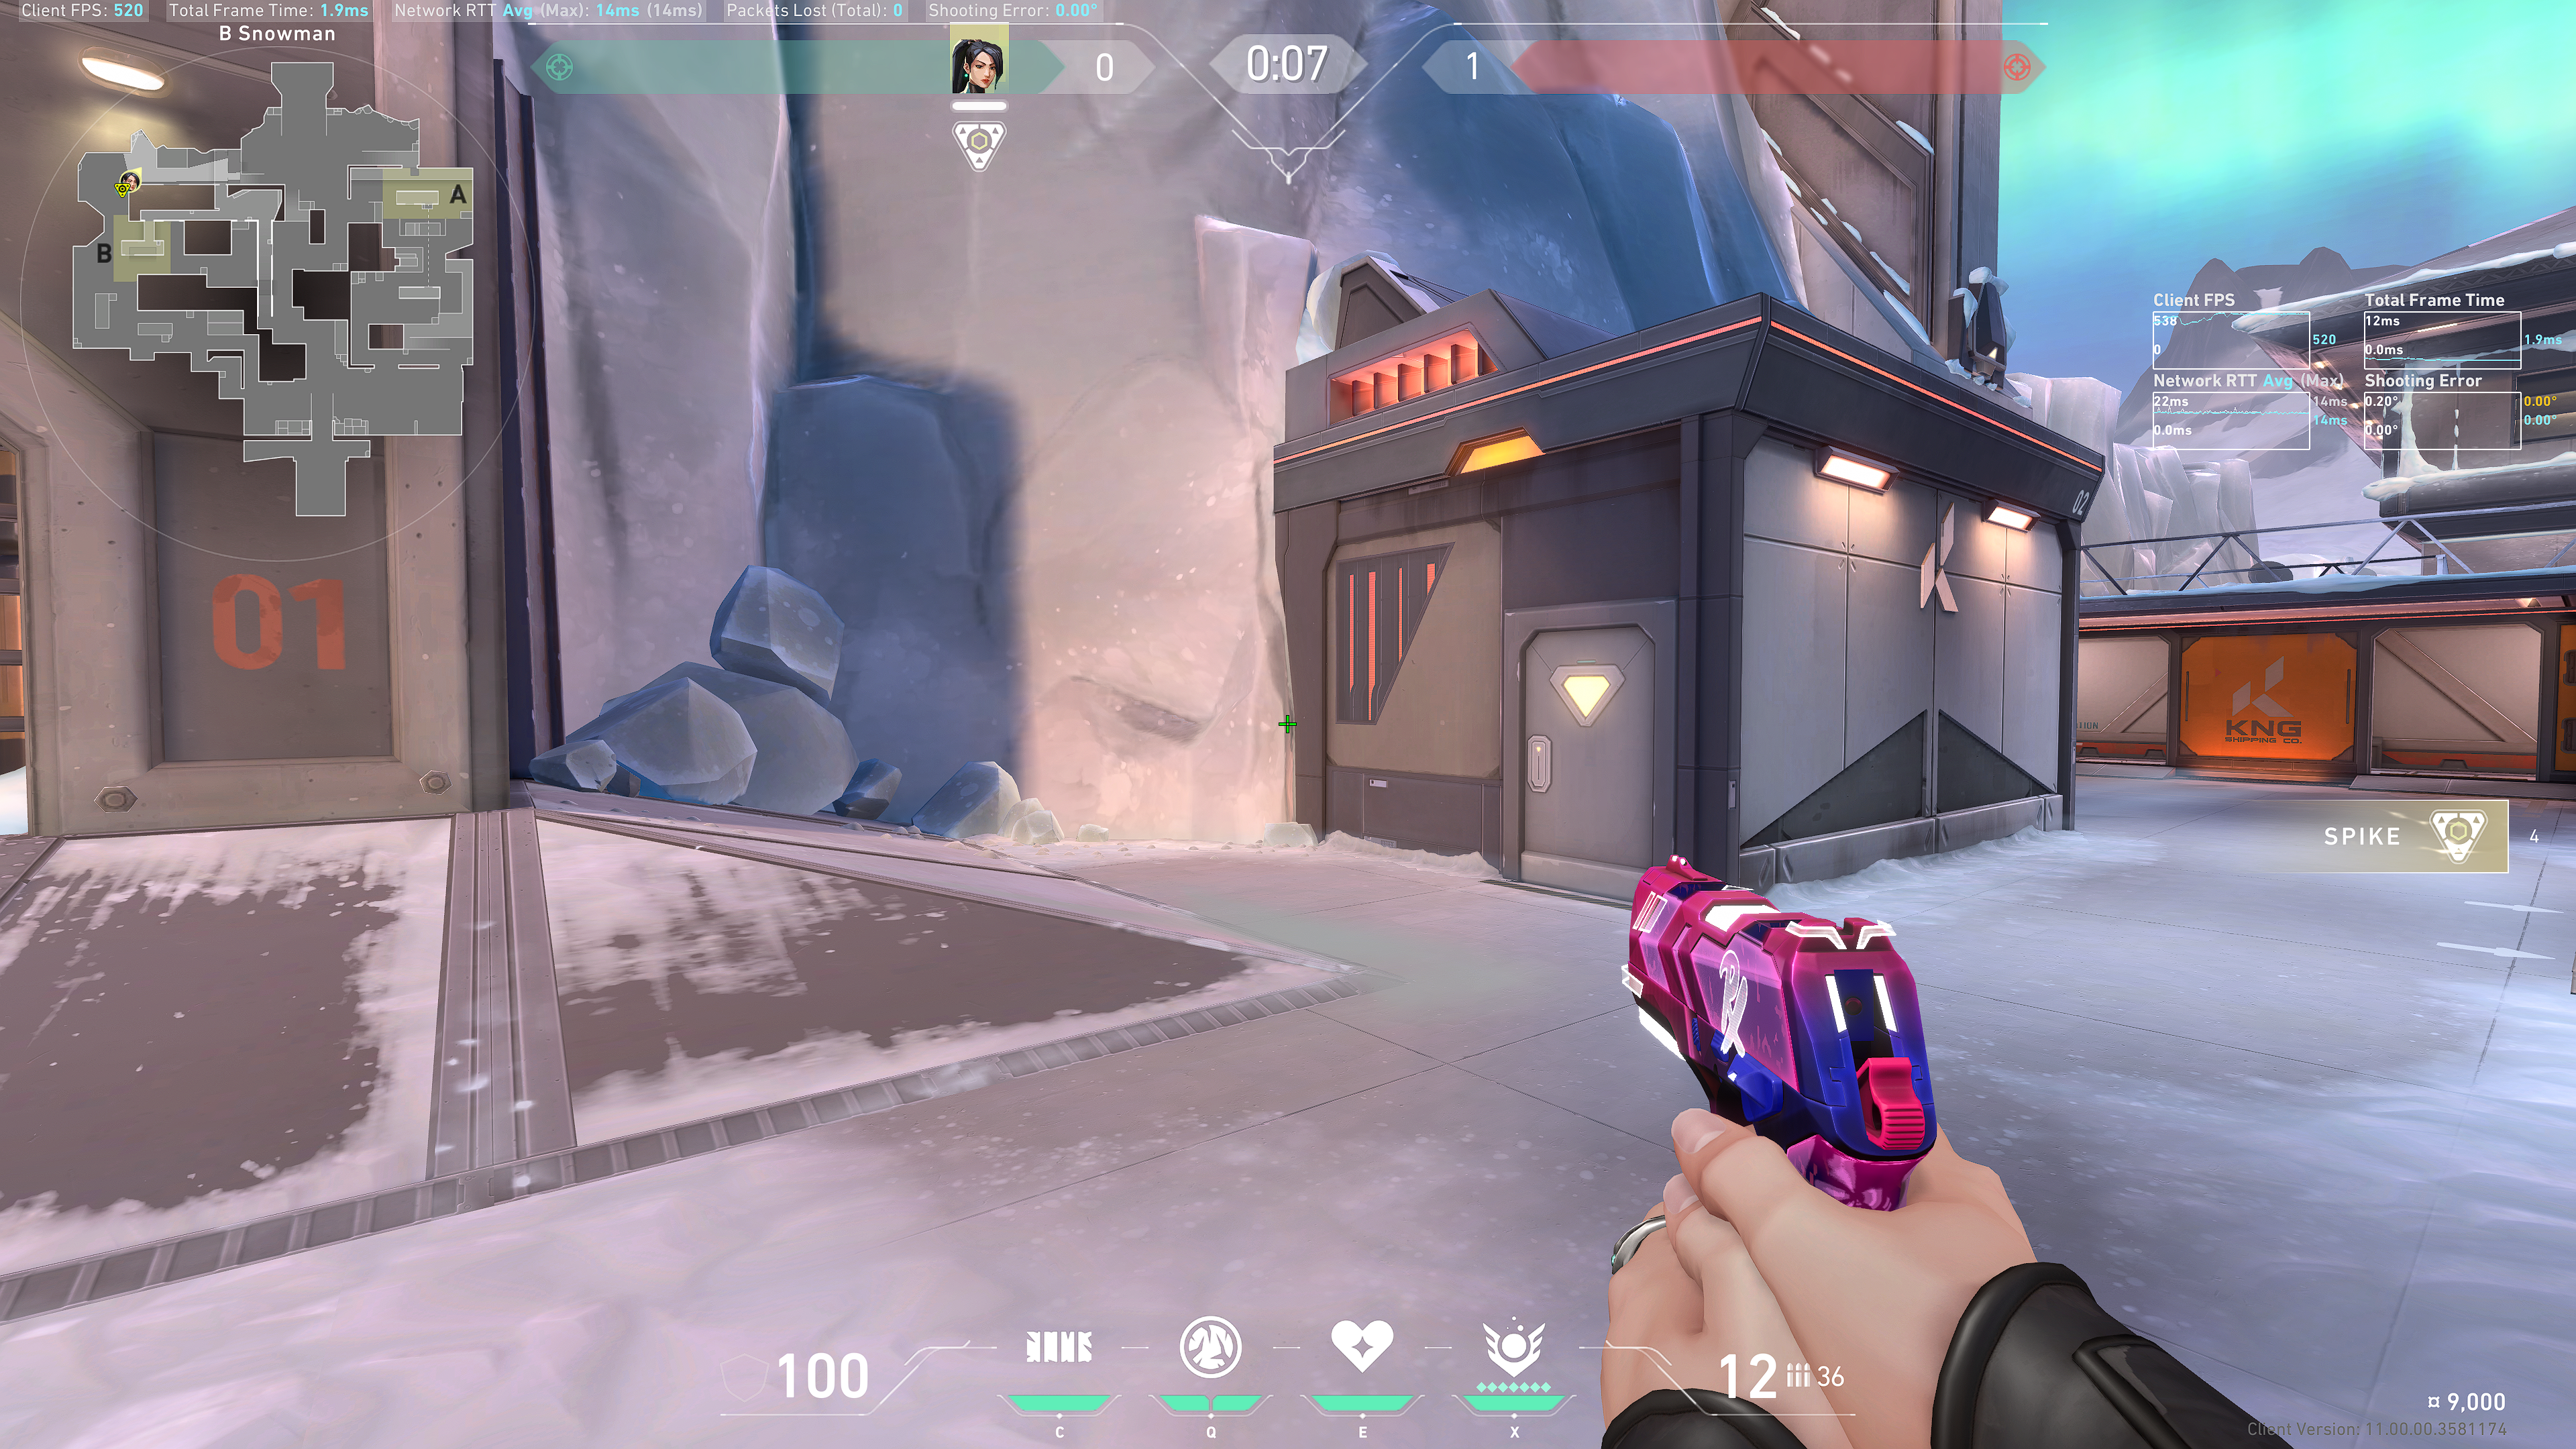
Aim at this star:
Result: