Ascent
Attack
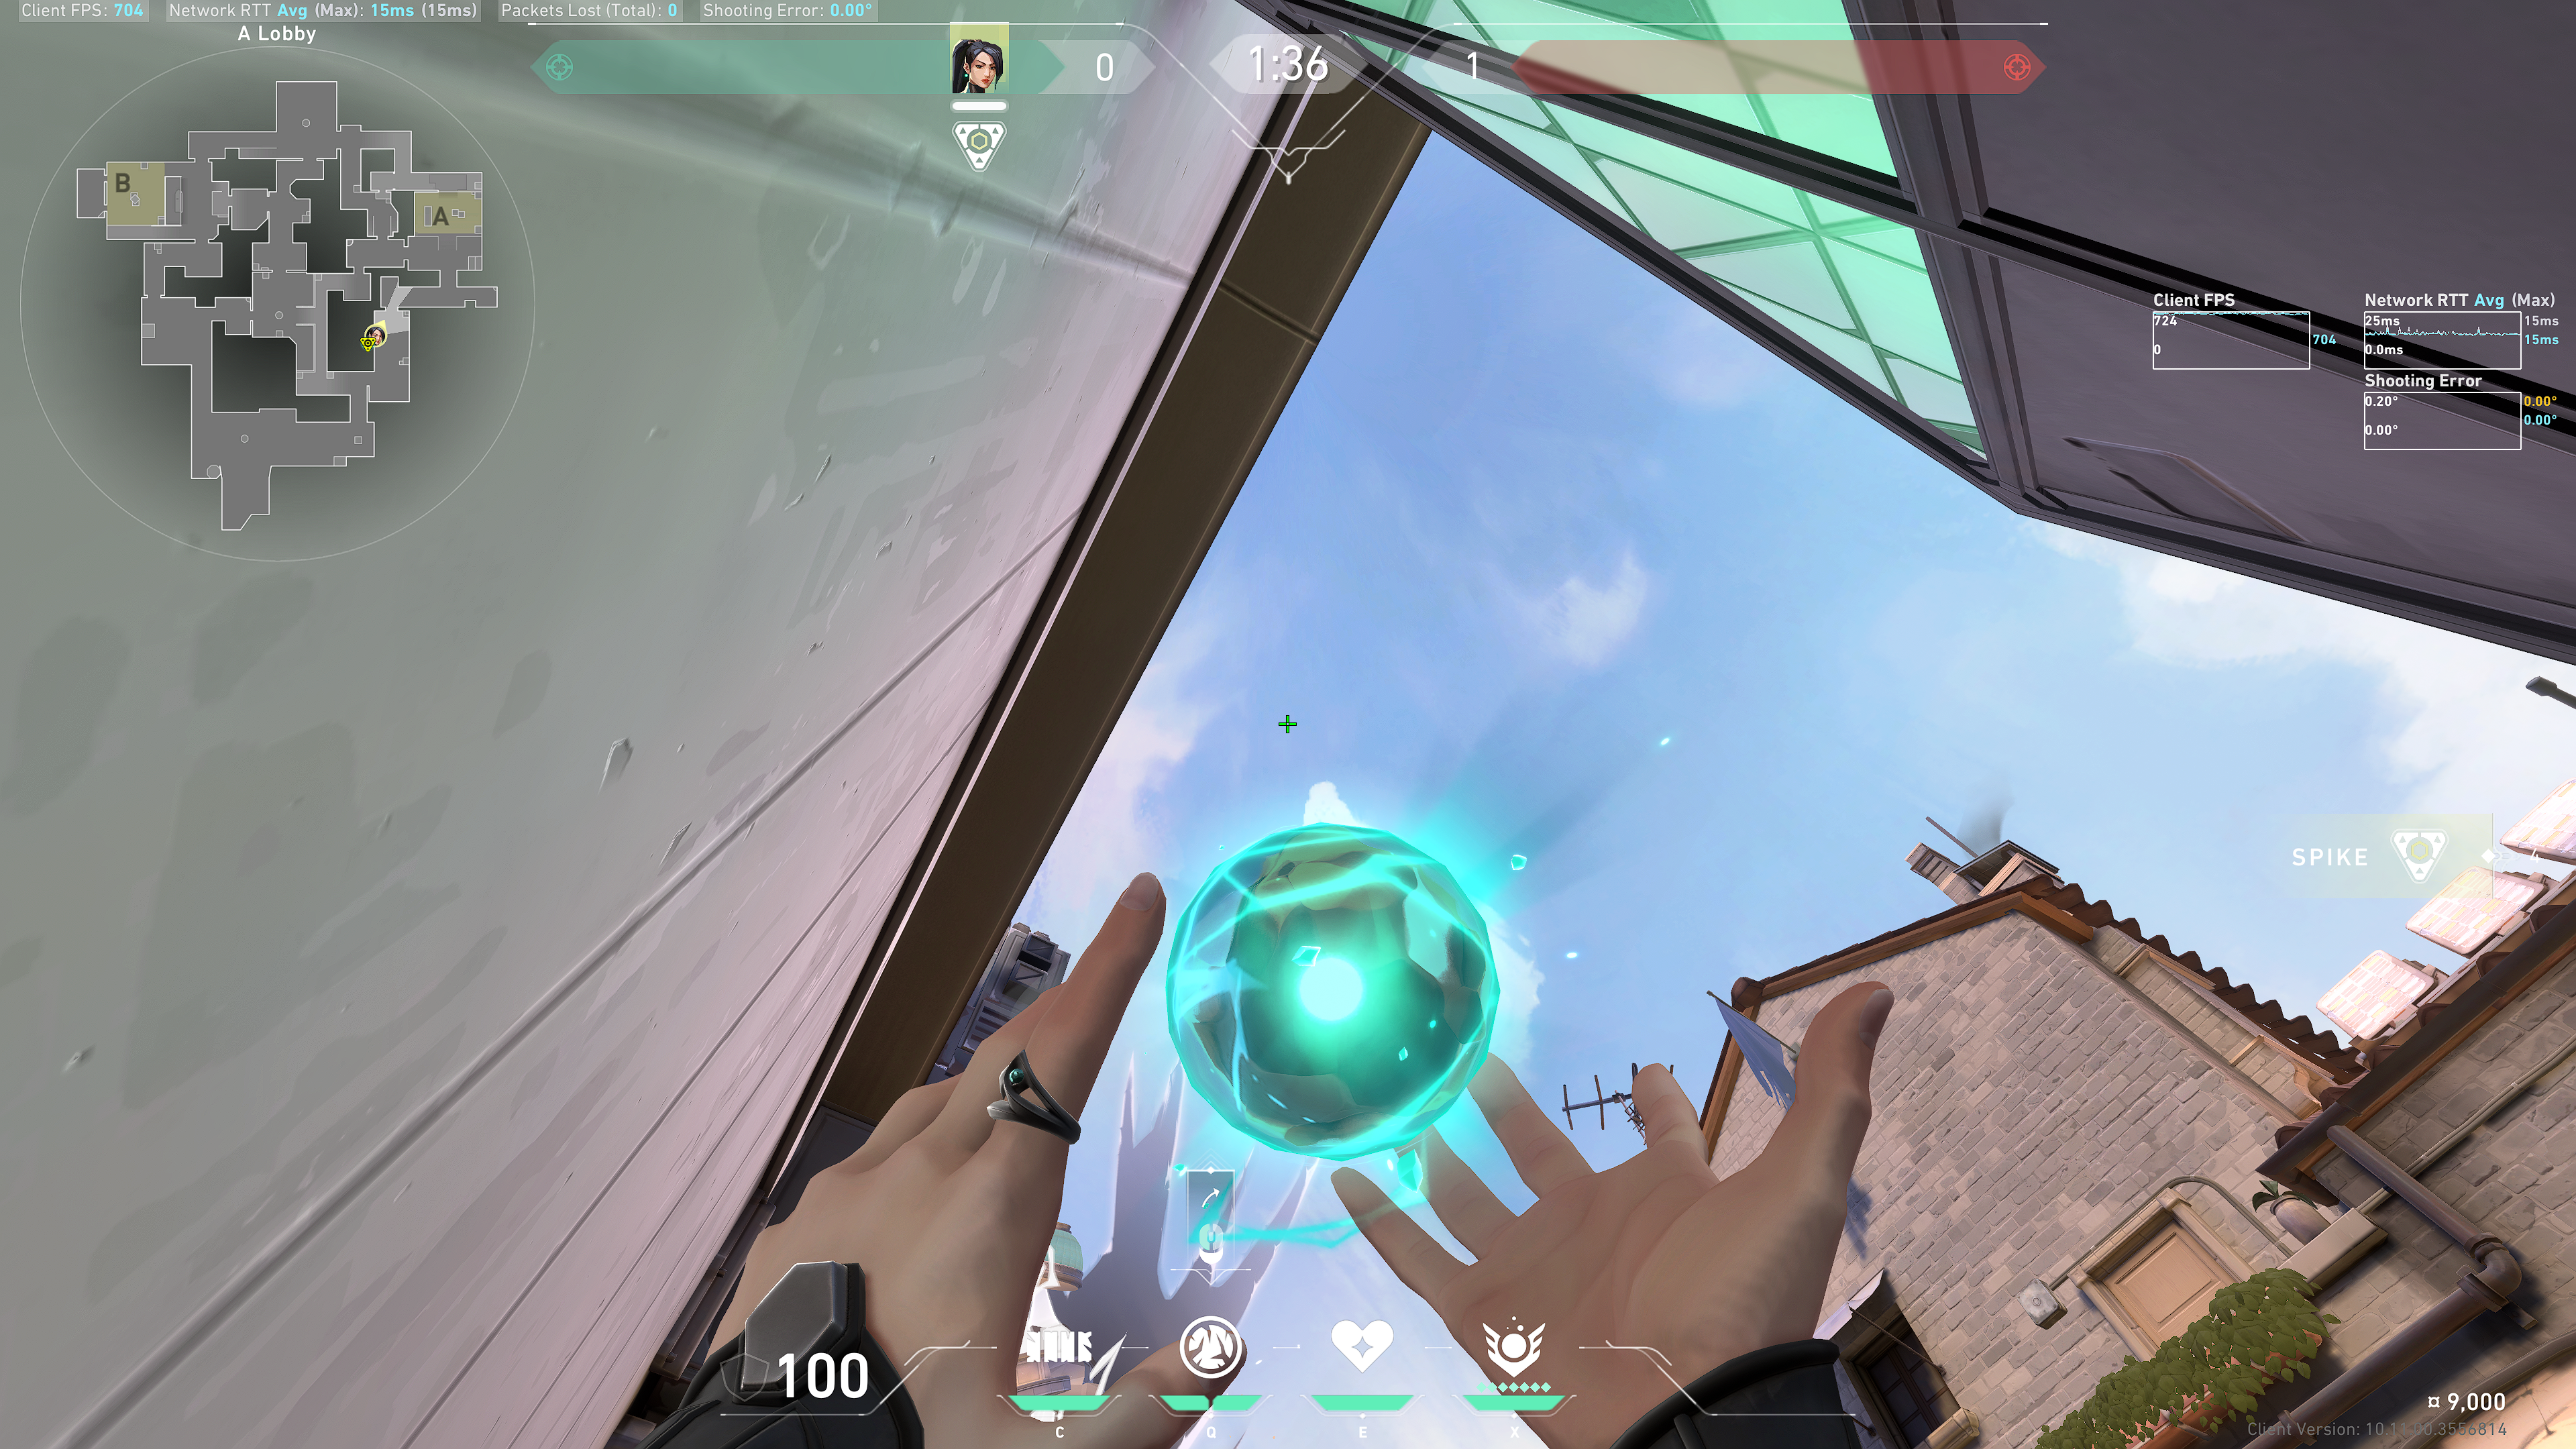
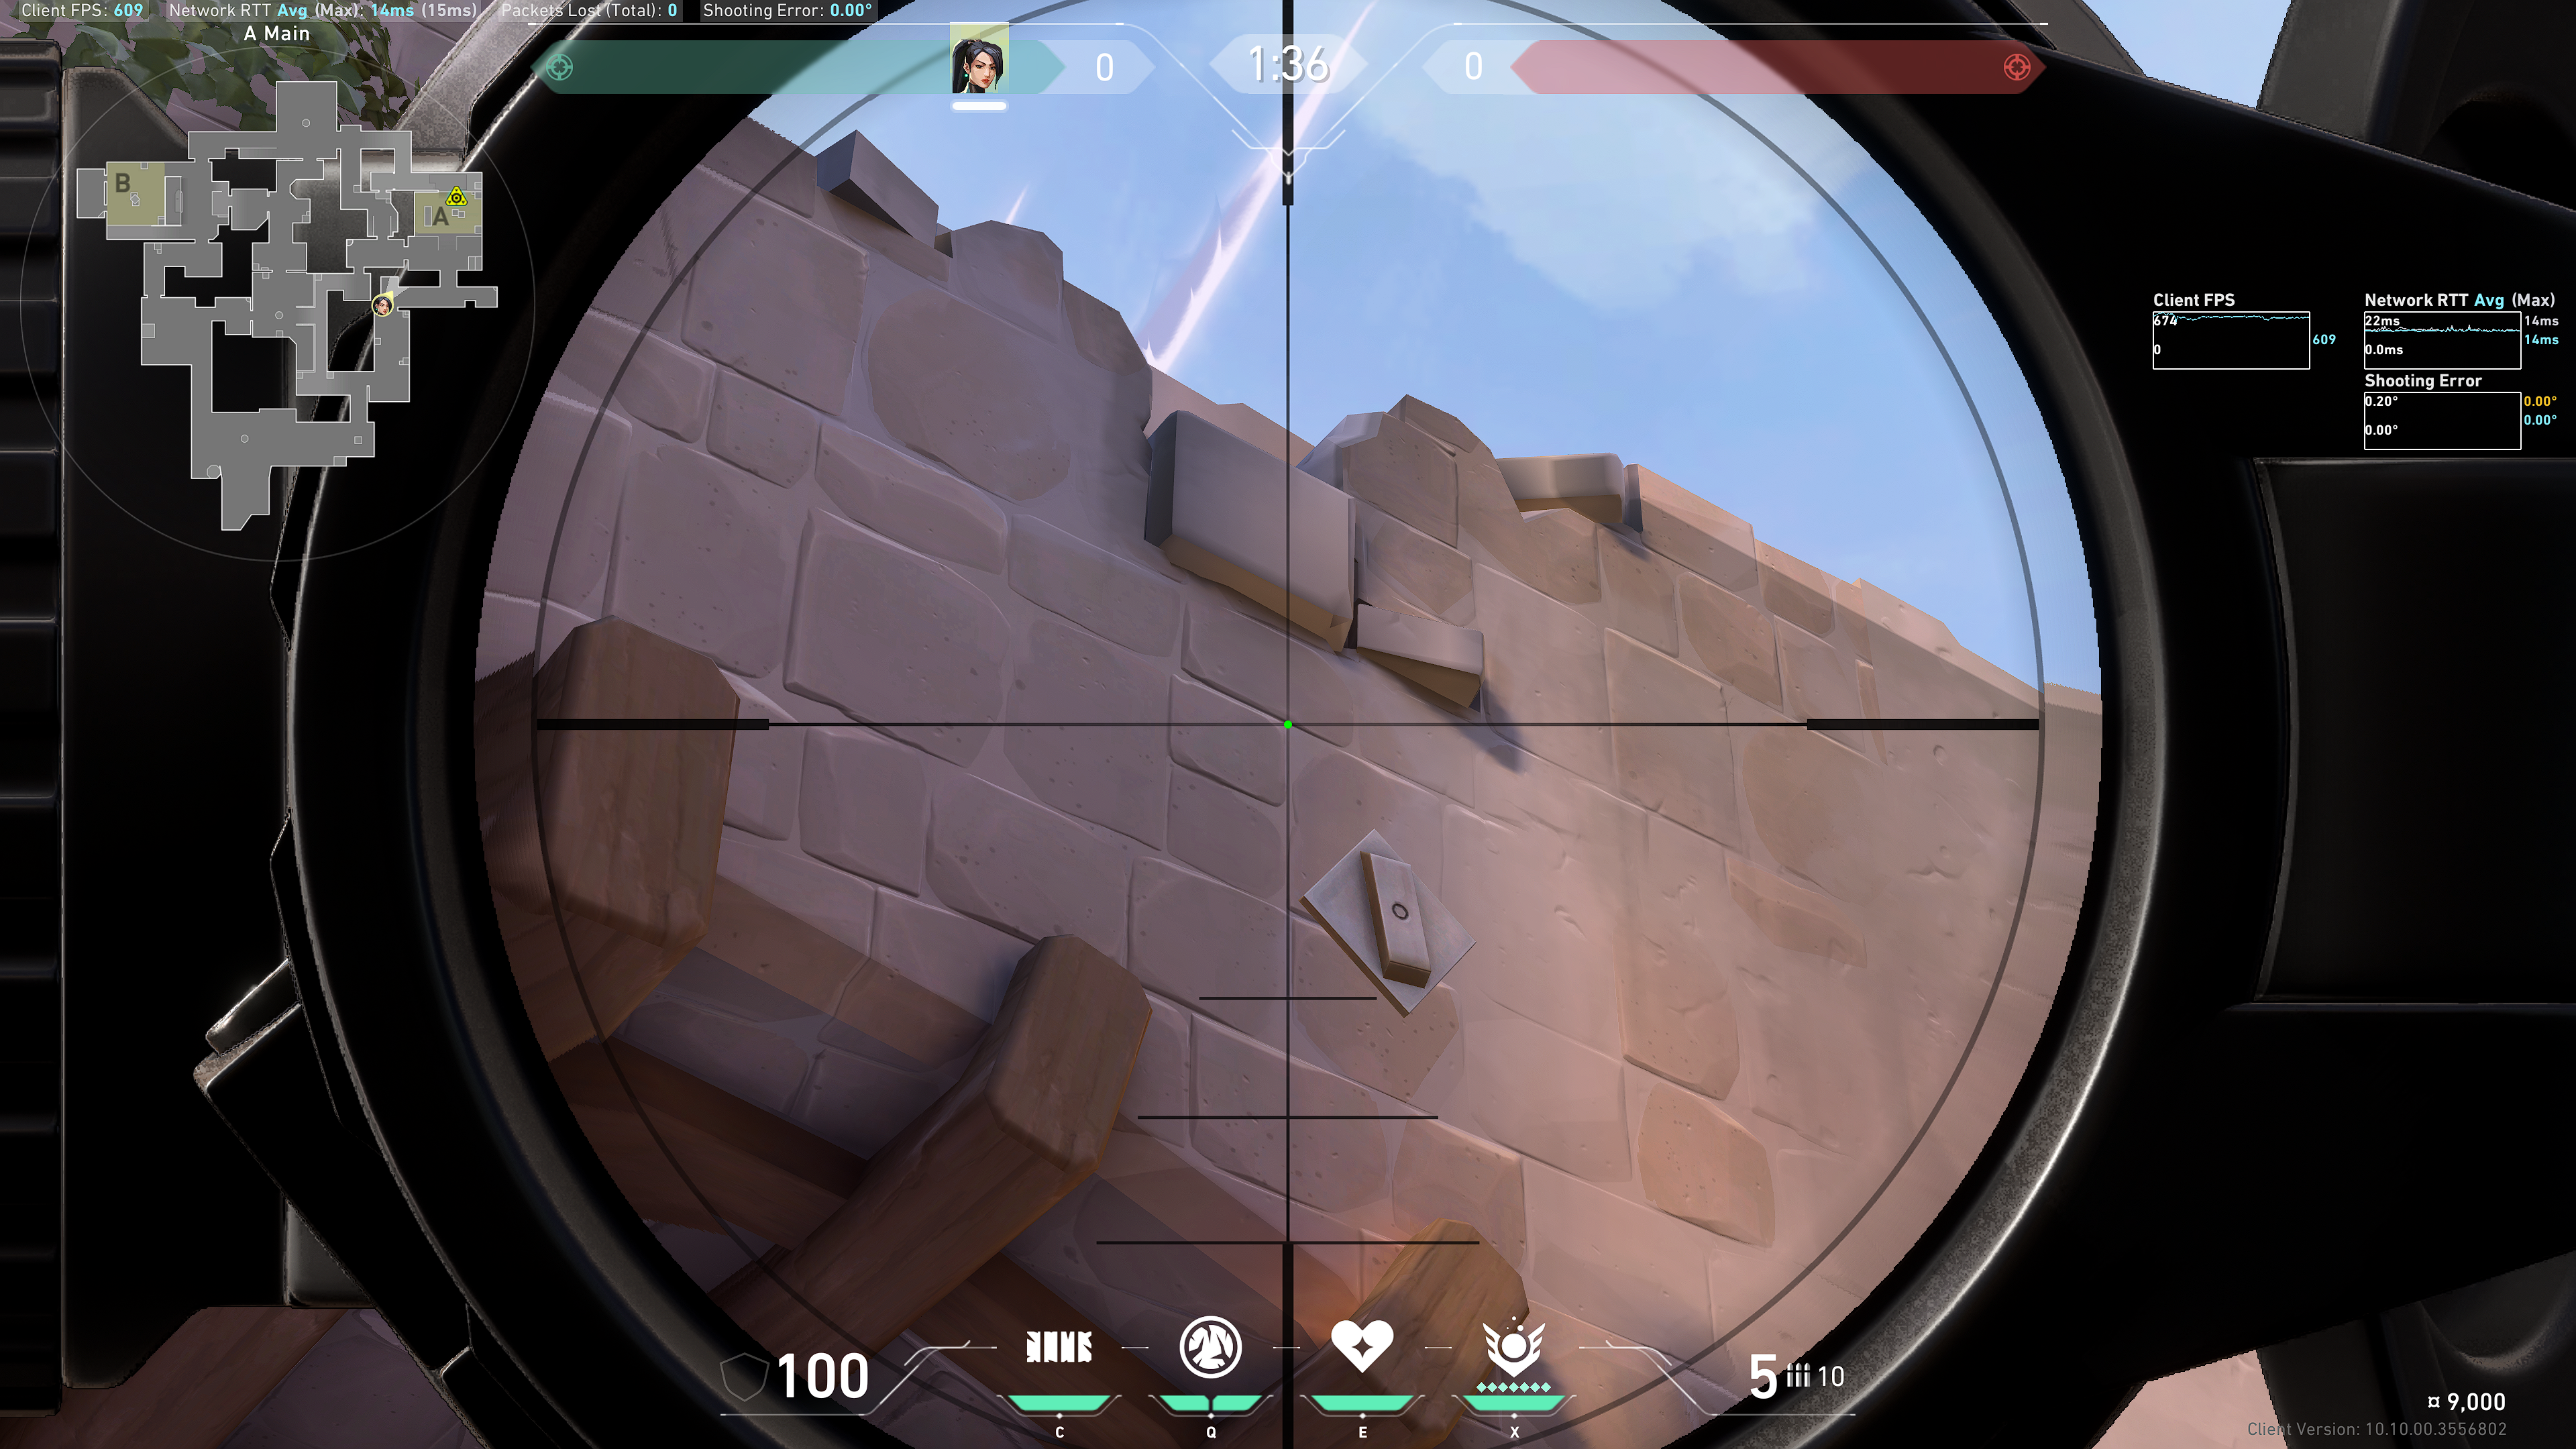
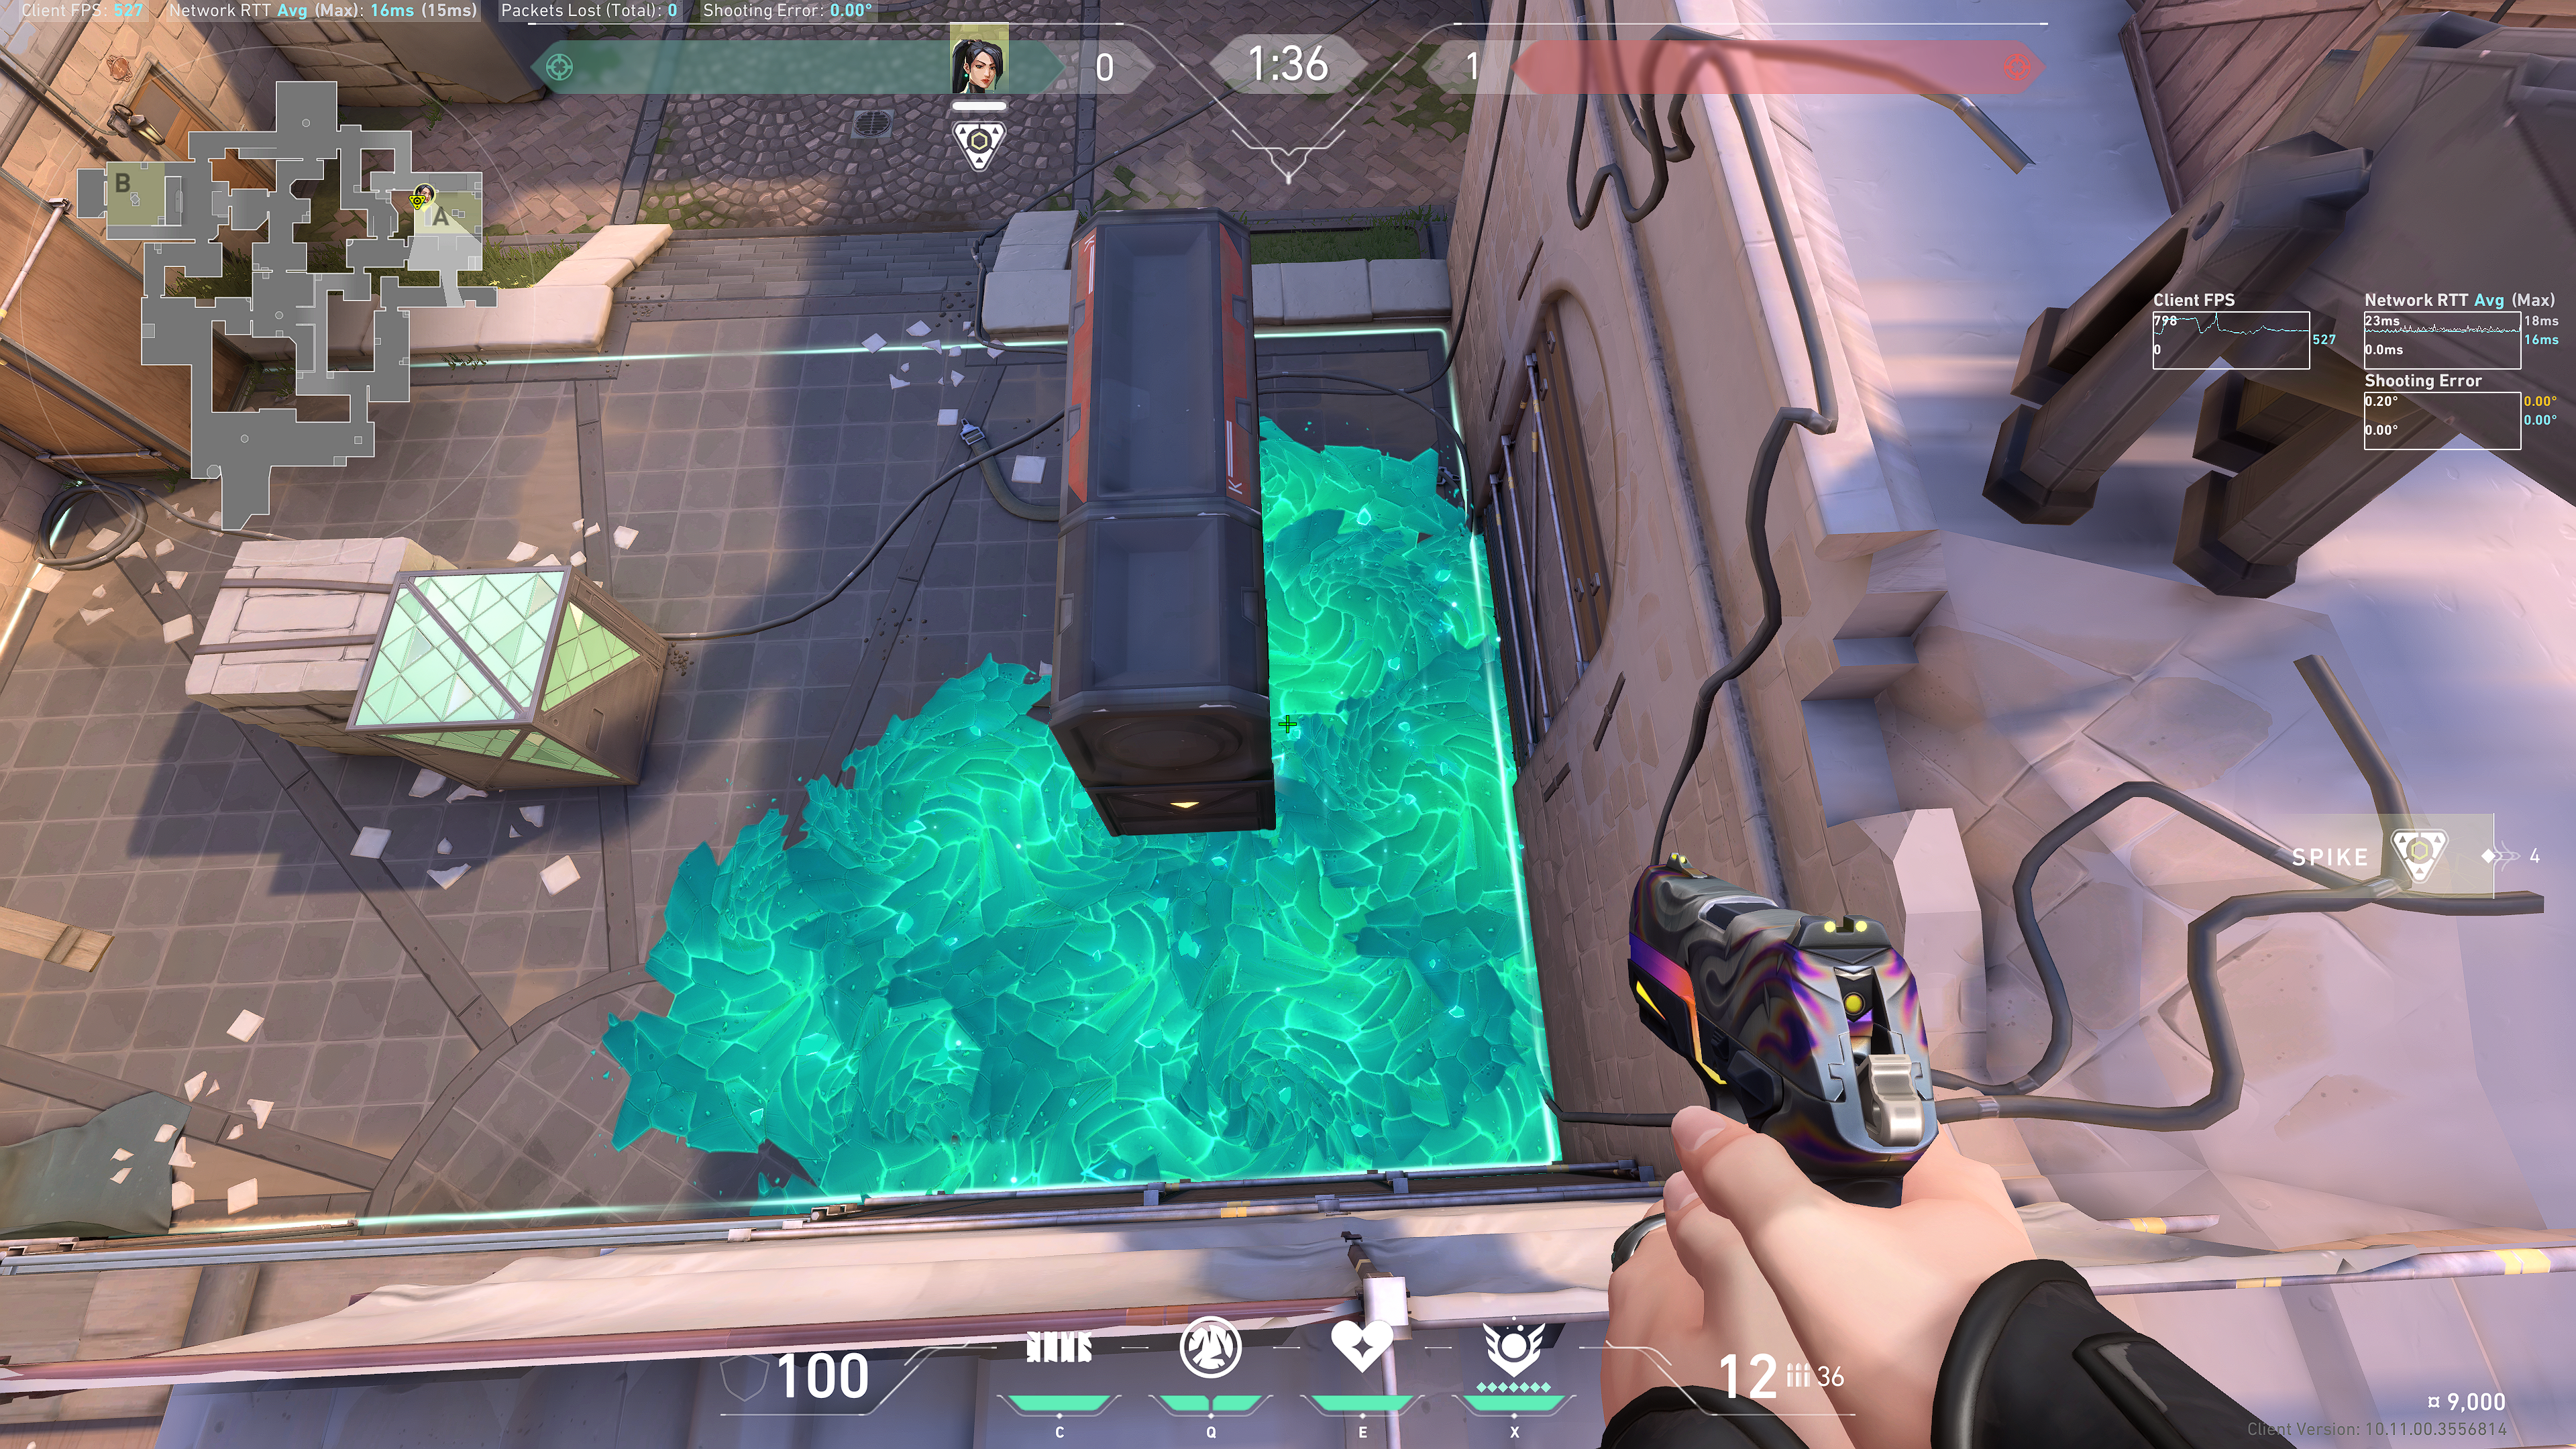
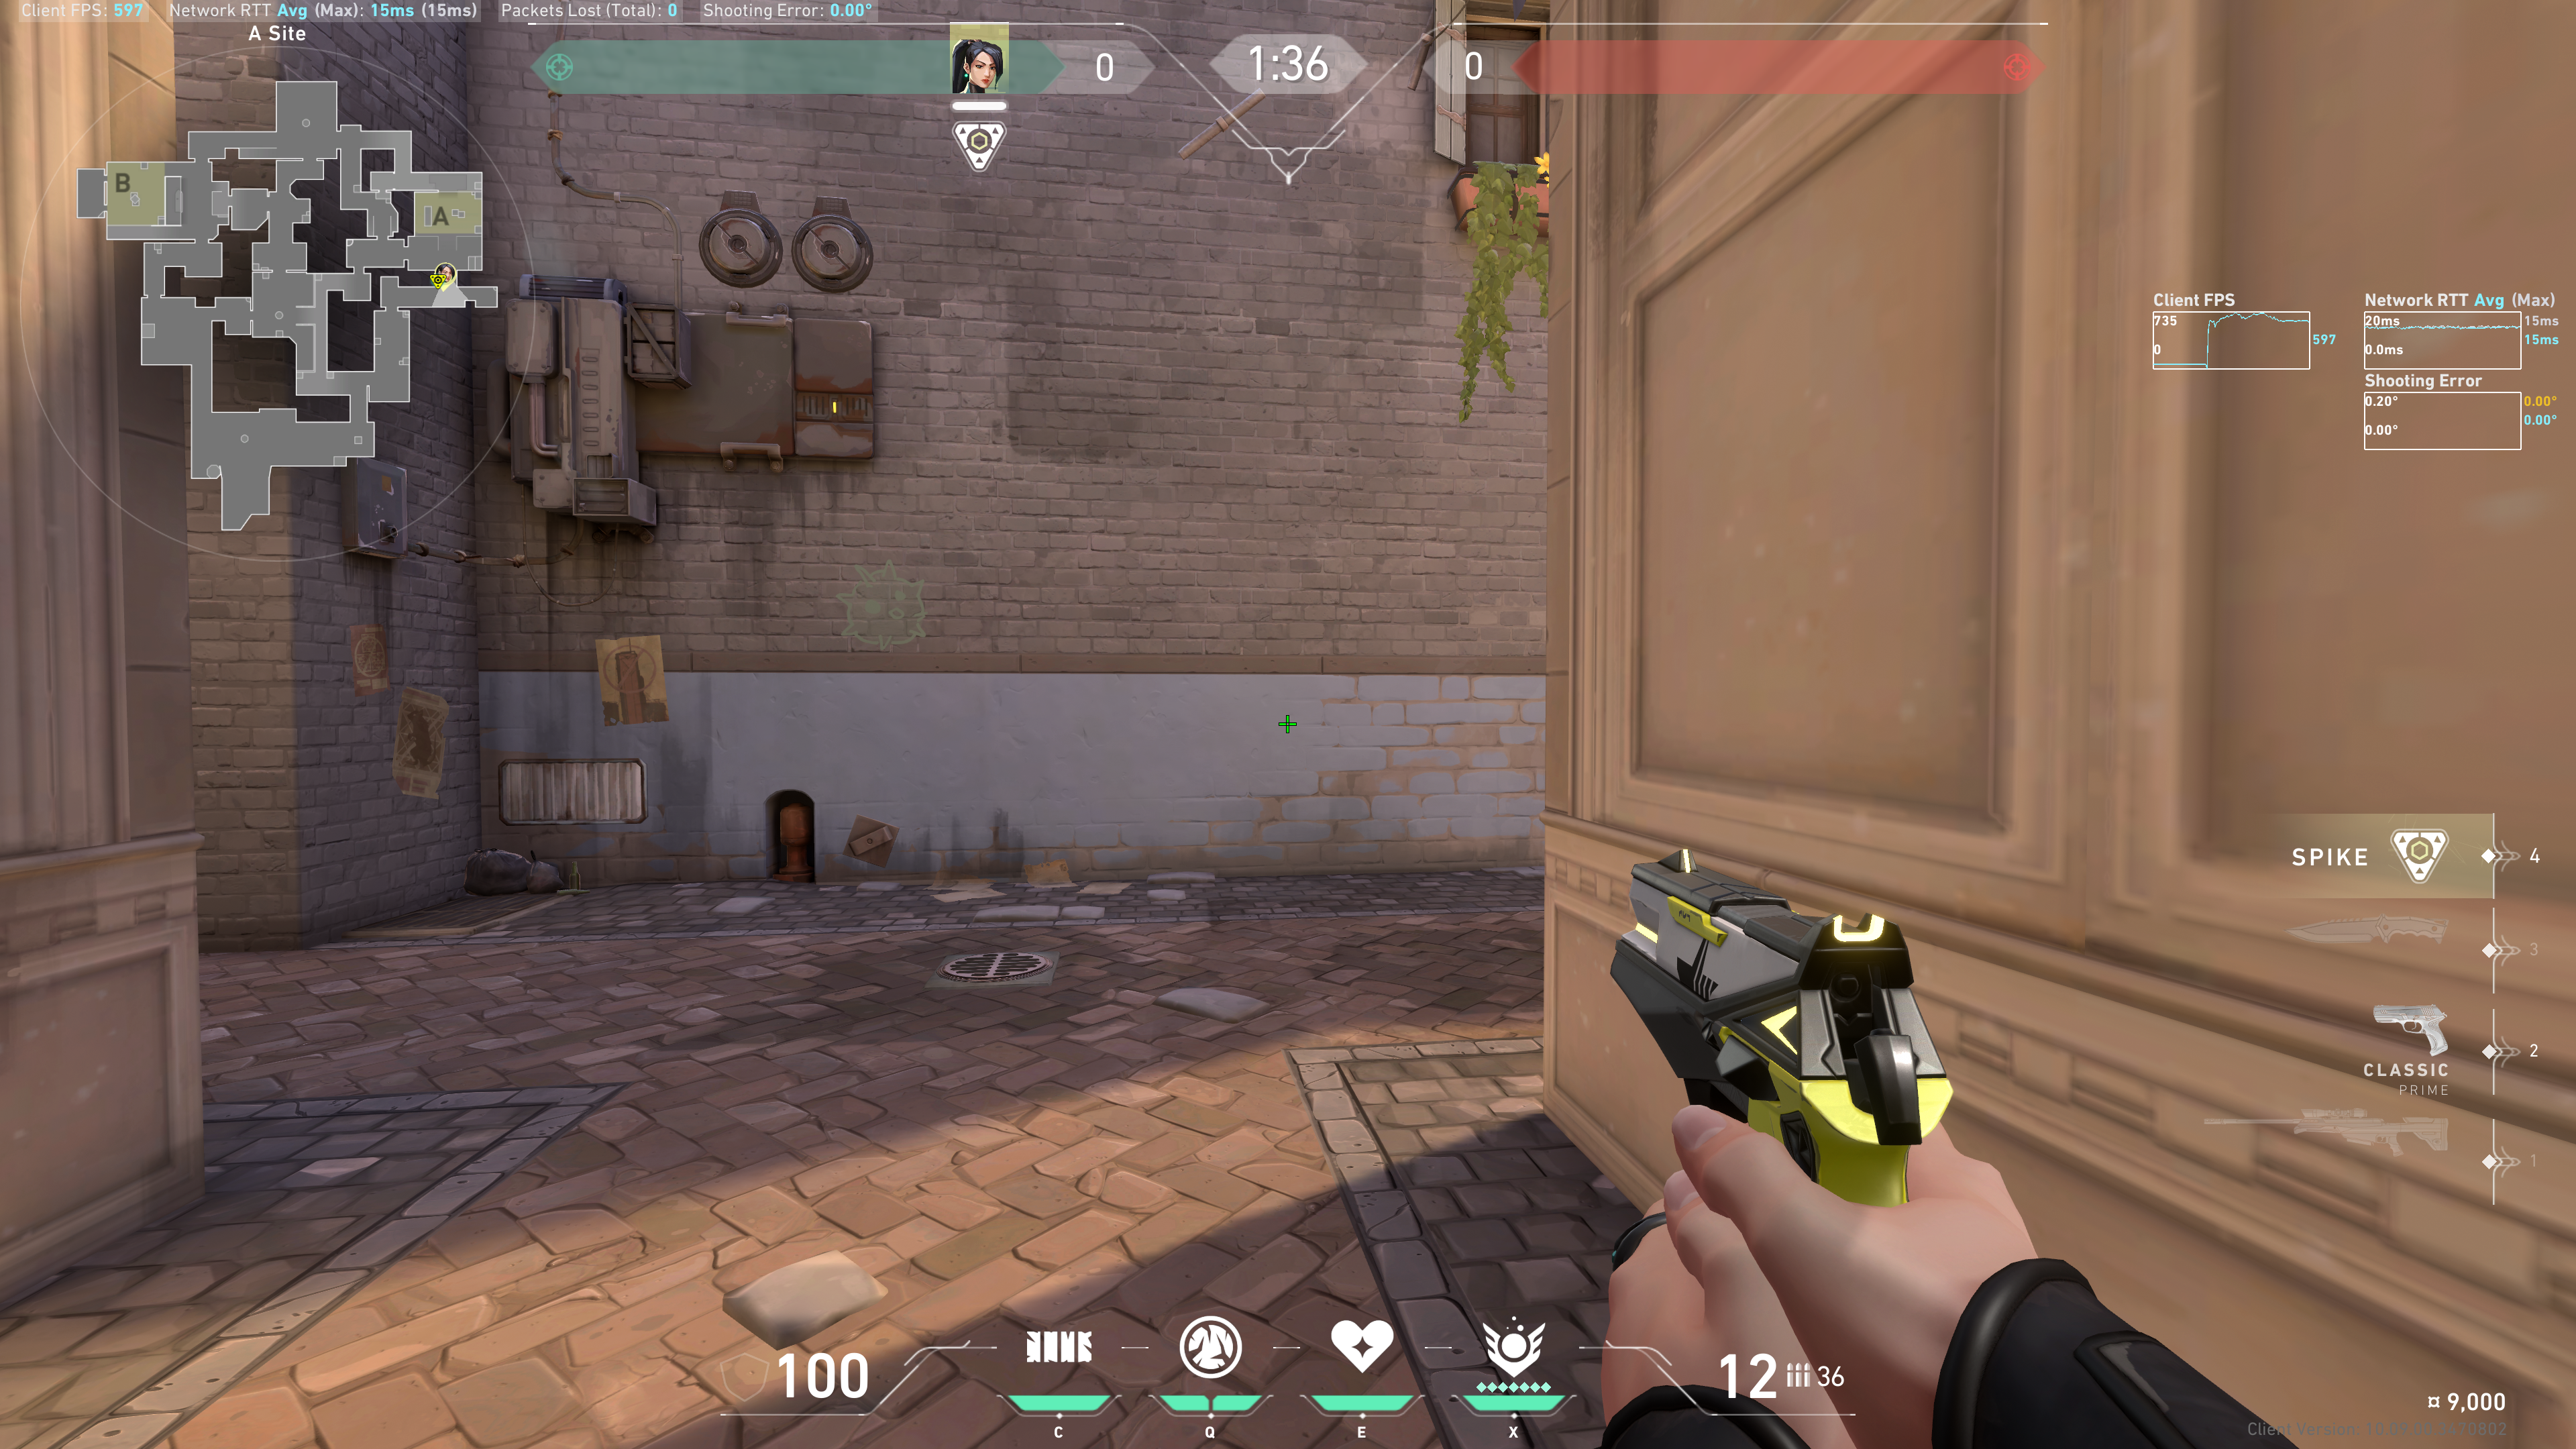
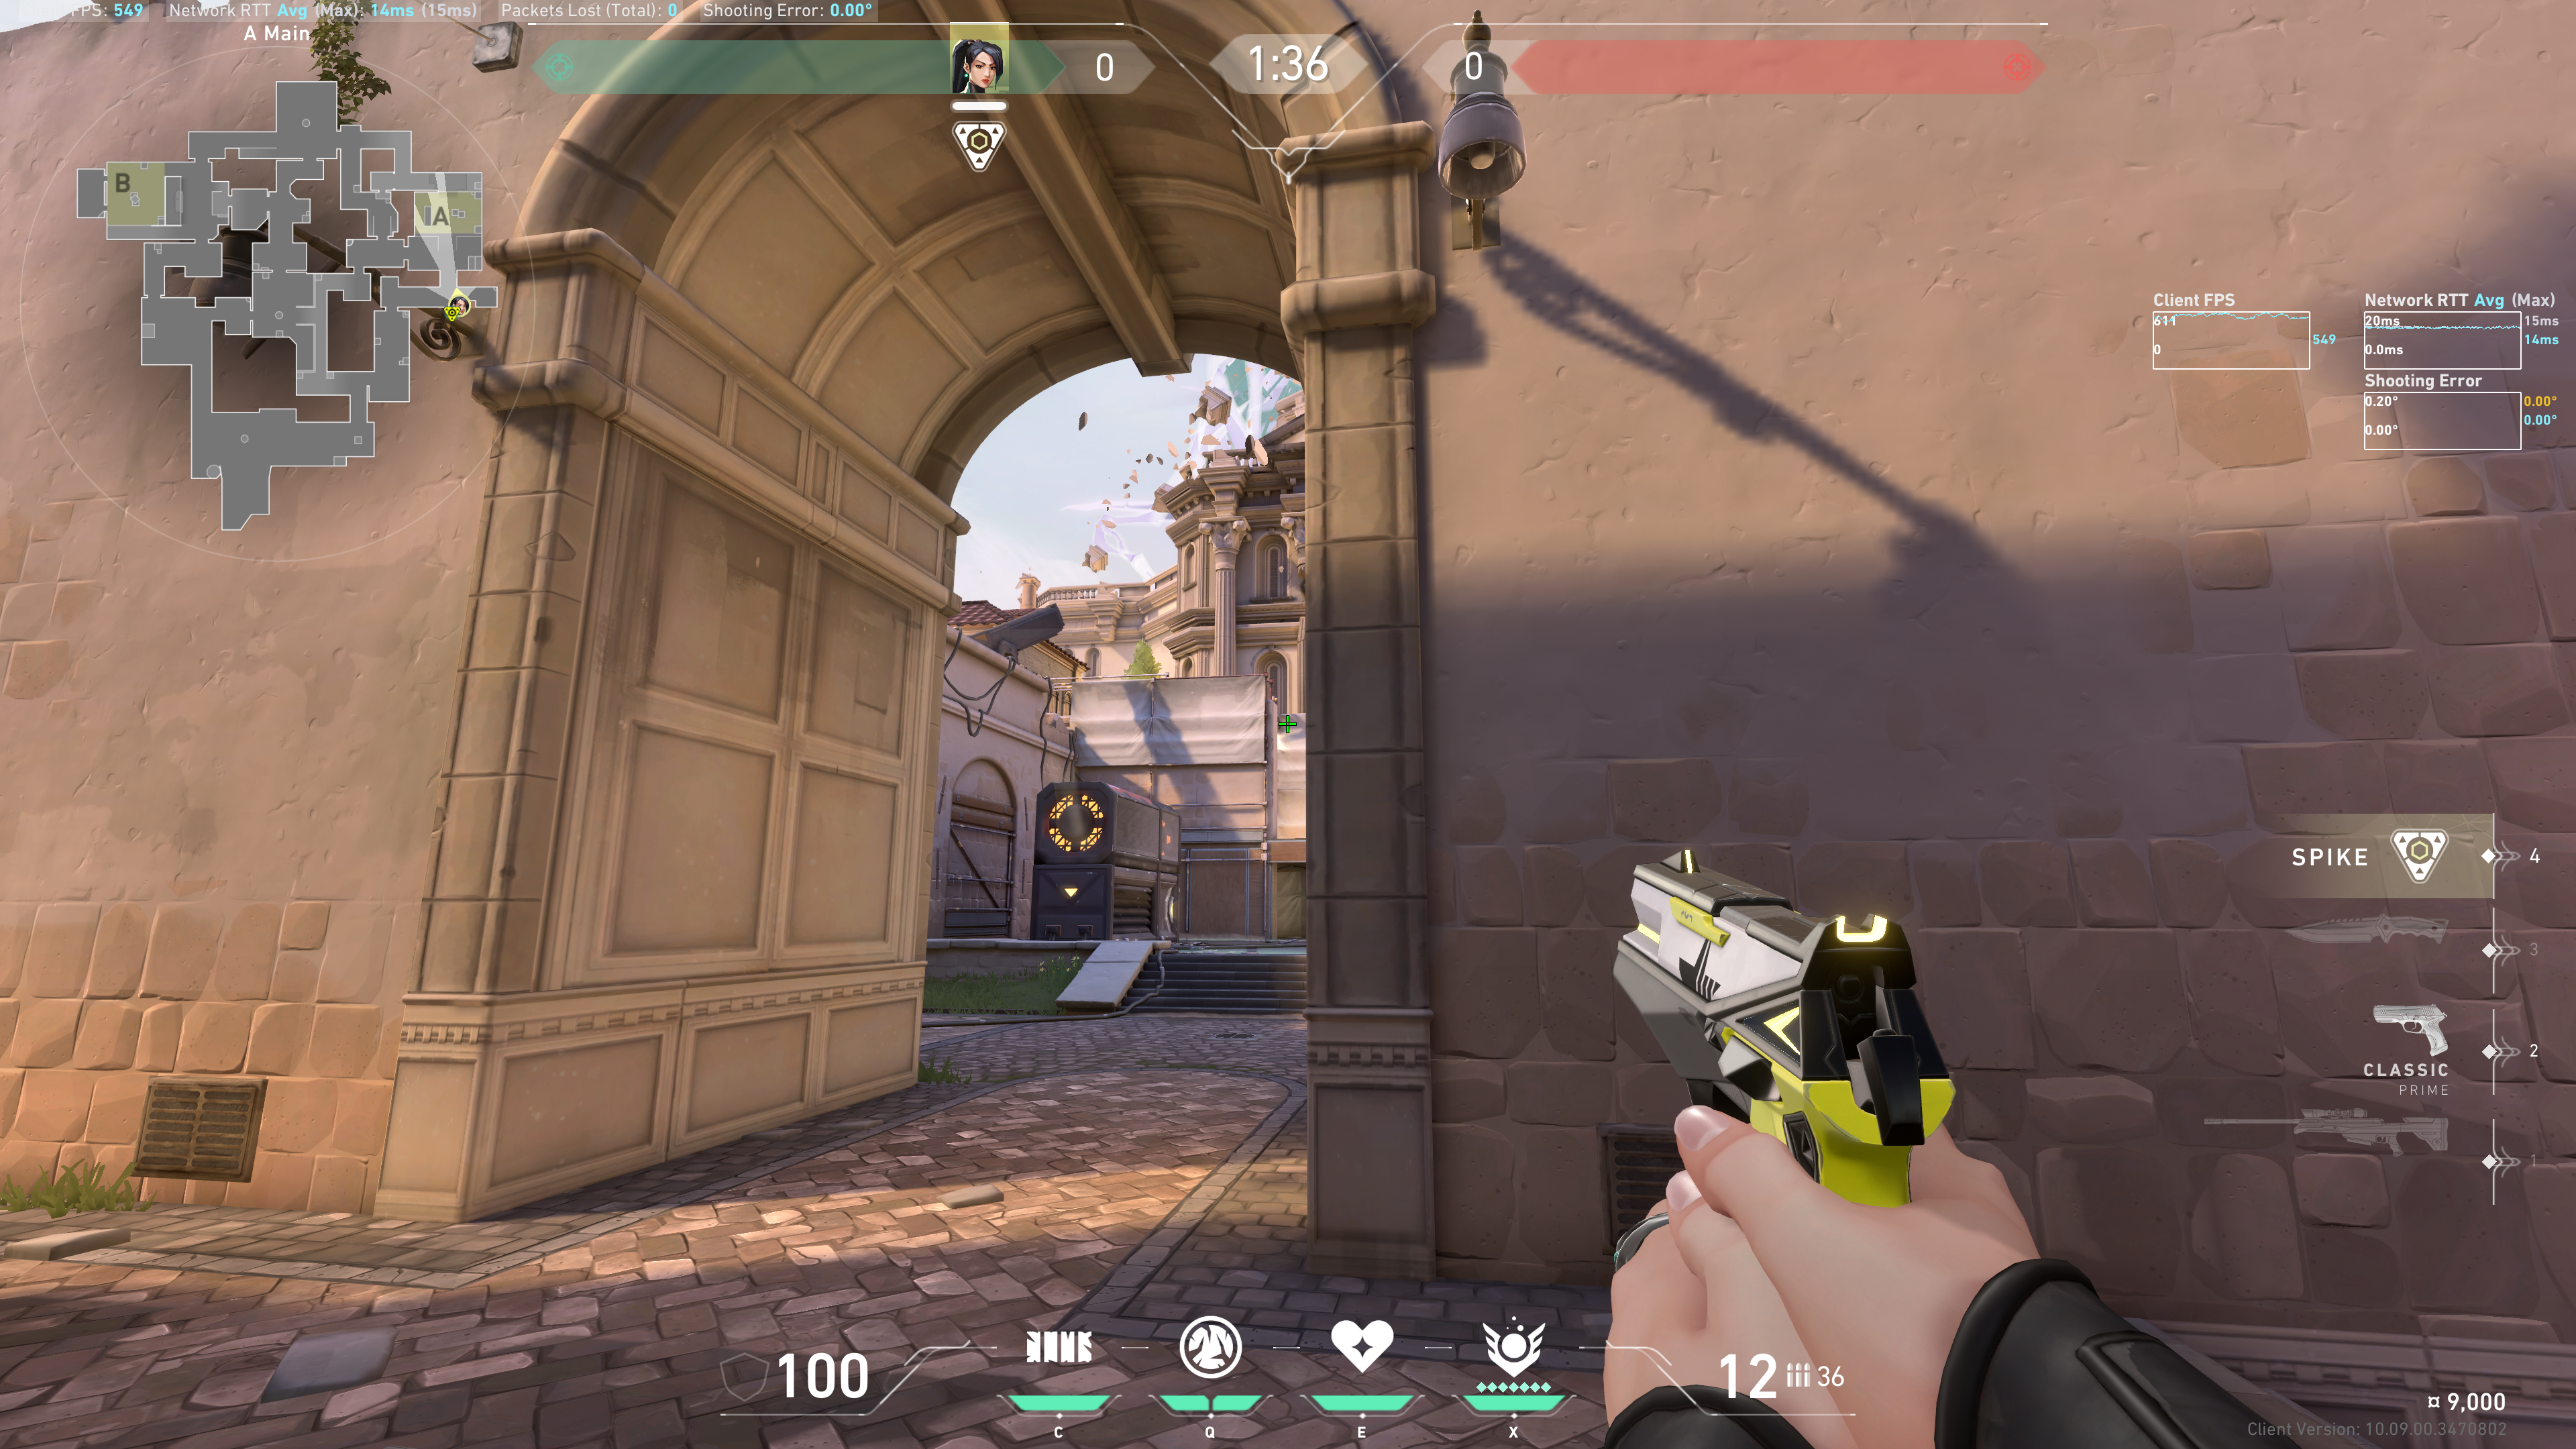
A Site - fast execute
Note: this version is in between "walk contact" speed and "run it down" speed. Best used when your team is executing quickly but still needs a couple seconds to take A Main control.
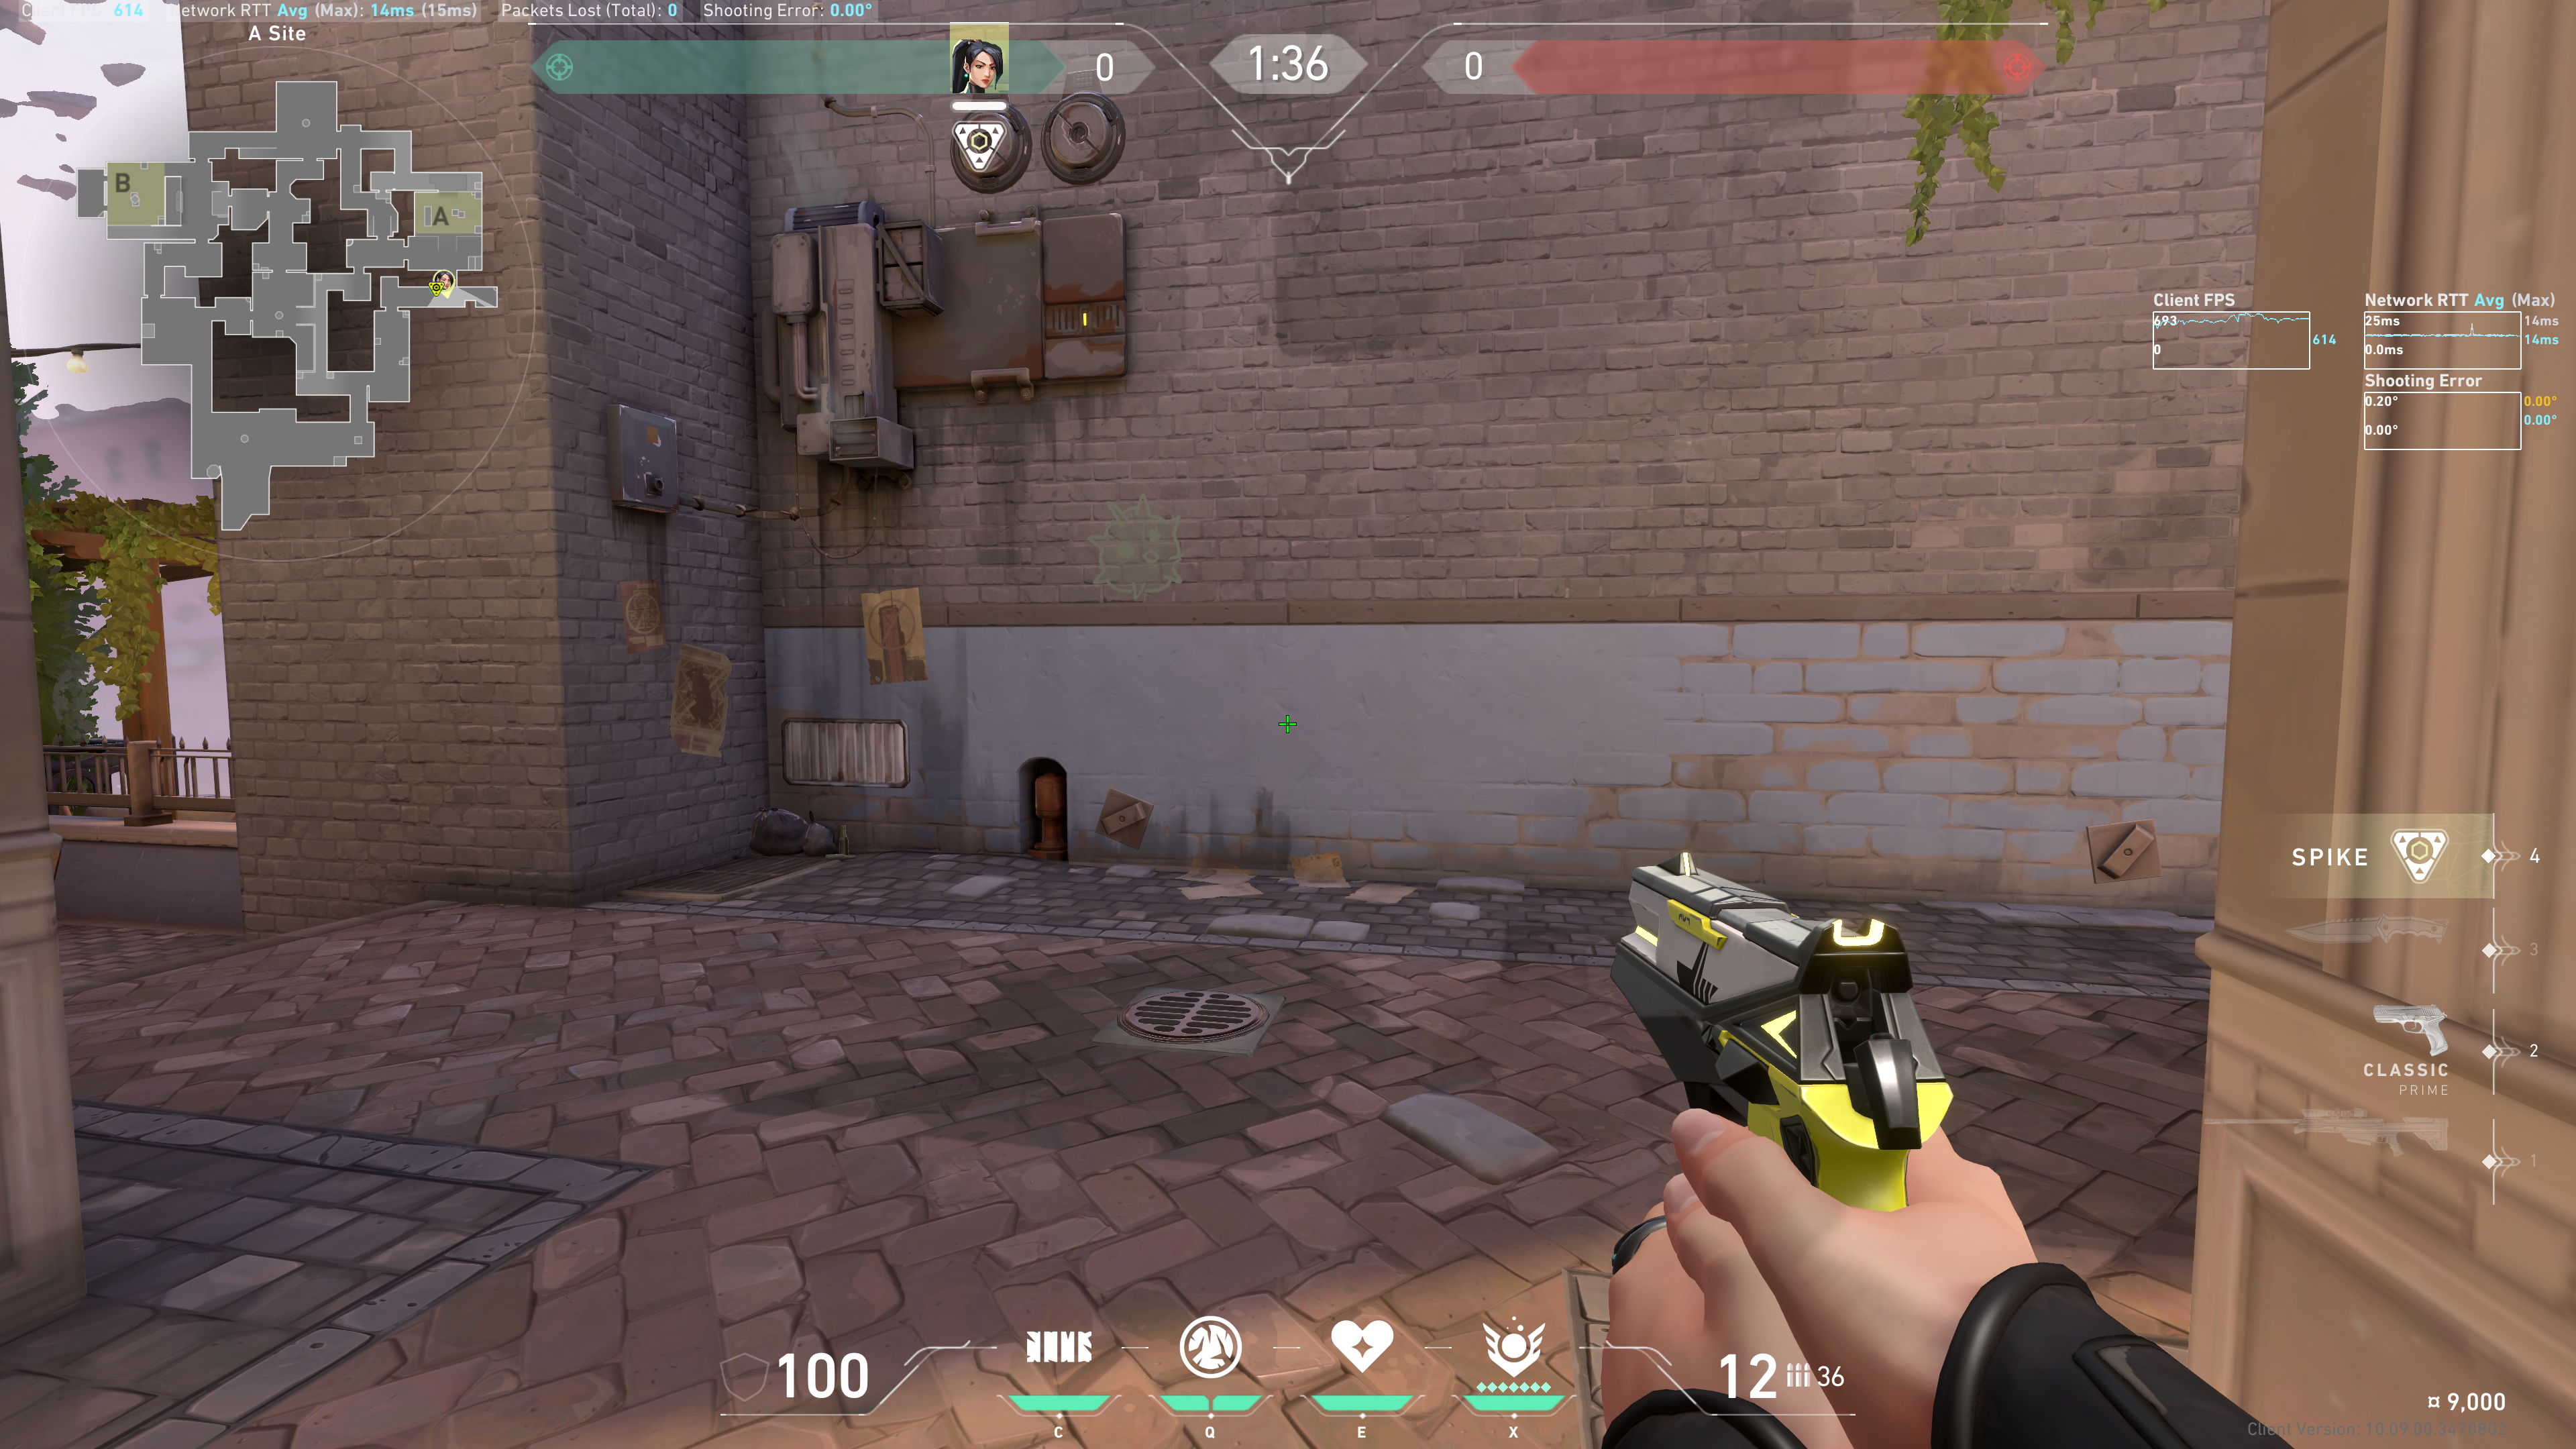
Tuck into this corner with the box:
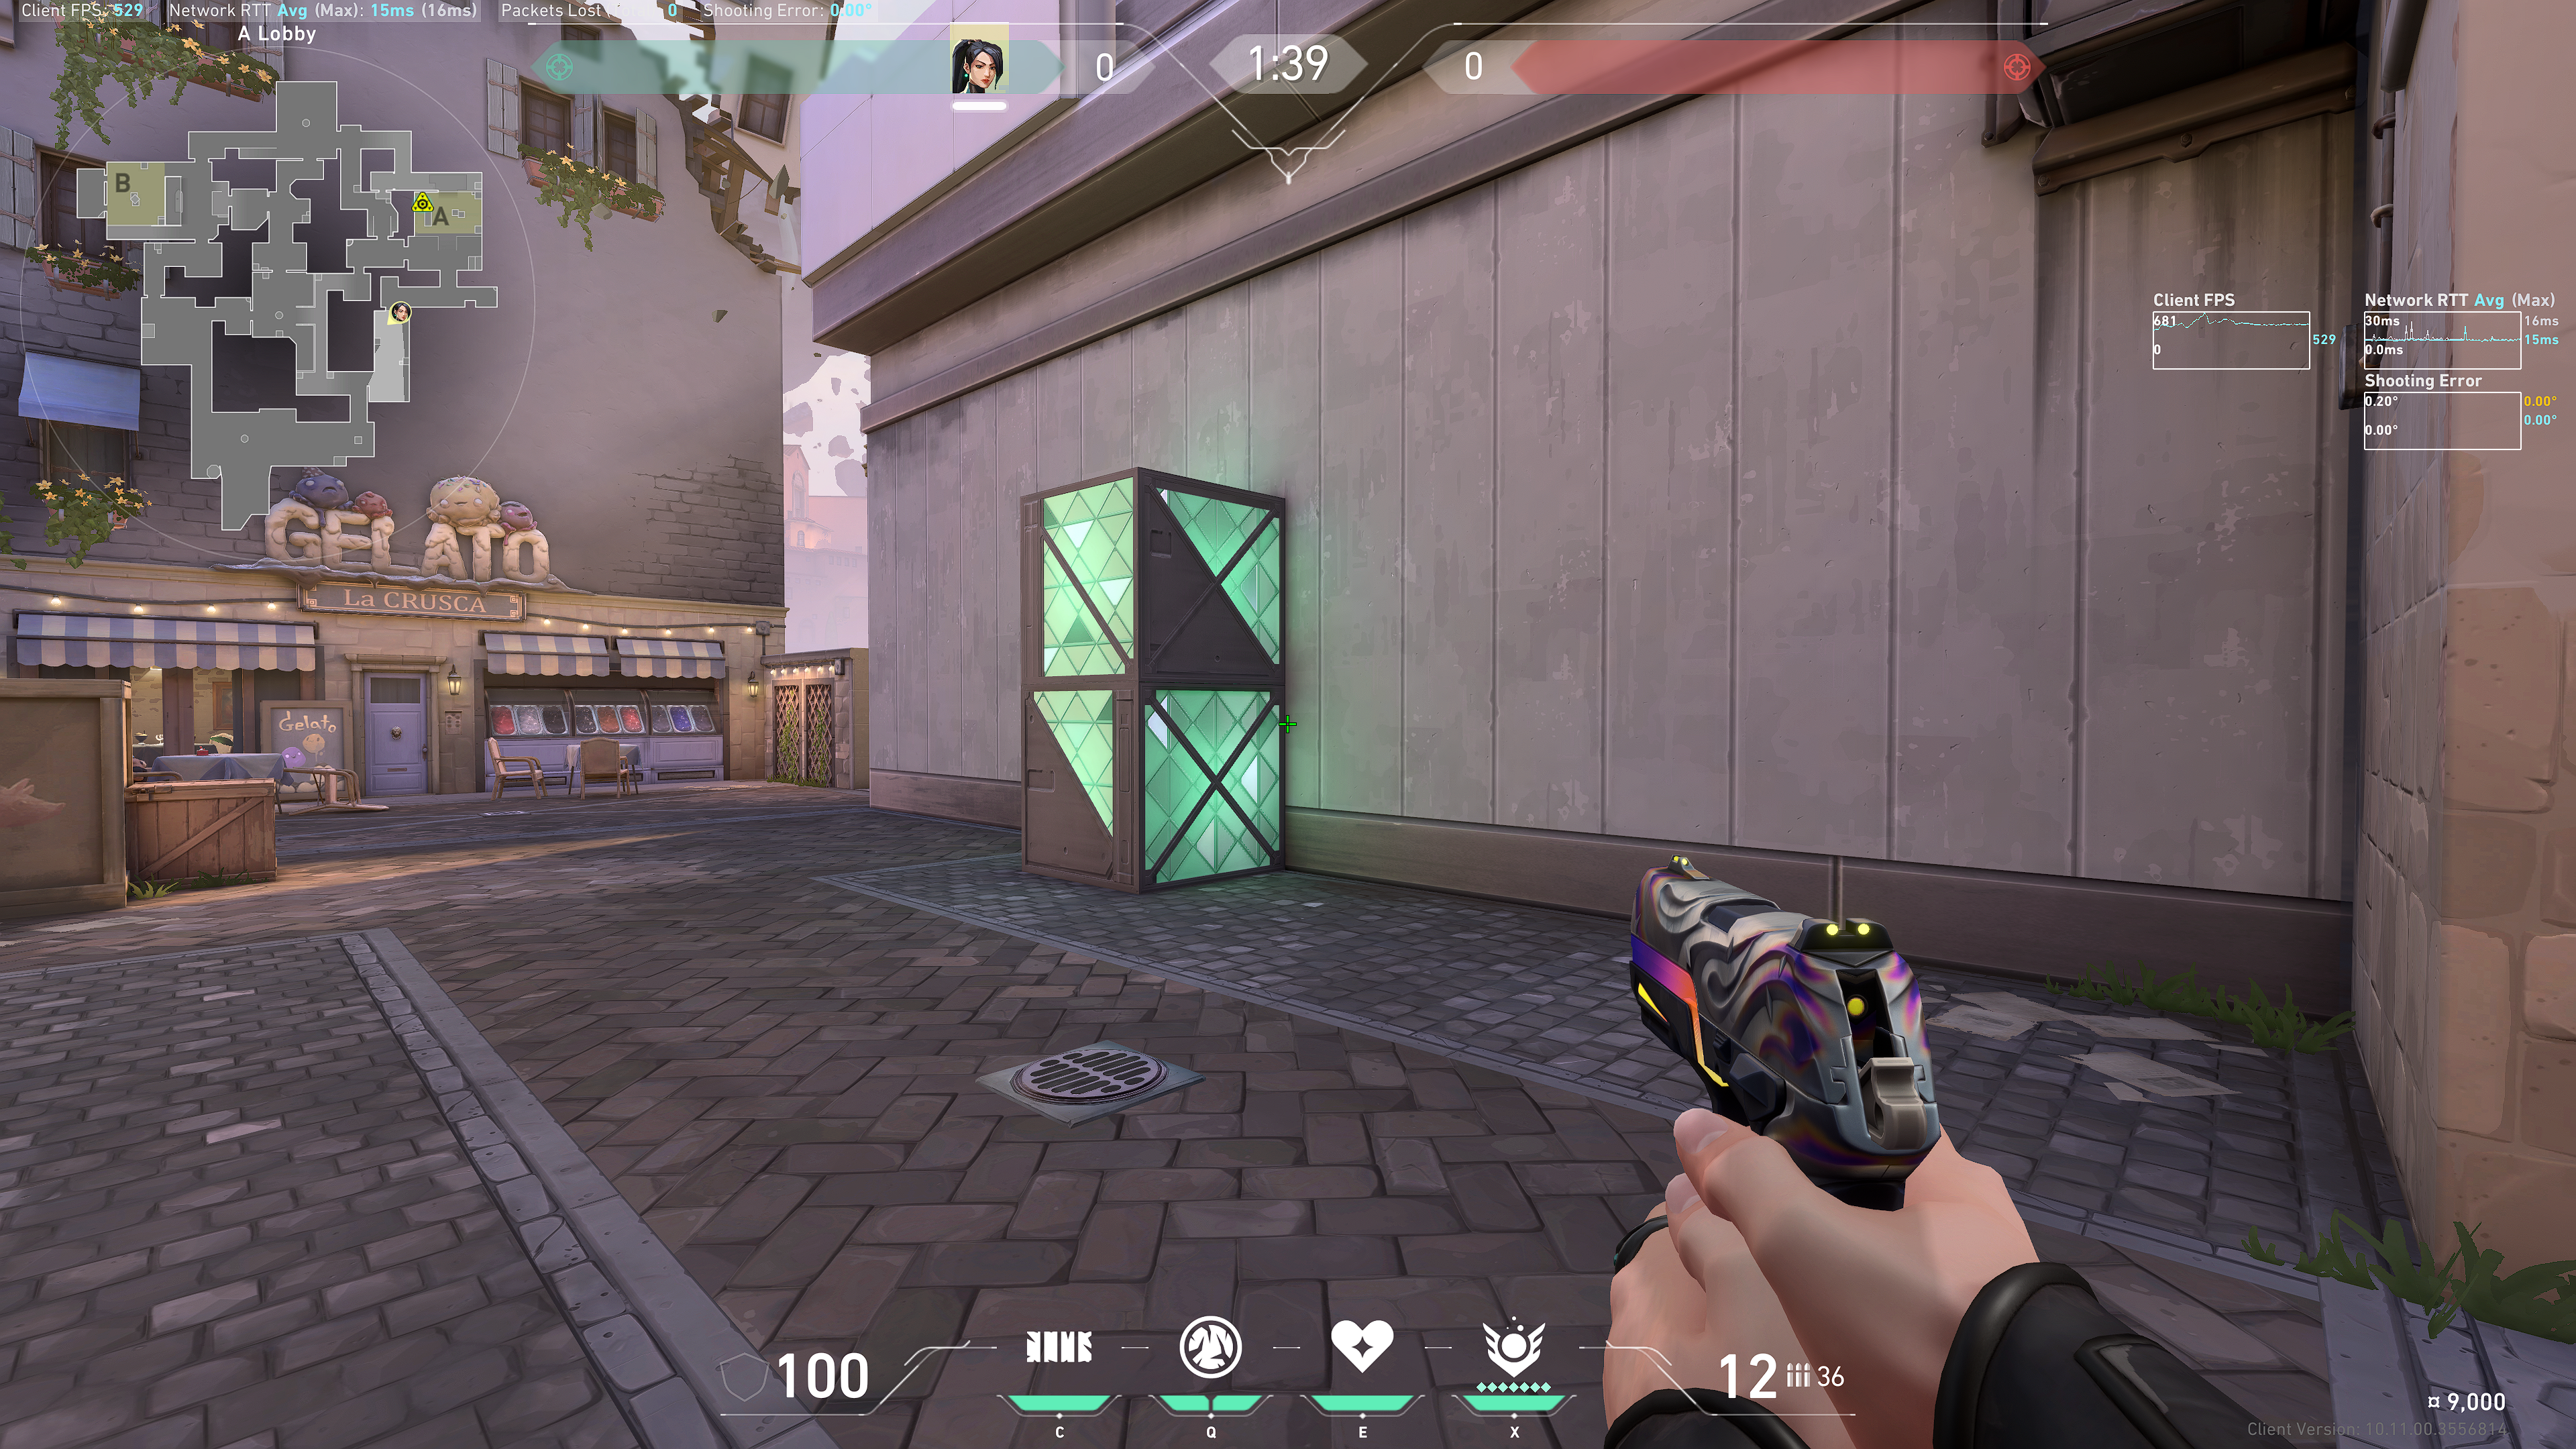
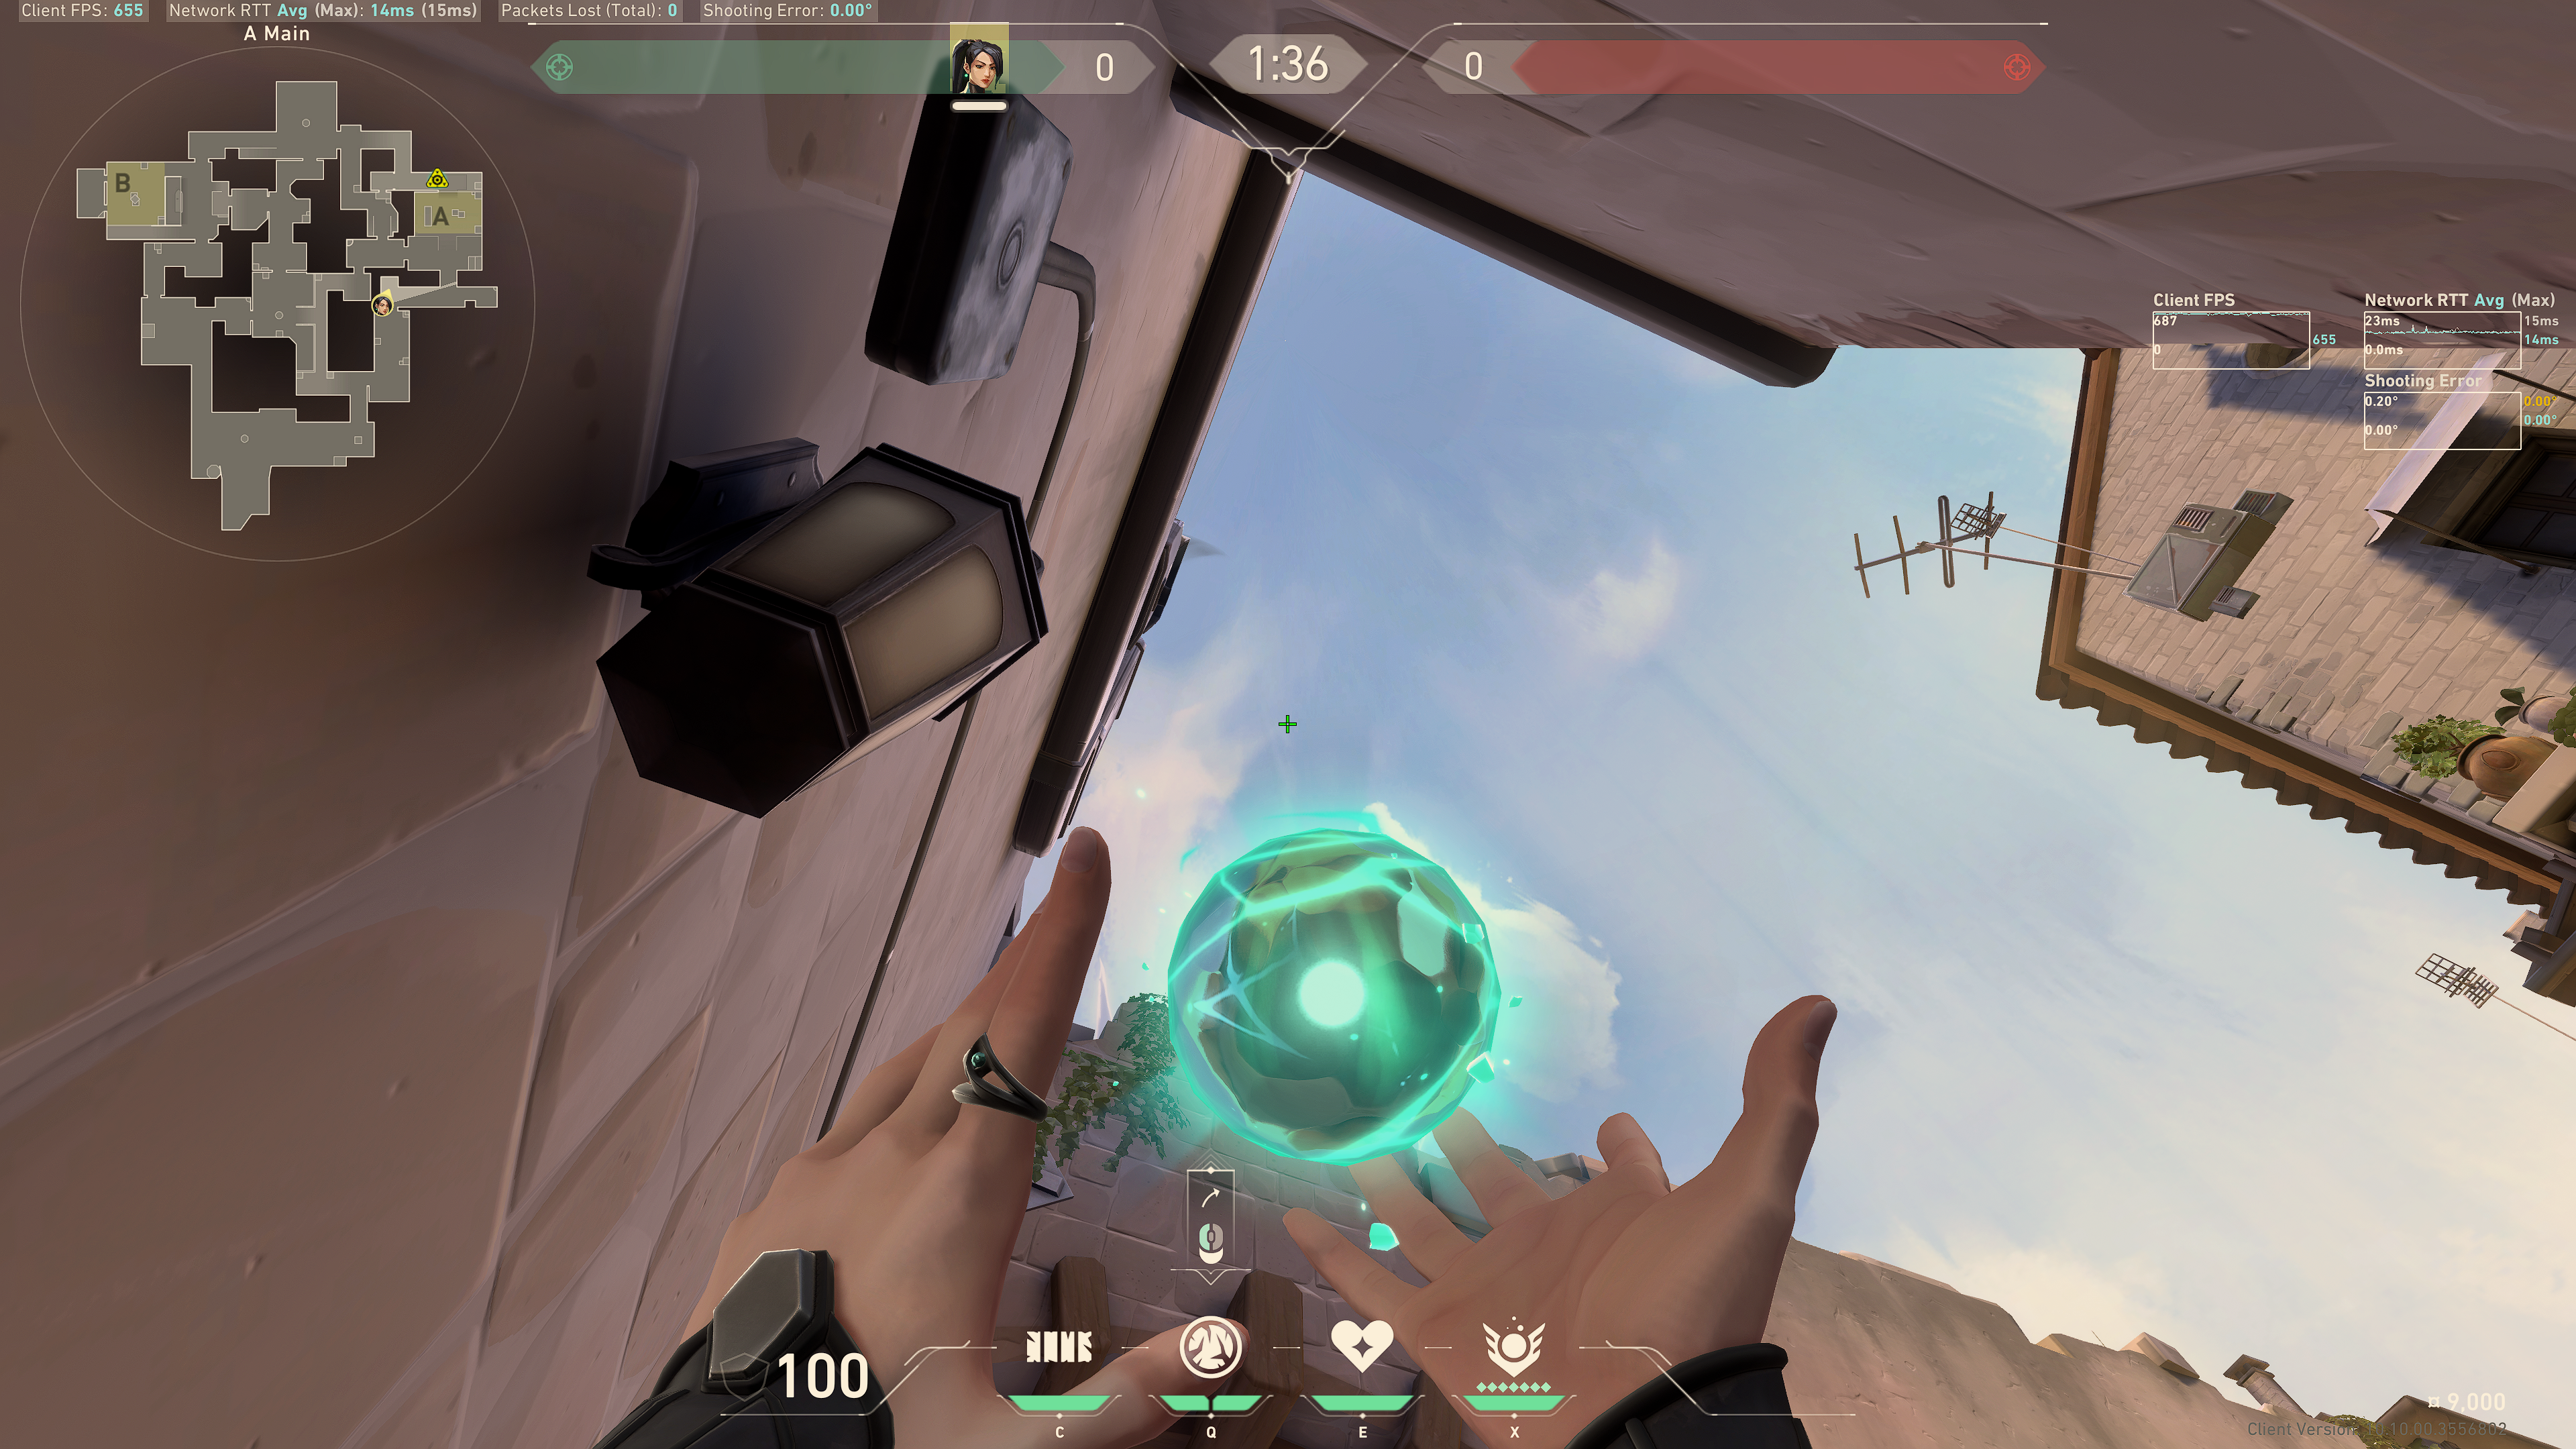
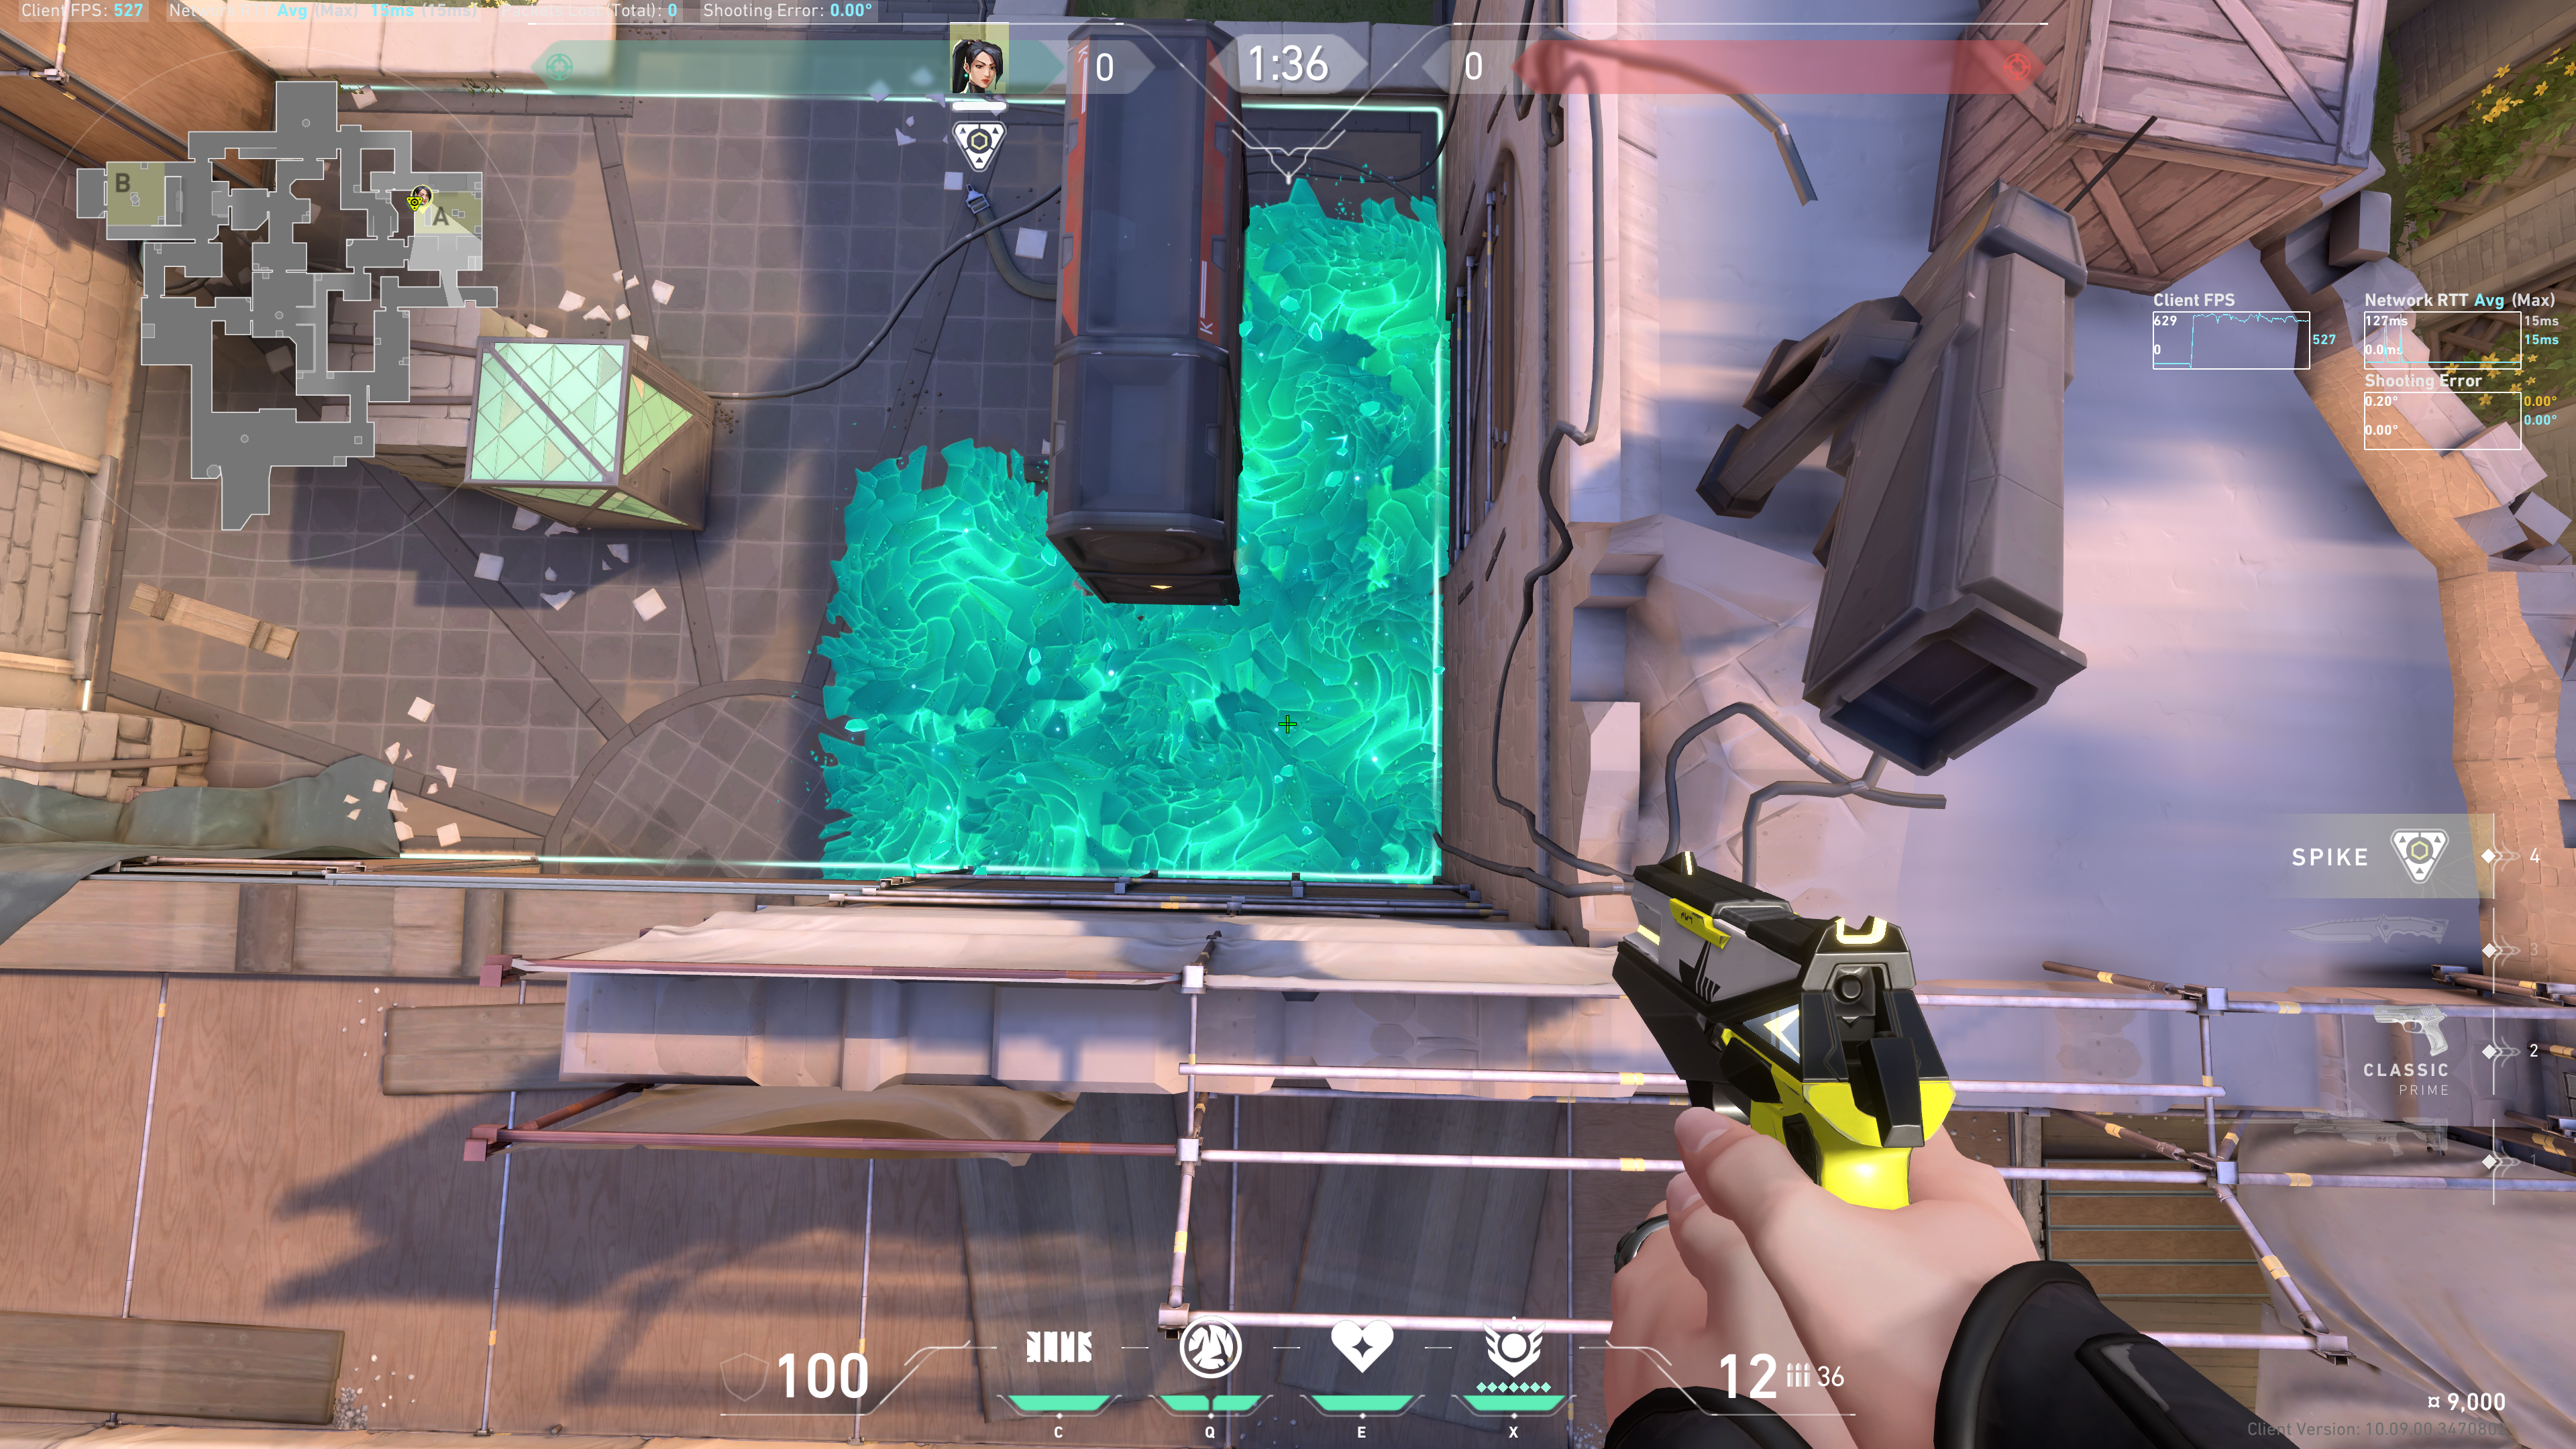
Generator
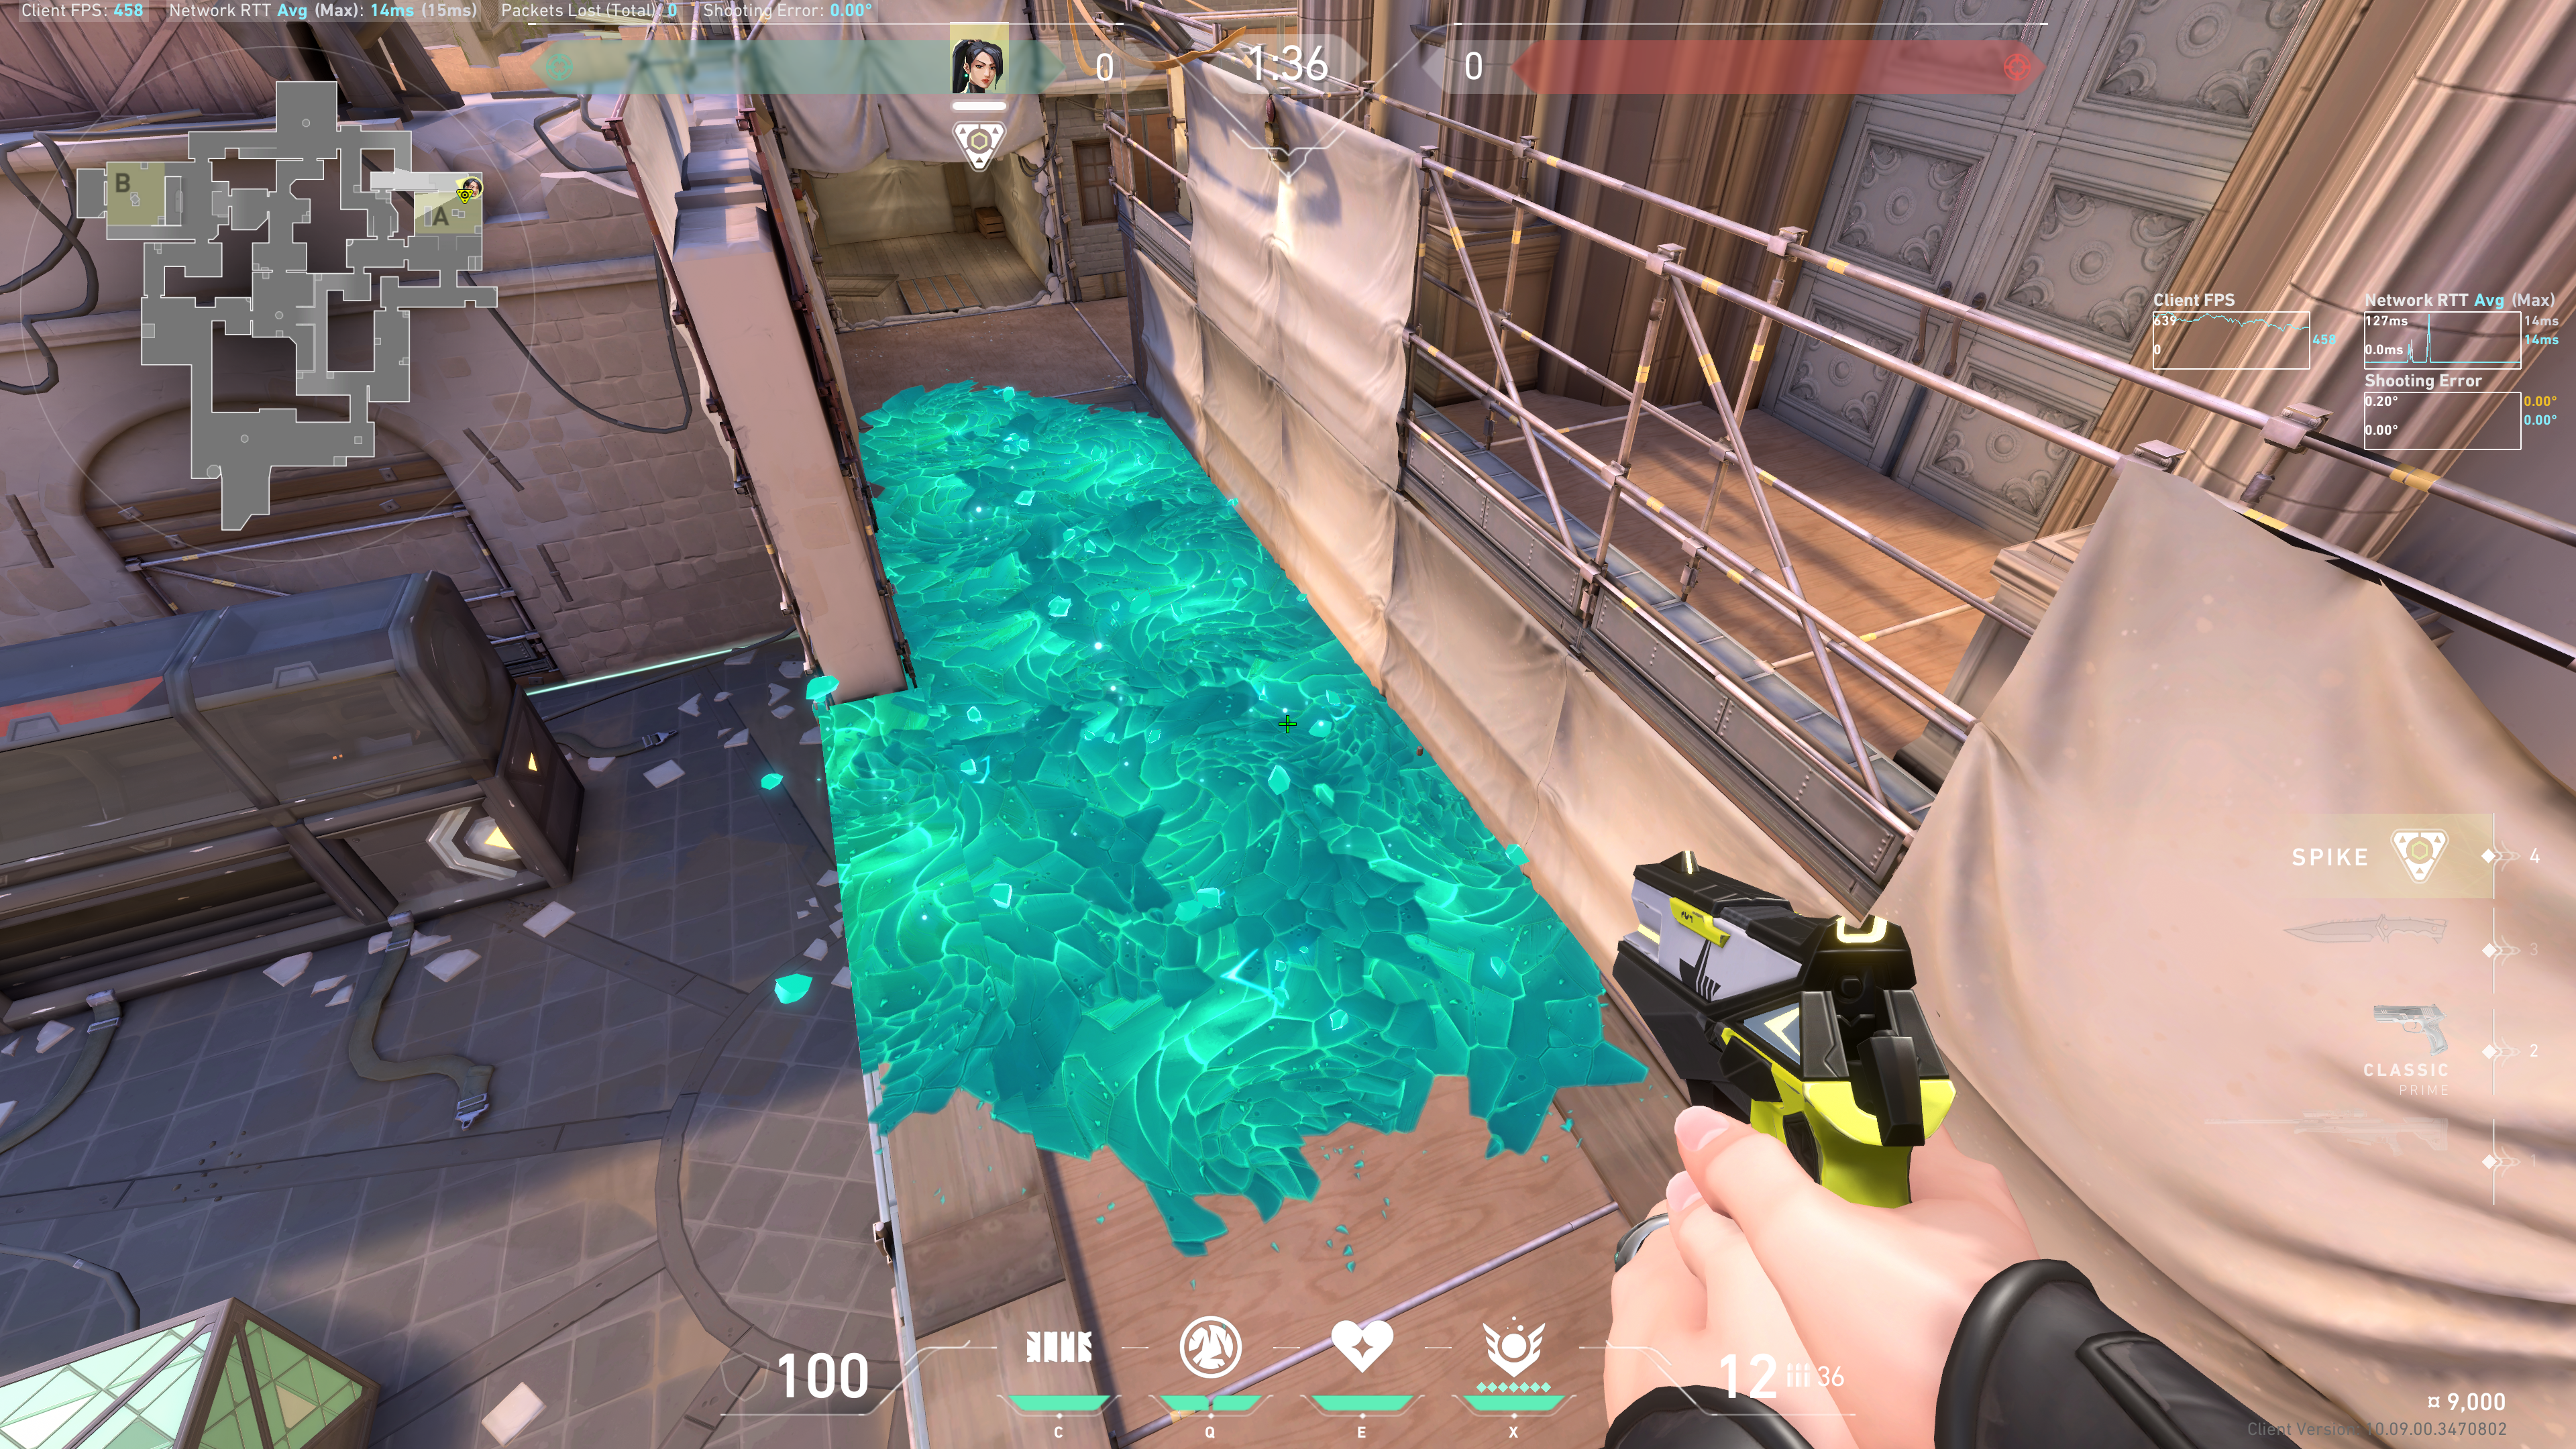
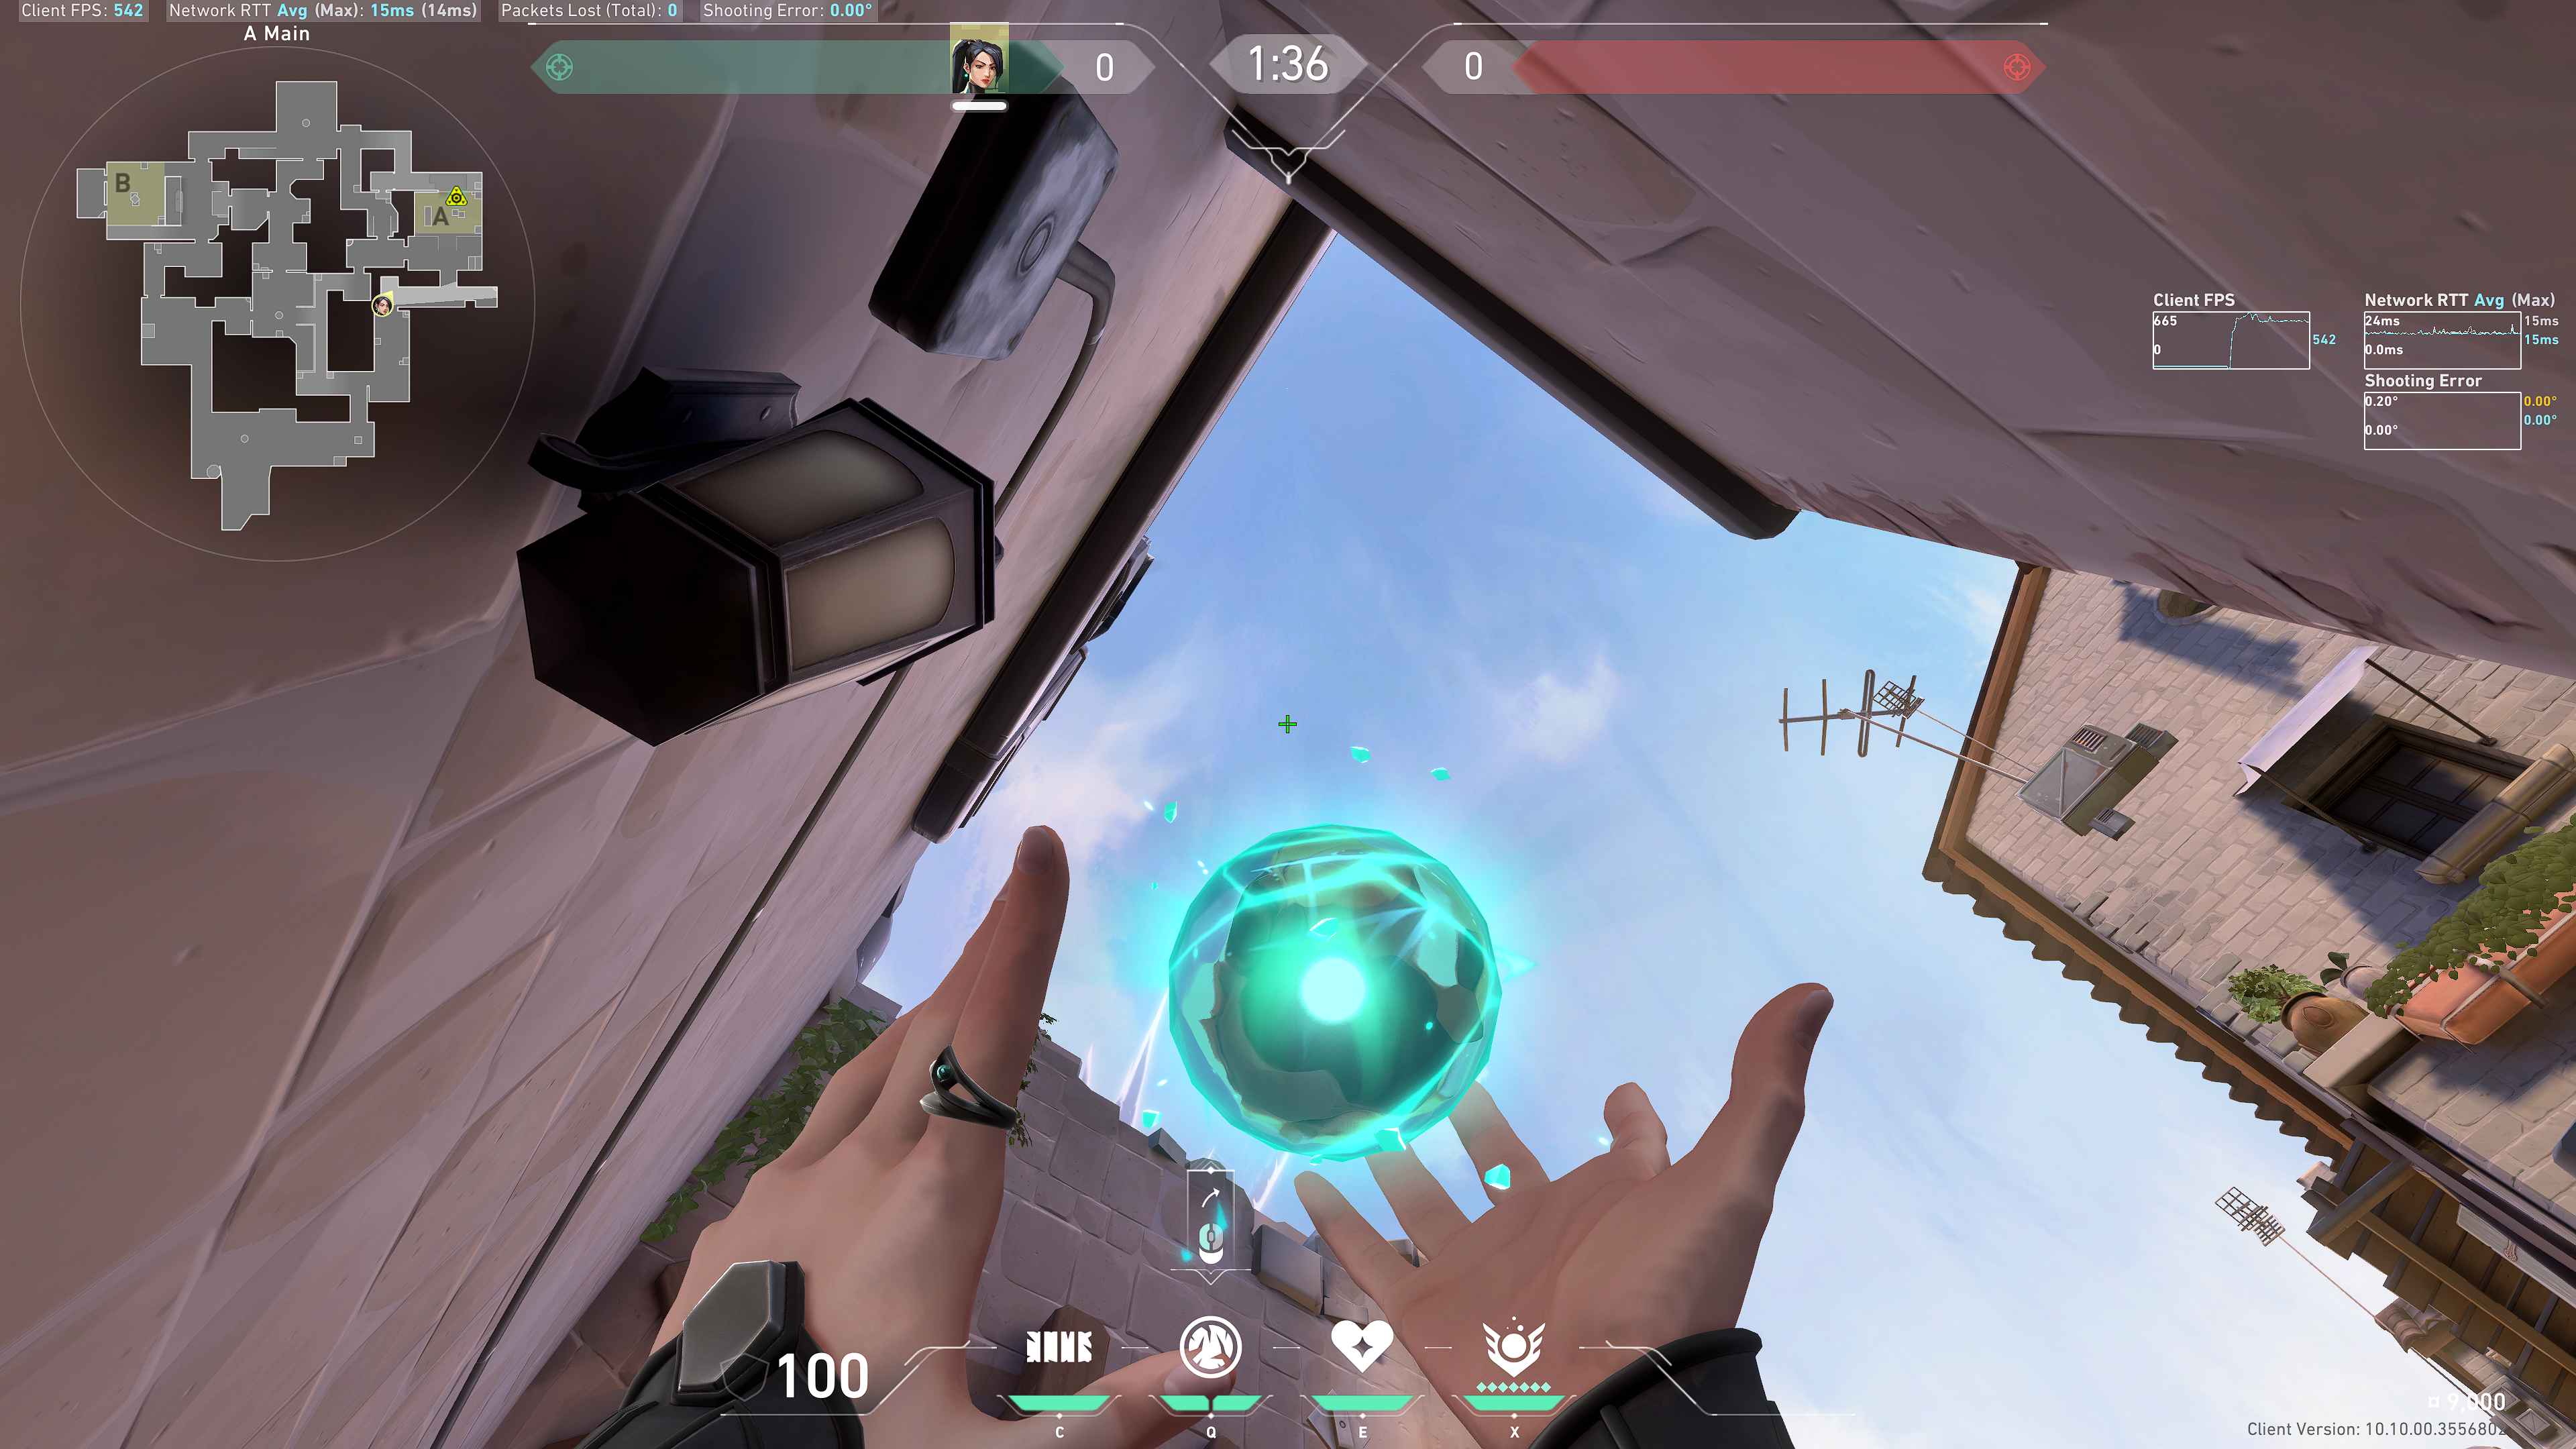
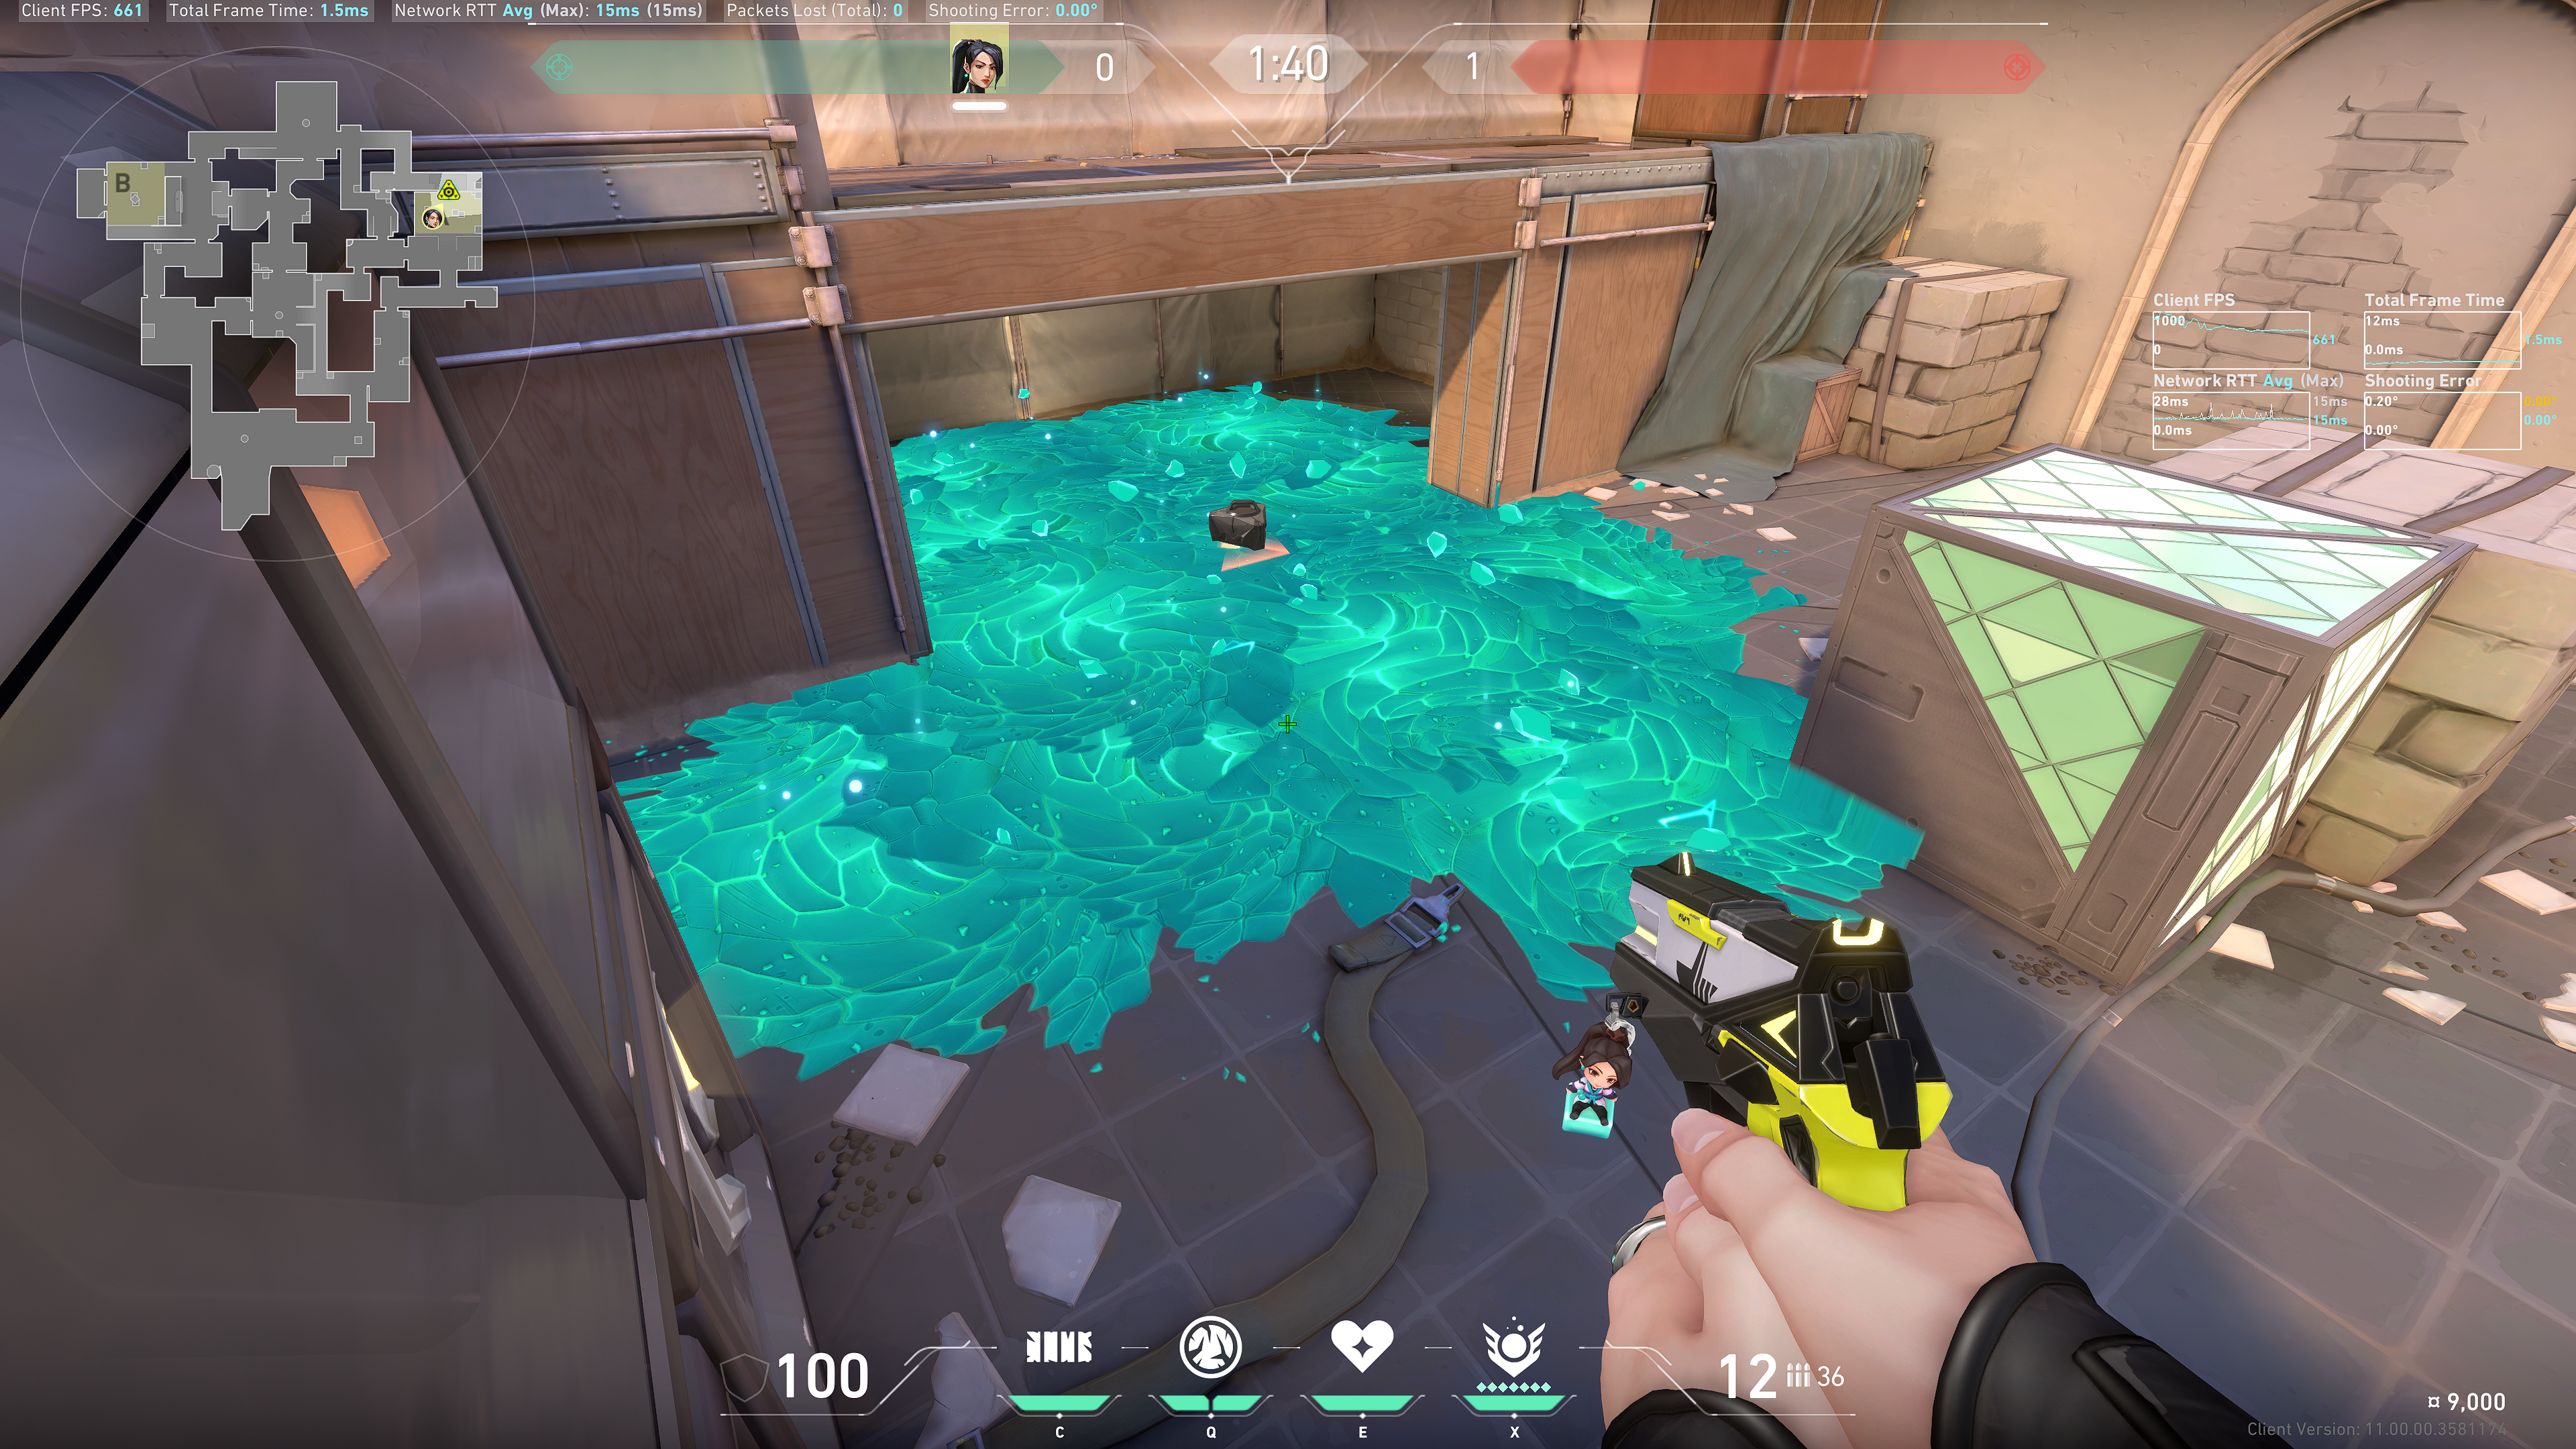
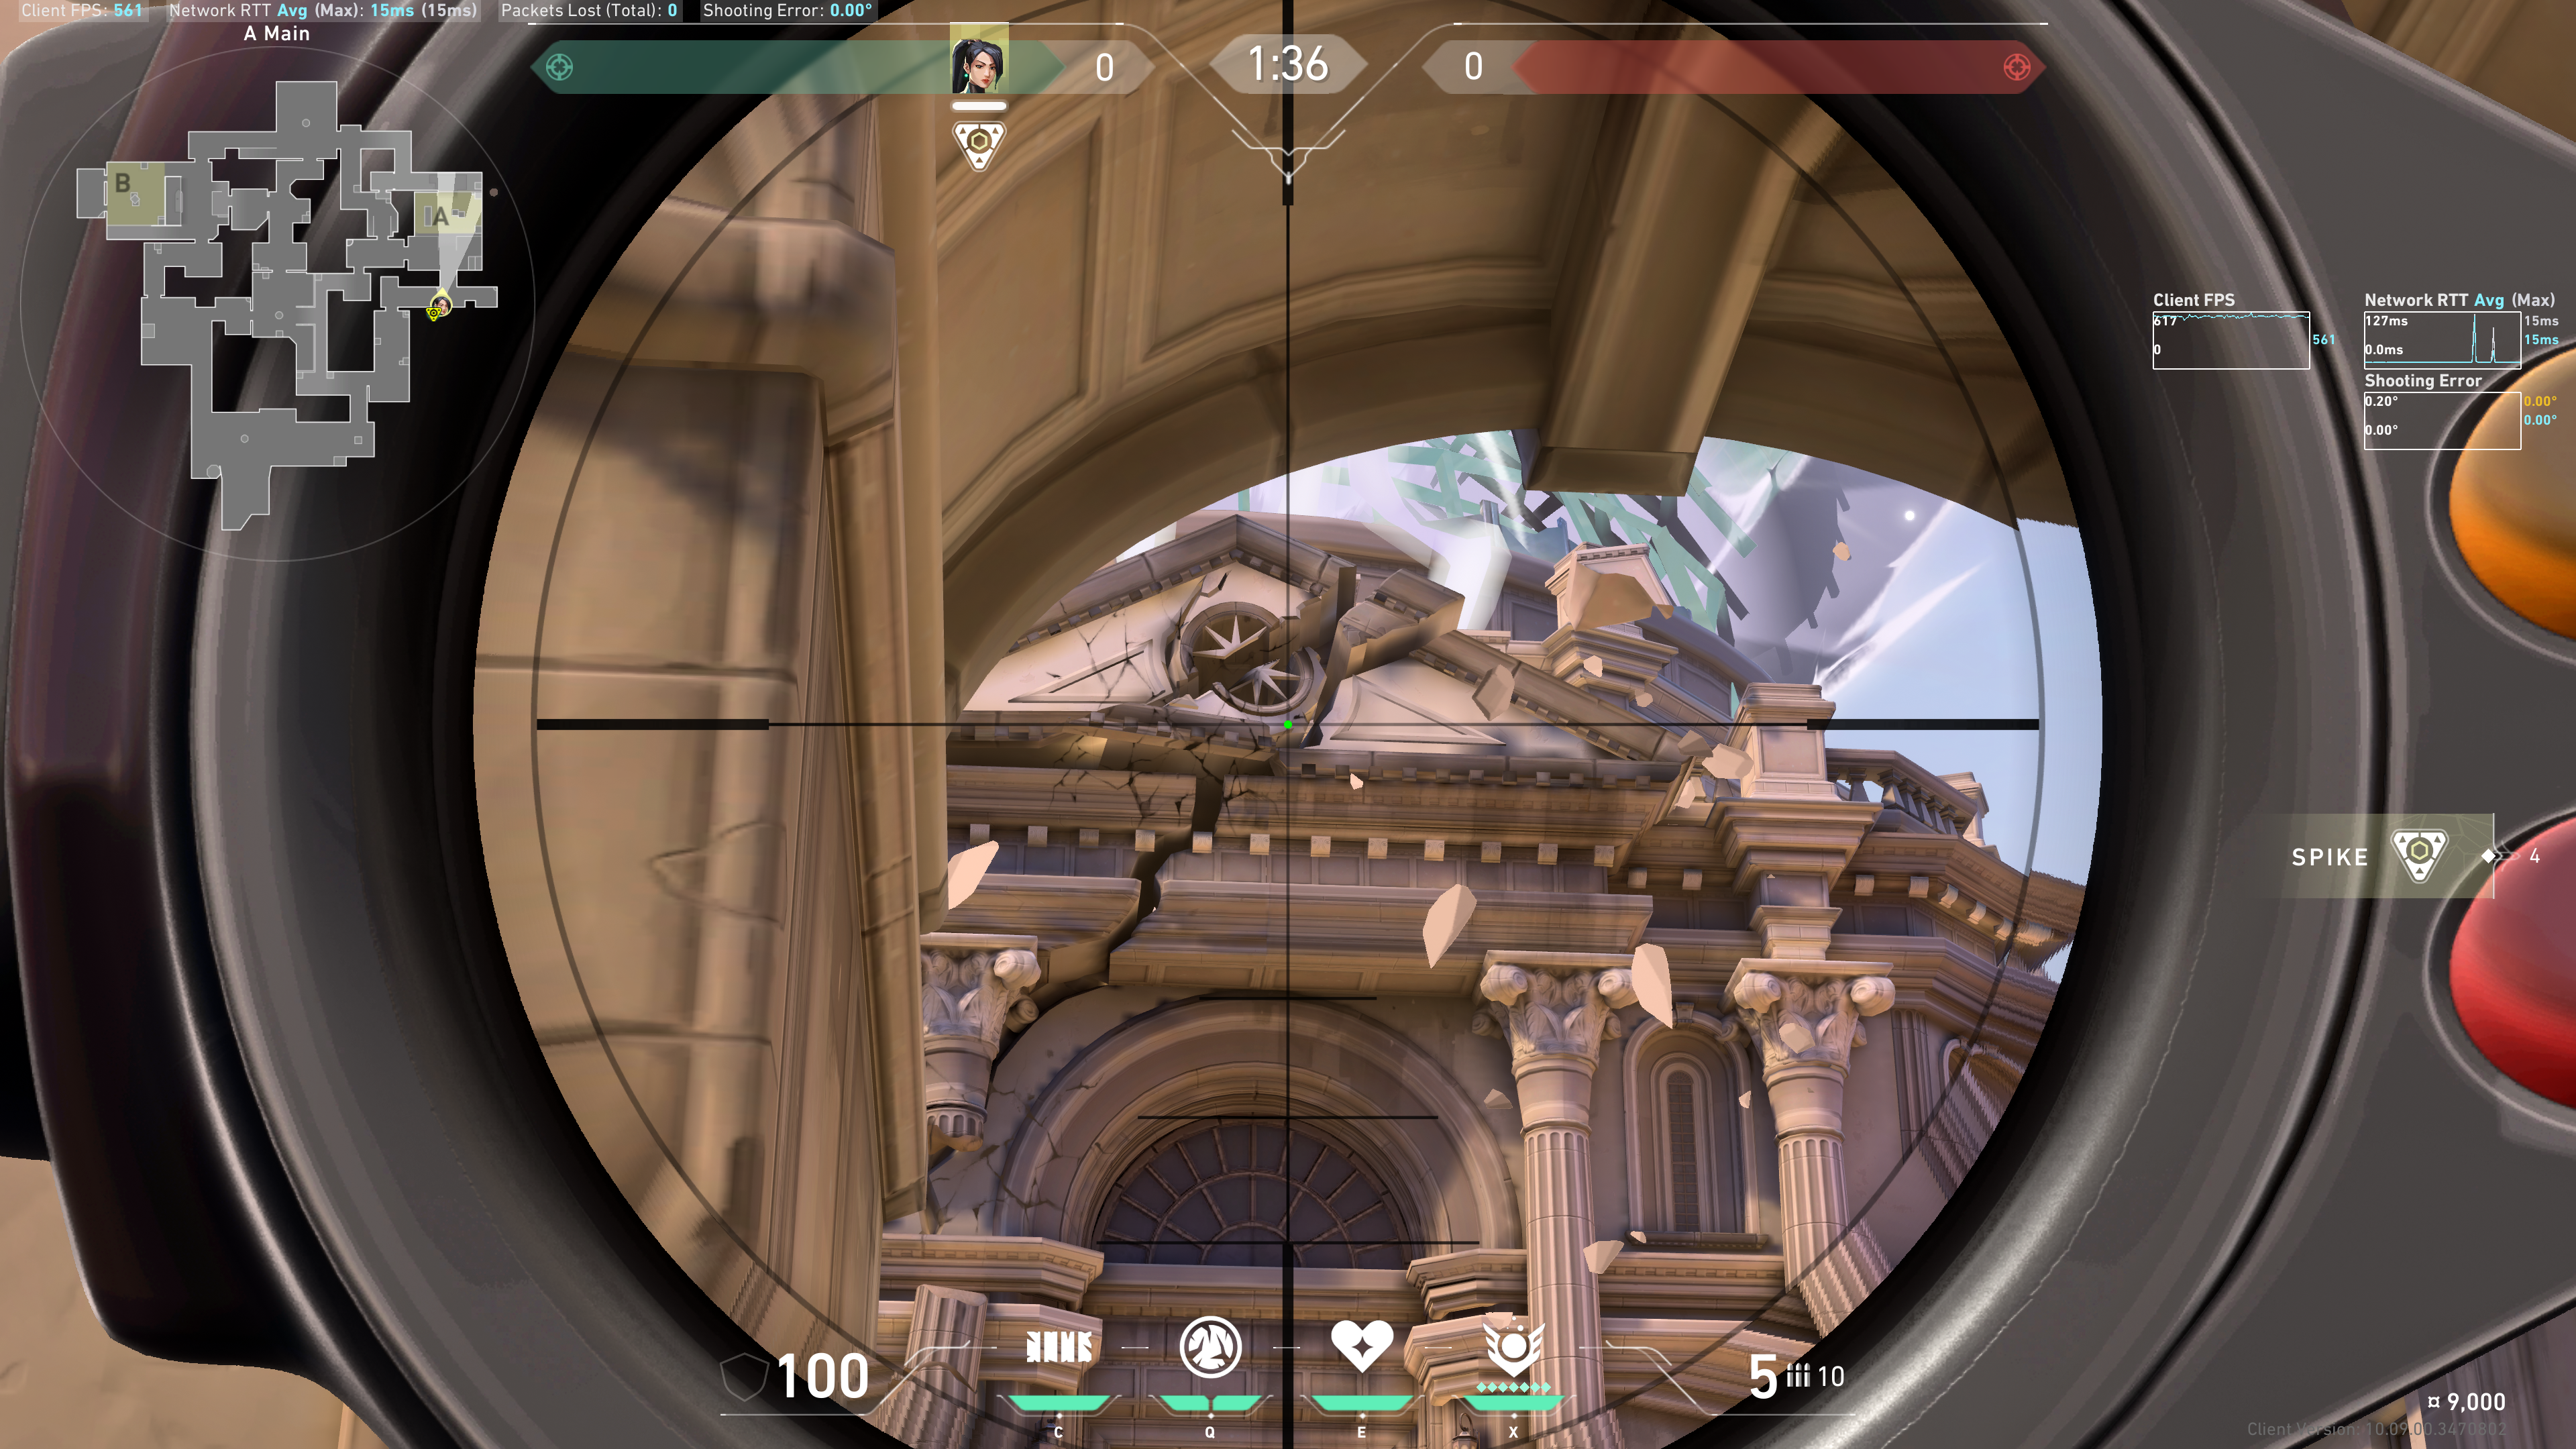
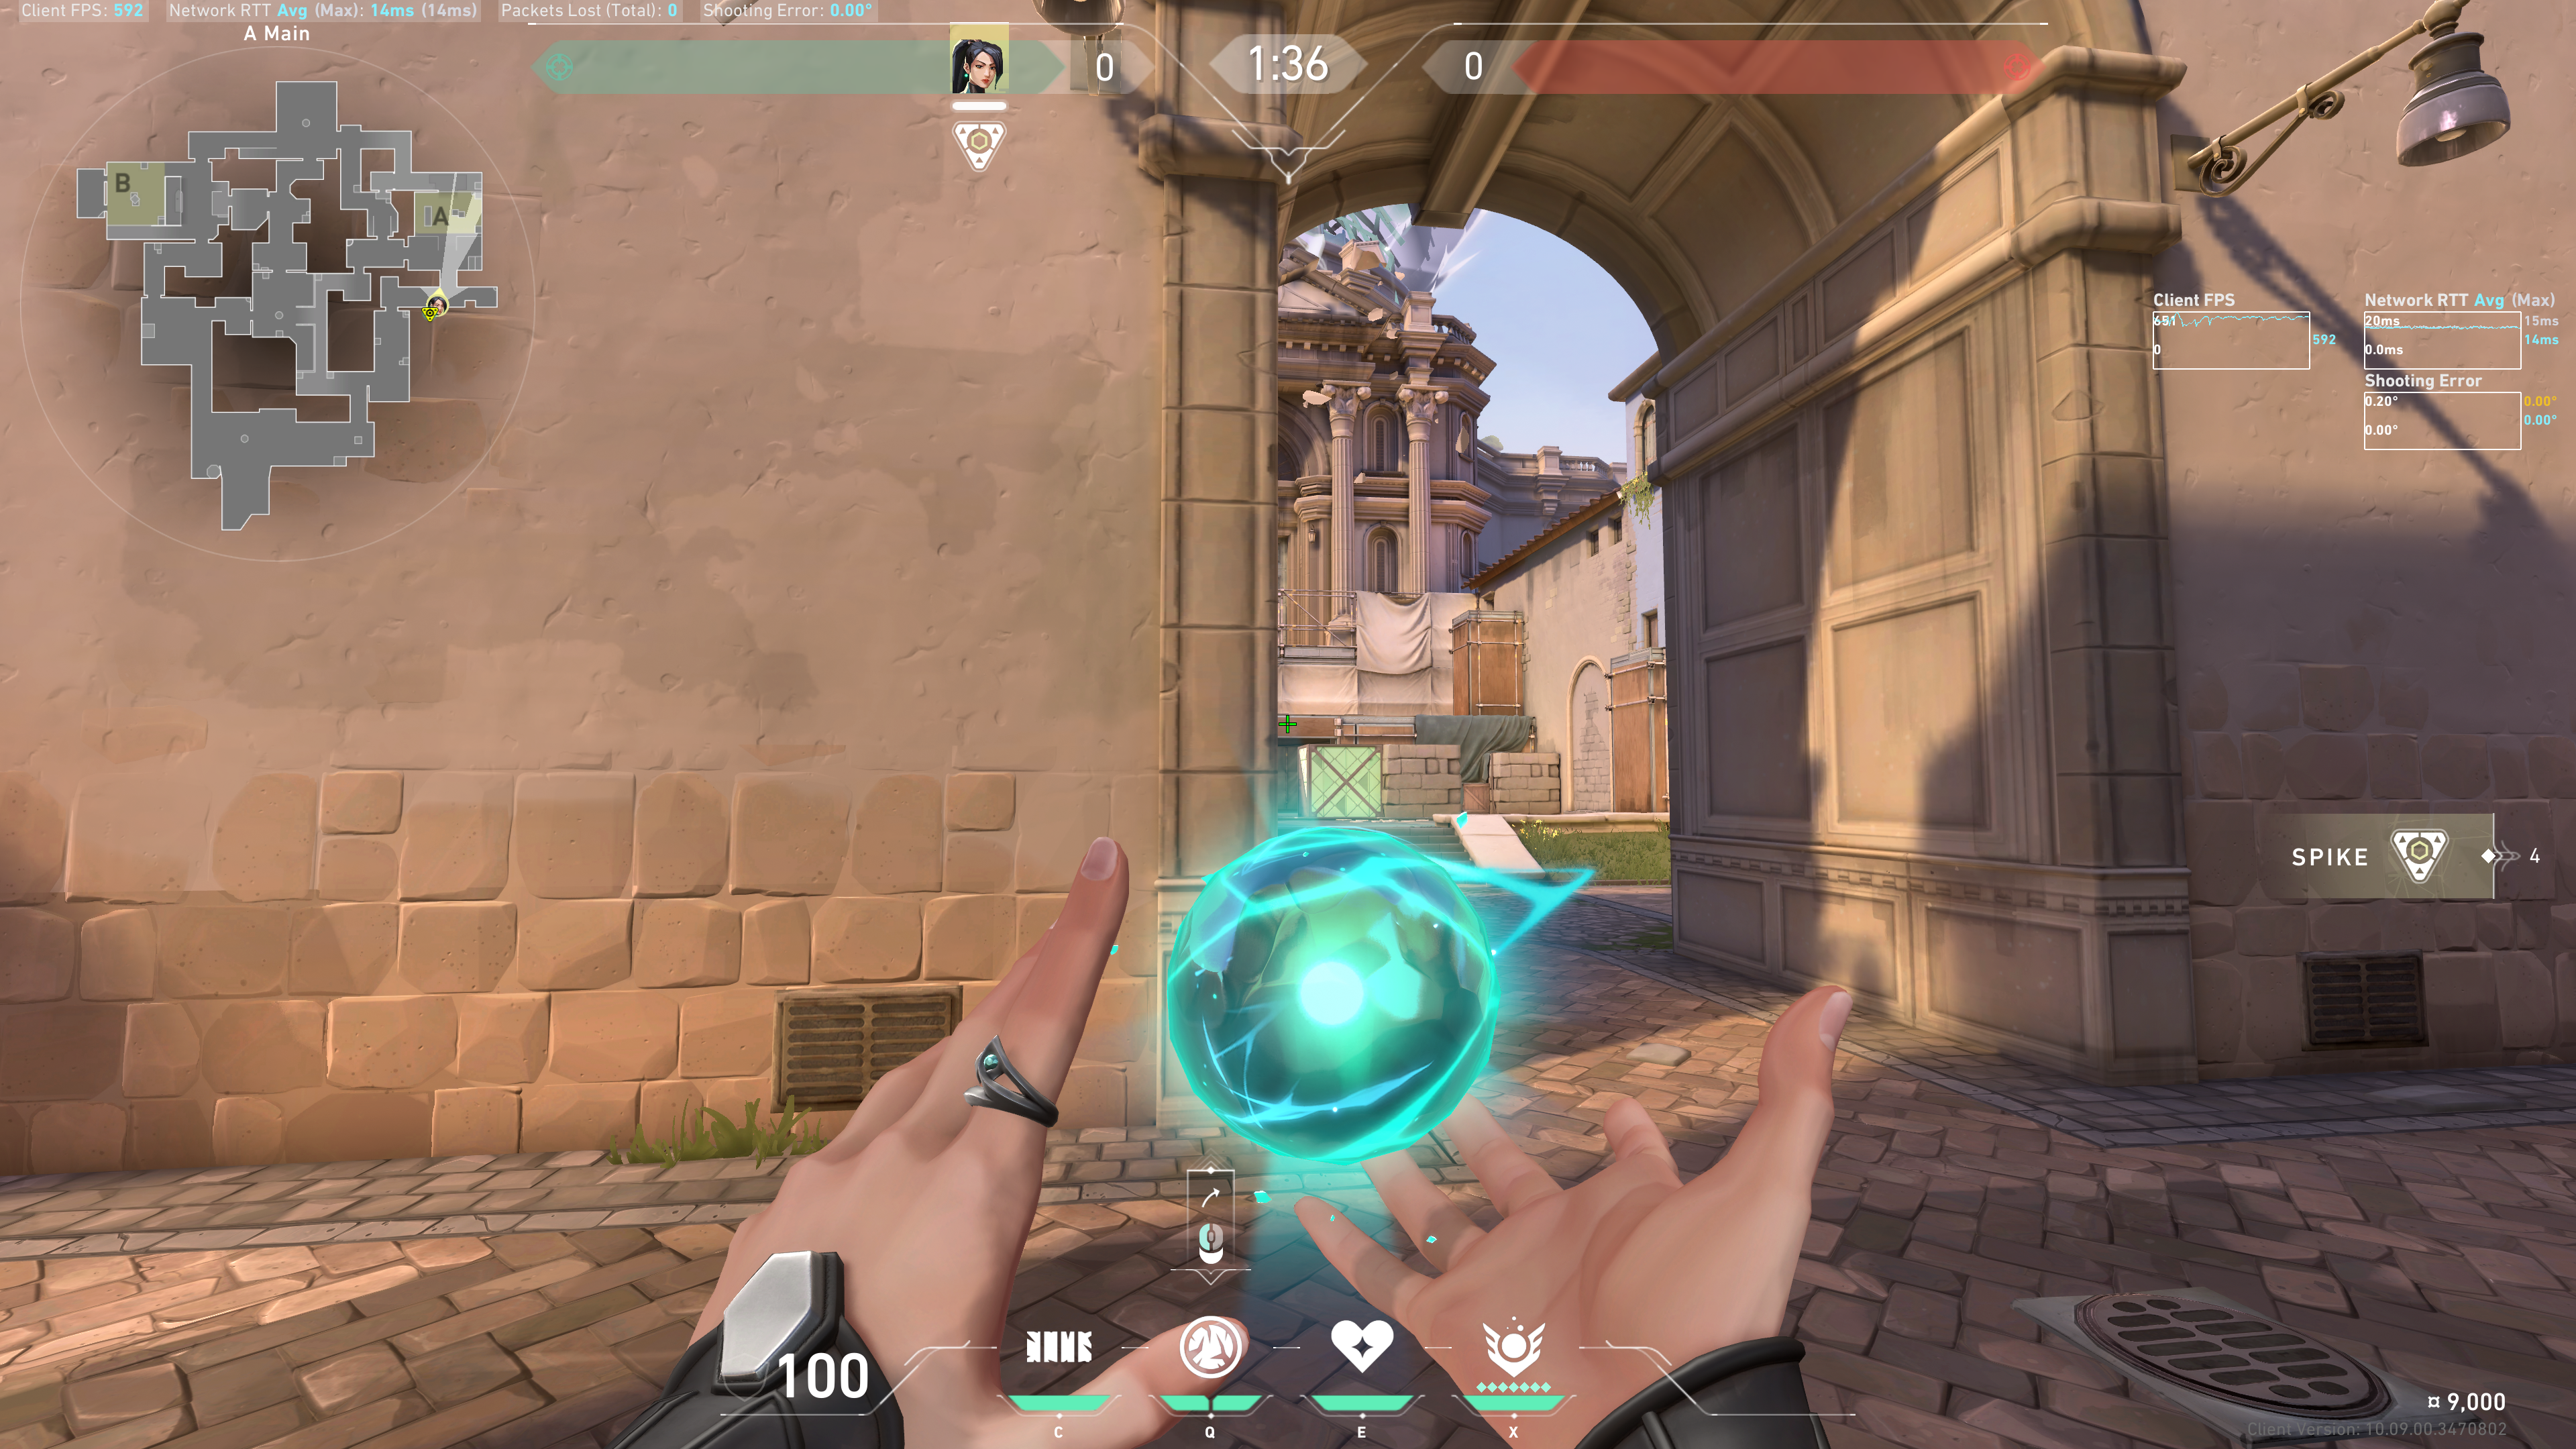
Aim at this part in the cloud:
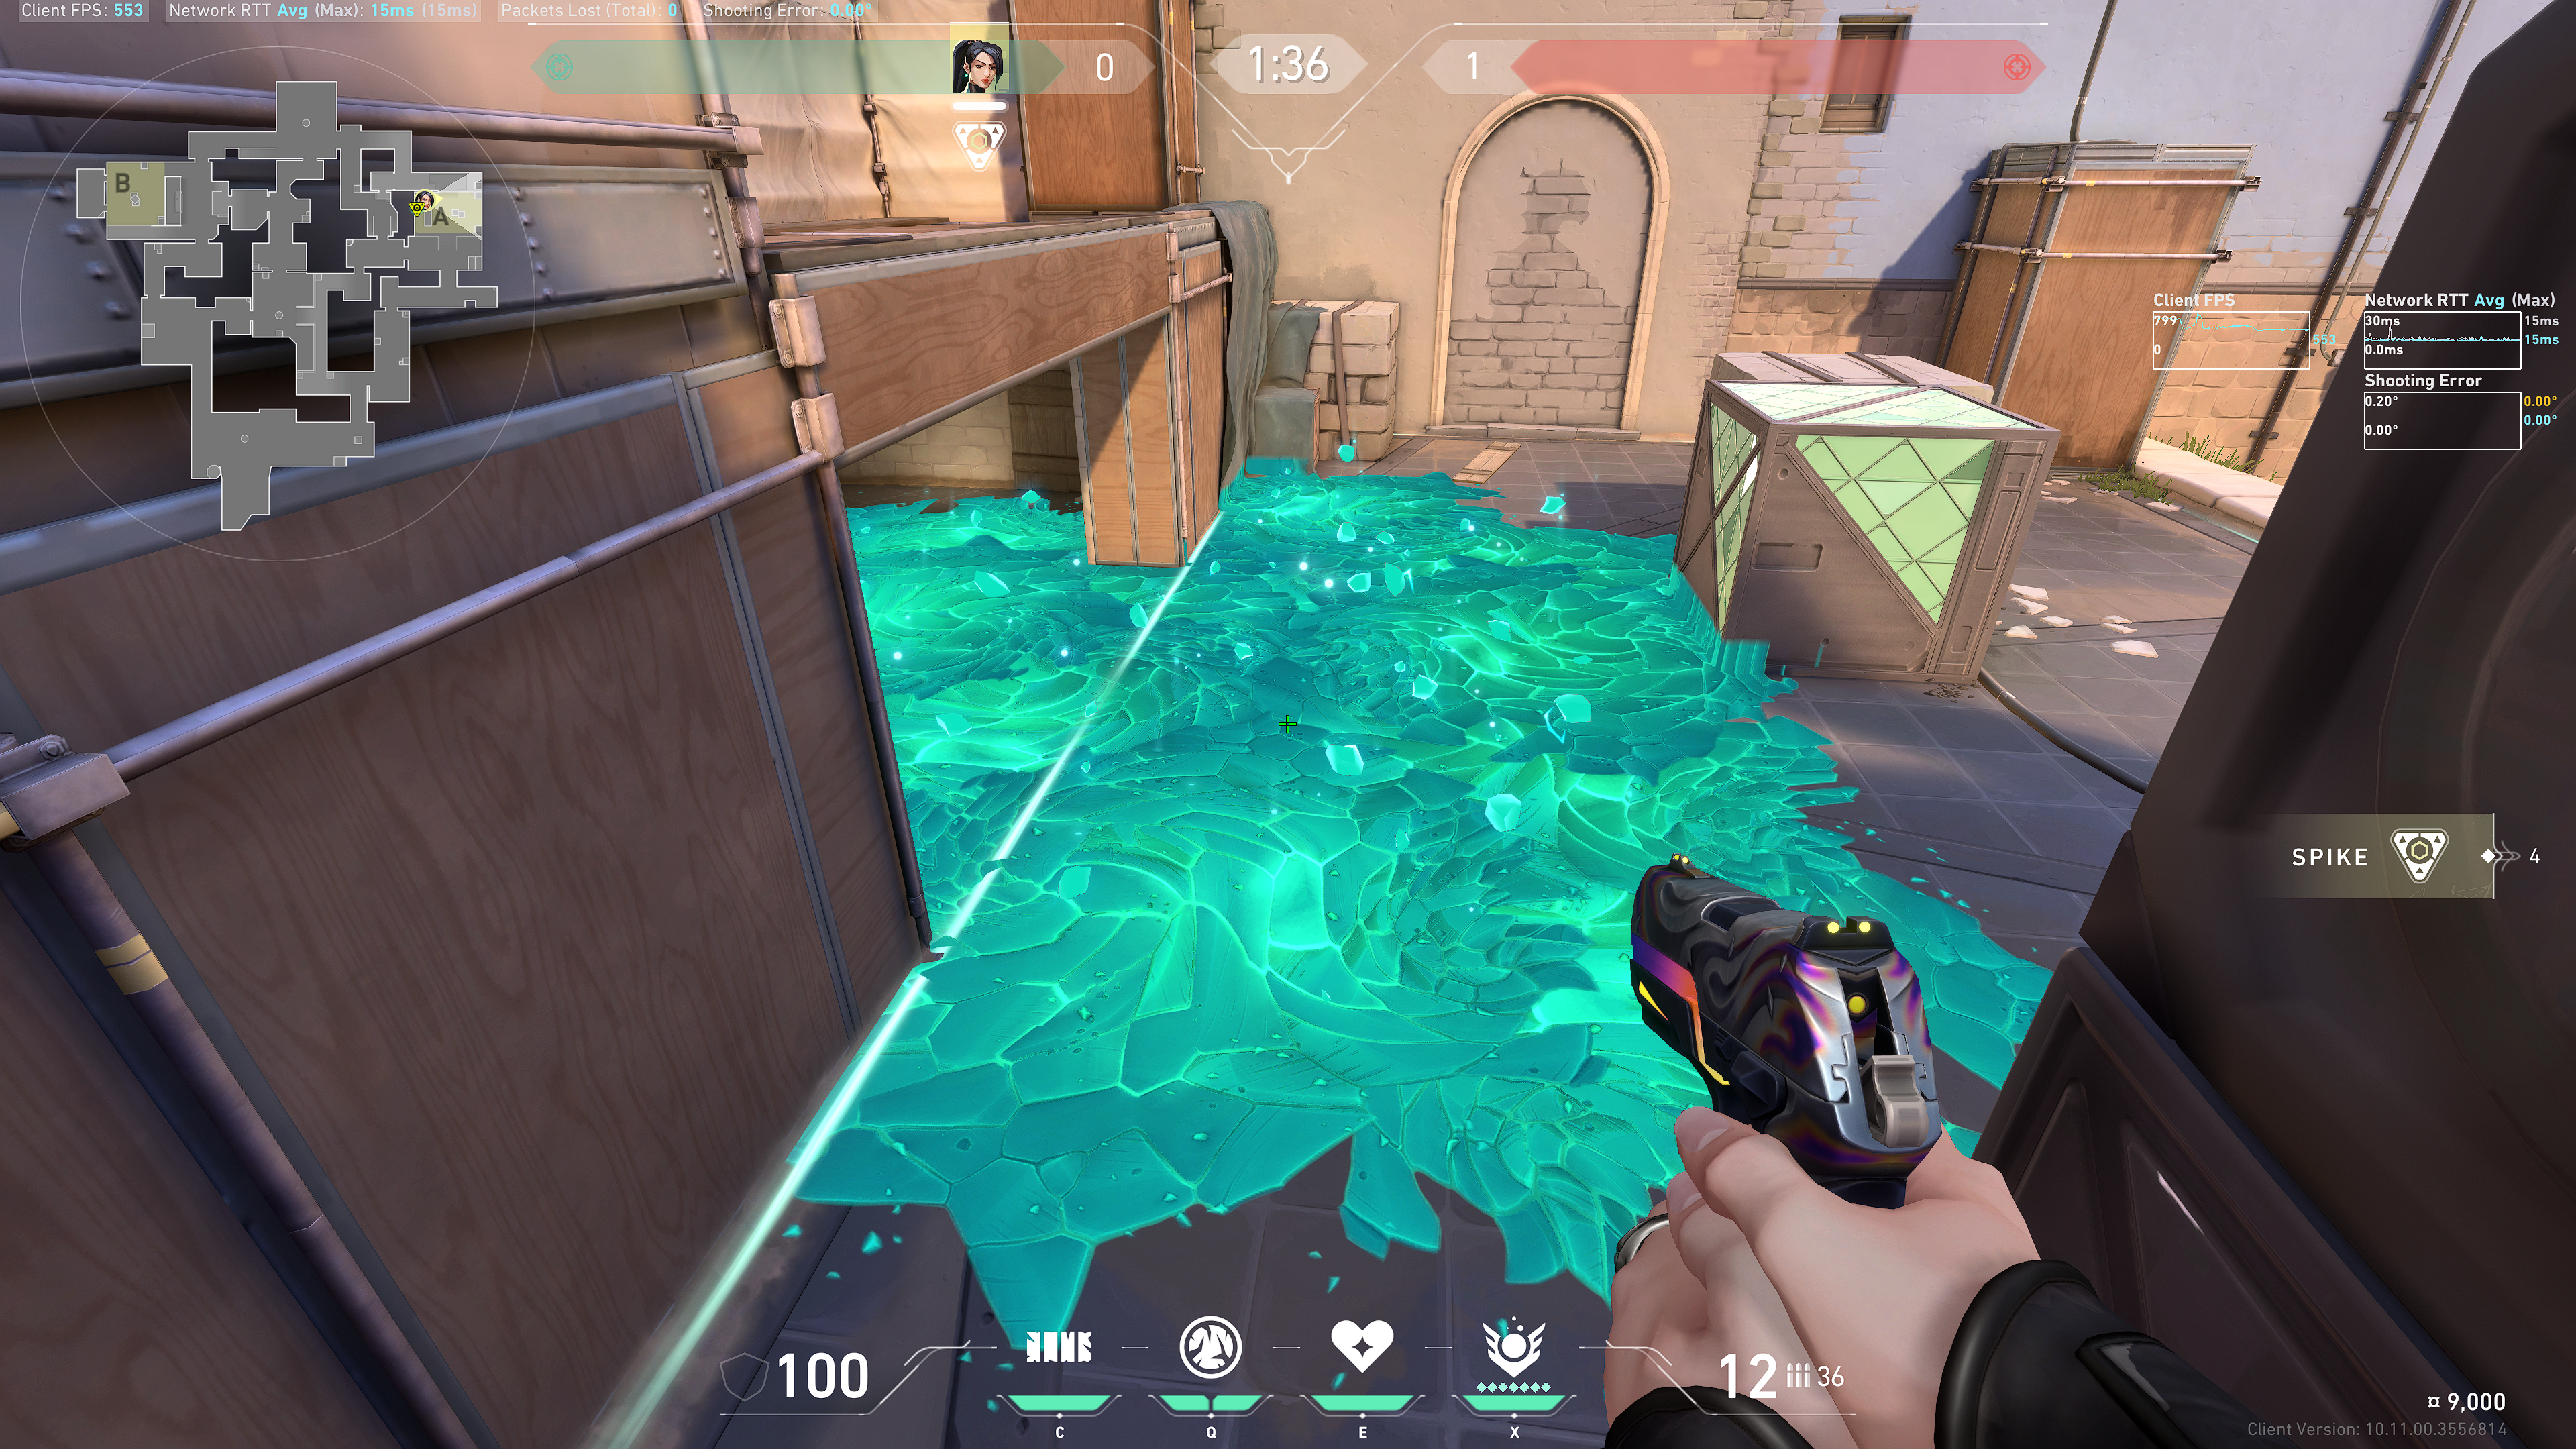
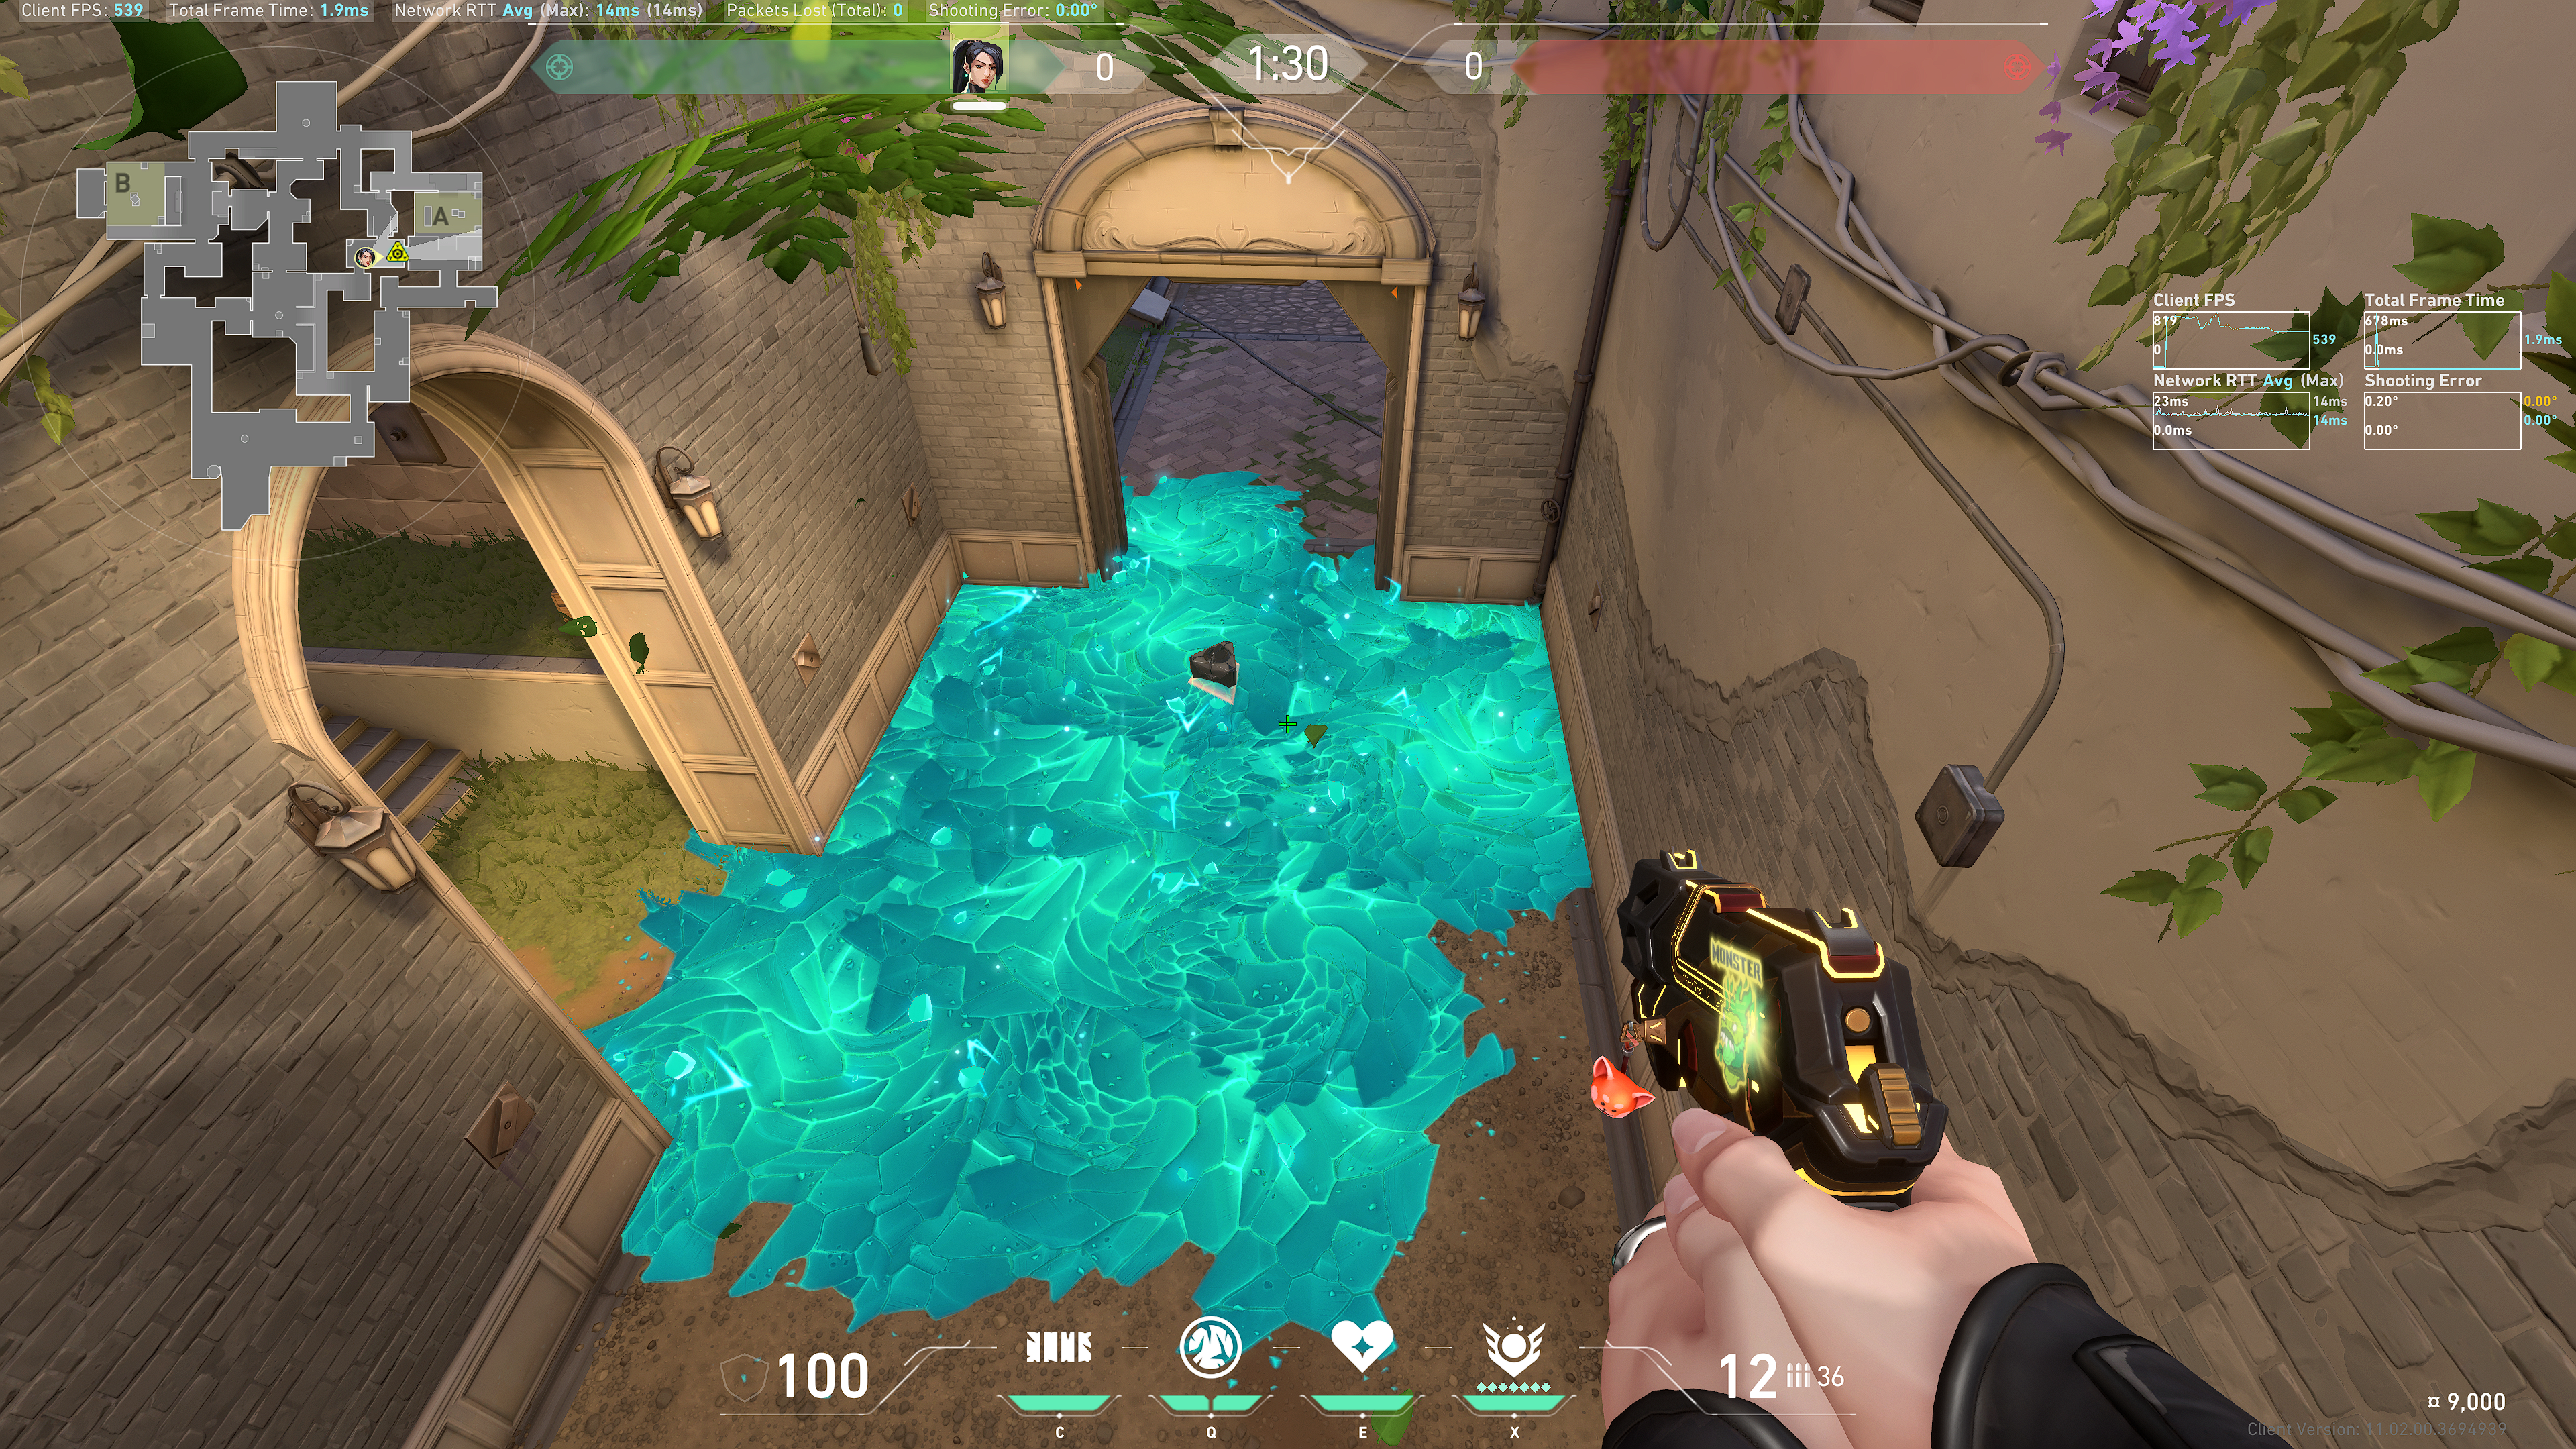
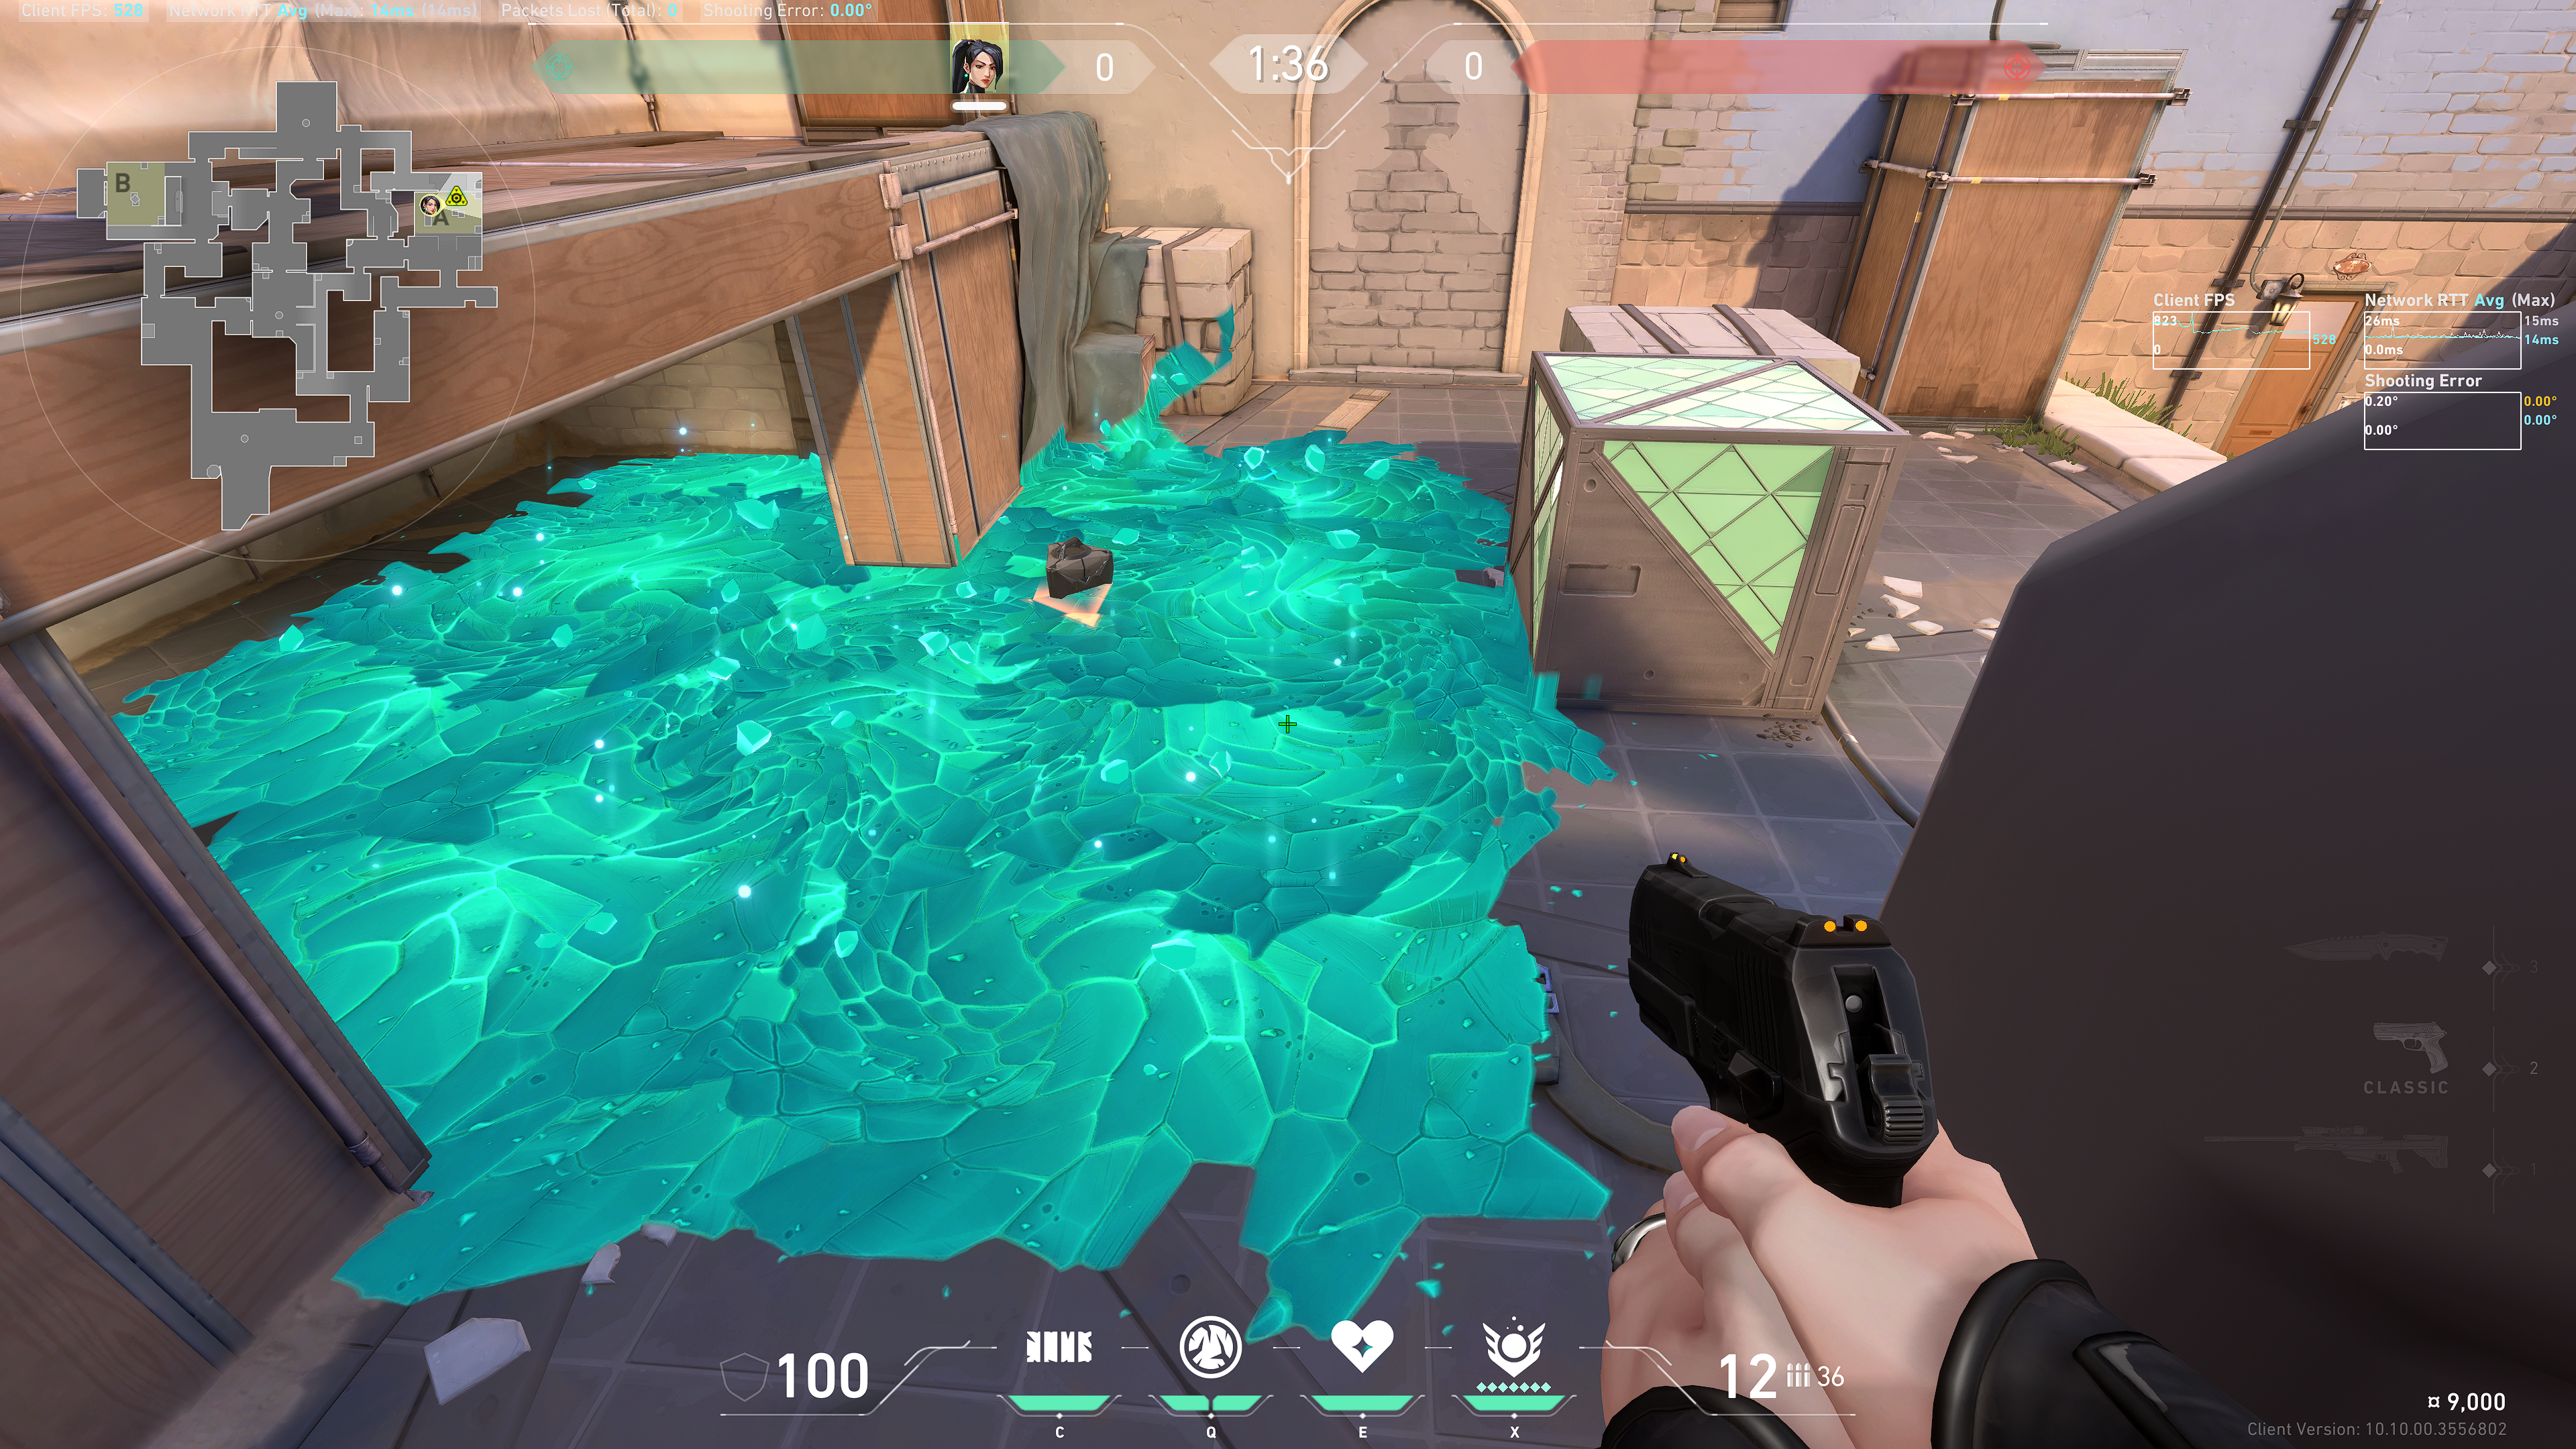
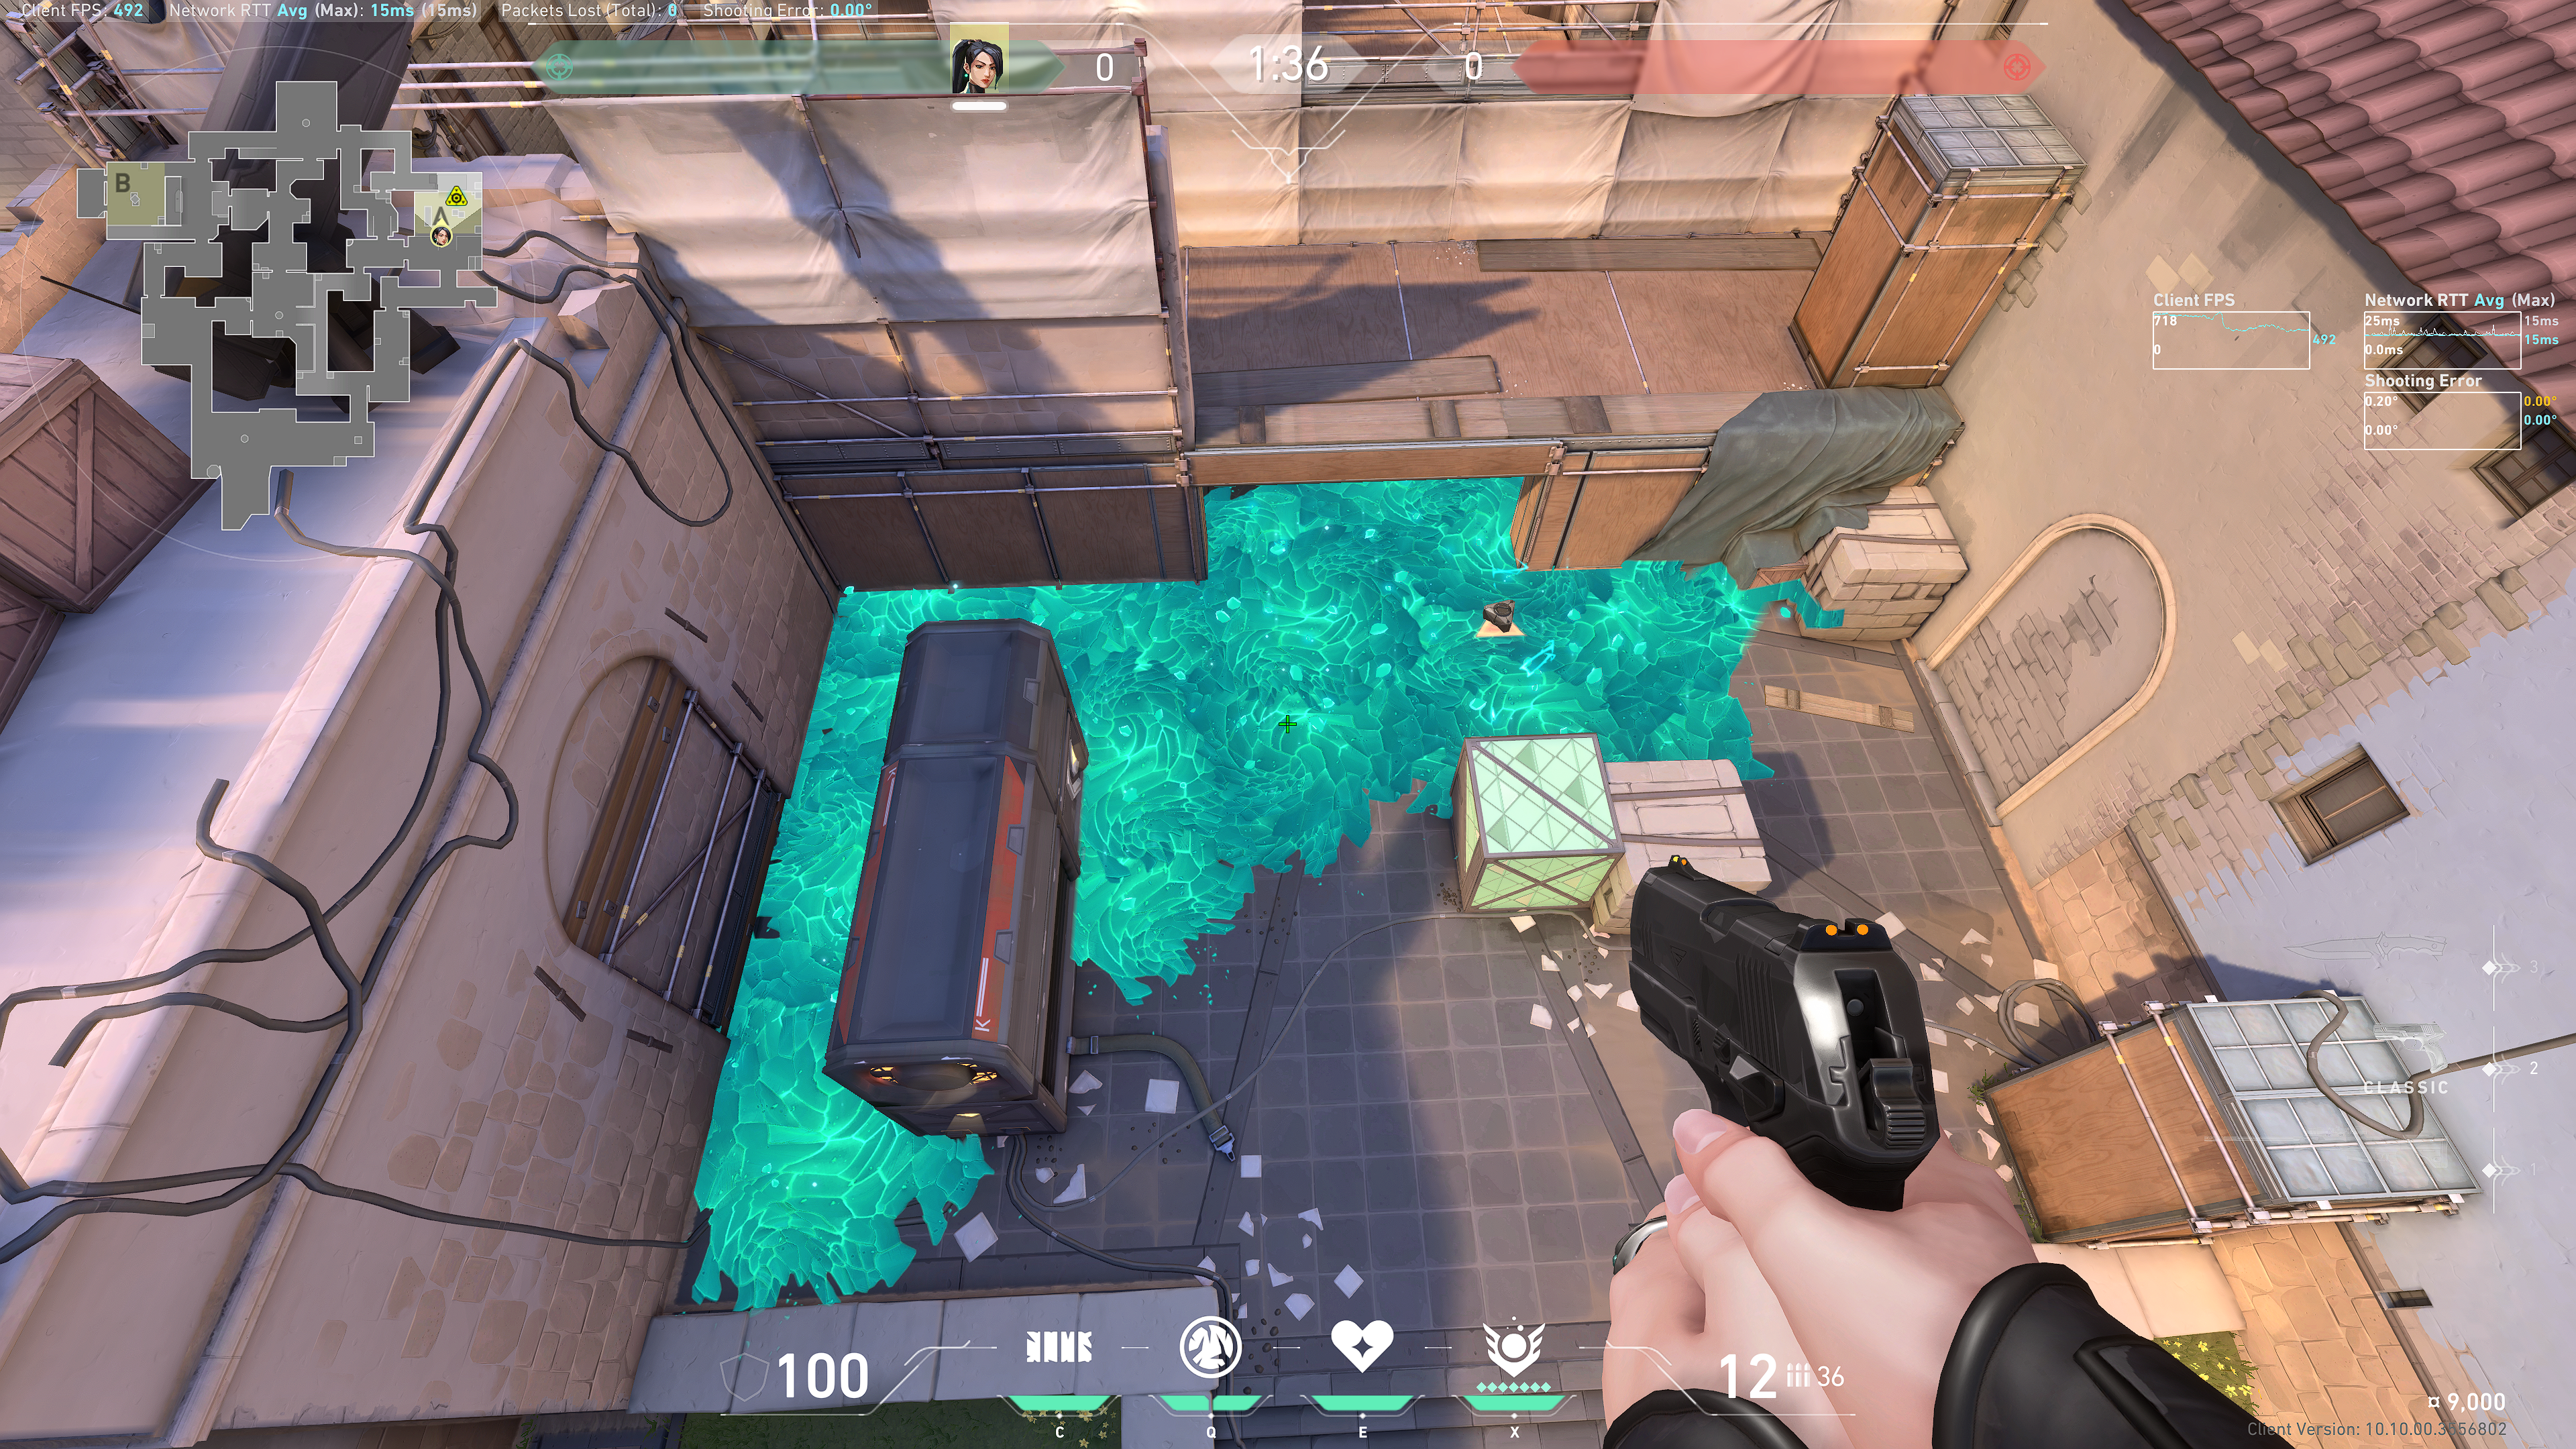
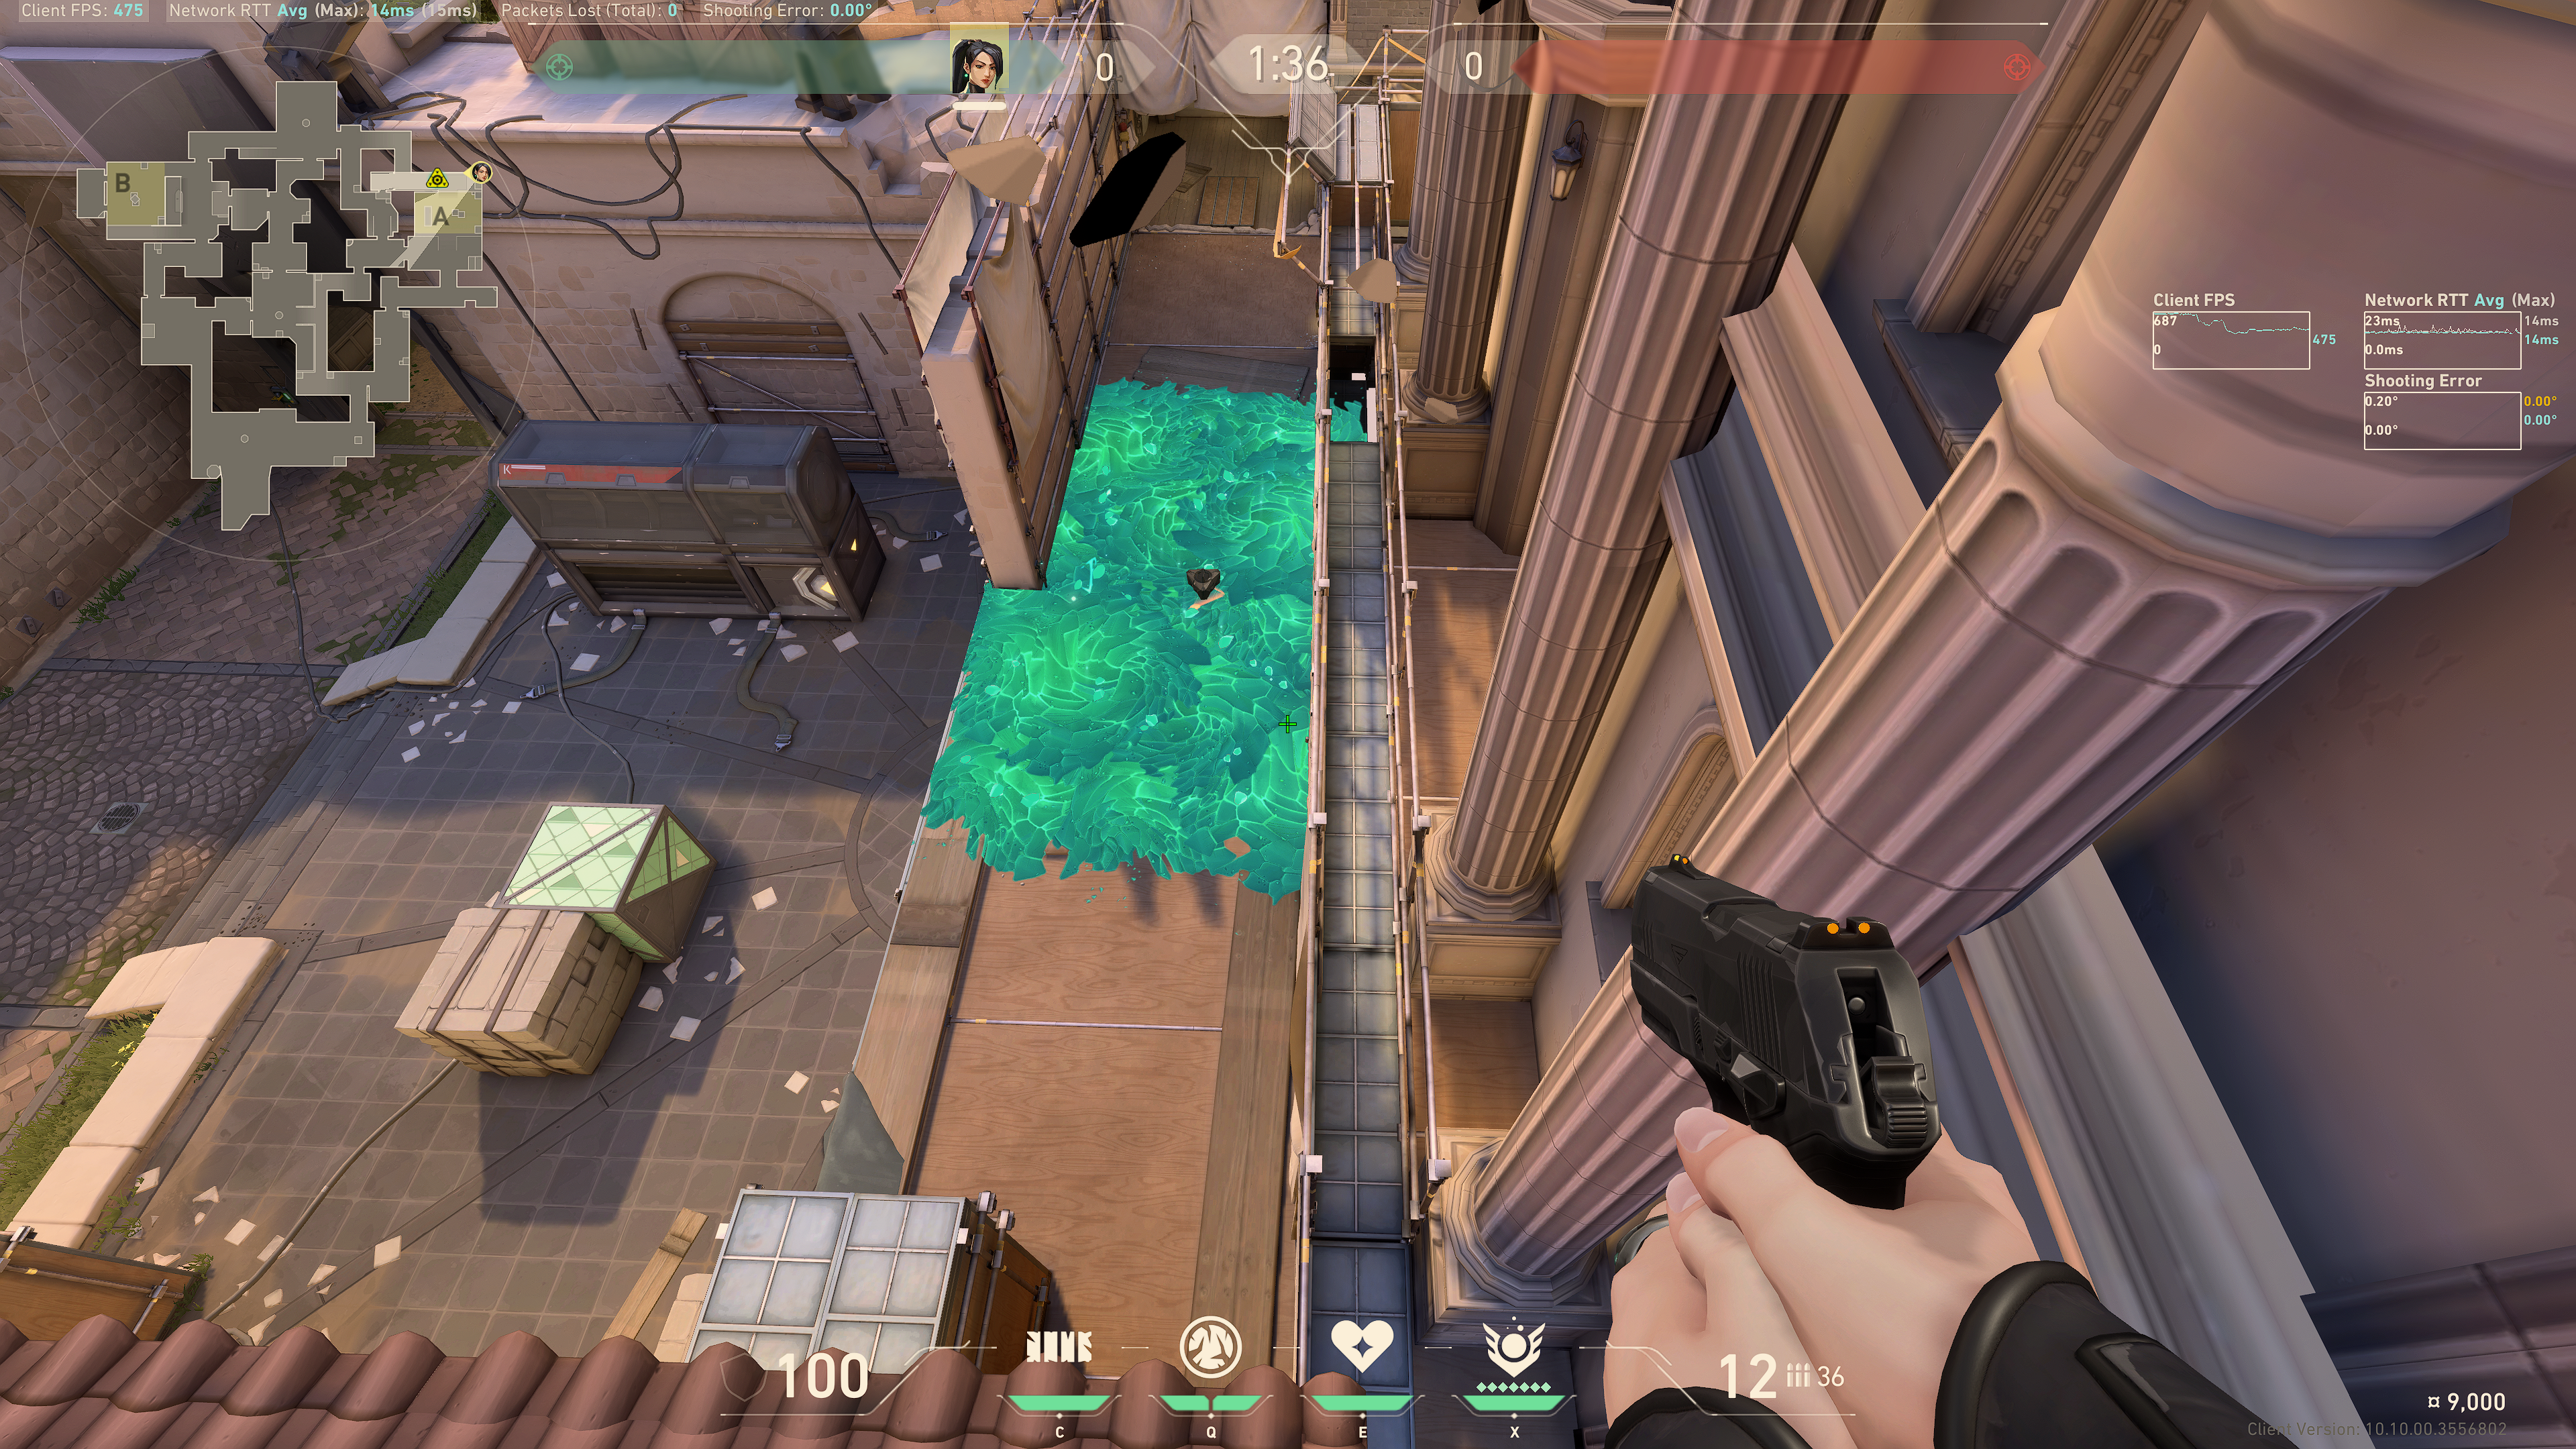
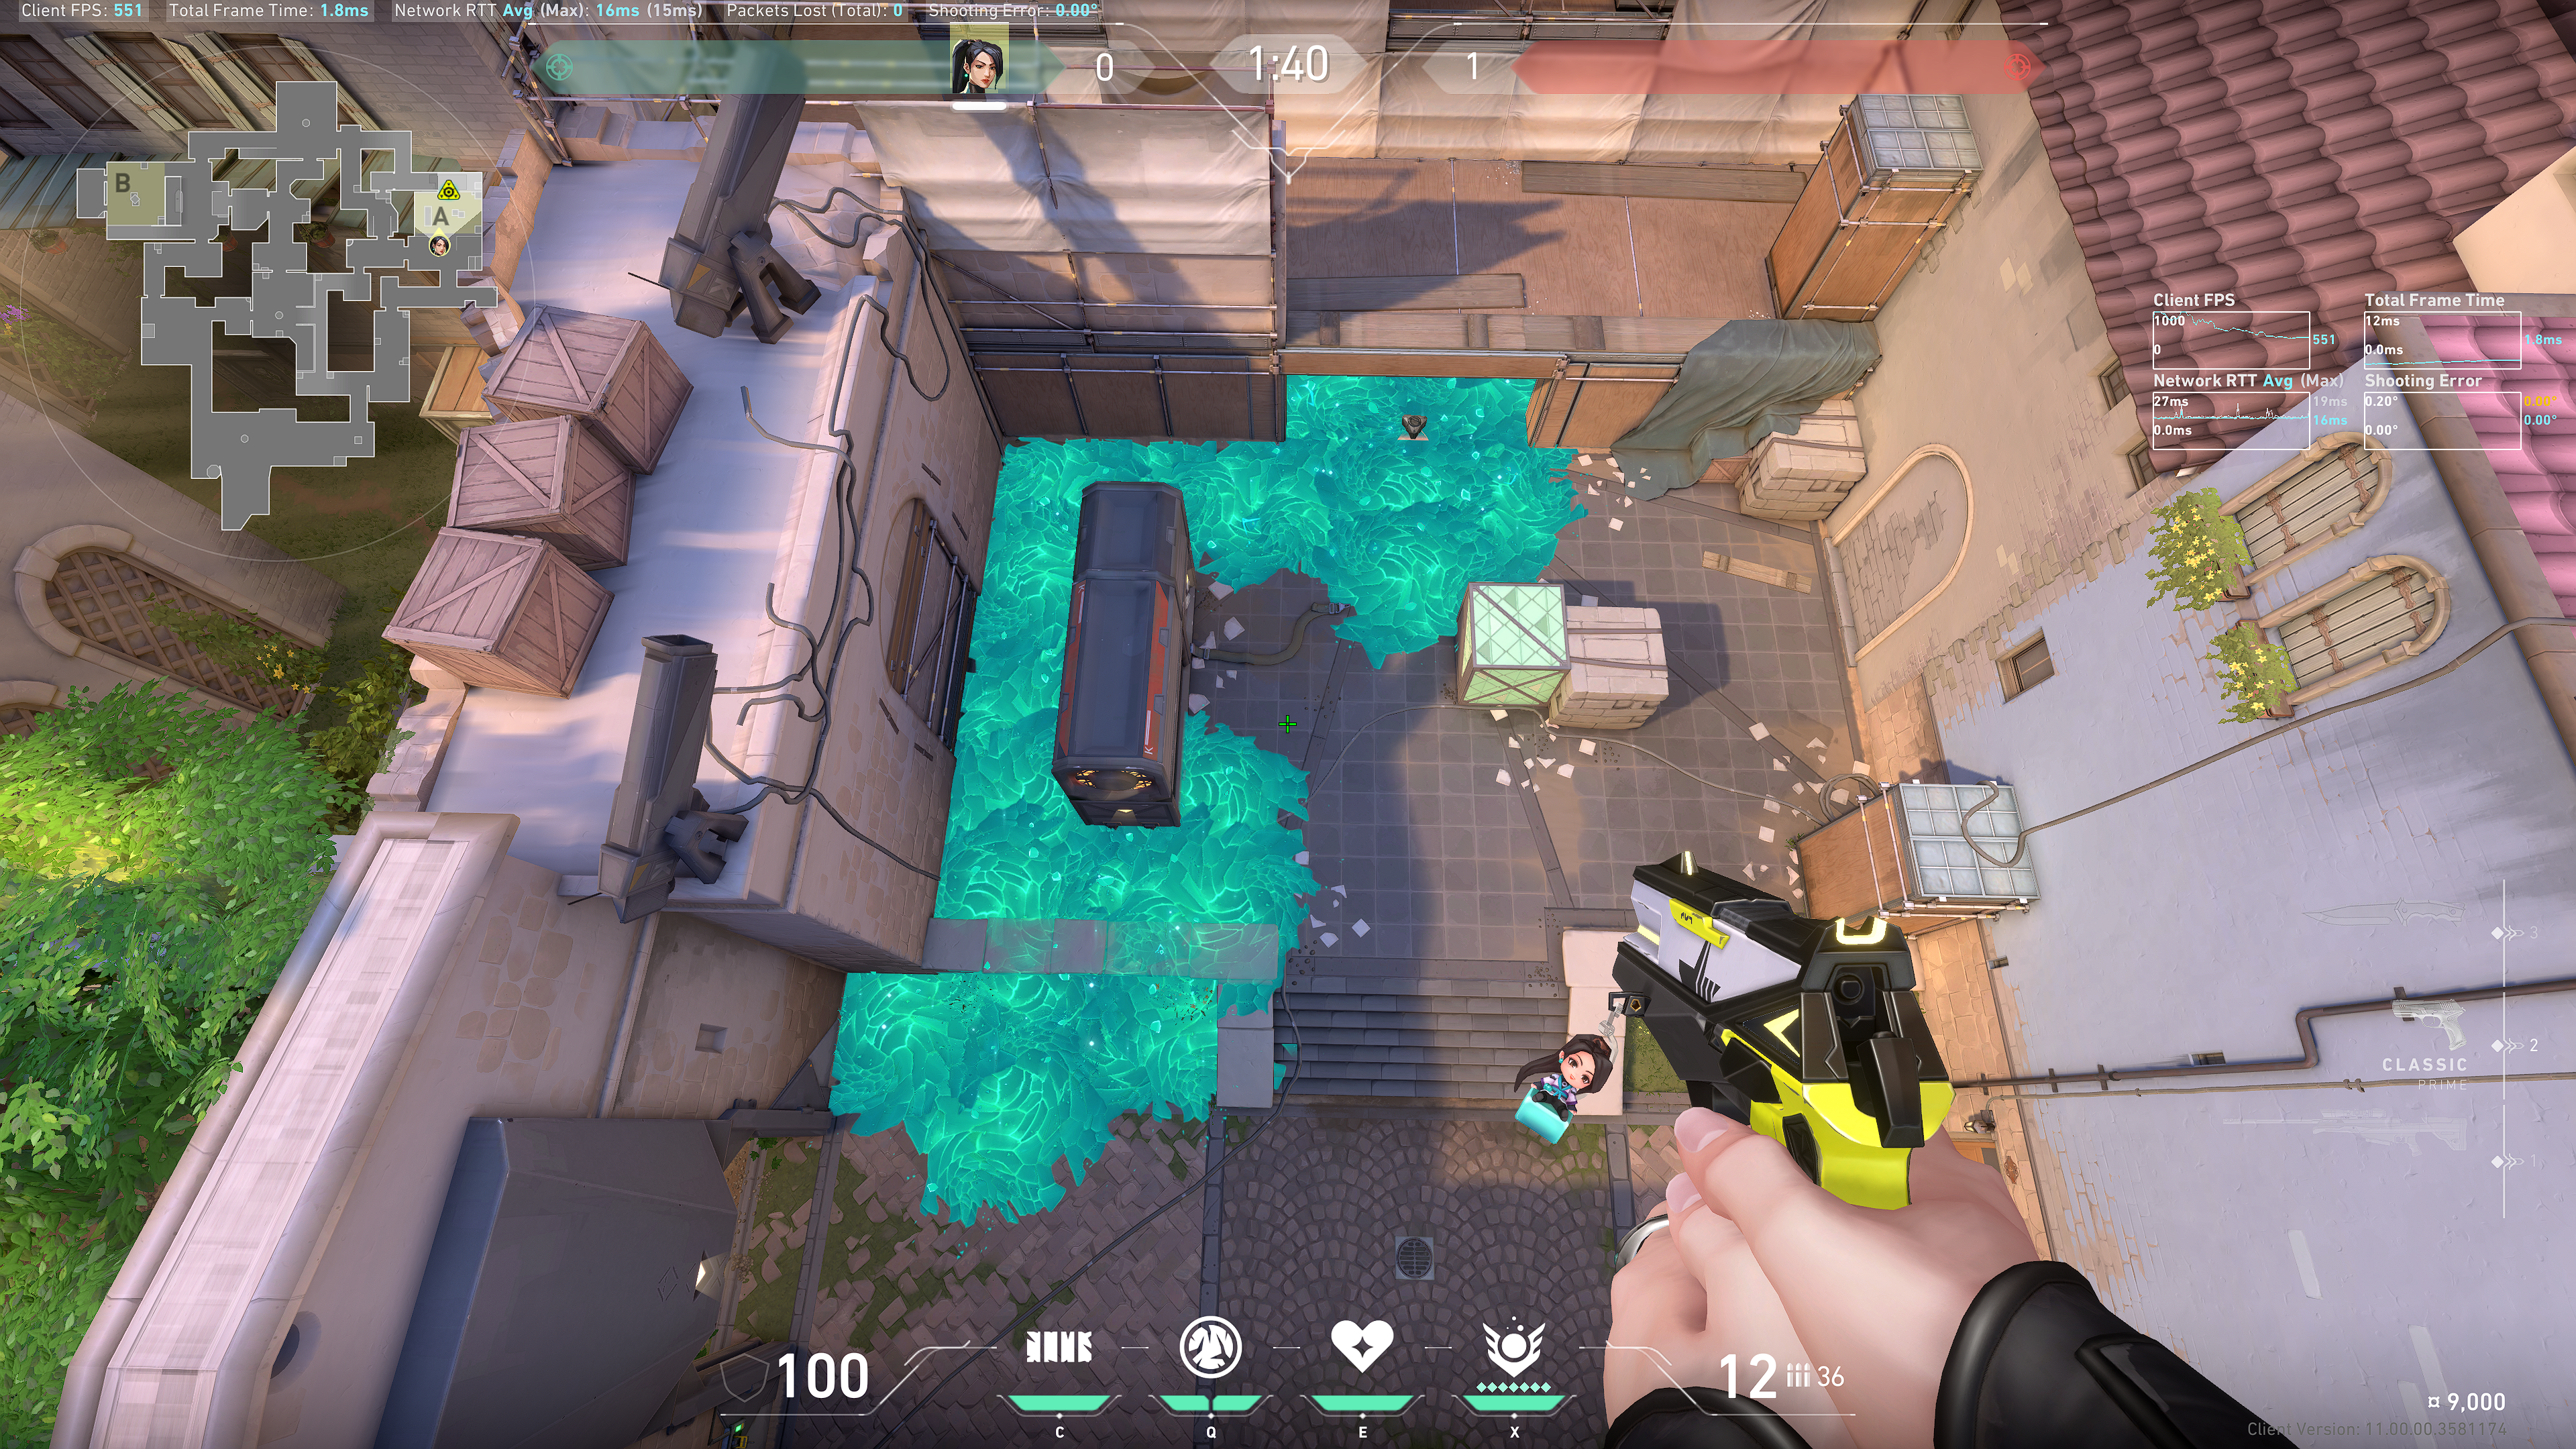
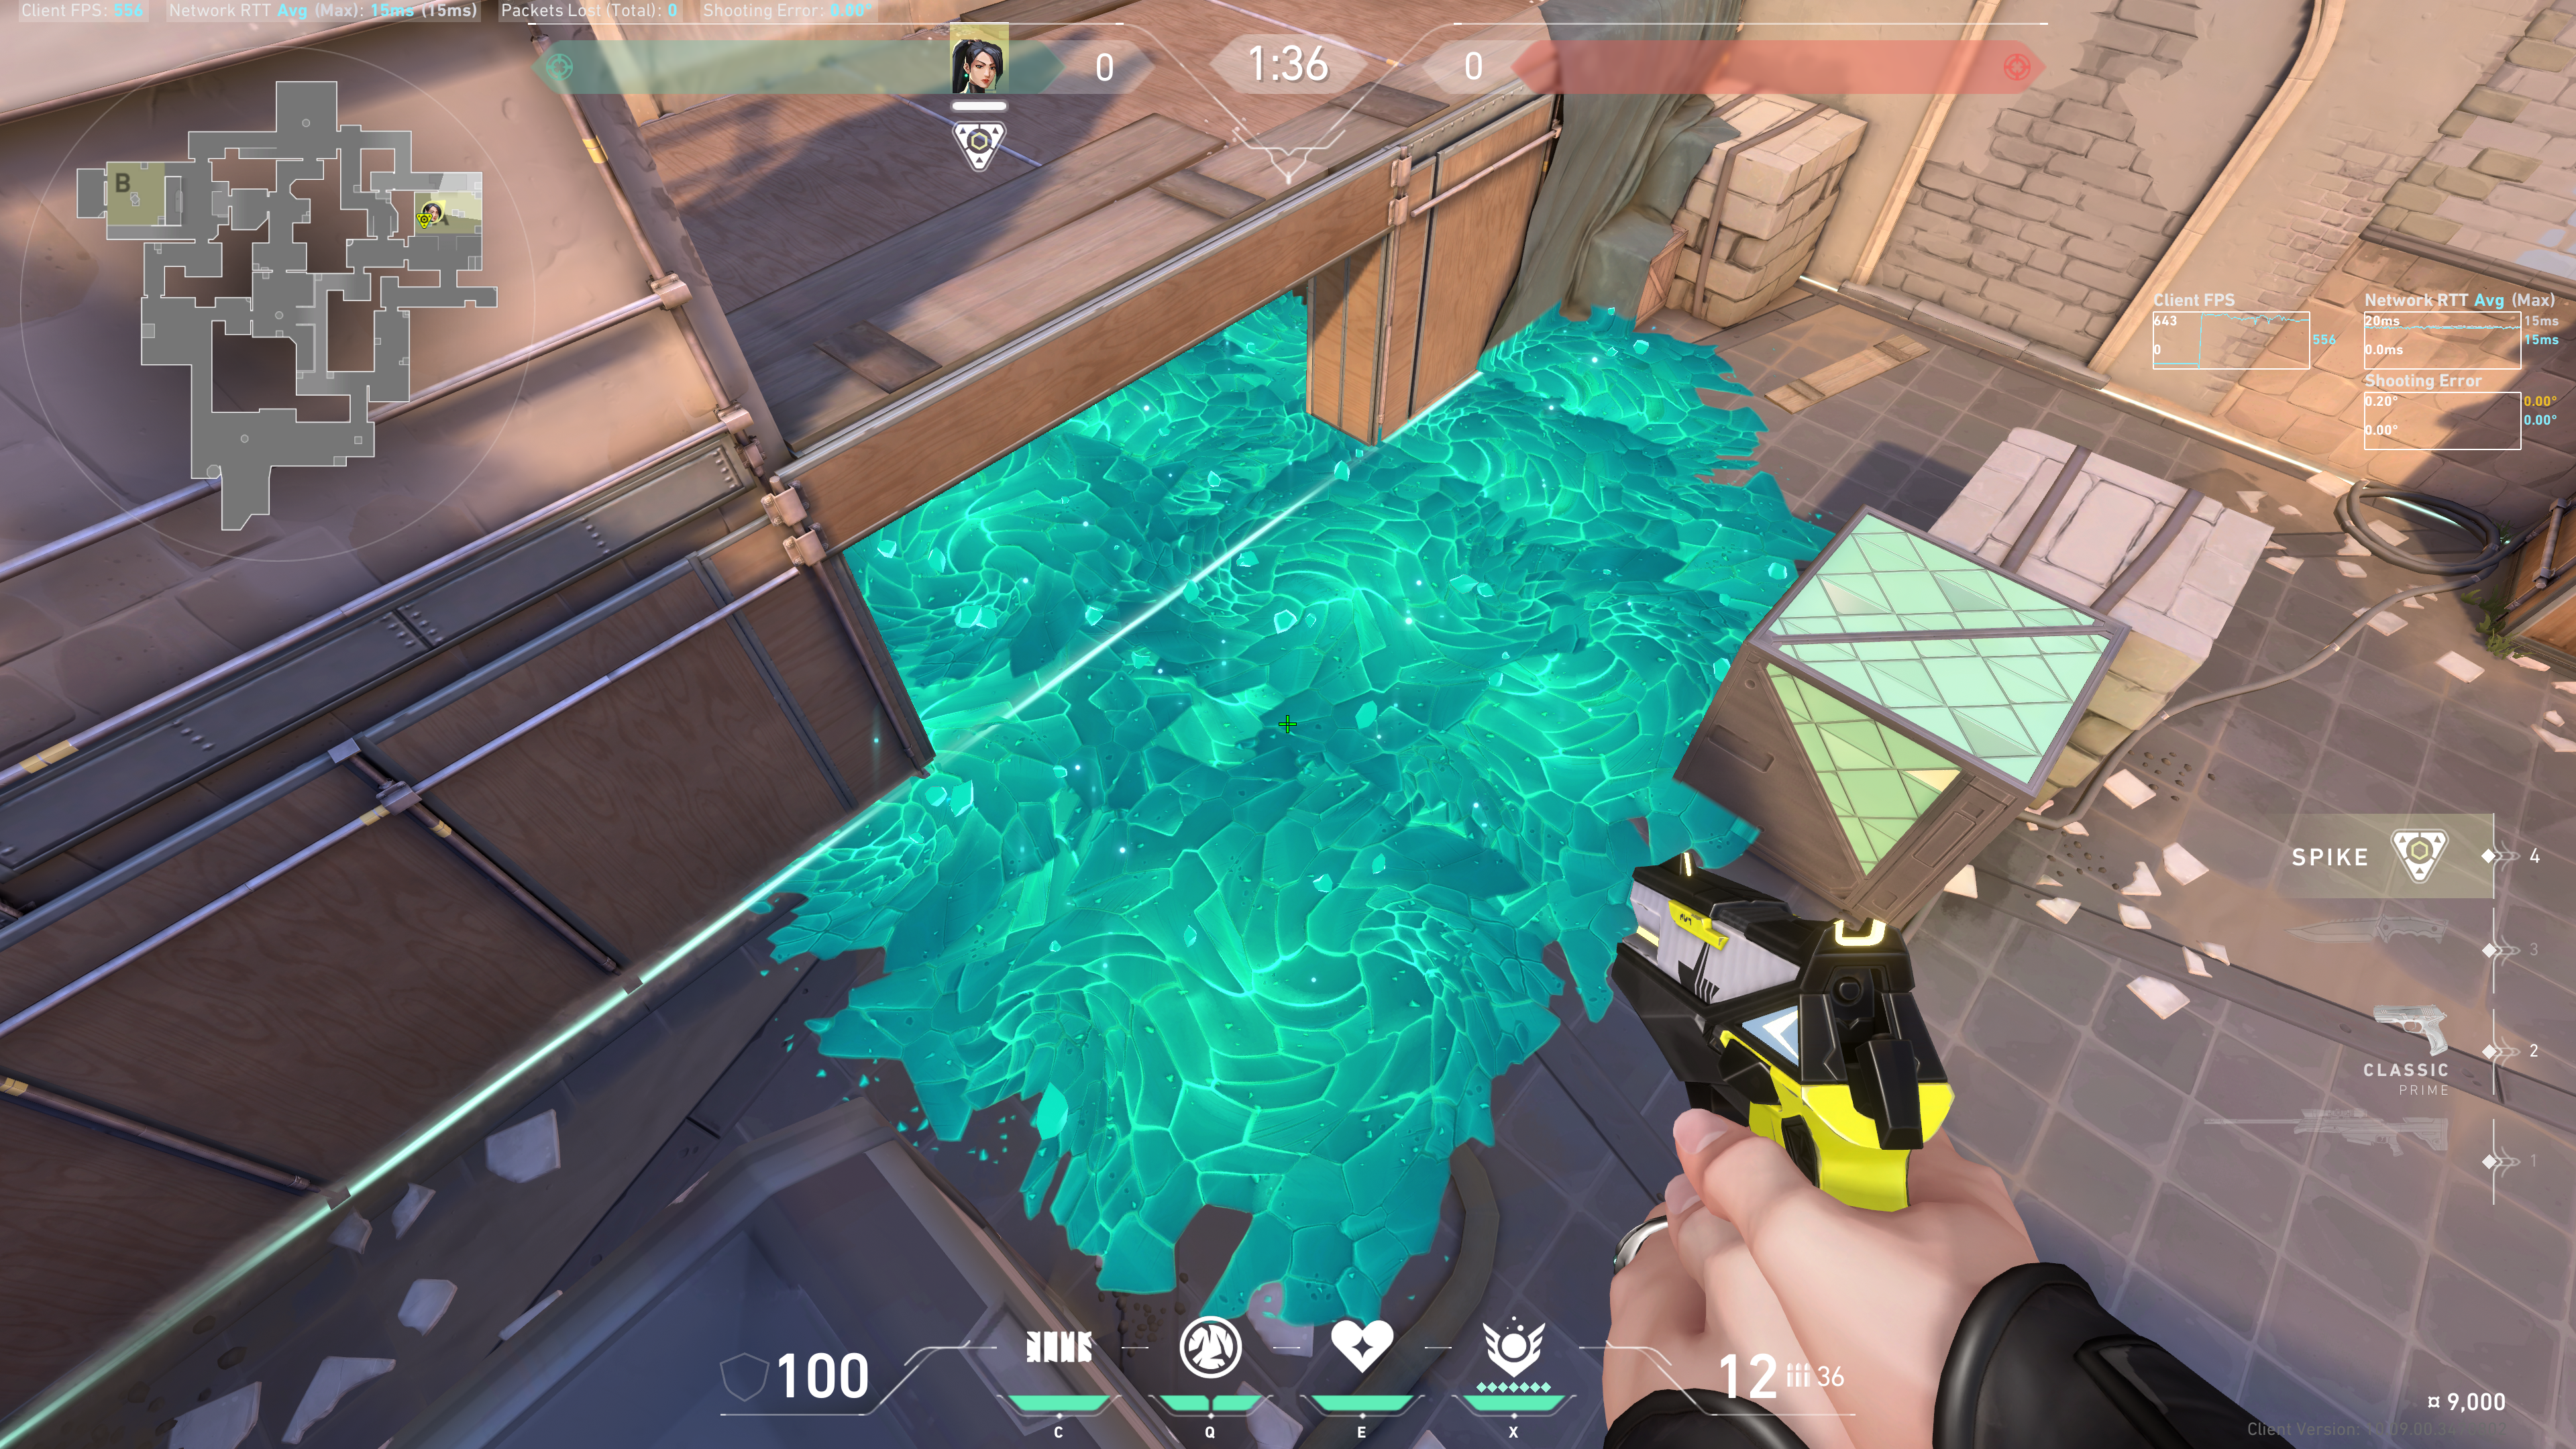
 Example result:
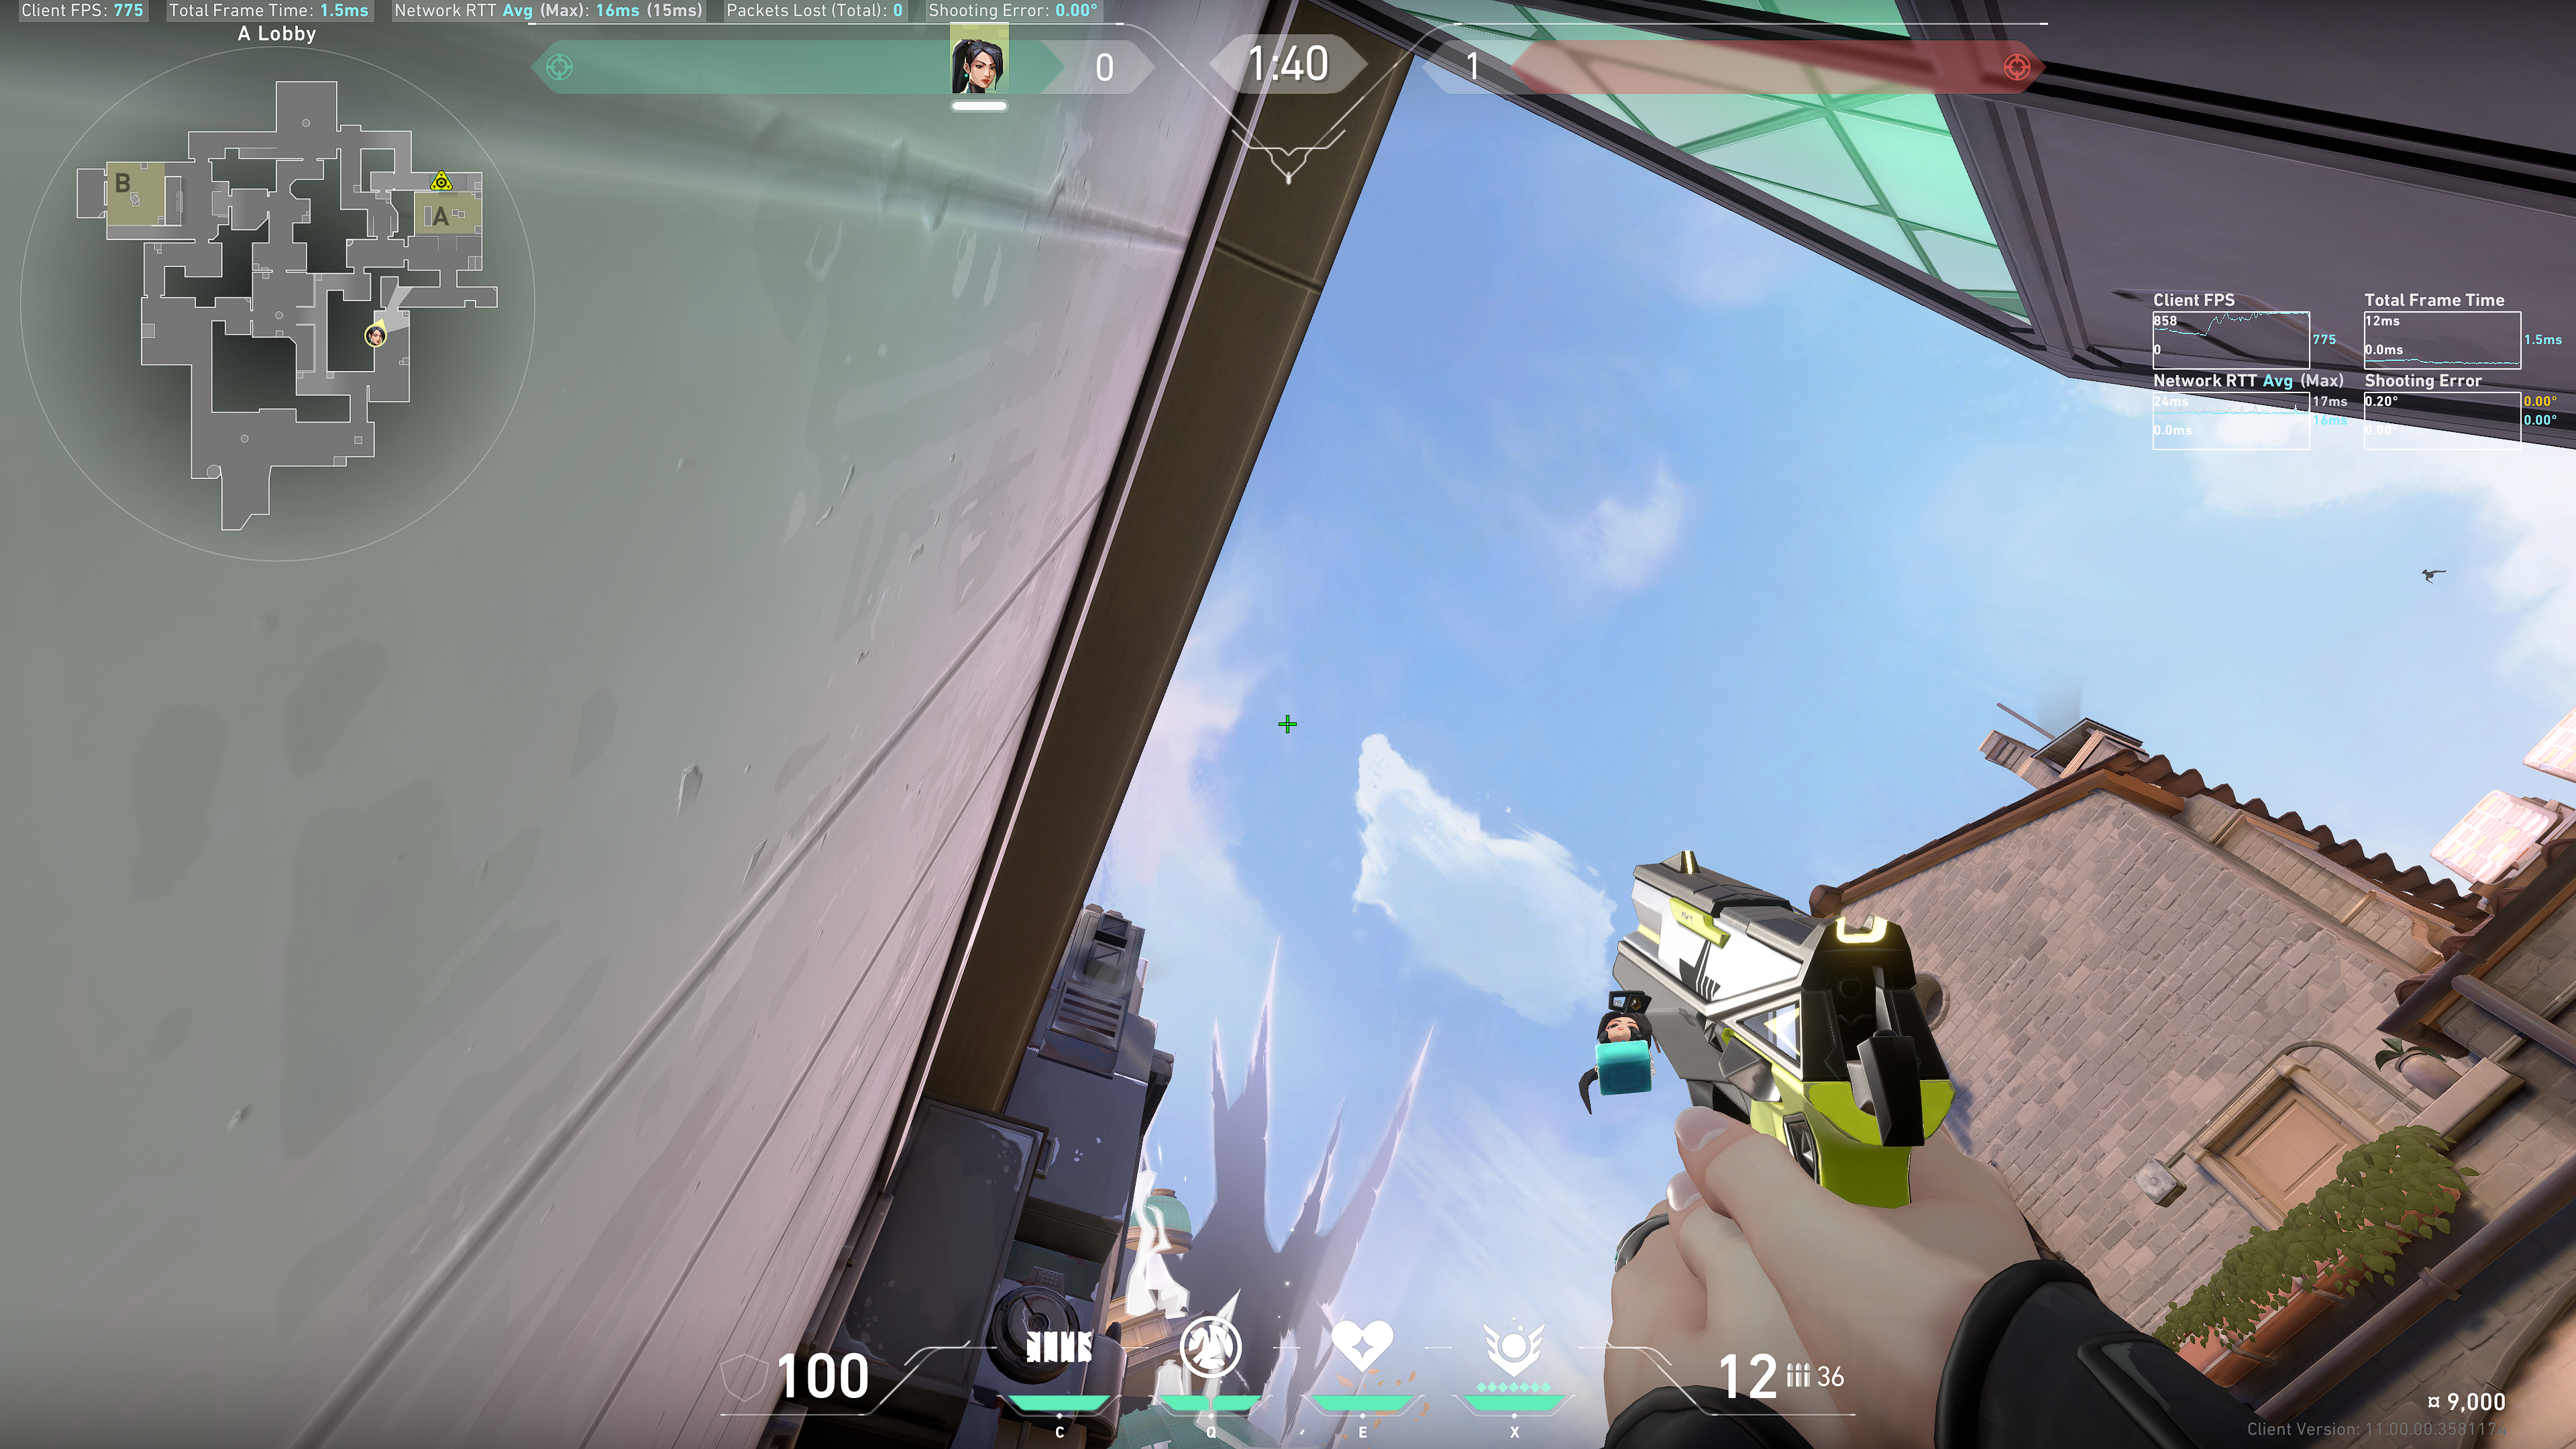
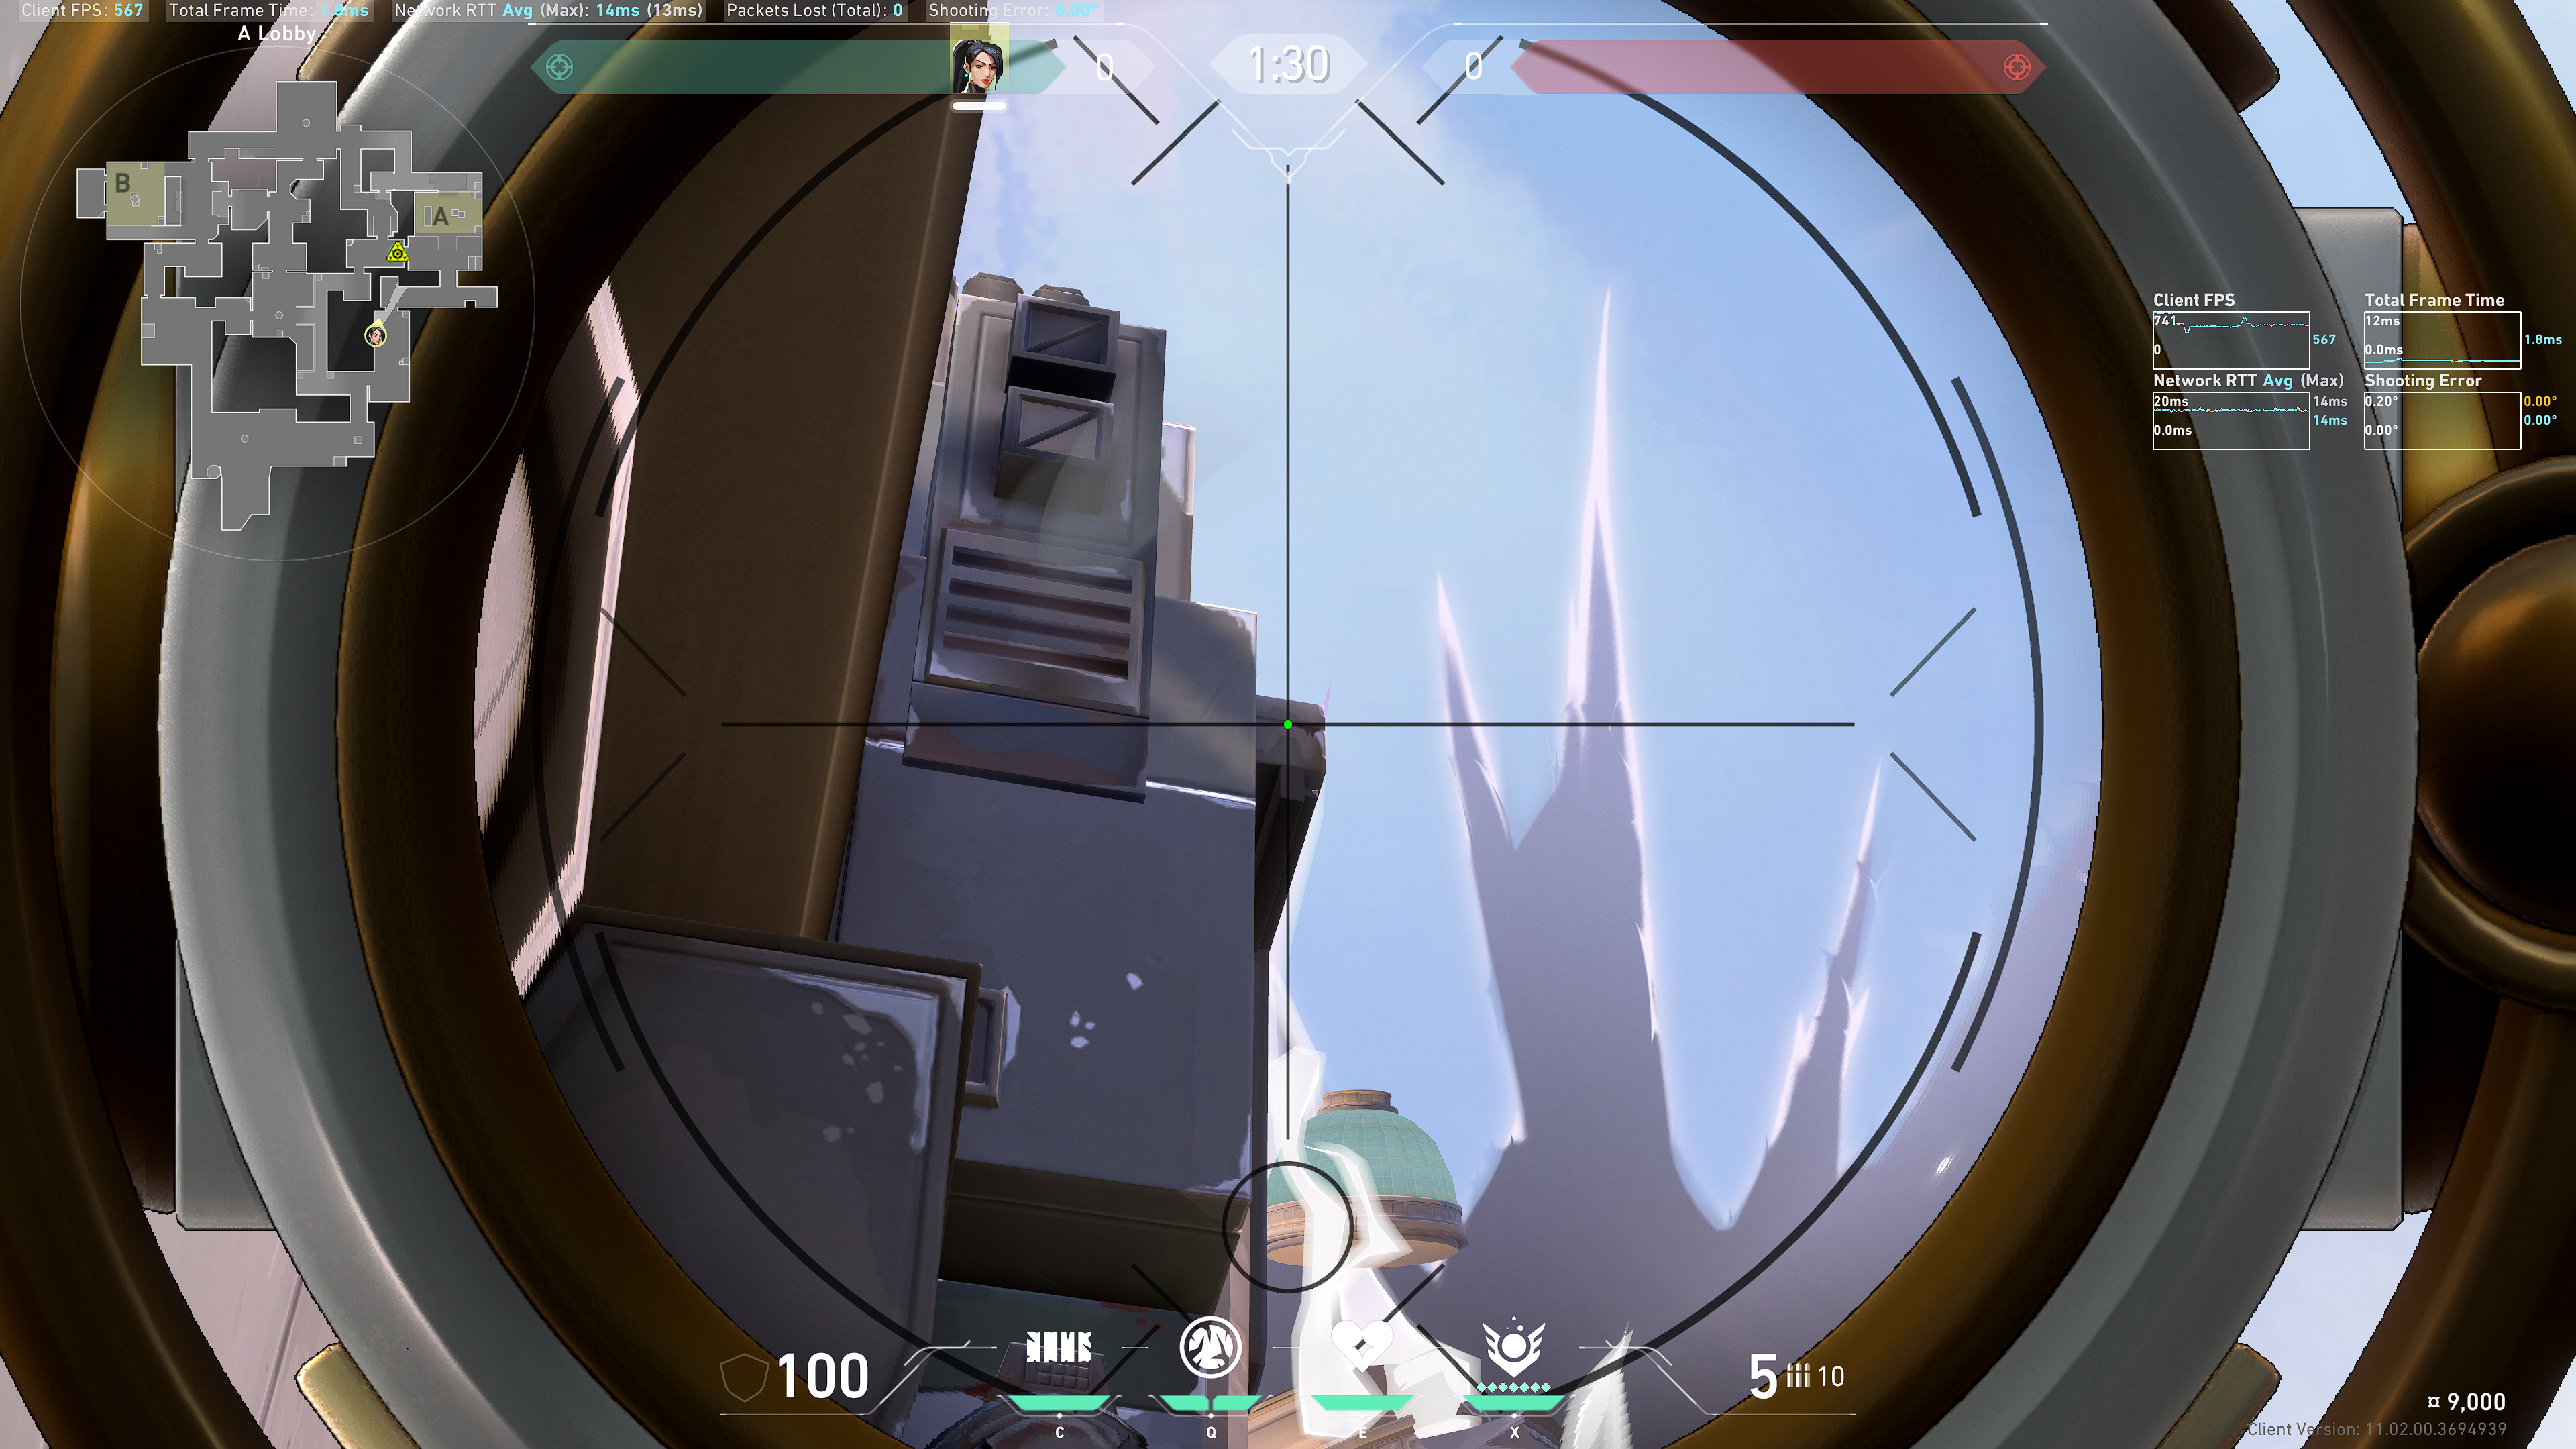
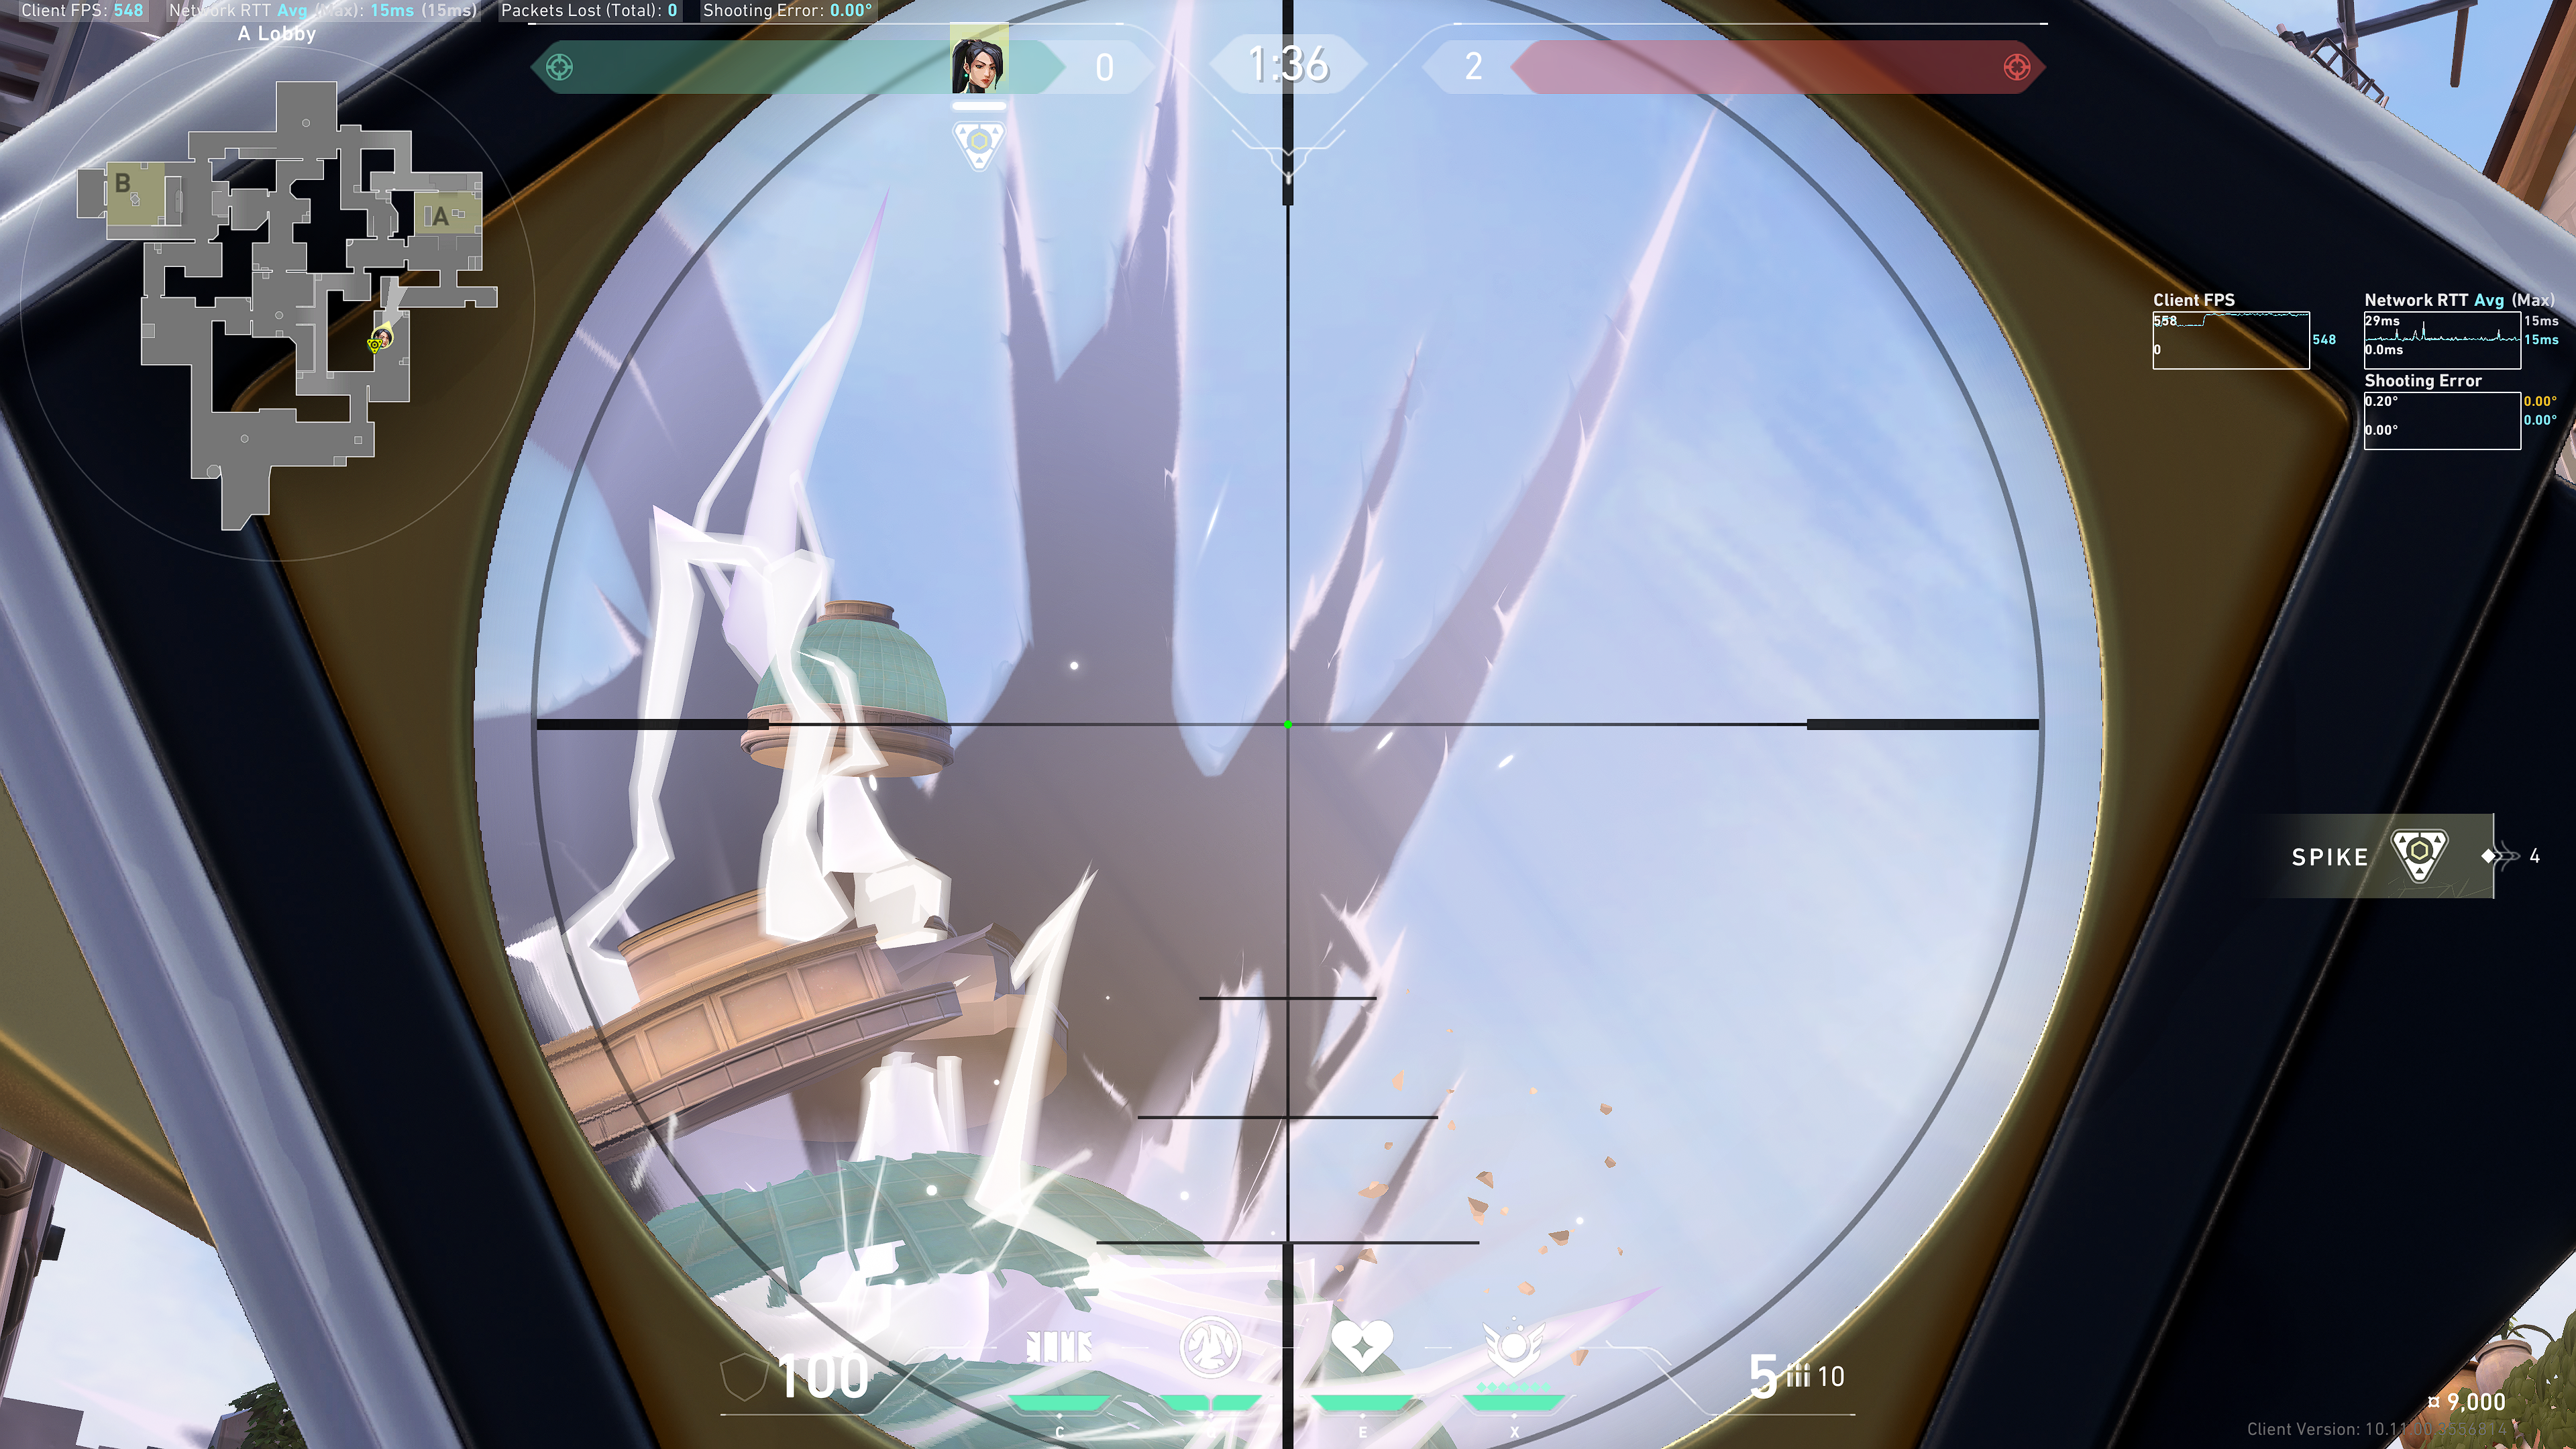
Back site
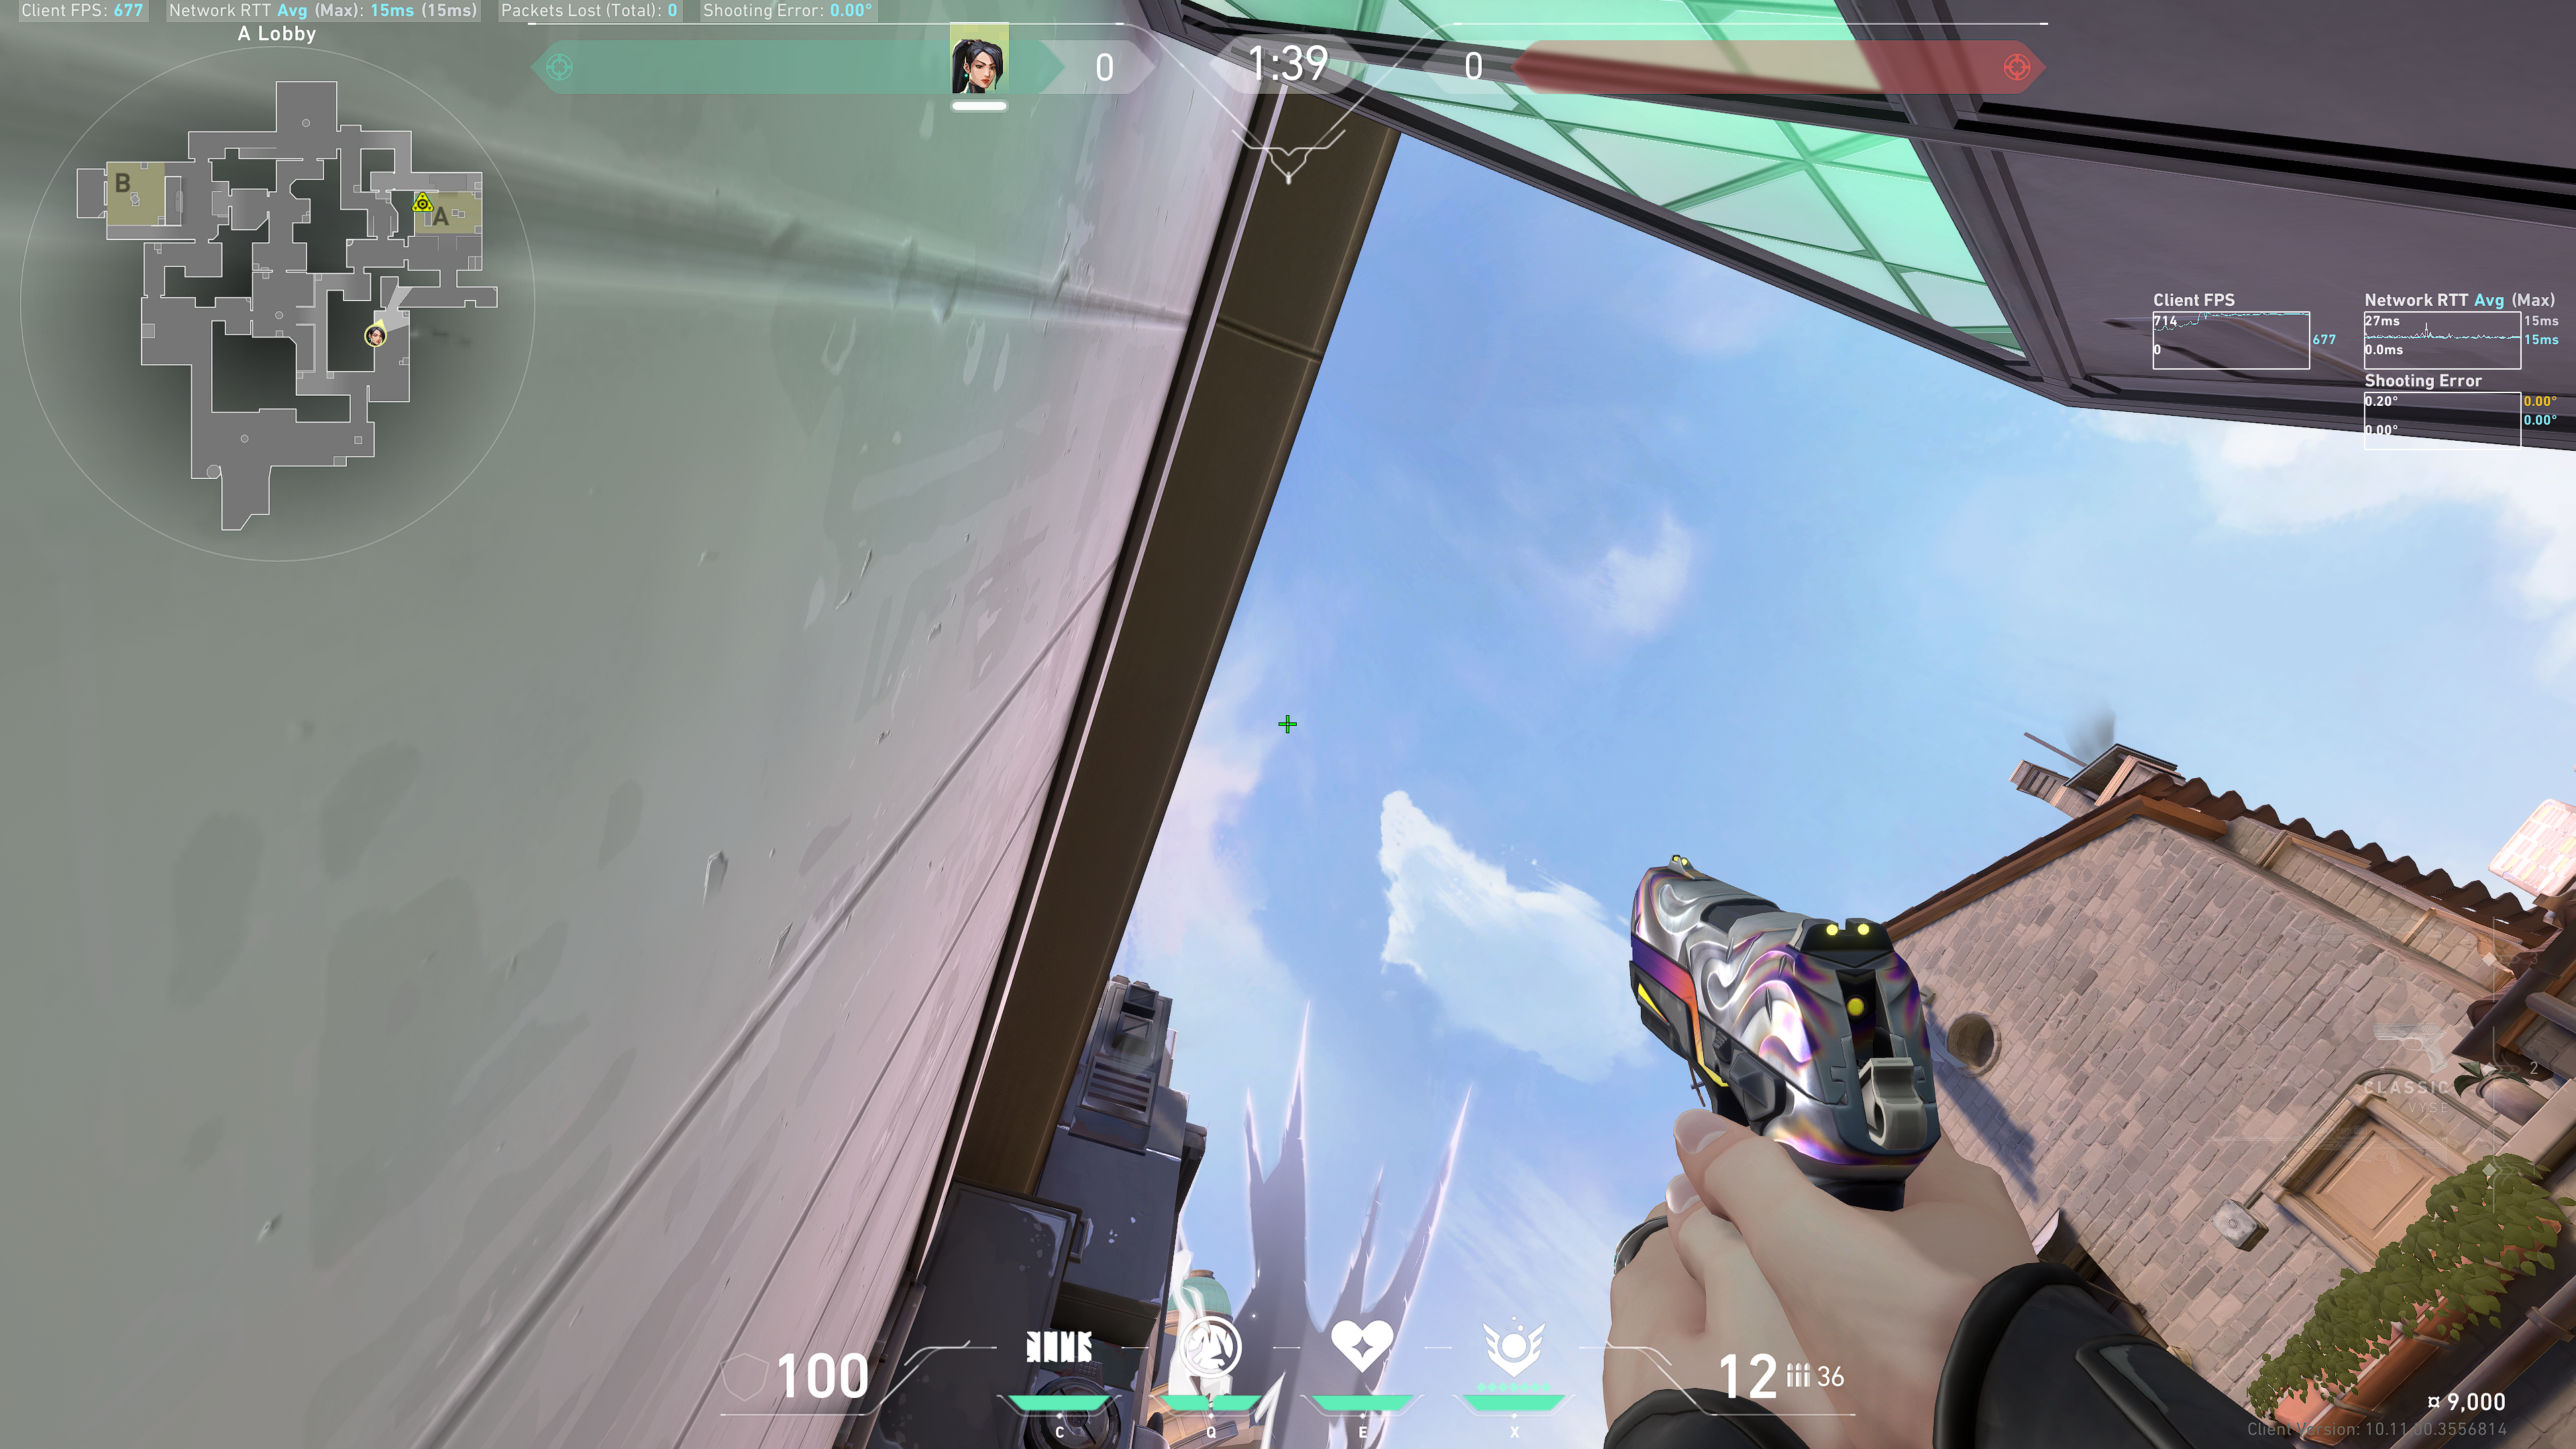
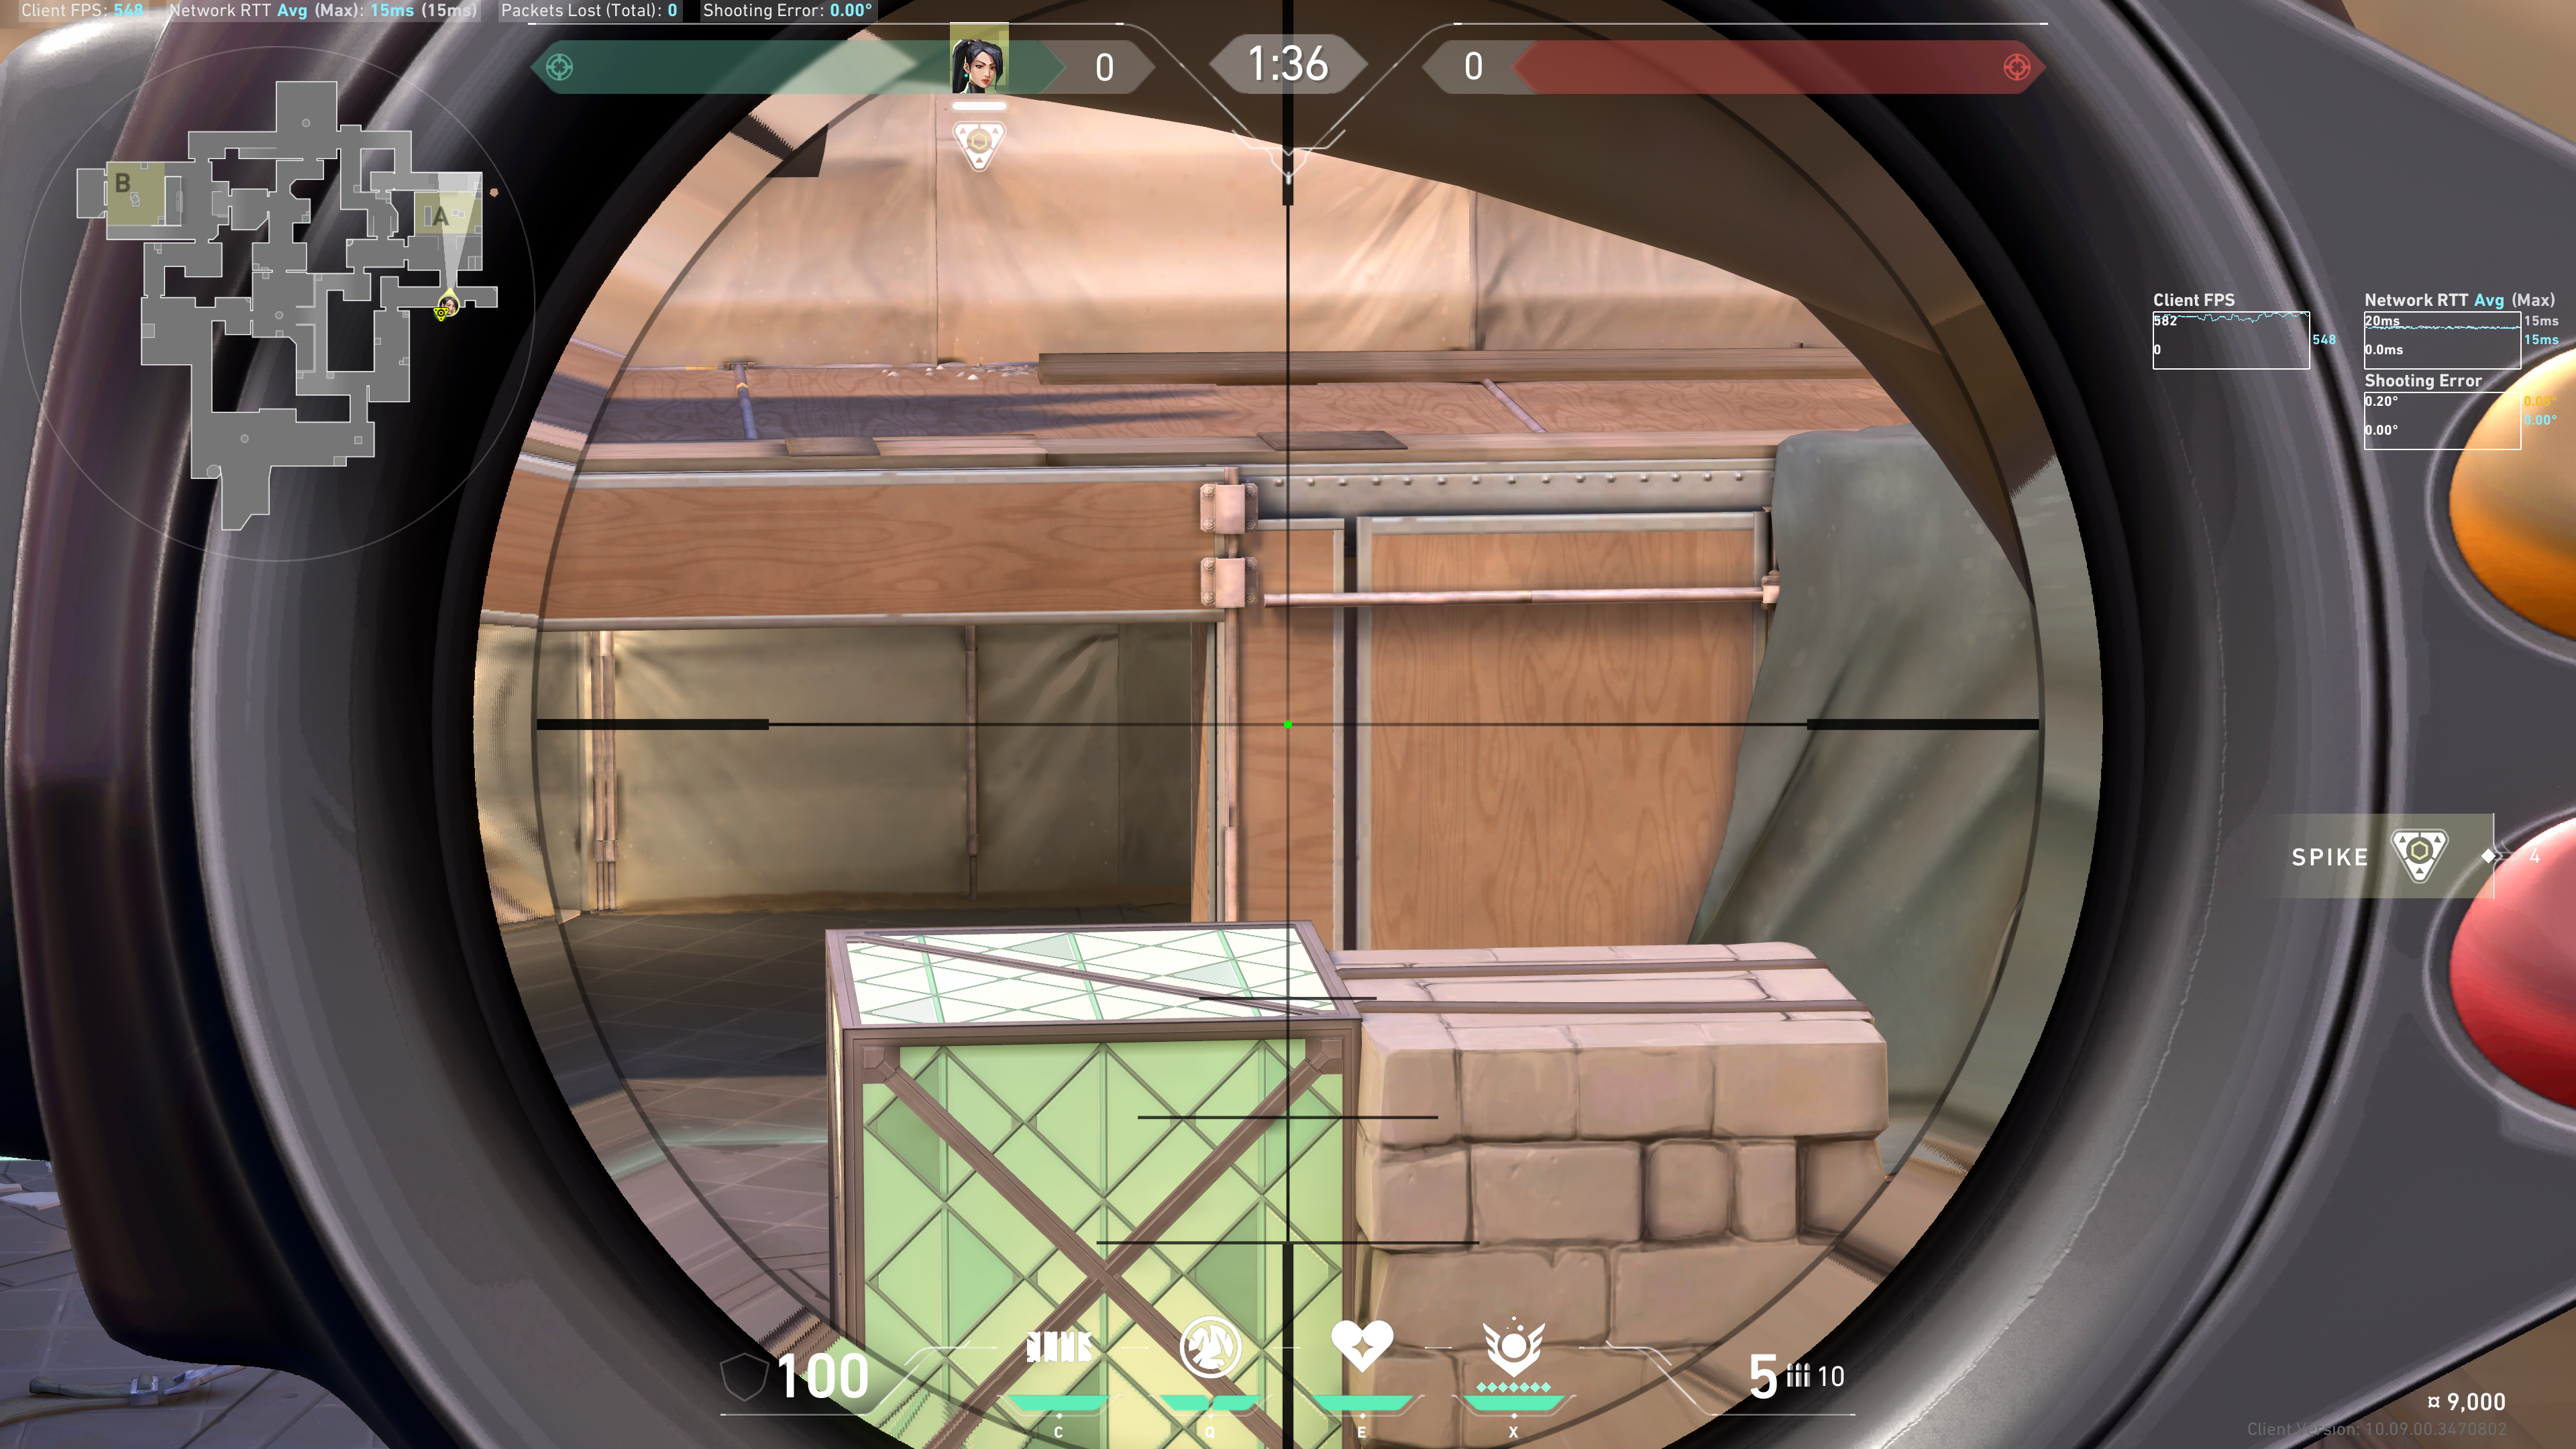
Note these spikes in the sky:
 Line up the down arrow of the Ice Ob indicator in between the right two spikes:
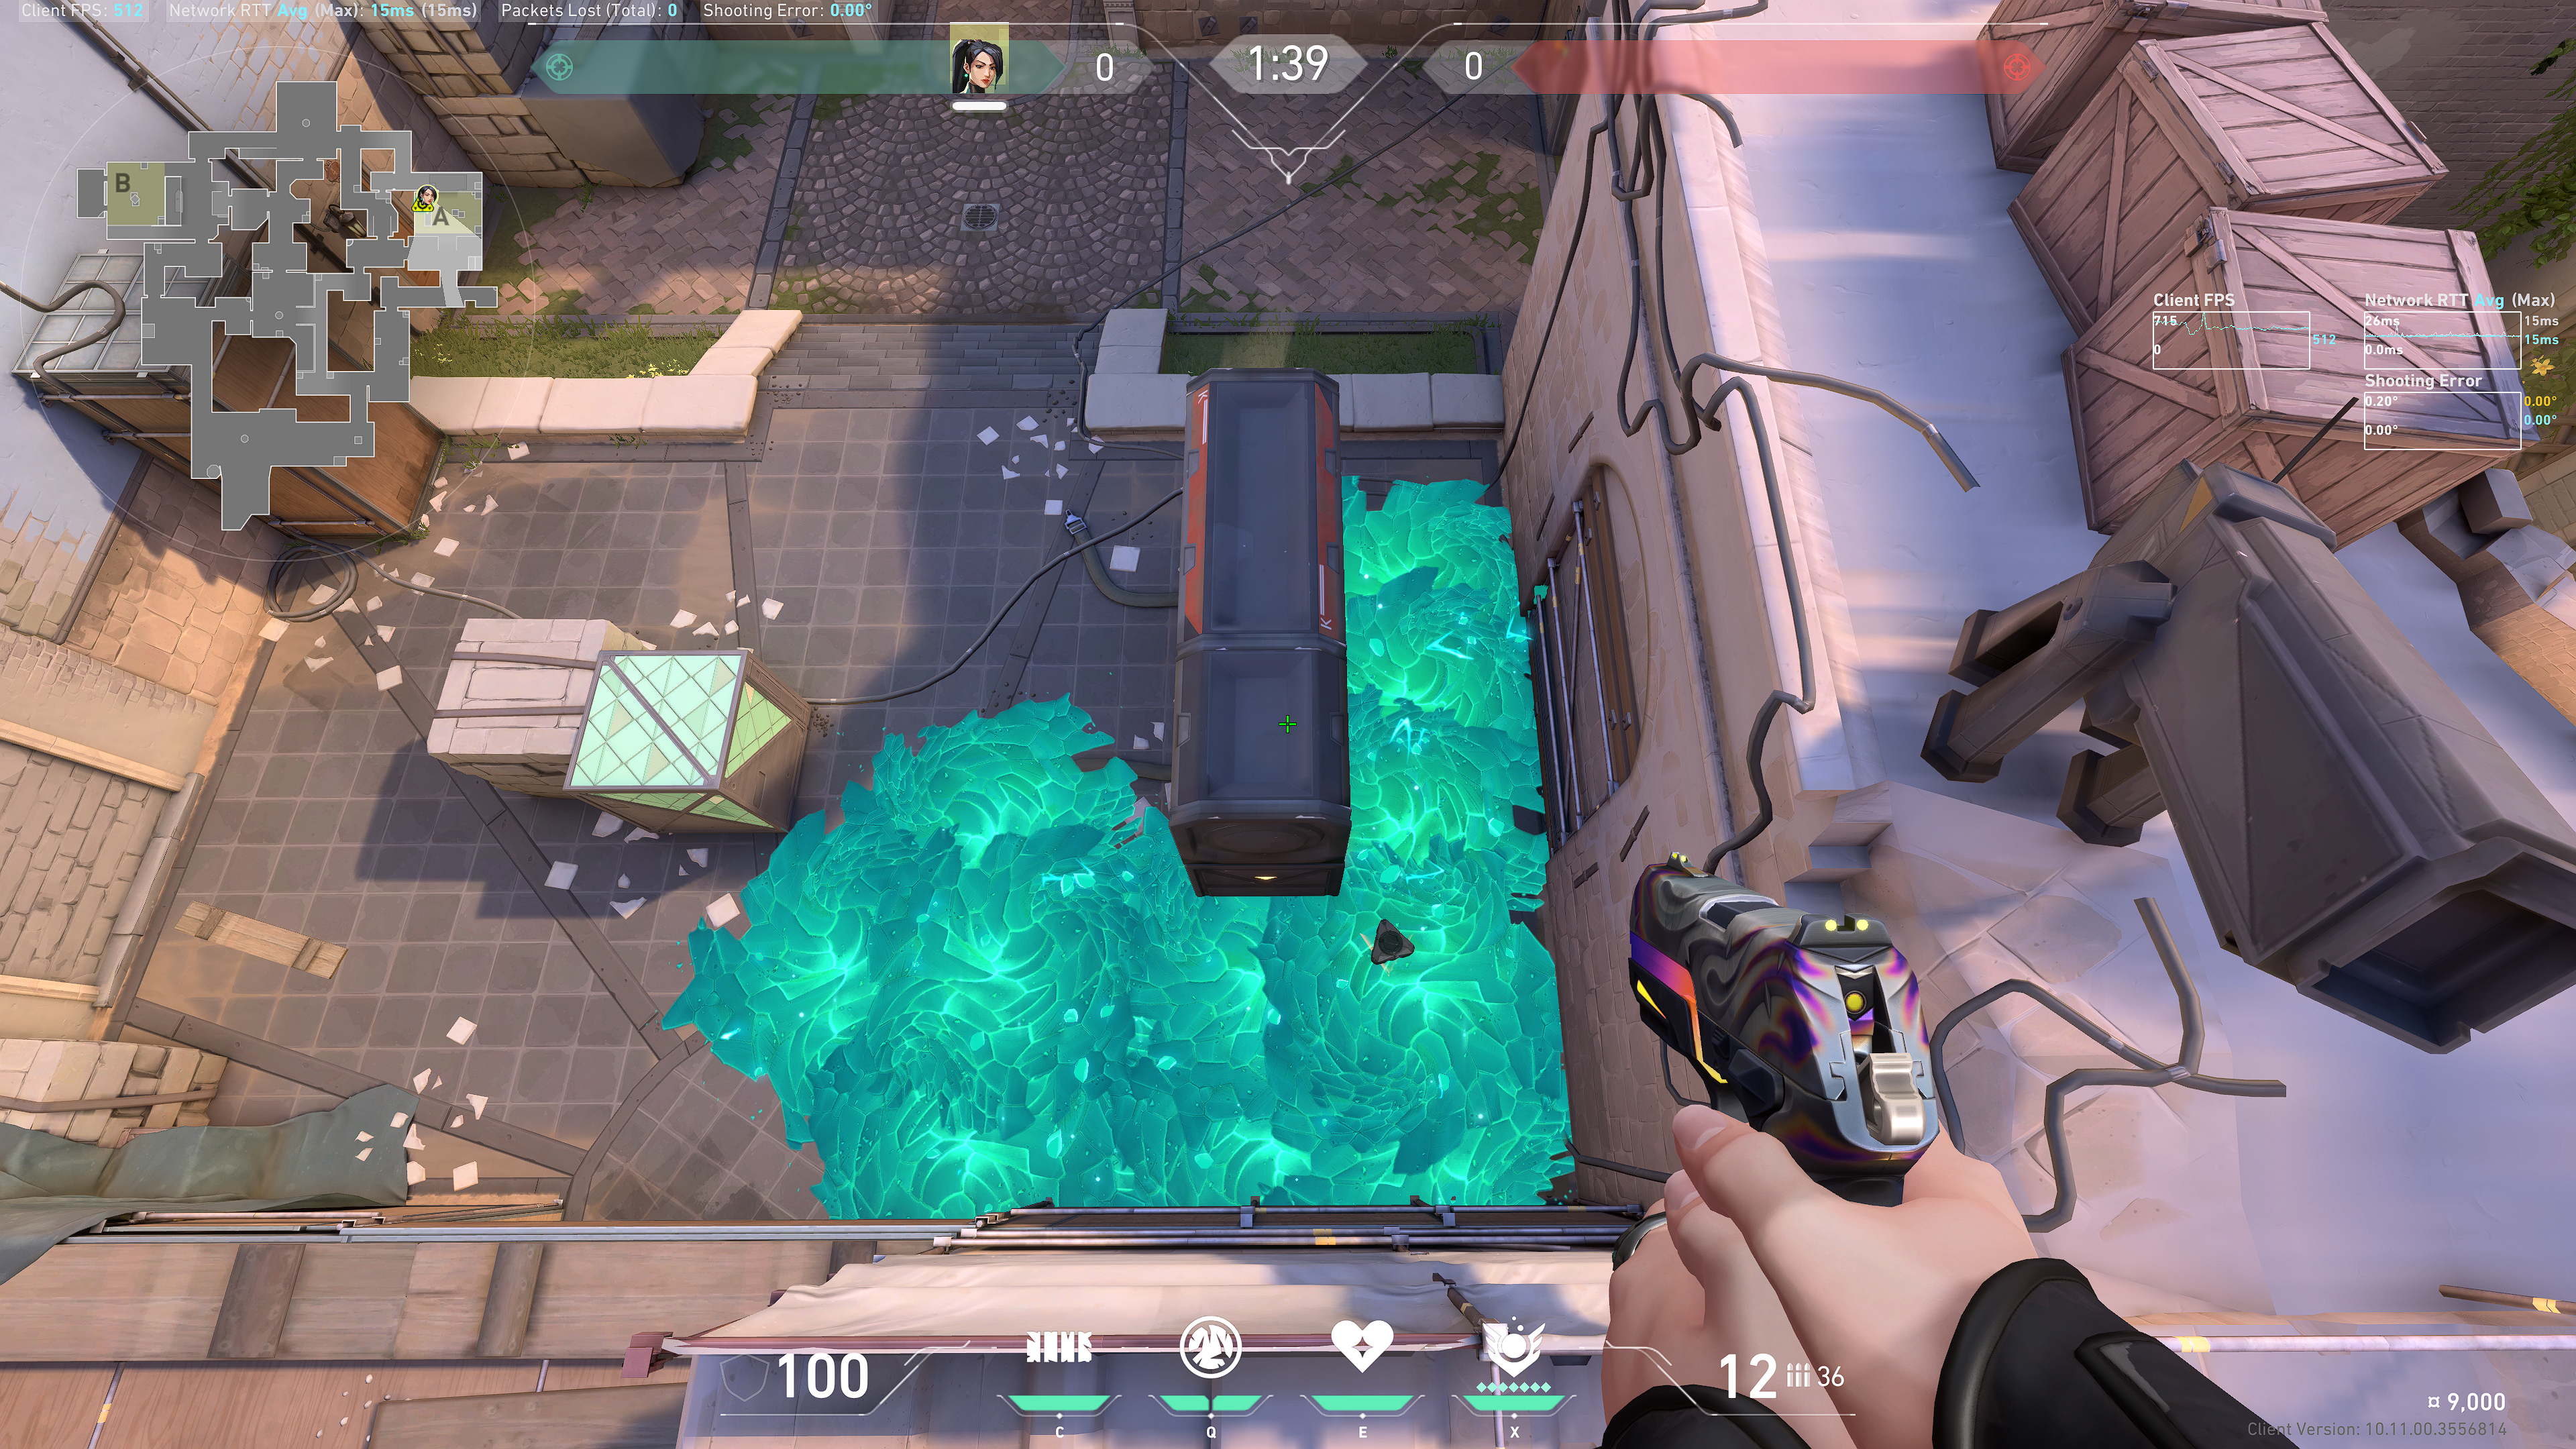
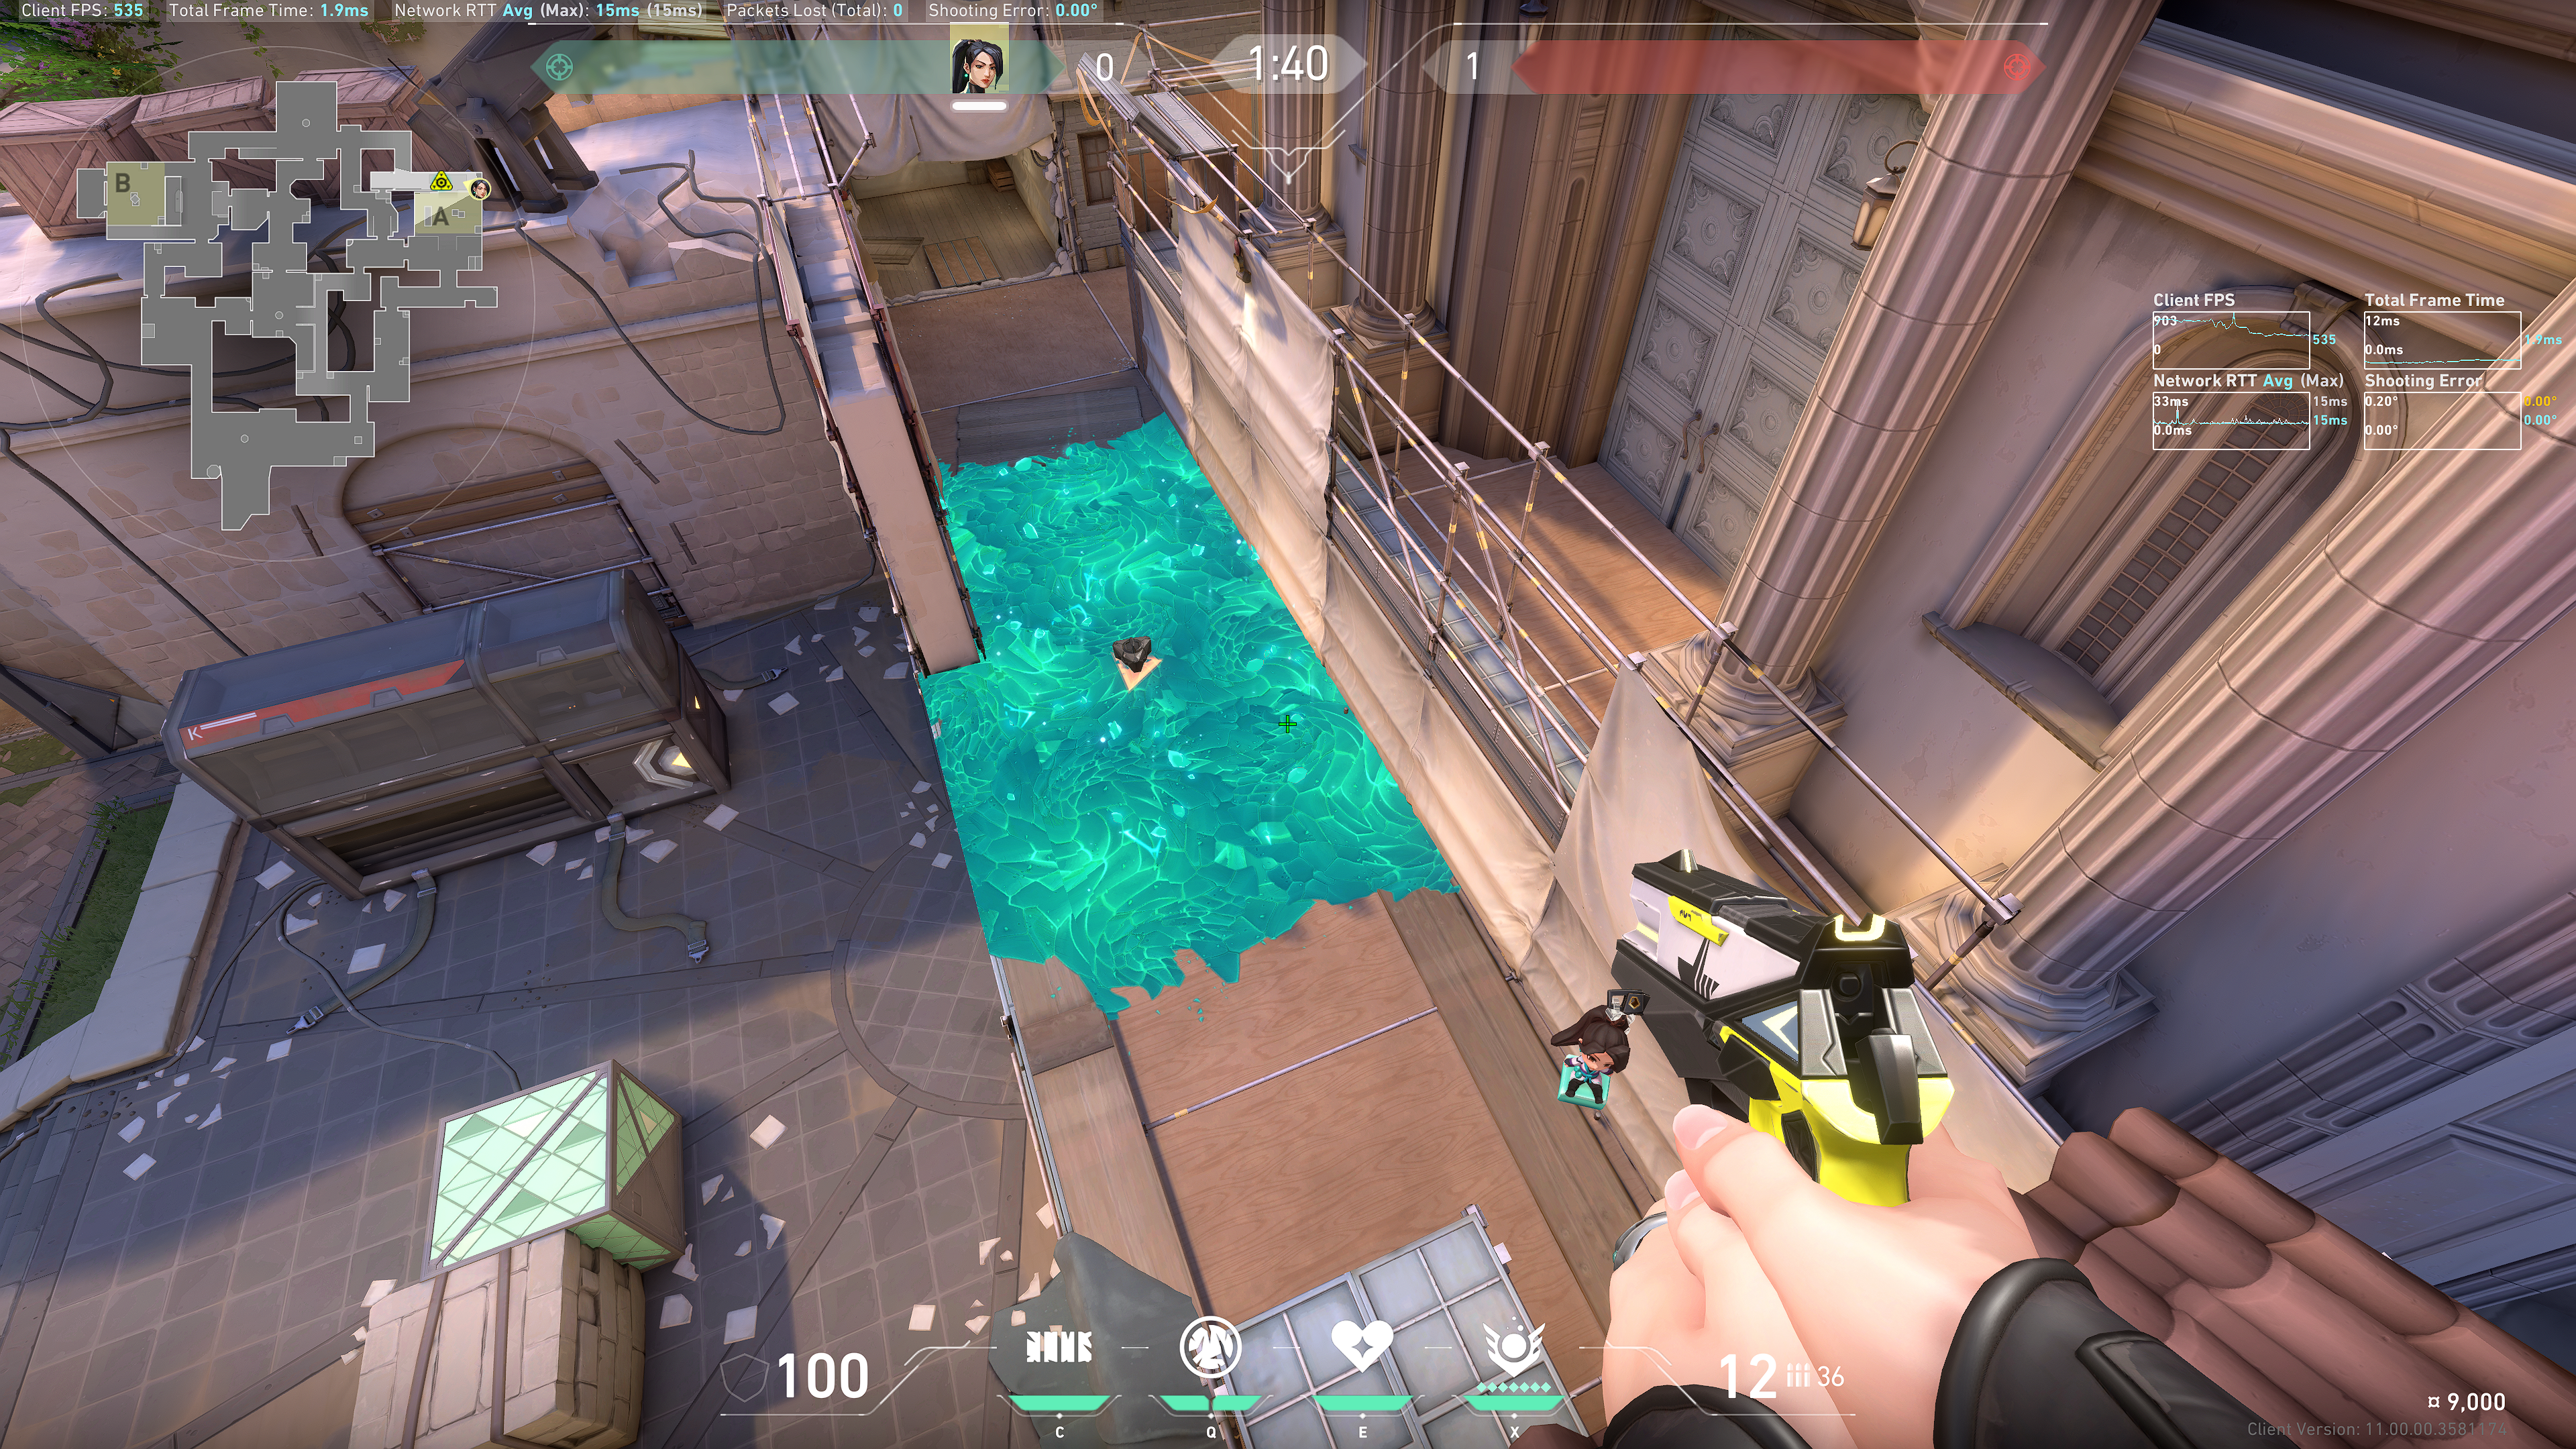
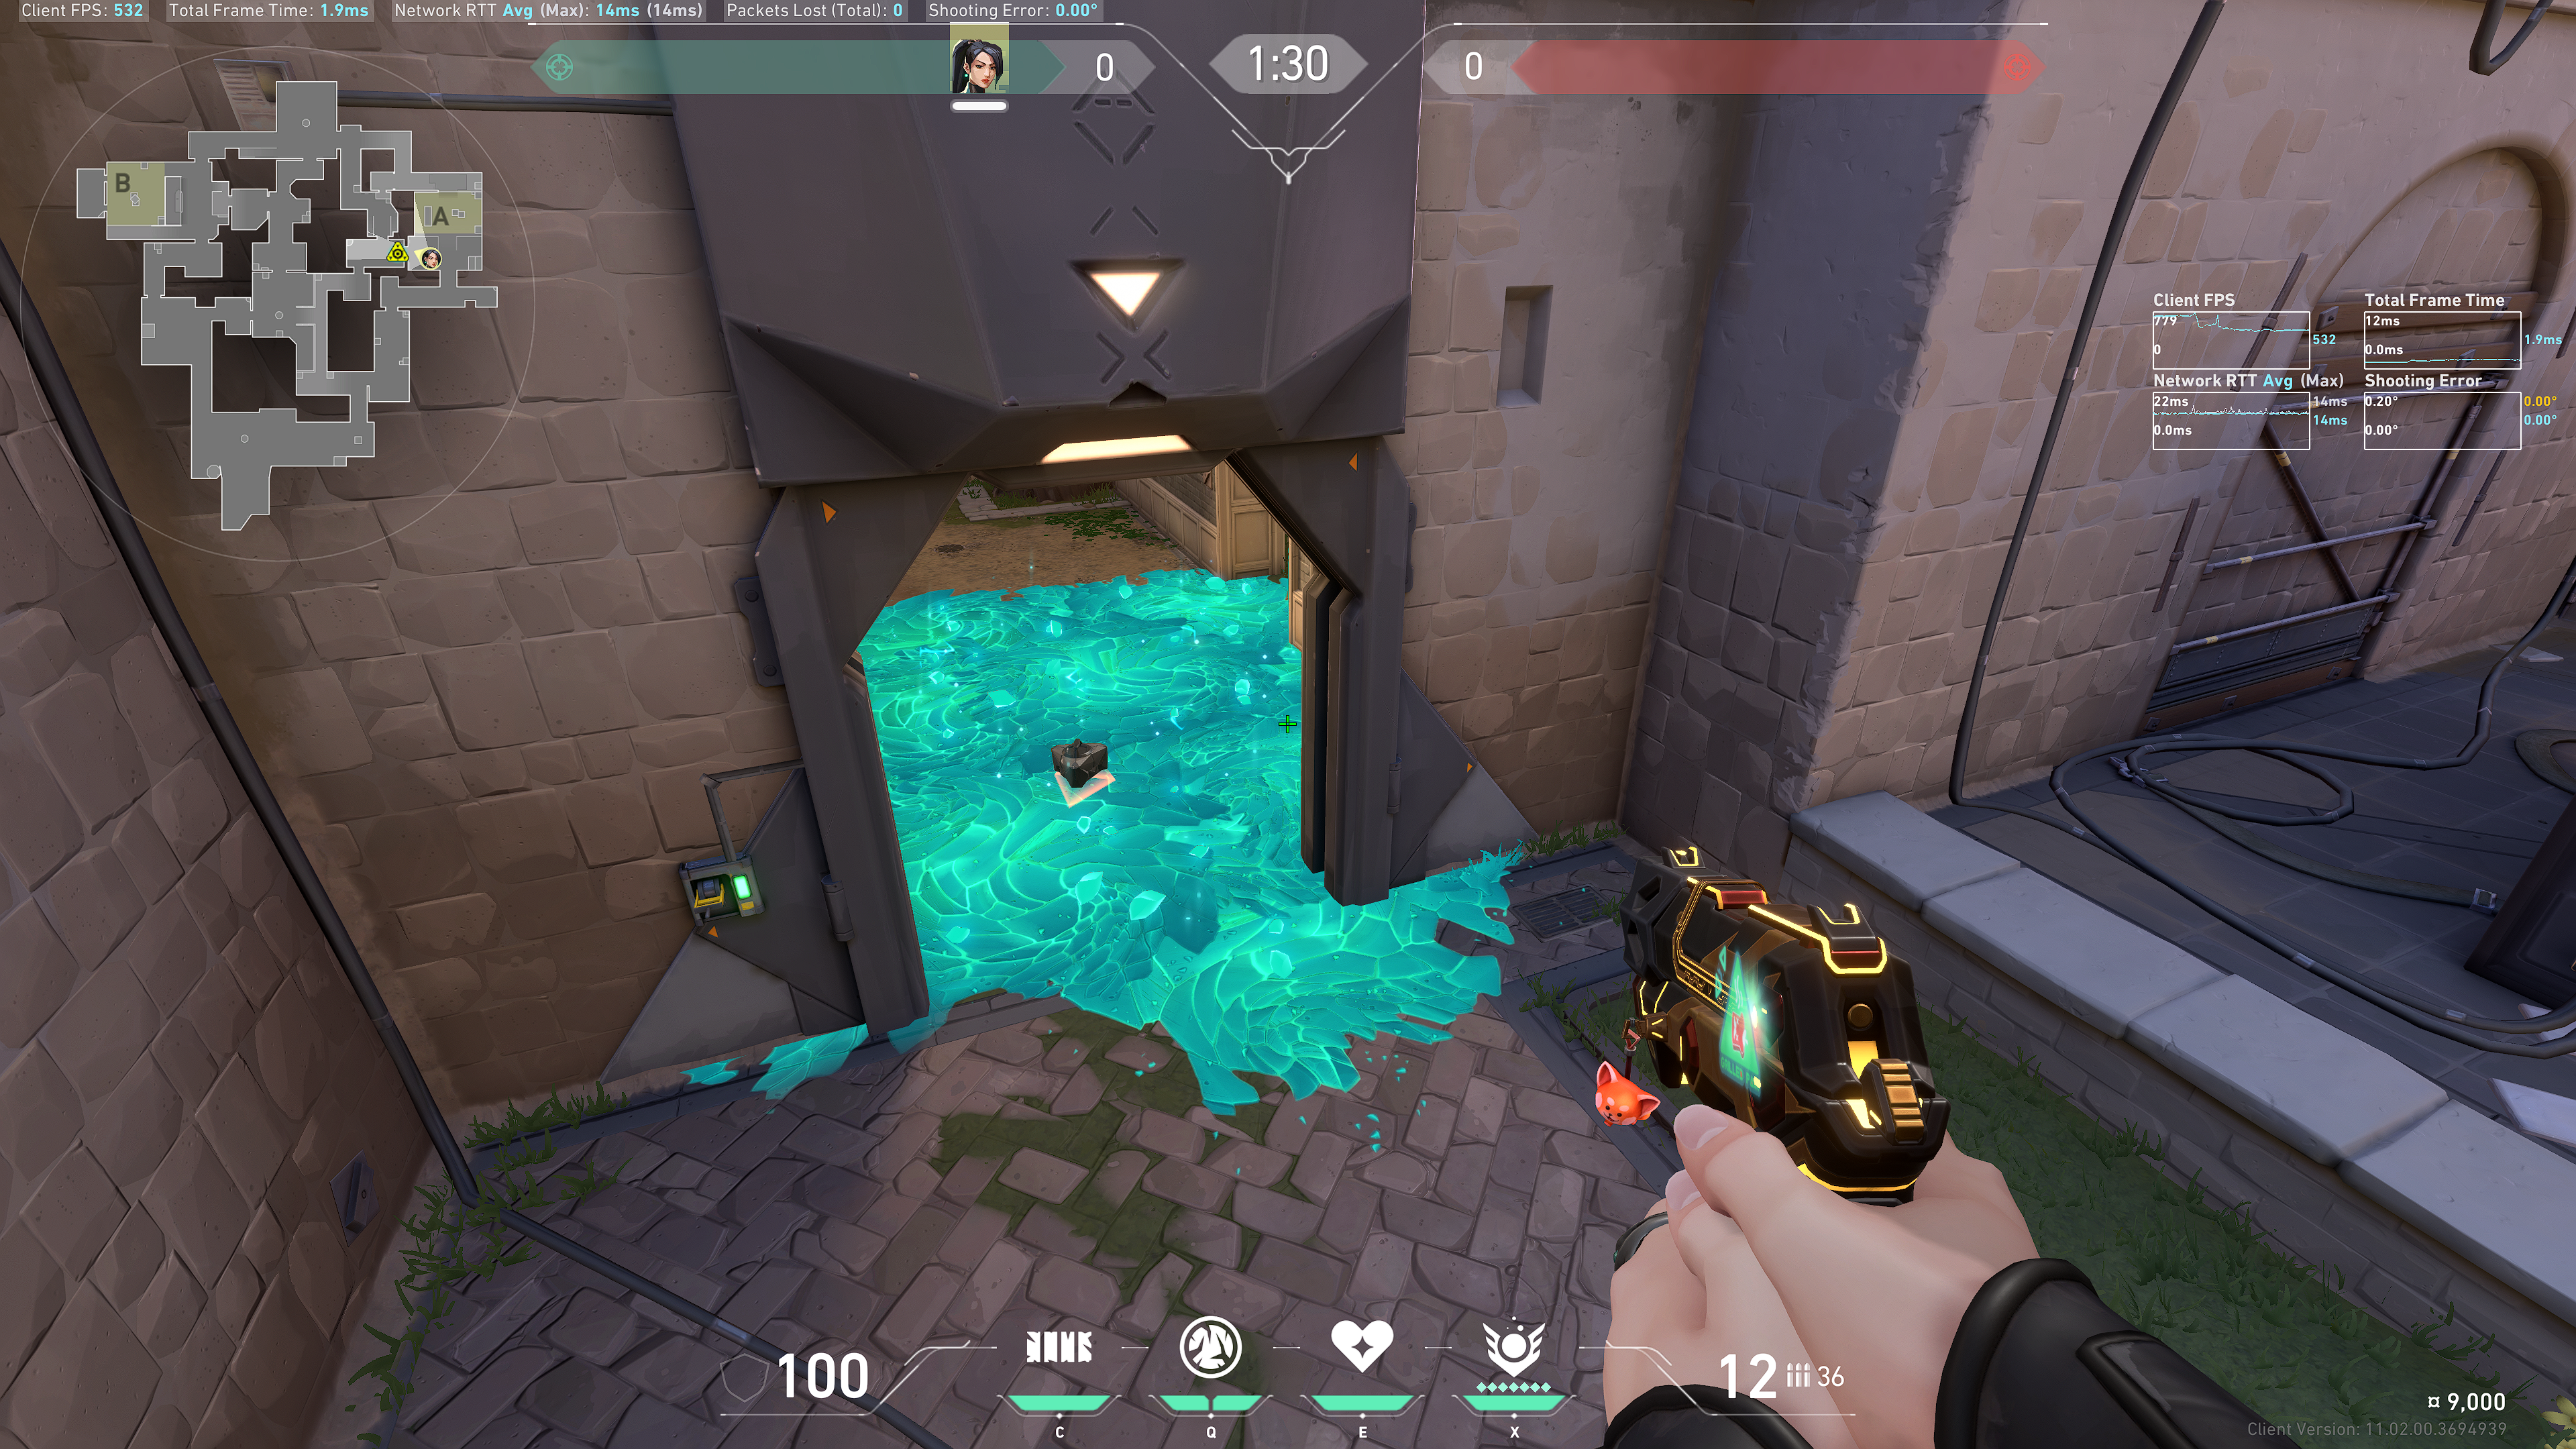
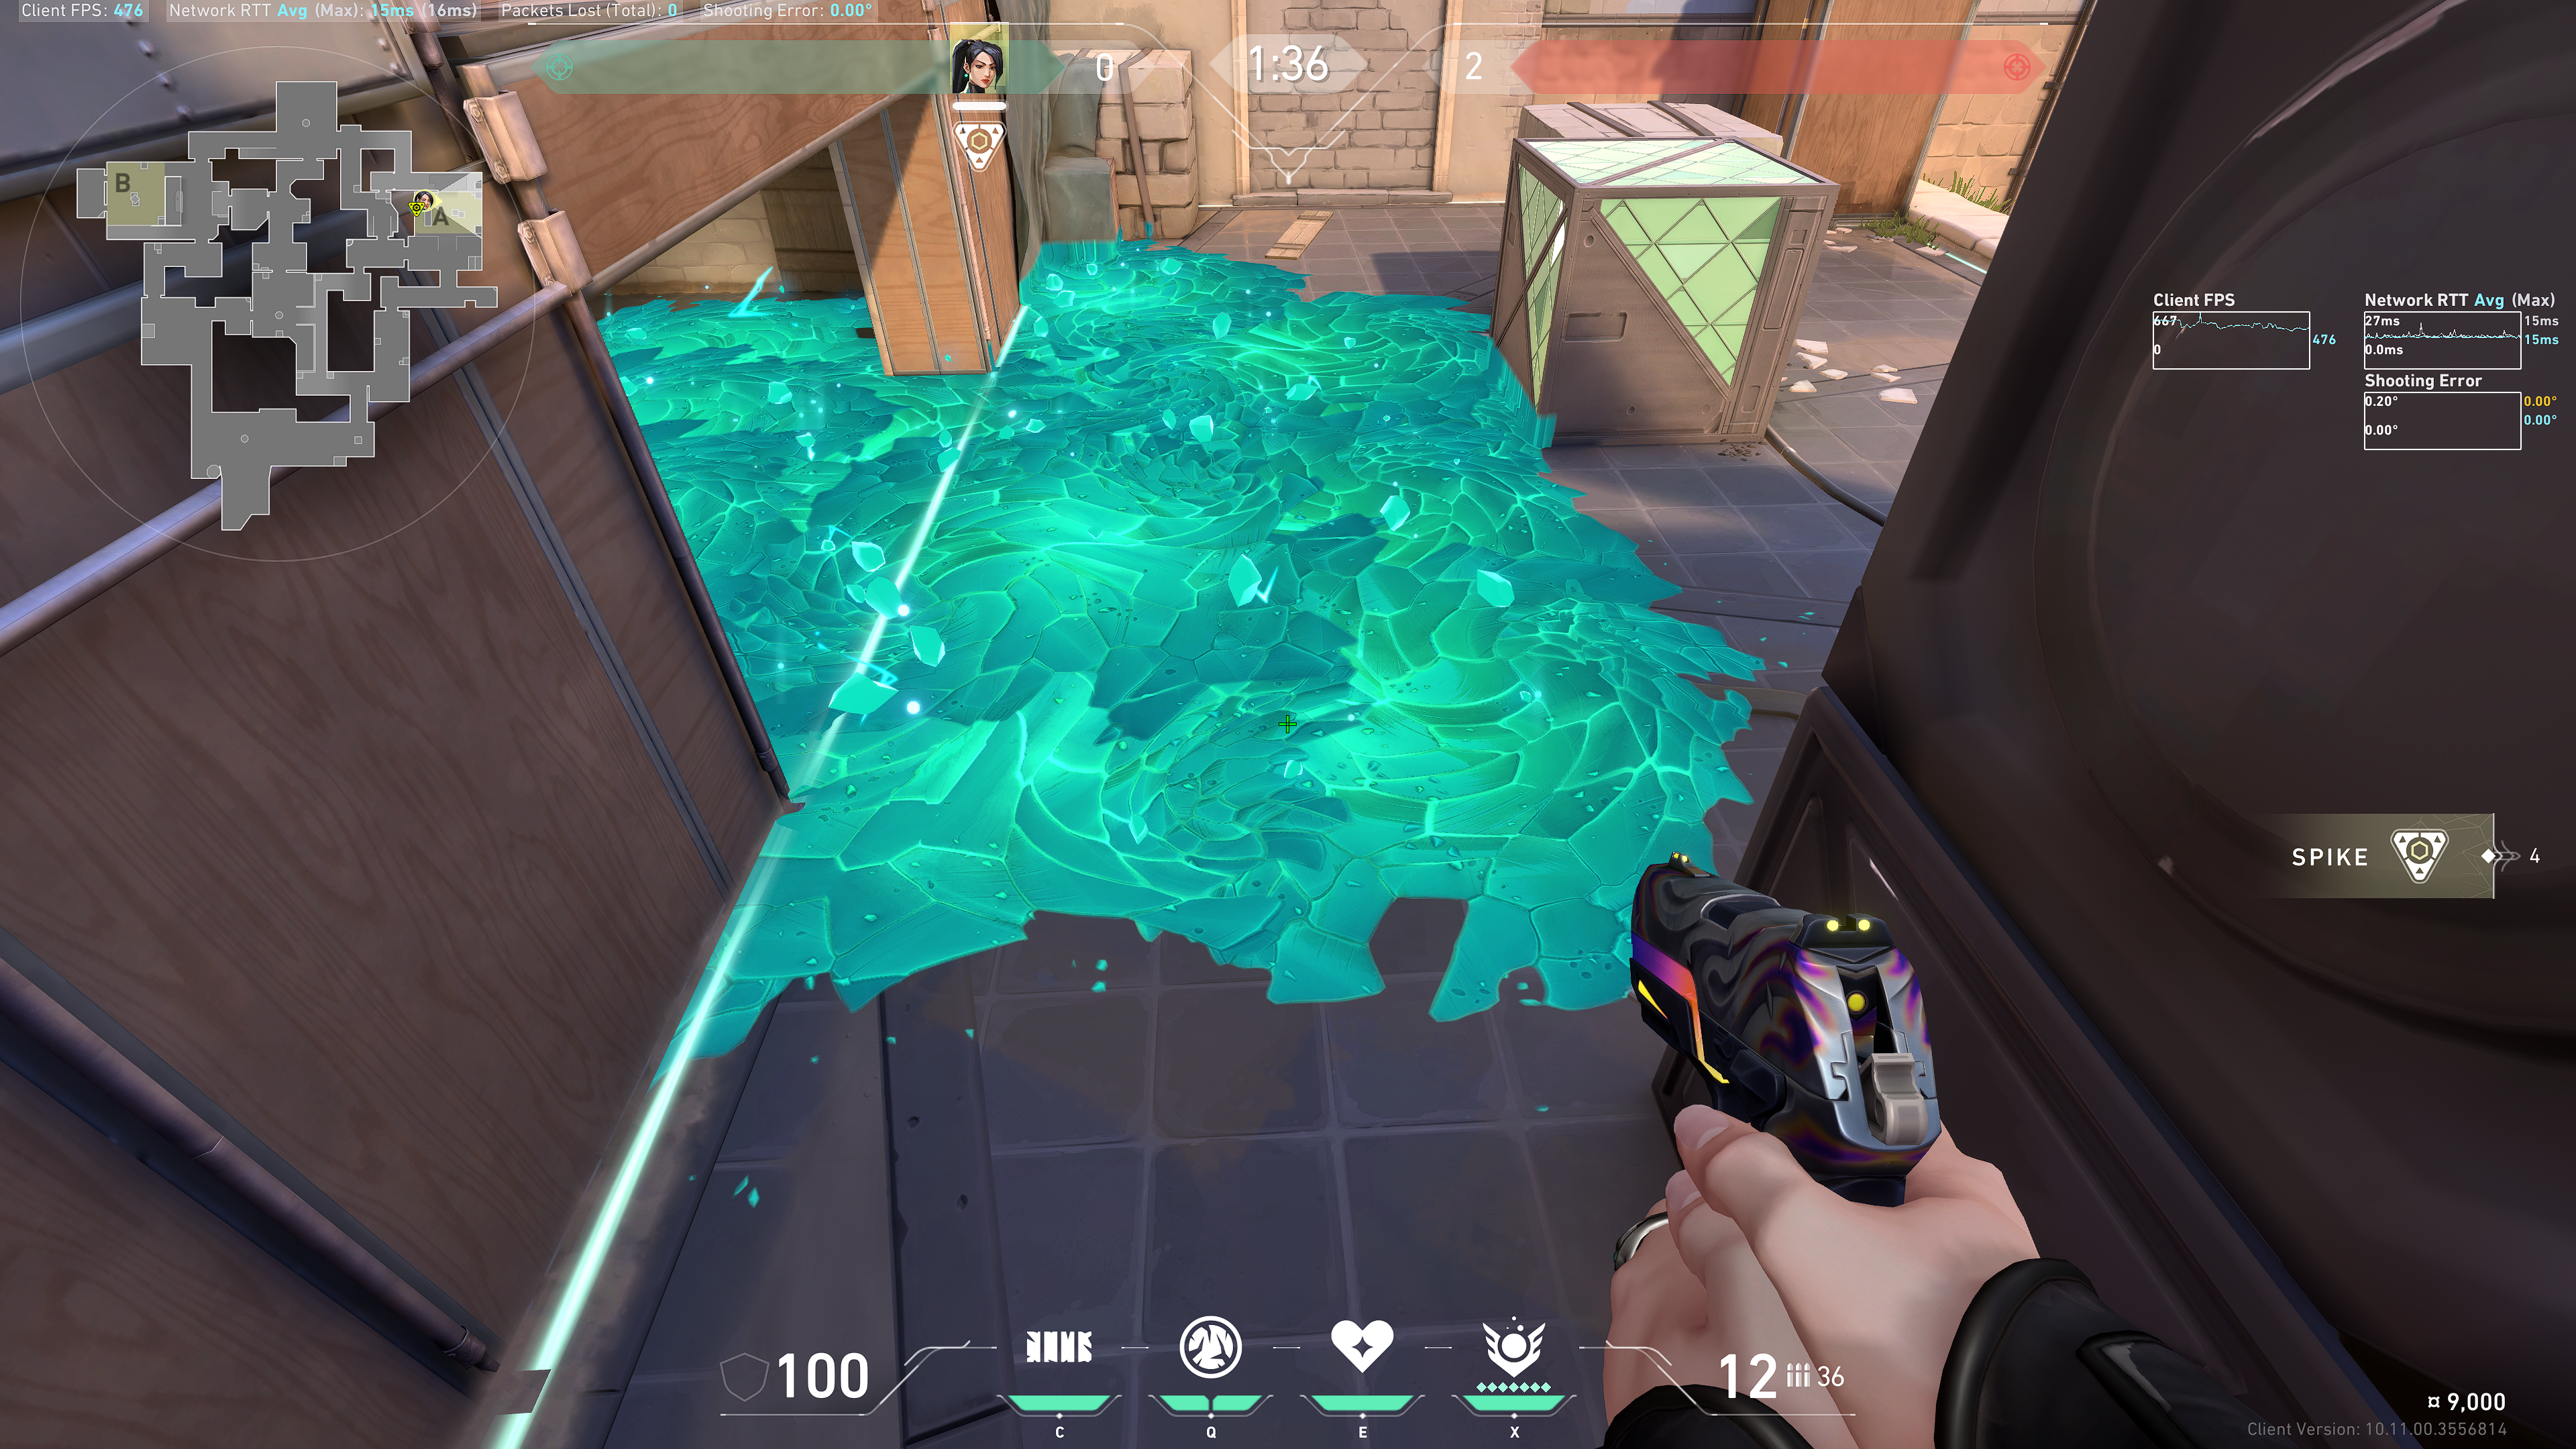
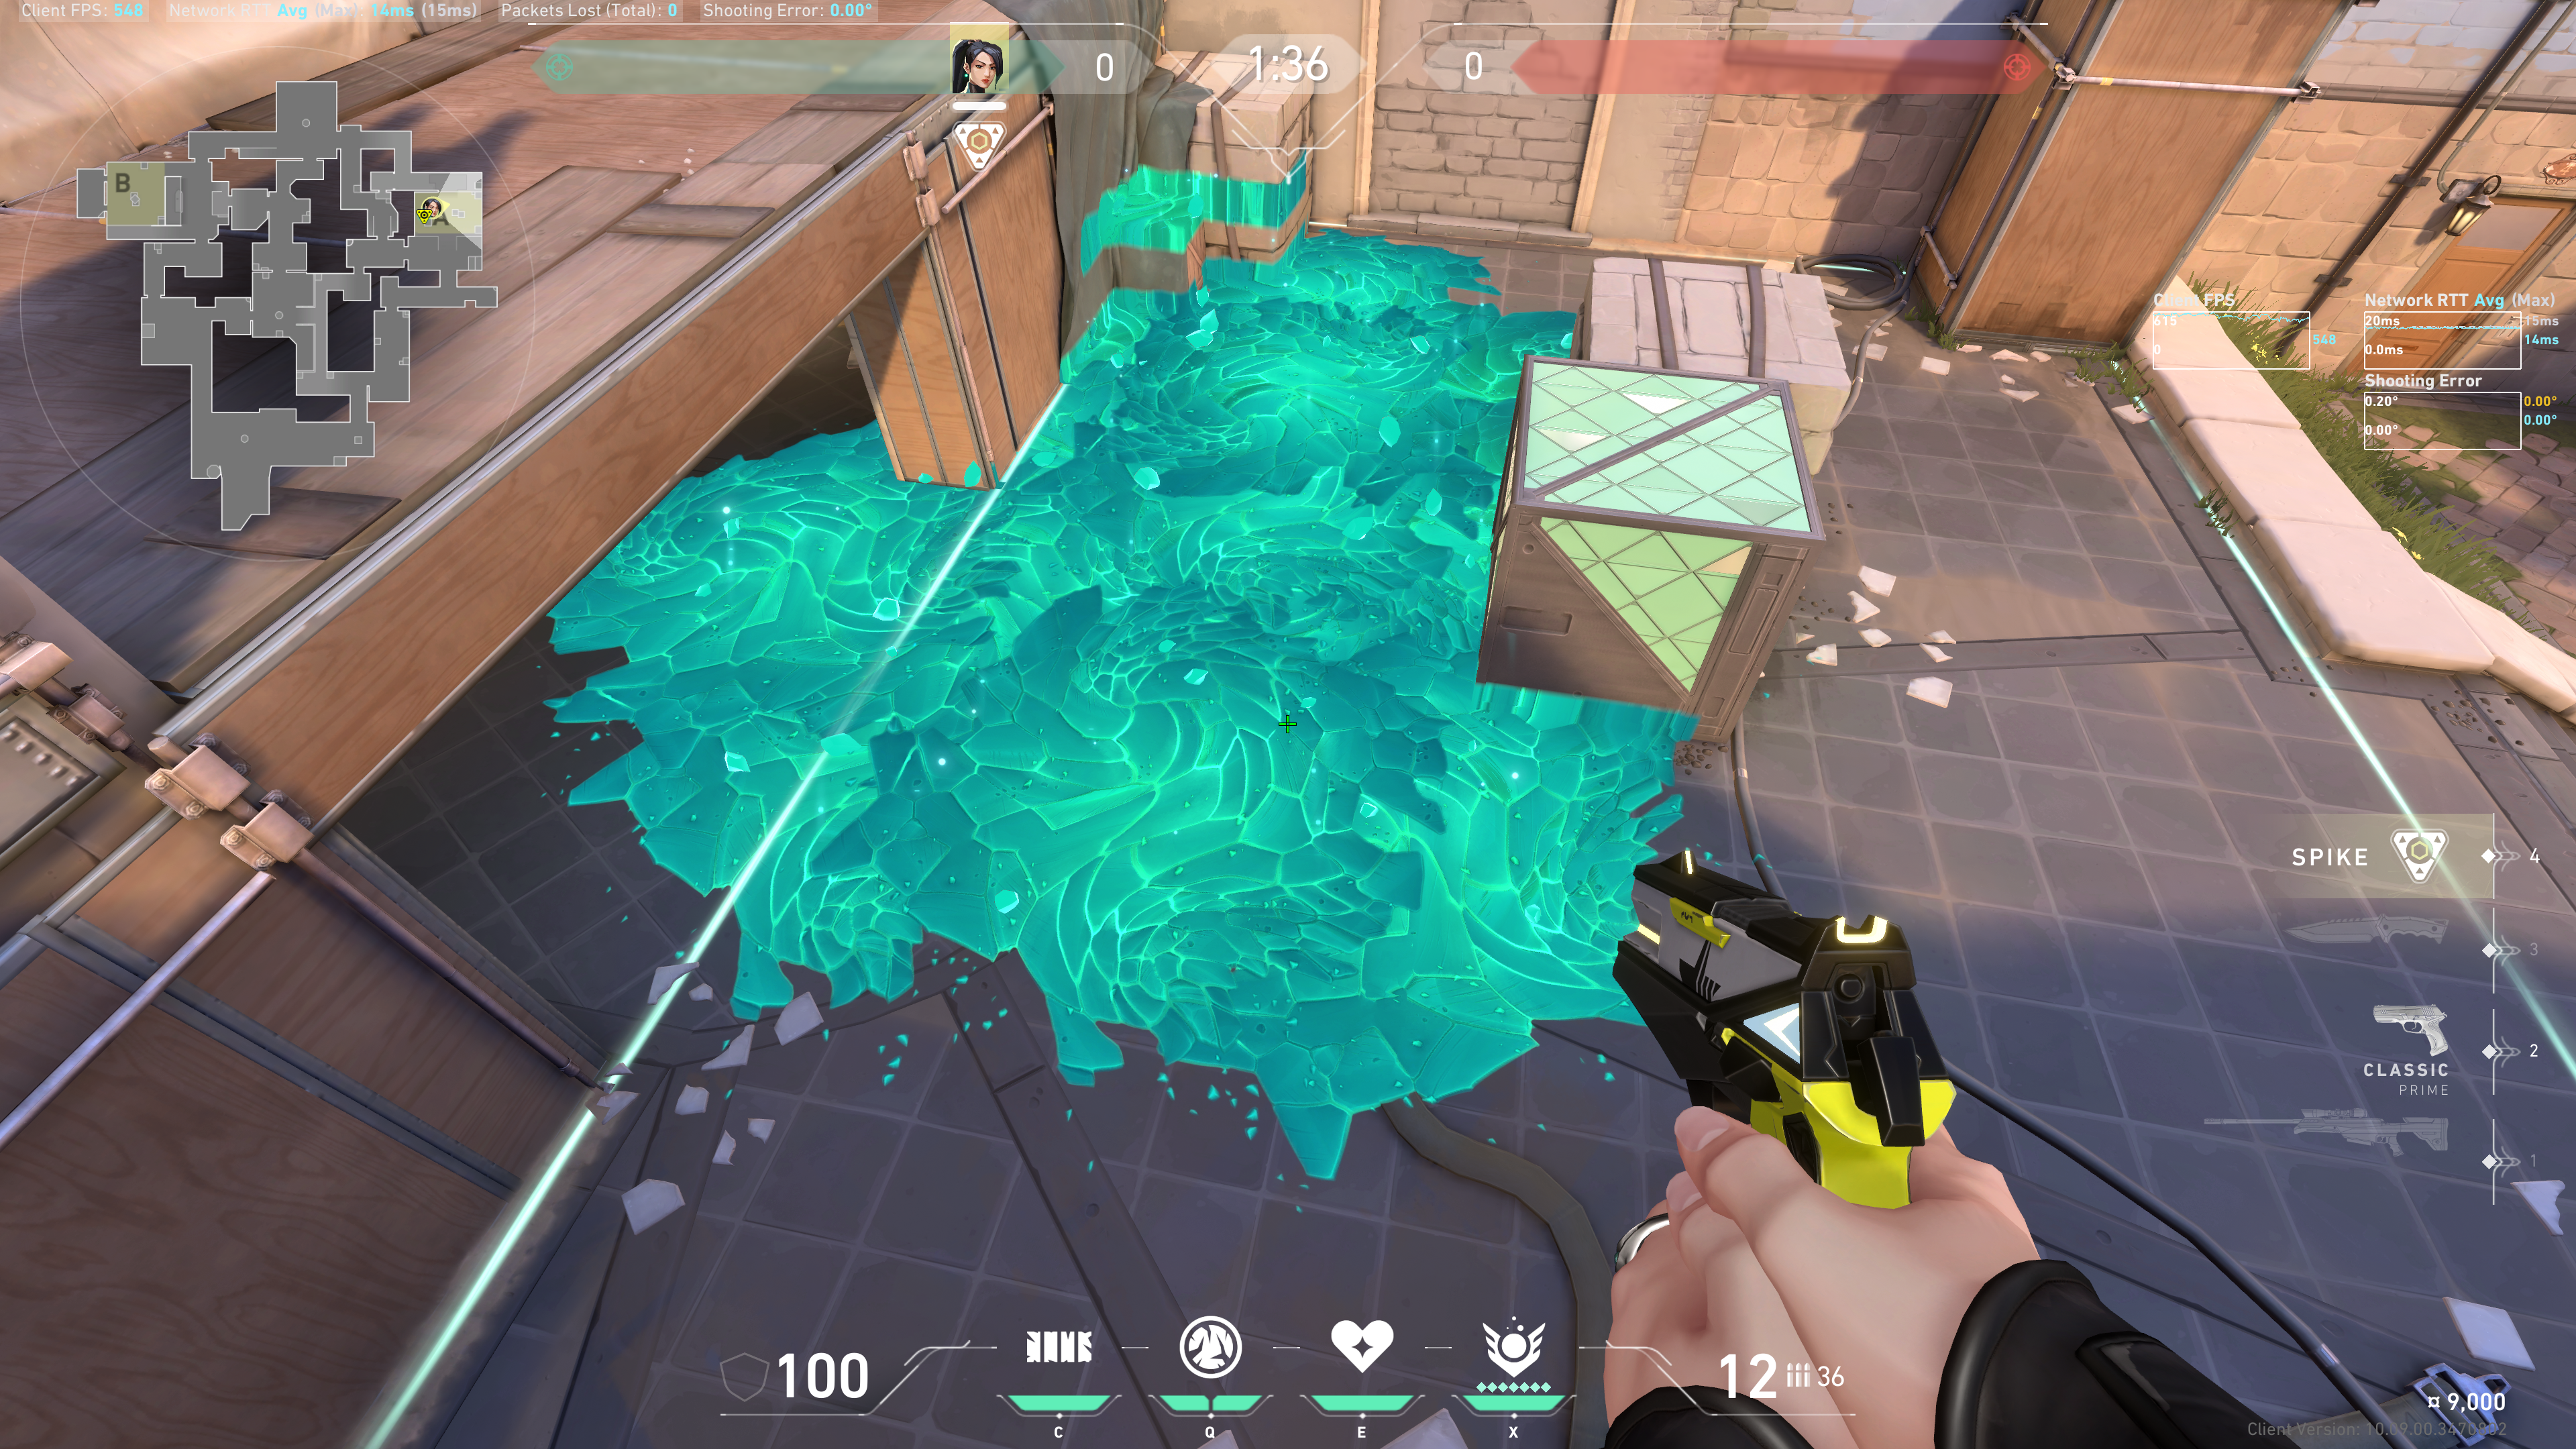
 Result:
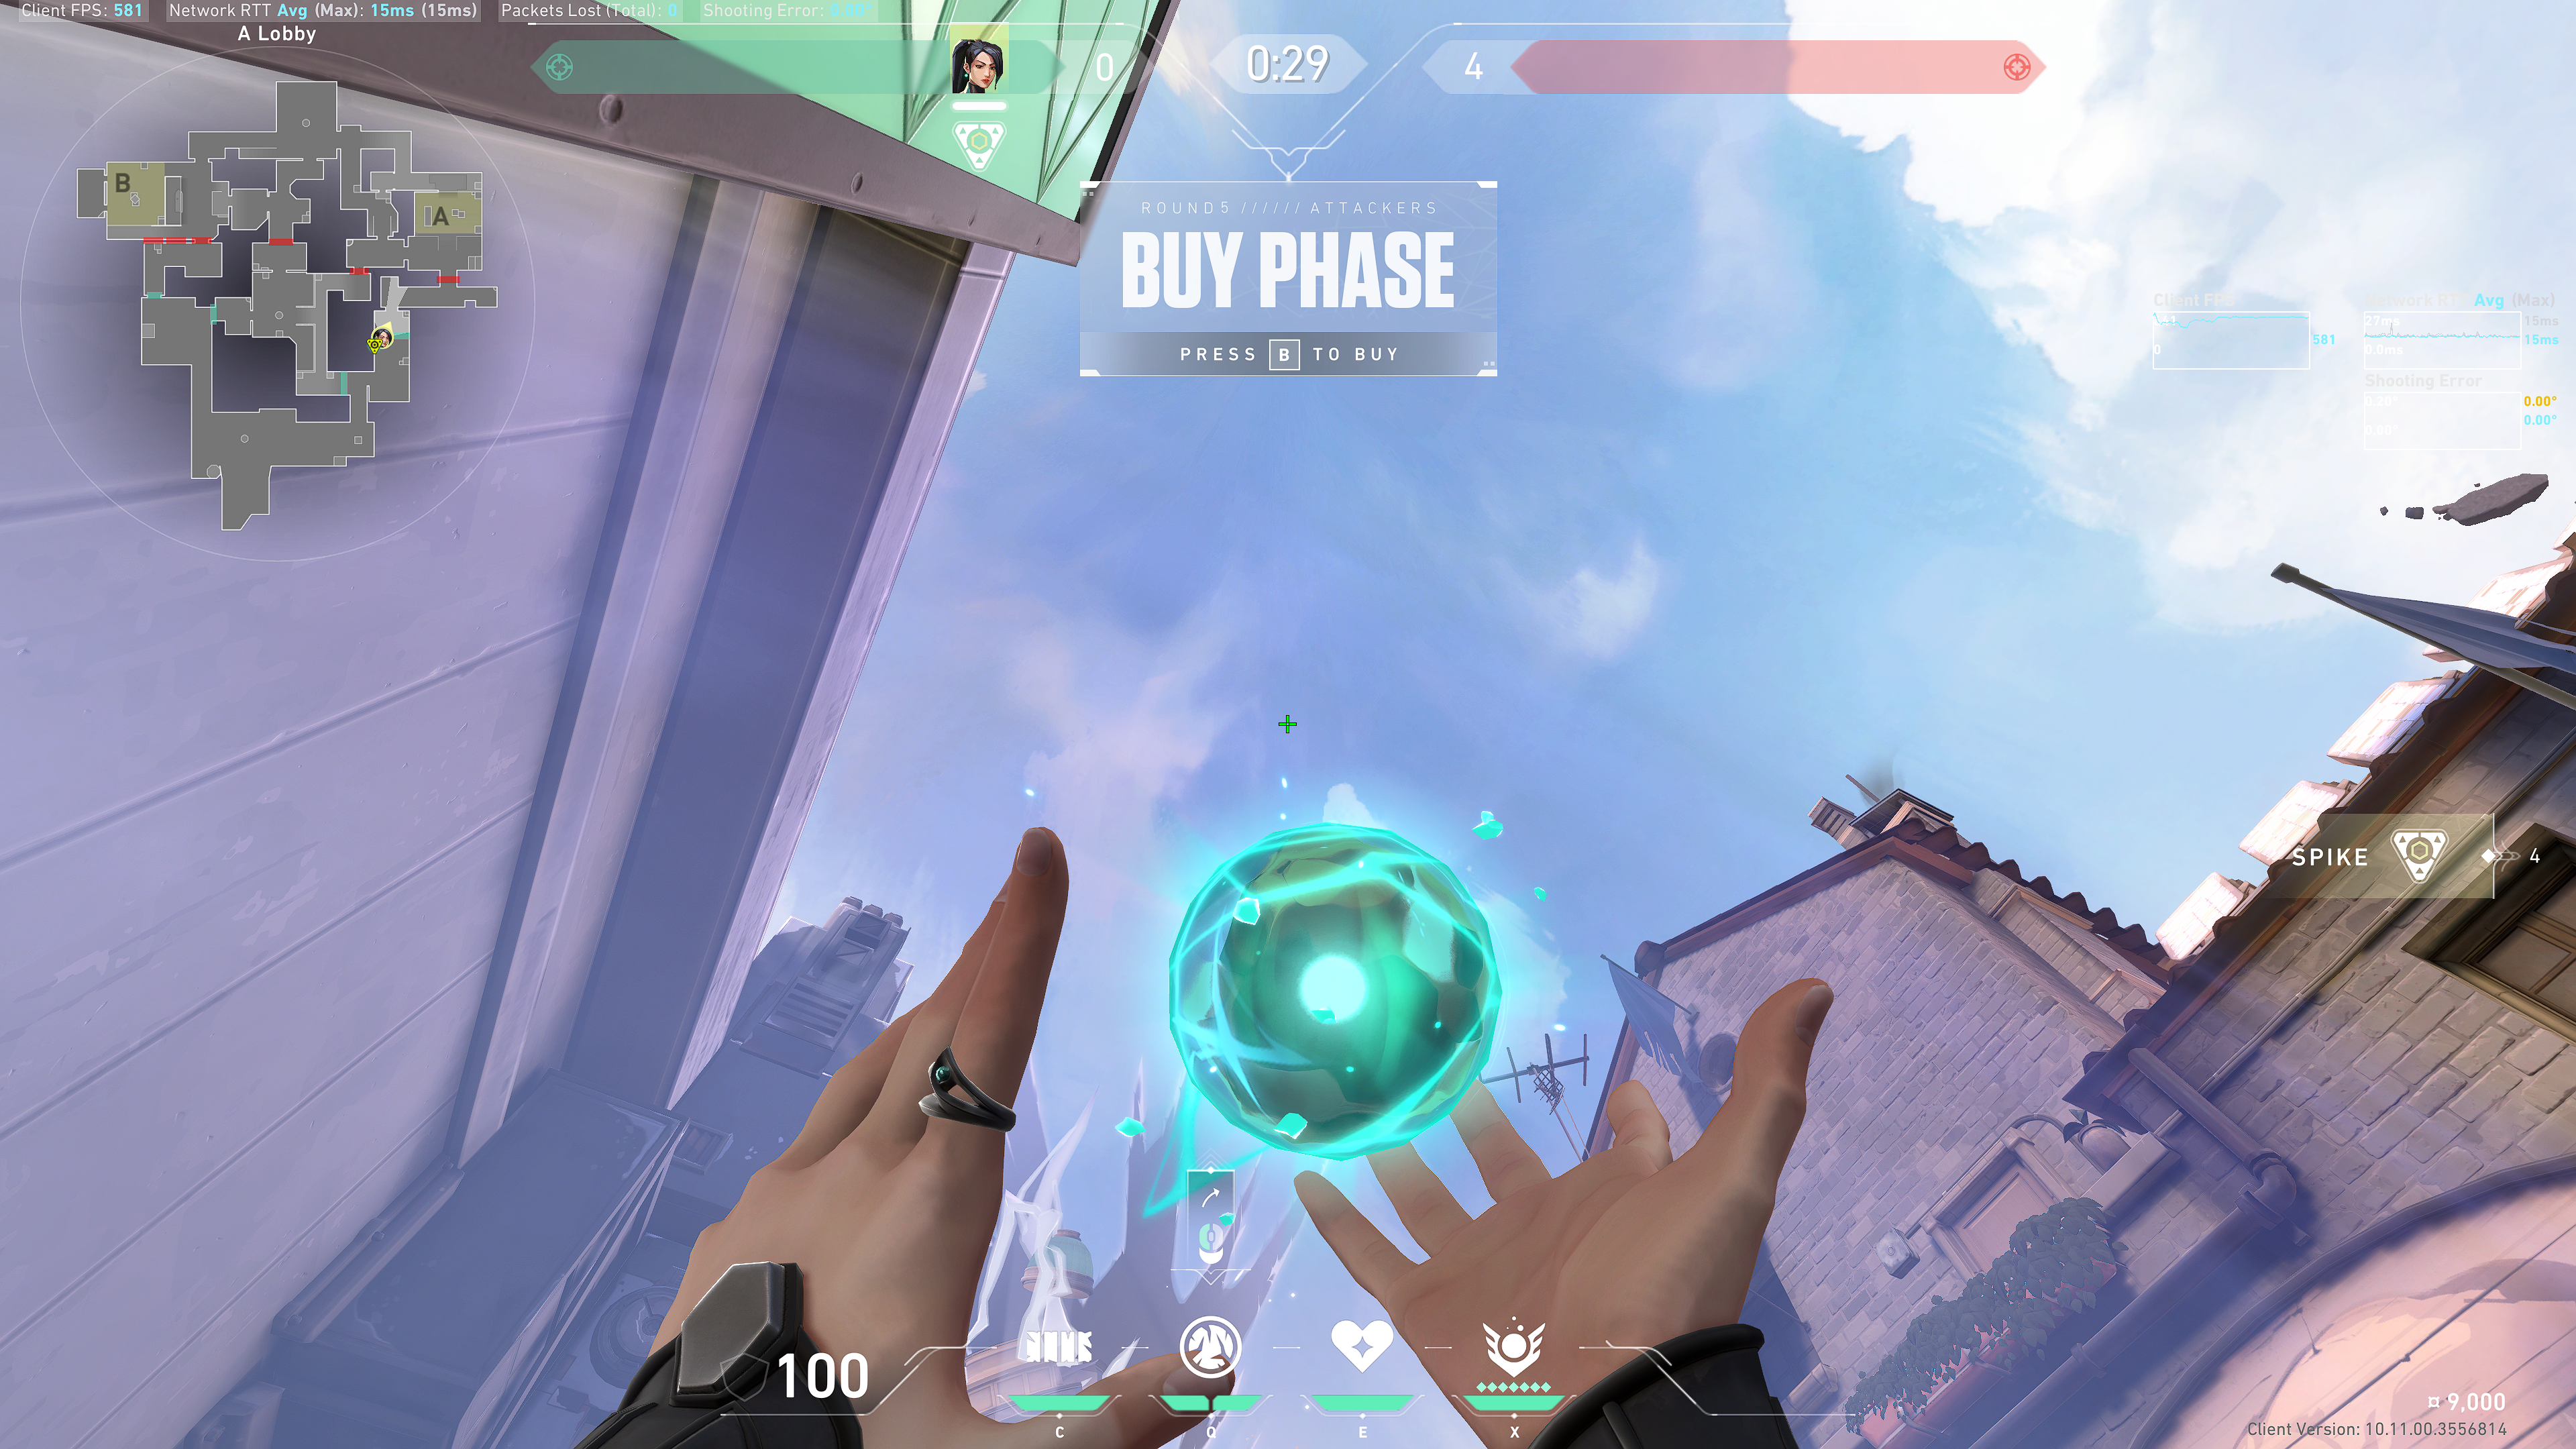
Heaven
Aim in the middle of this island cloud in the sky:
 Result:
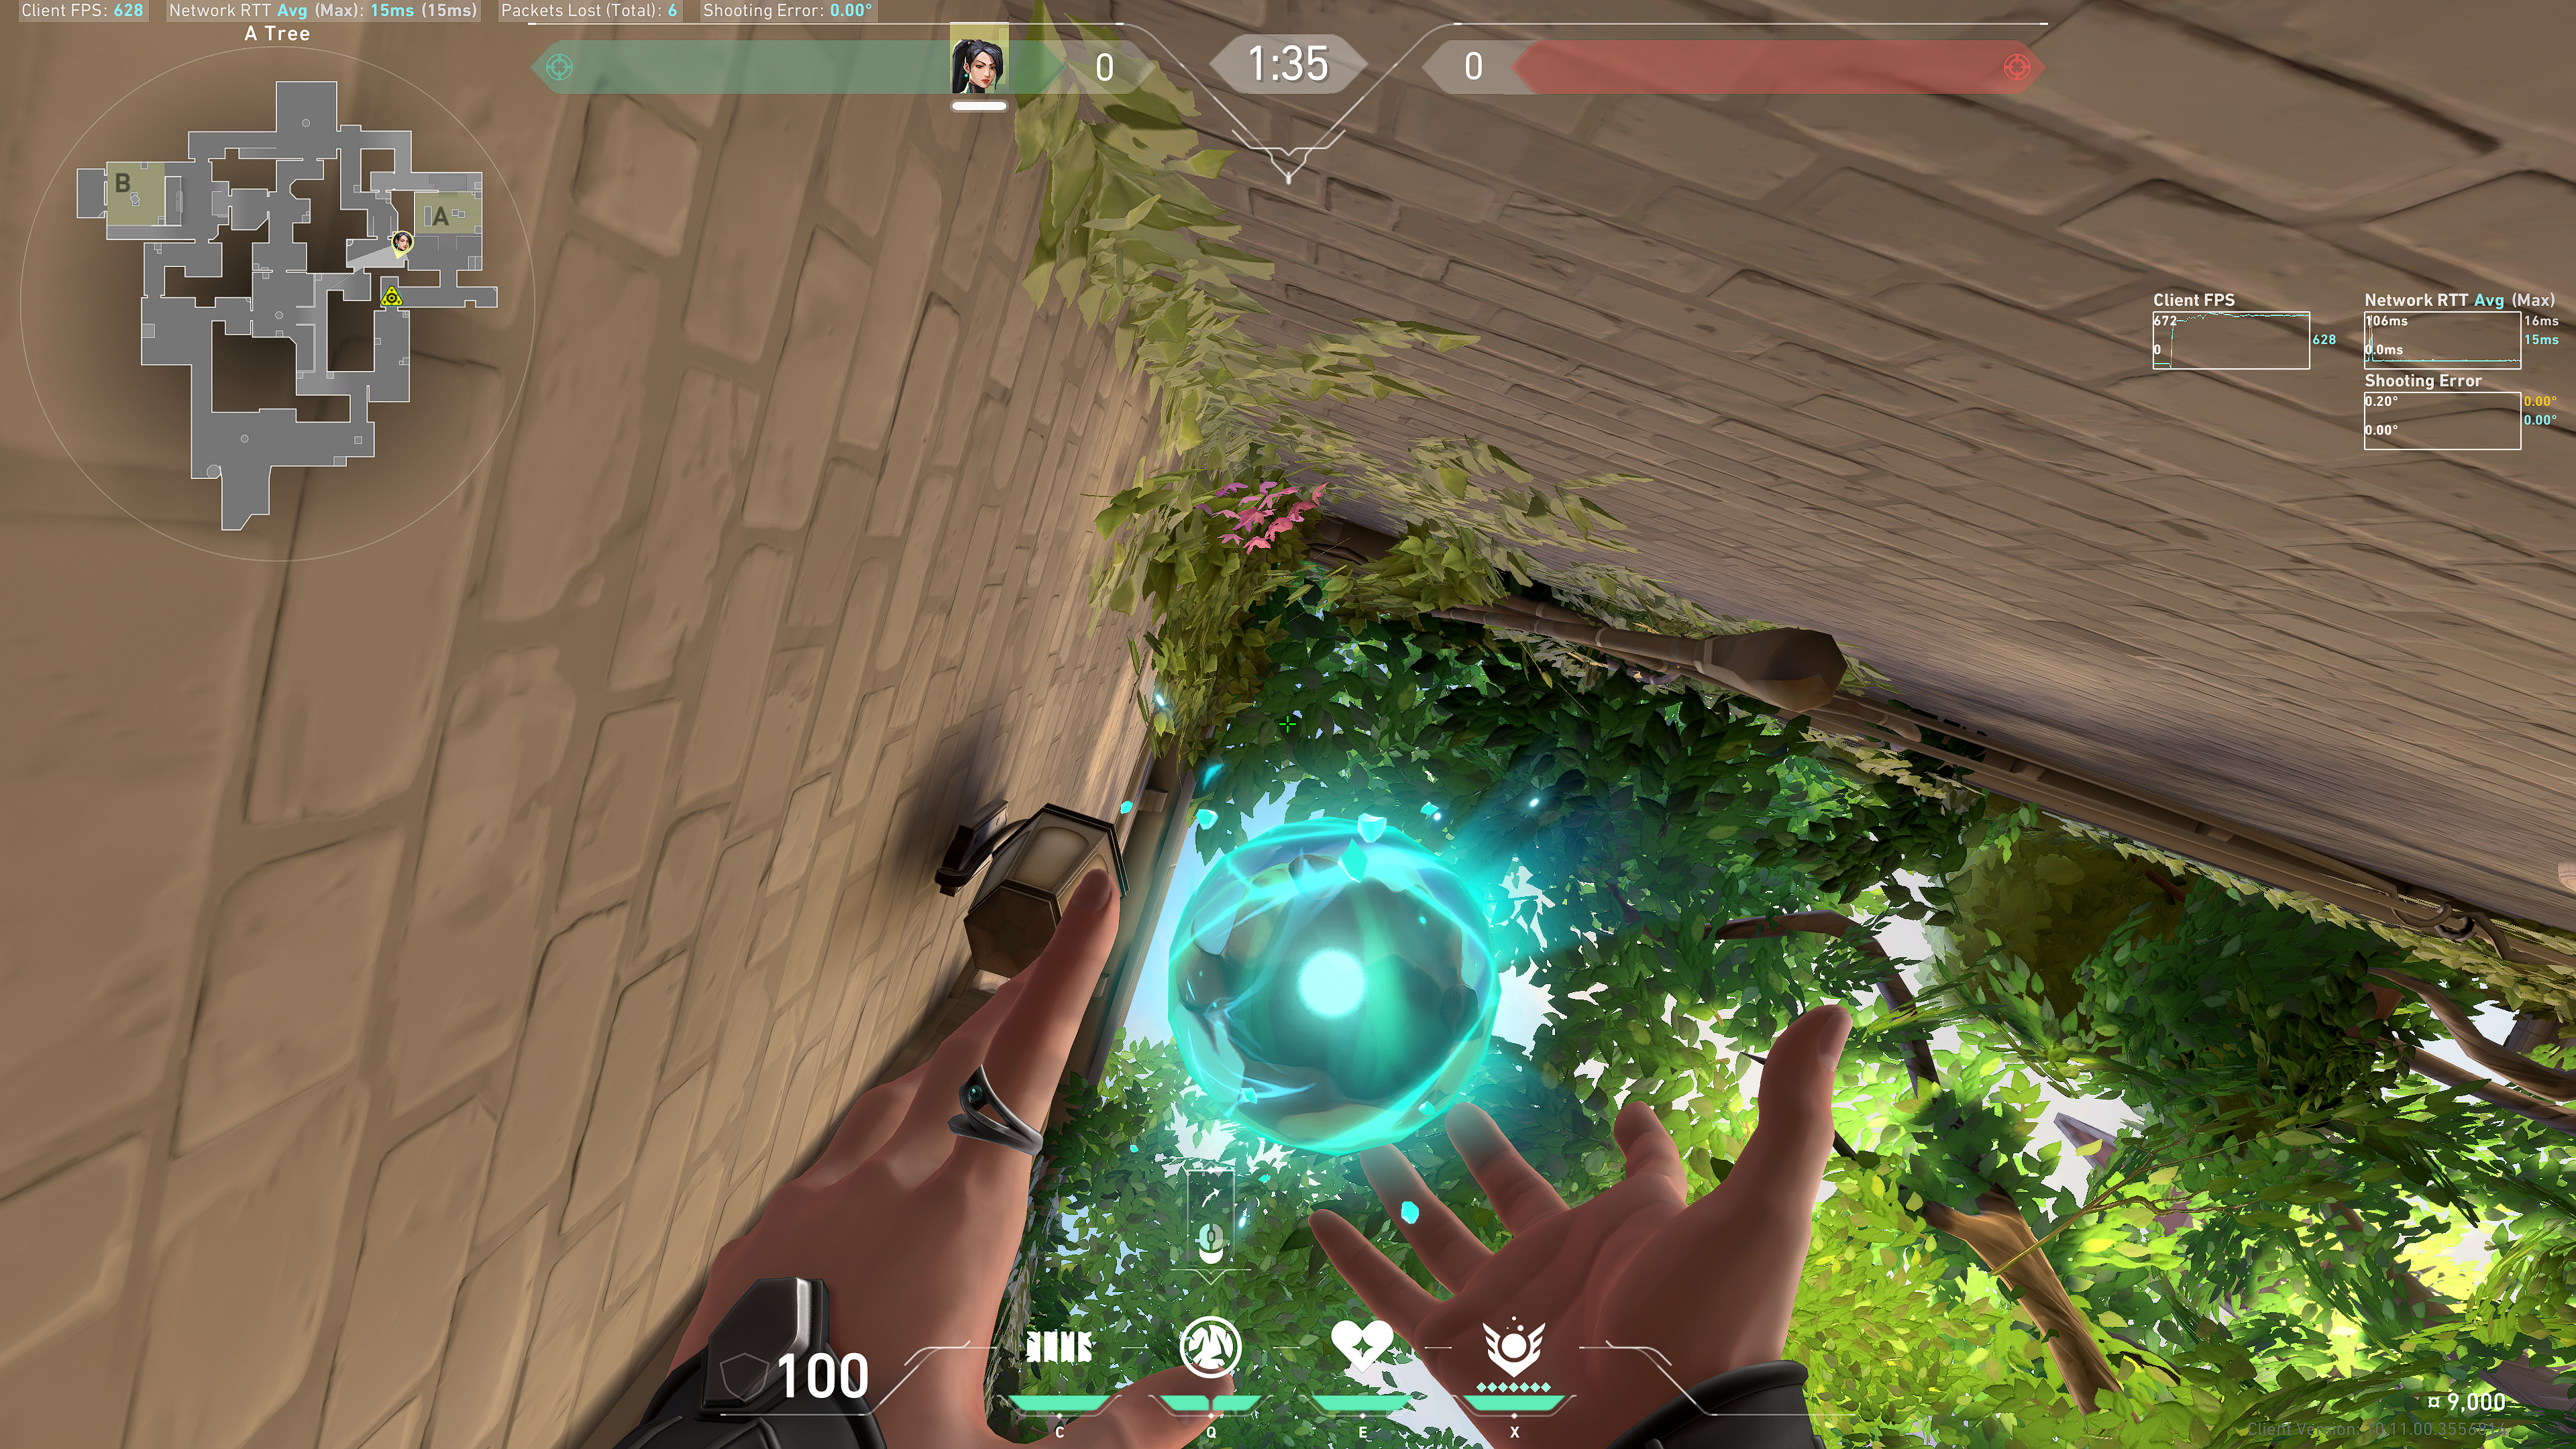
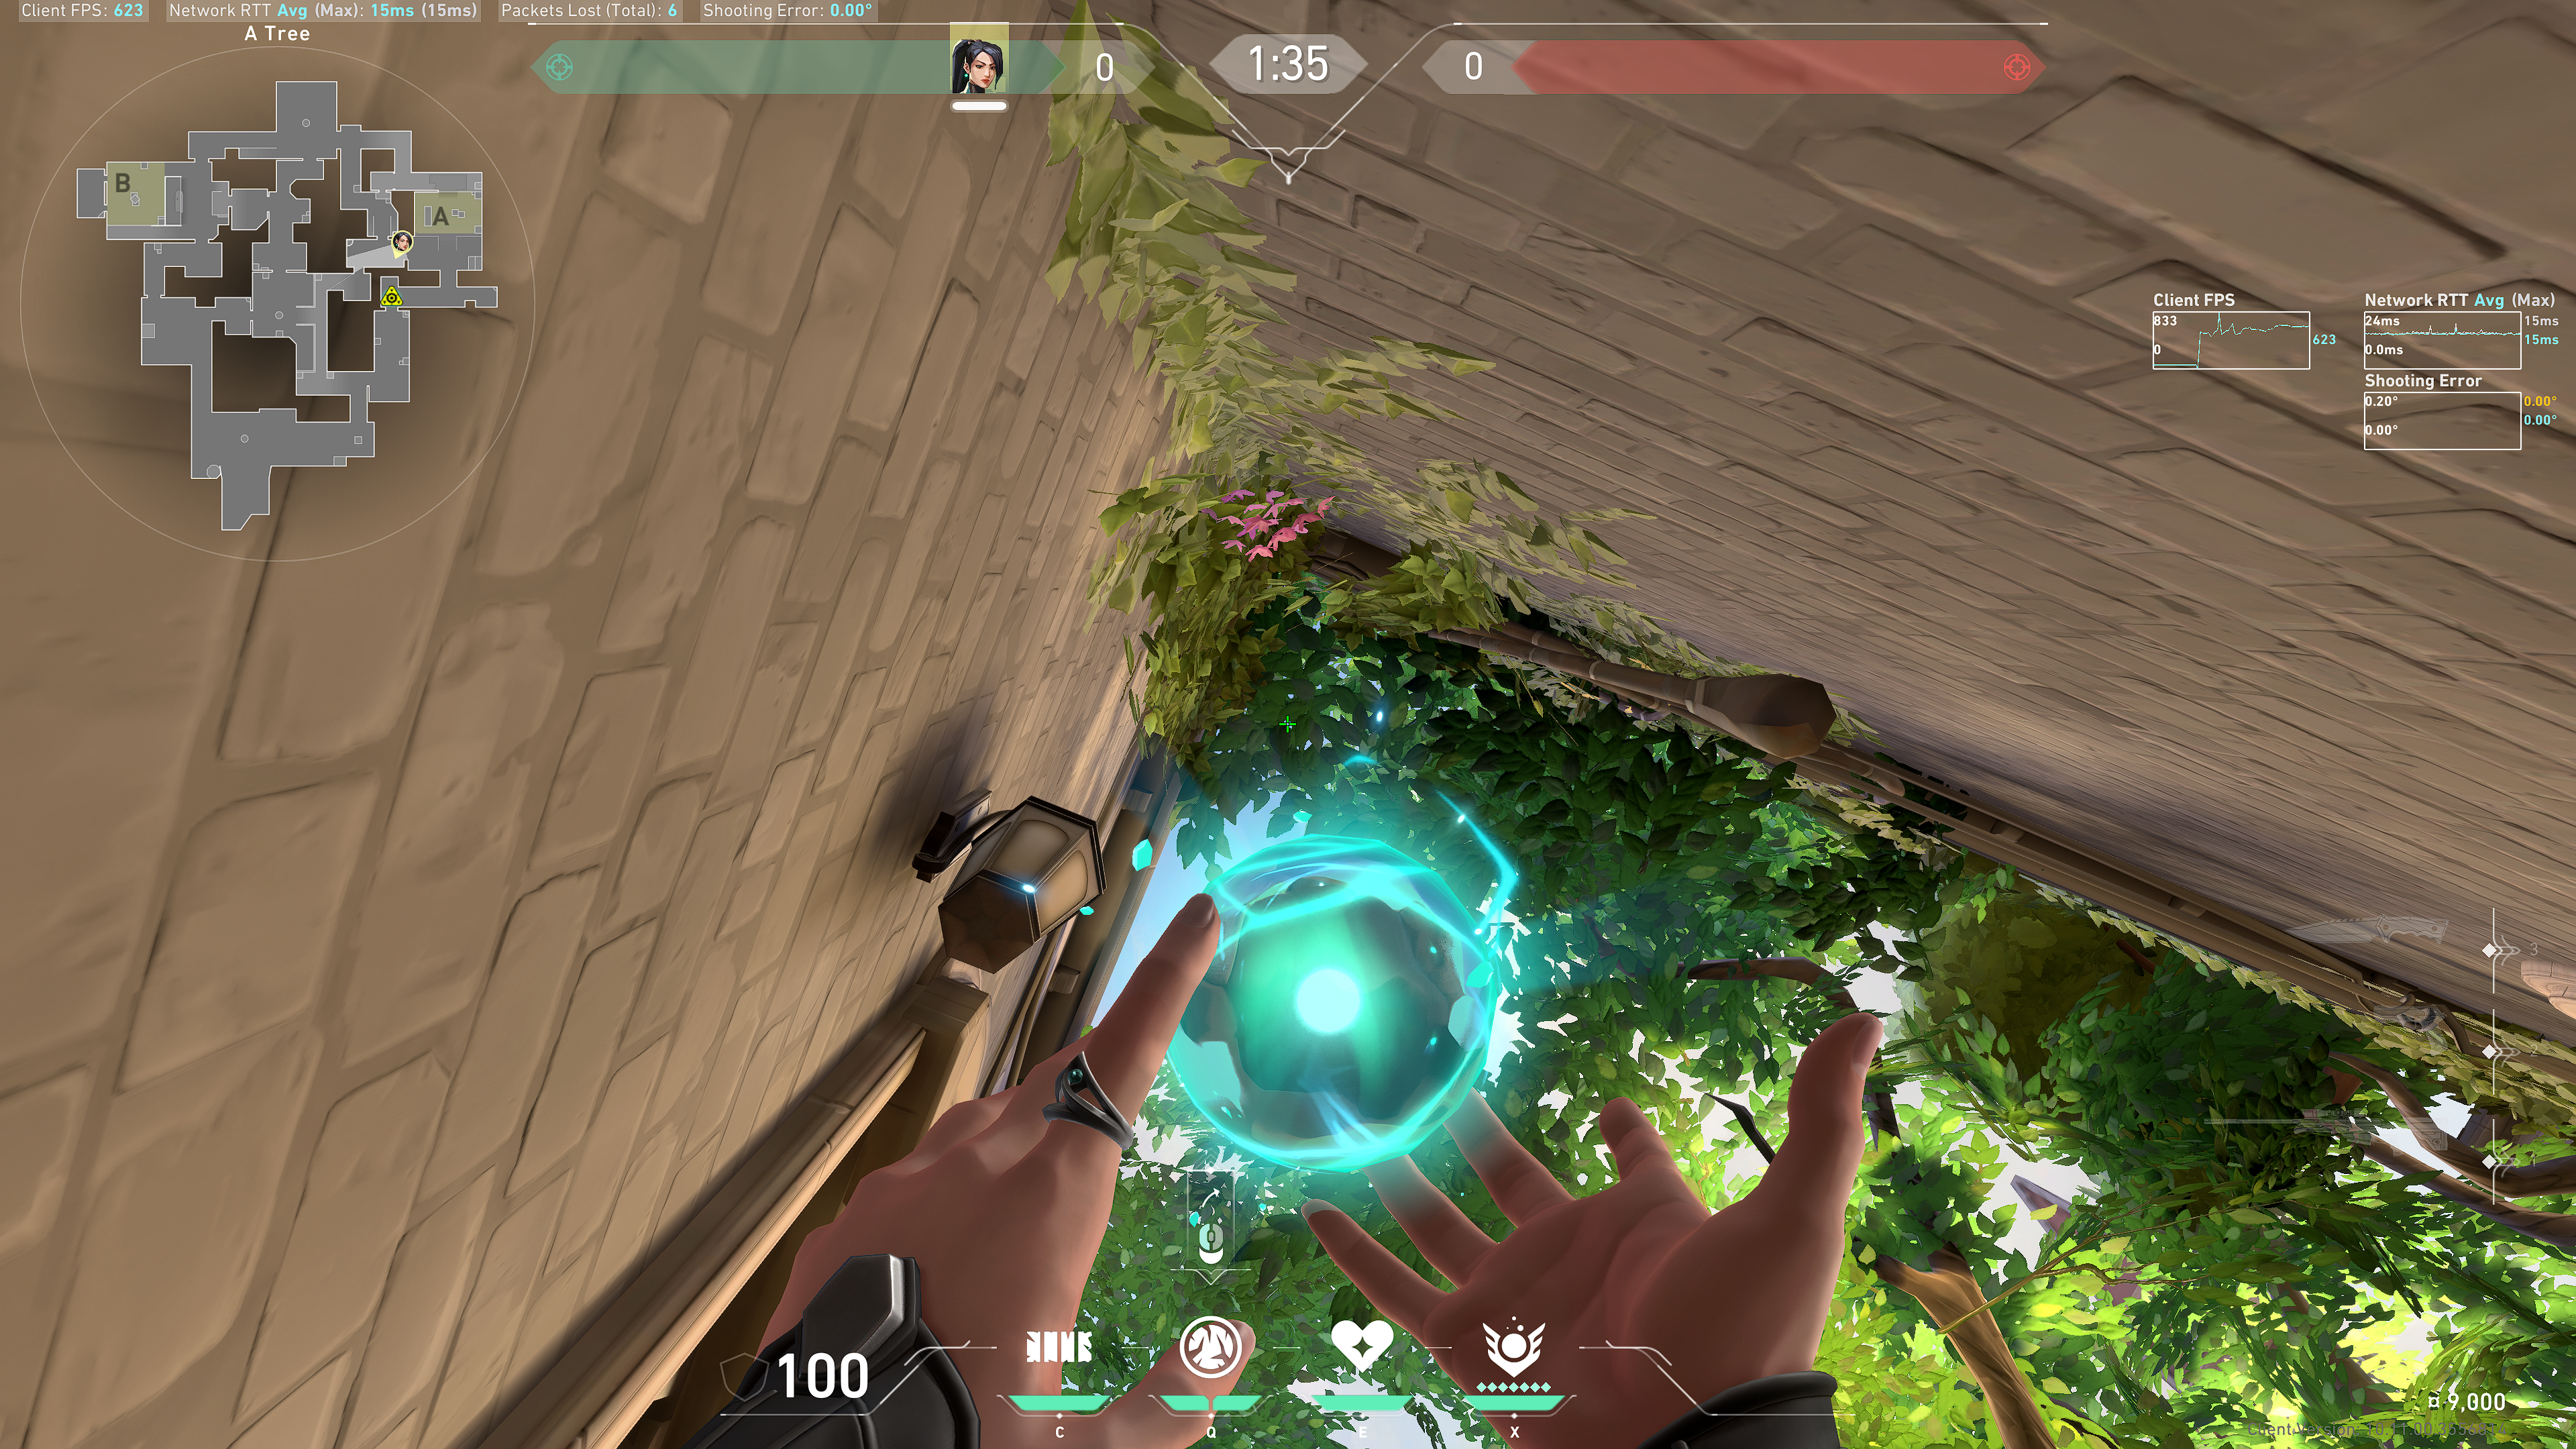
Tree
Notice this line in the electrical box:
 The separator bar between the Slow and Heart symbols; lineup the right side of it with the line in the electrical box:
 Note: careful not to go too far left that the Ice Slow accidentally bounces off the ceiling to your left.
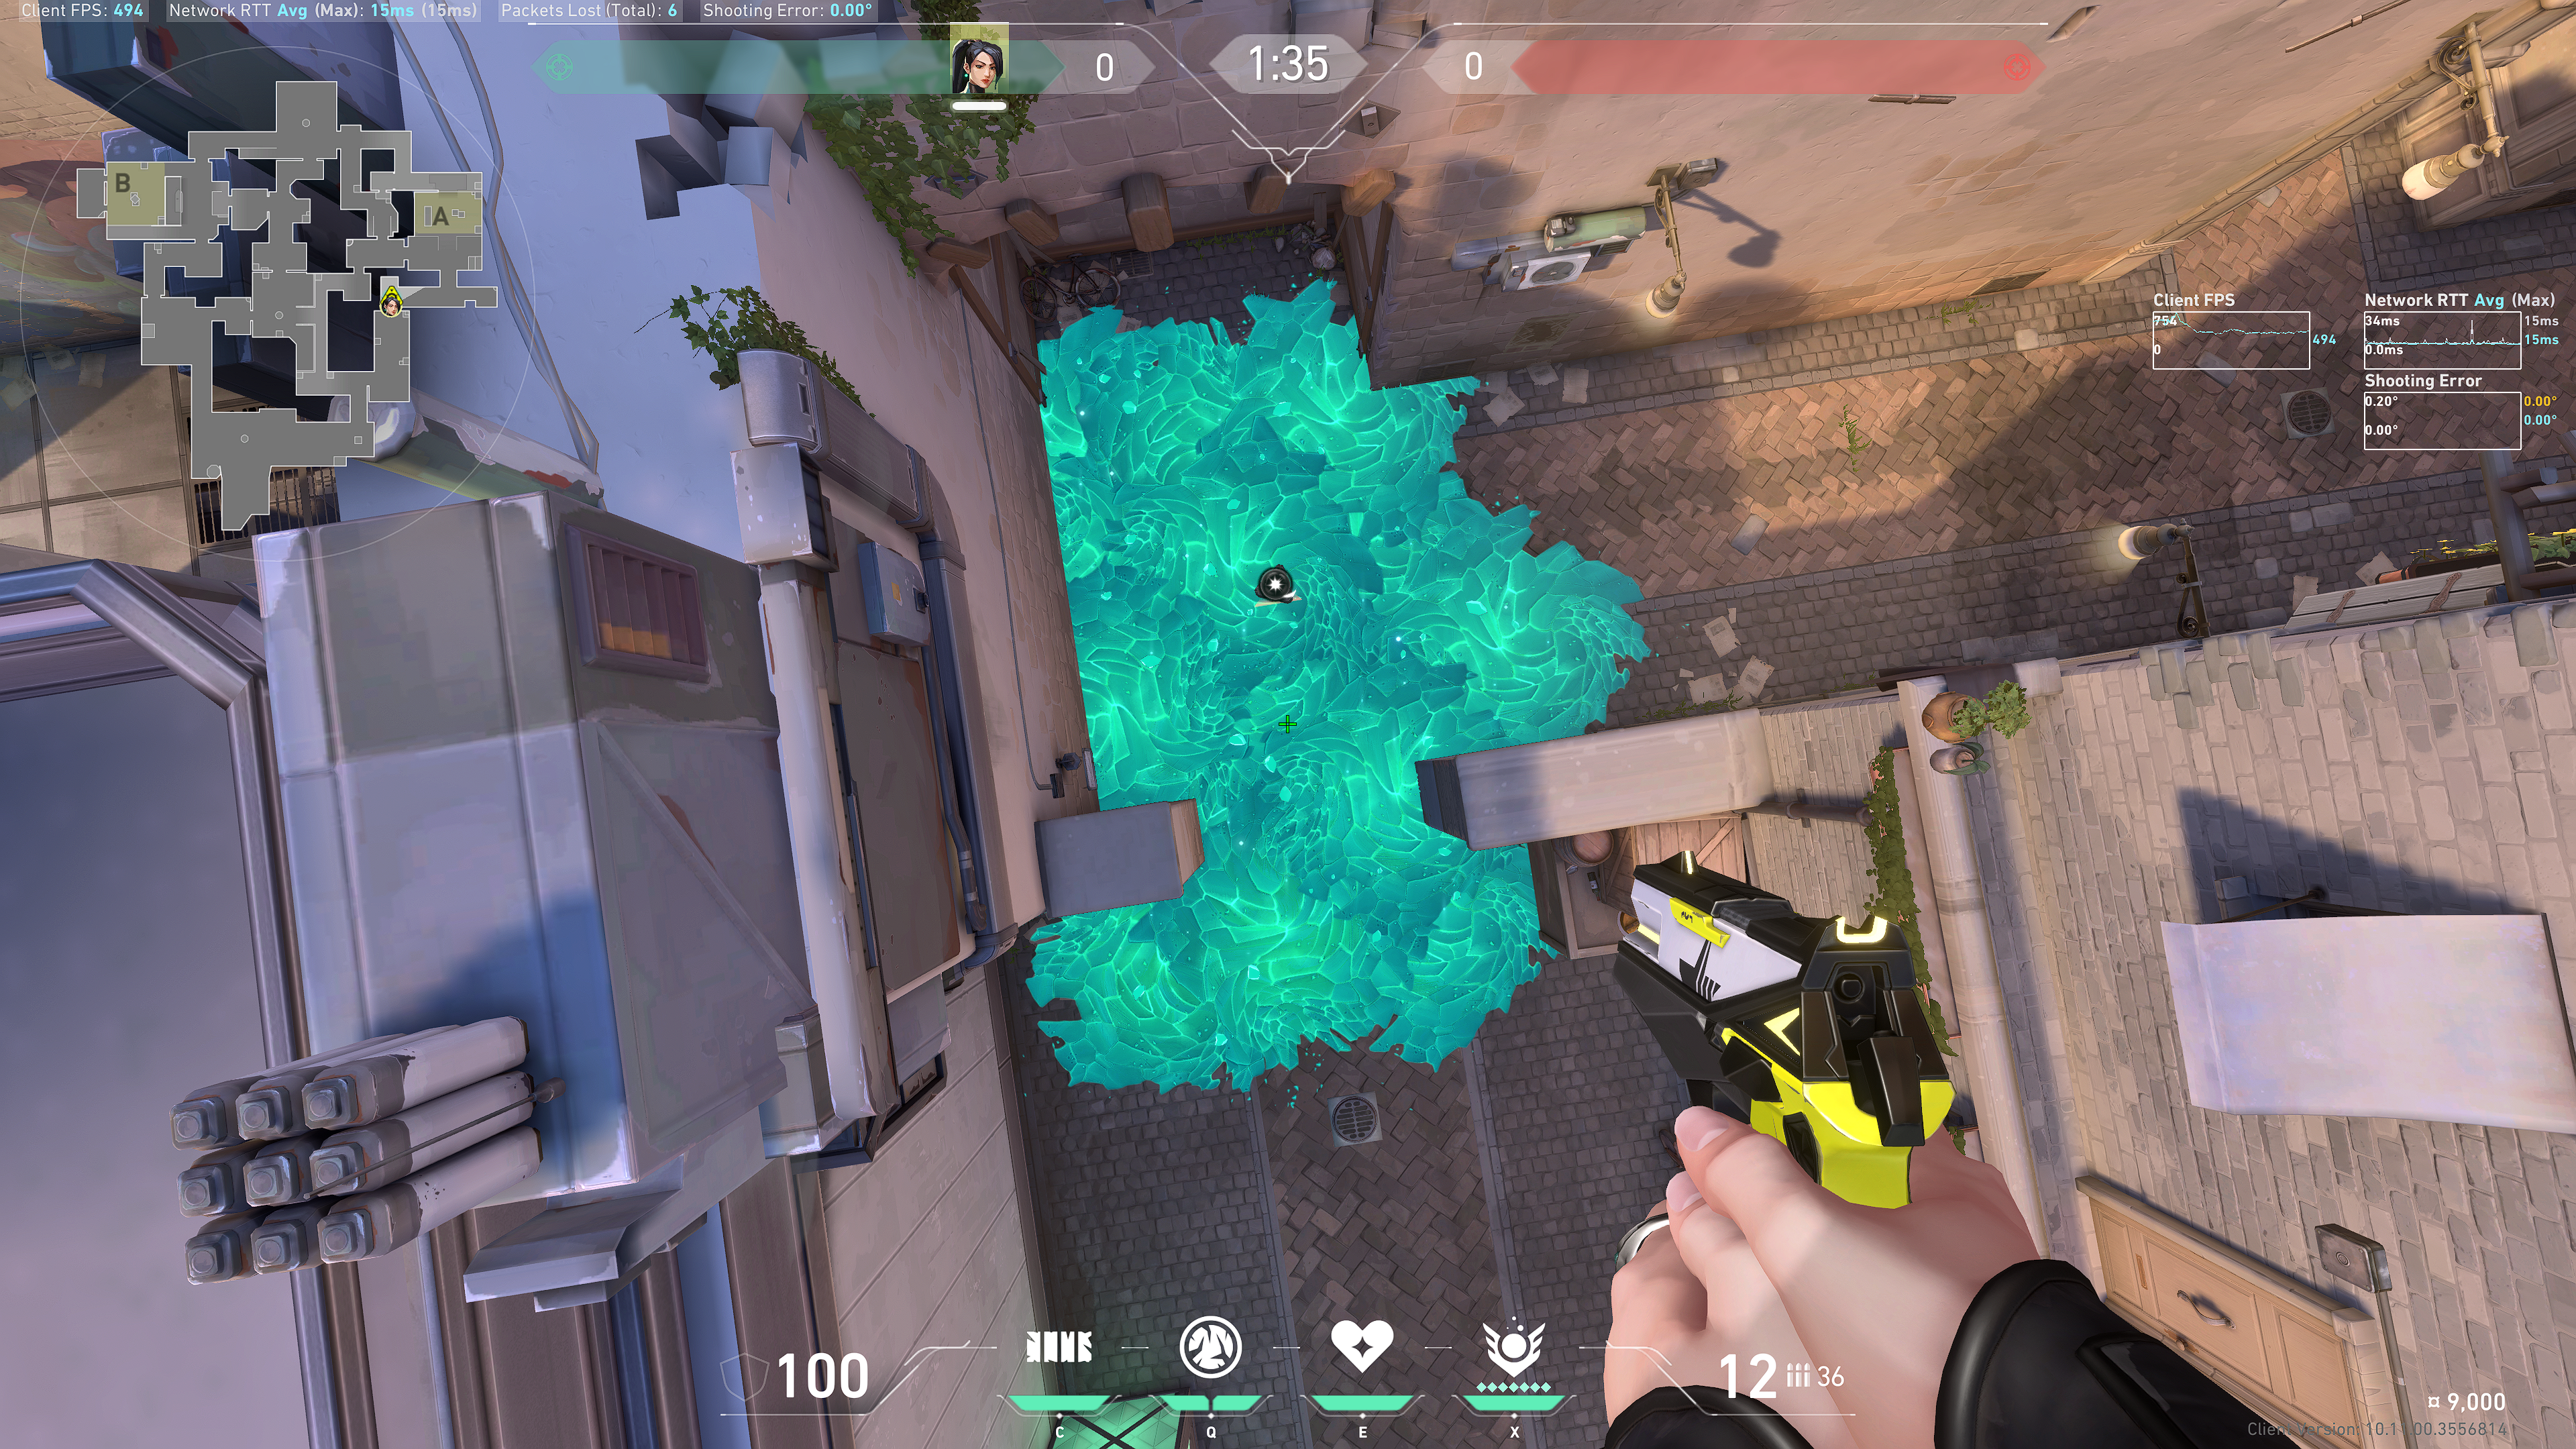
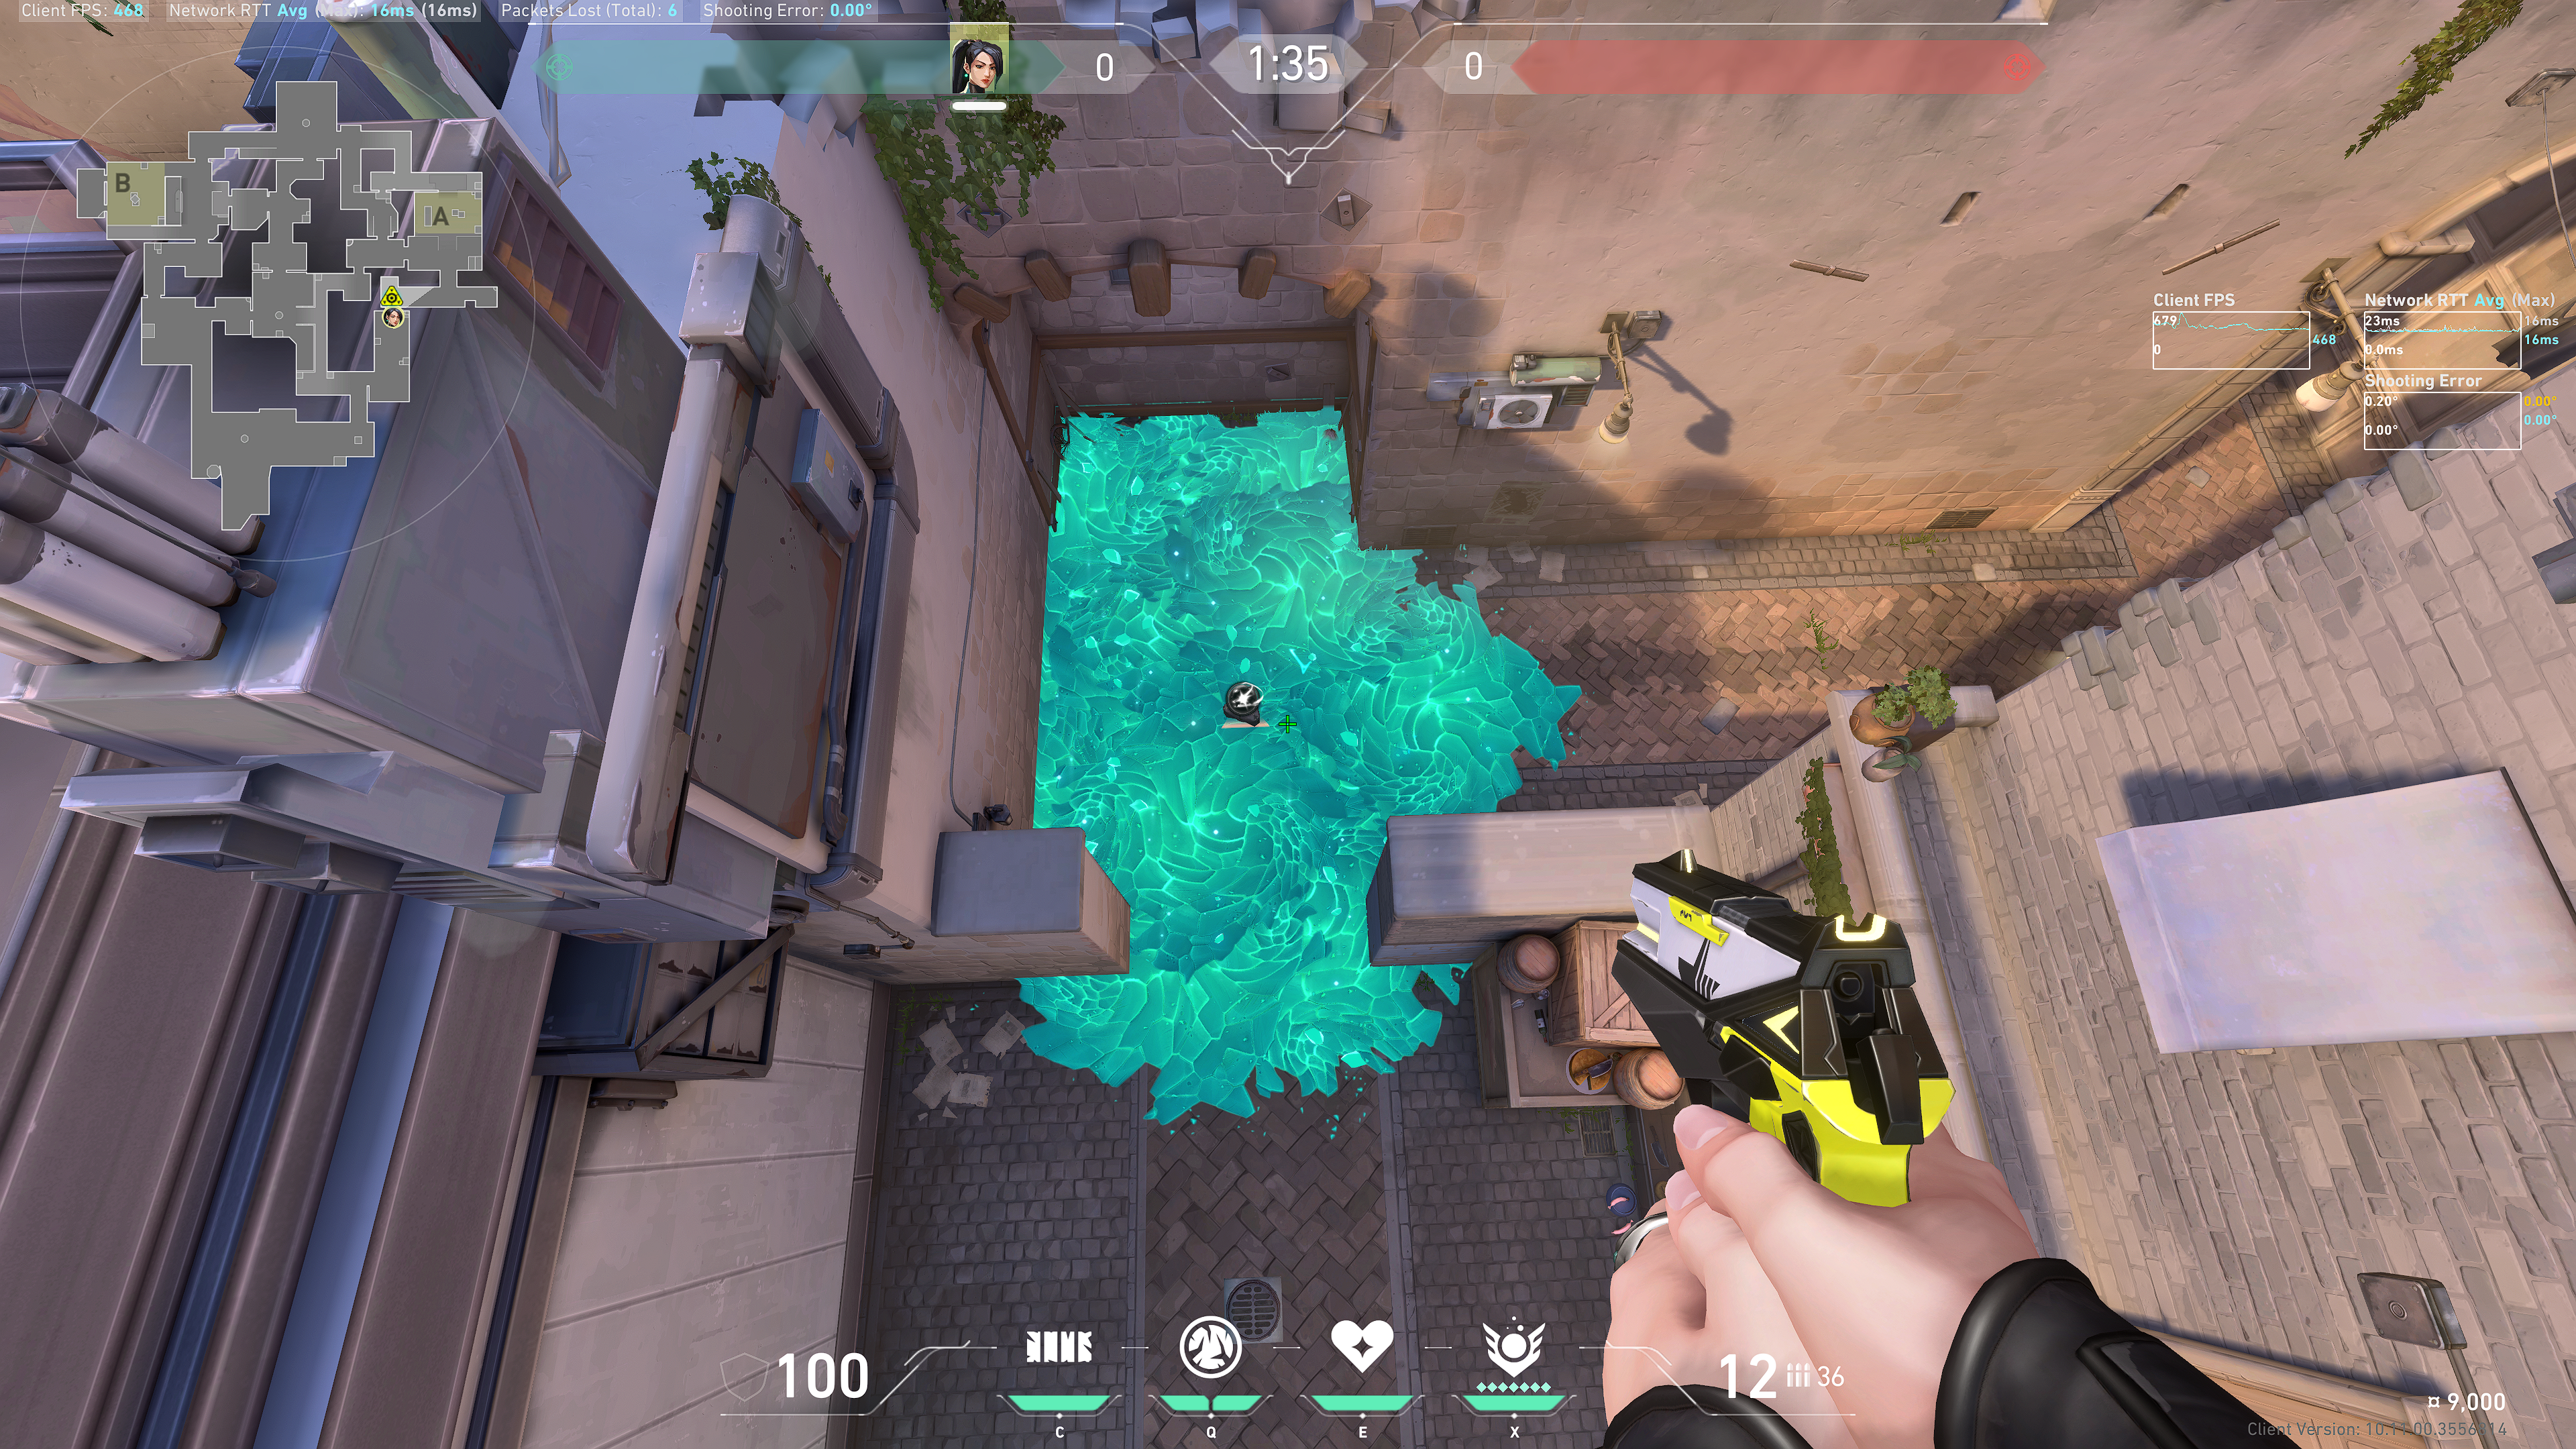
Result:
Note: careful not to go too far left that the Ice Slow accidentally bounces off the ceiling to your left.
Result:
A Site - walk contact
Note: this version is best for walk contact, as it does take some time to set up. The advantage is that you can immediately grab the orb and can more quickly rejoin your team. That being said, most of the time contacting up won't be possible, so the Fast Execute lineups are more practical to learn first.
Tuck in this corner:
Generator
Take note of this intersection of bricks above the middle wood arch:
 The small bar between the Ice Orb and Heal ability; line up the right side of the bar with the bricks:
 Result:
Back site
Take note this intersection of bricks:
 The small bar between the Ice Orb and Heal ability; line up the right side of the bar with the bricks:
 Result:
 Combo results (version 1):
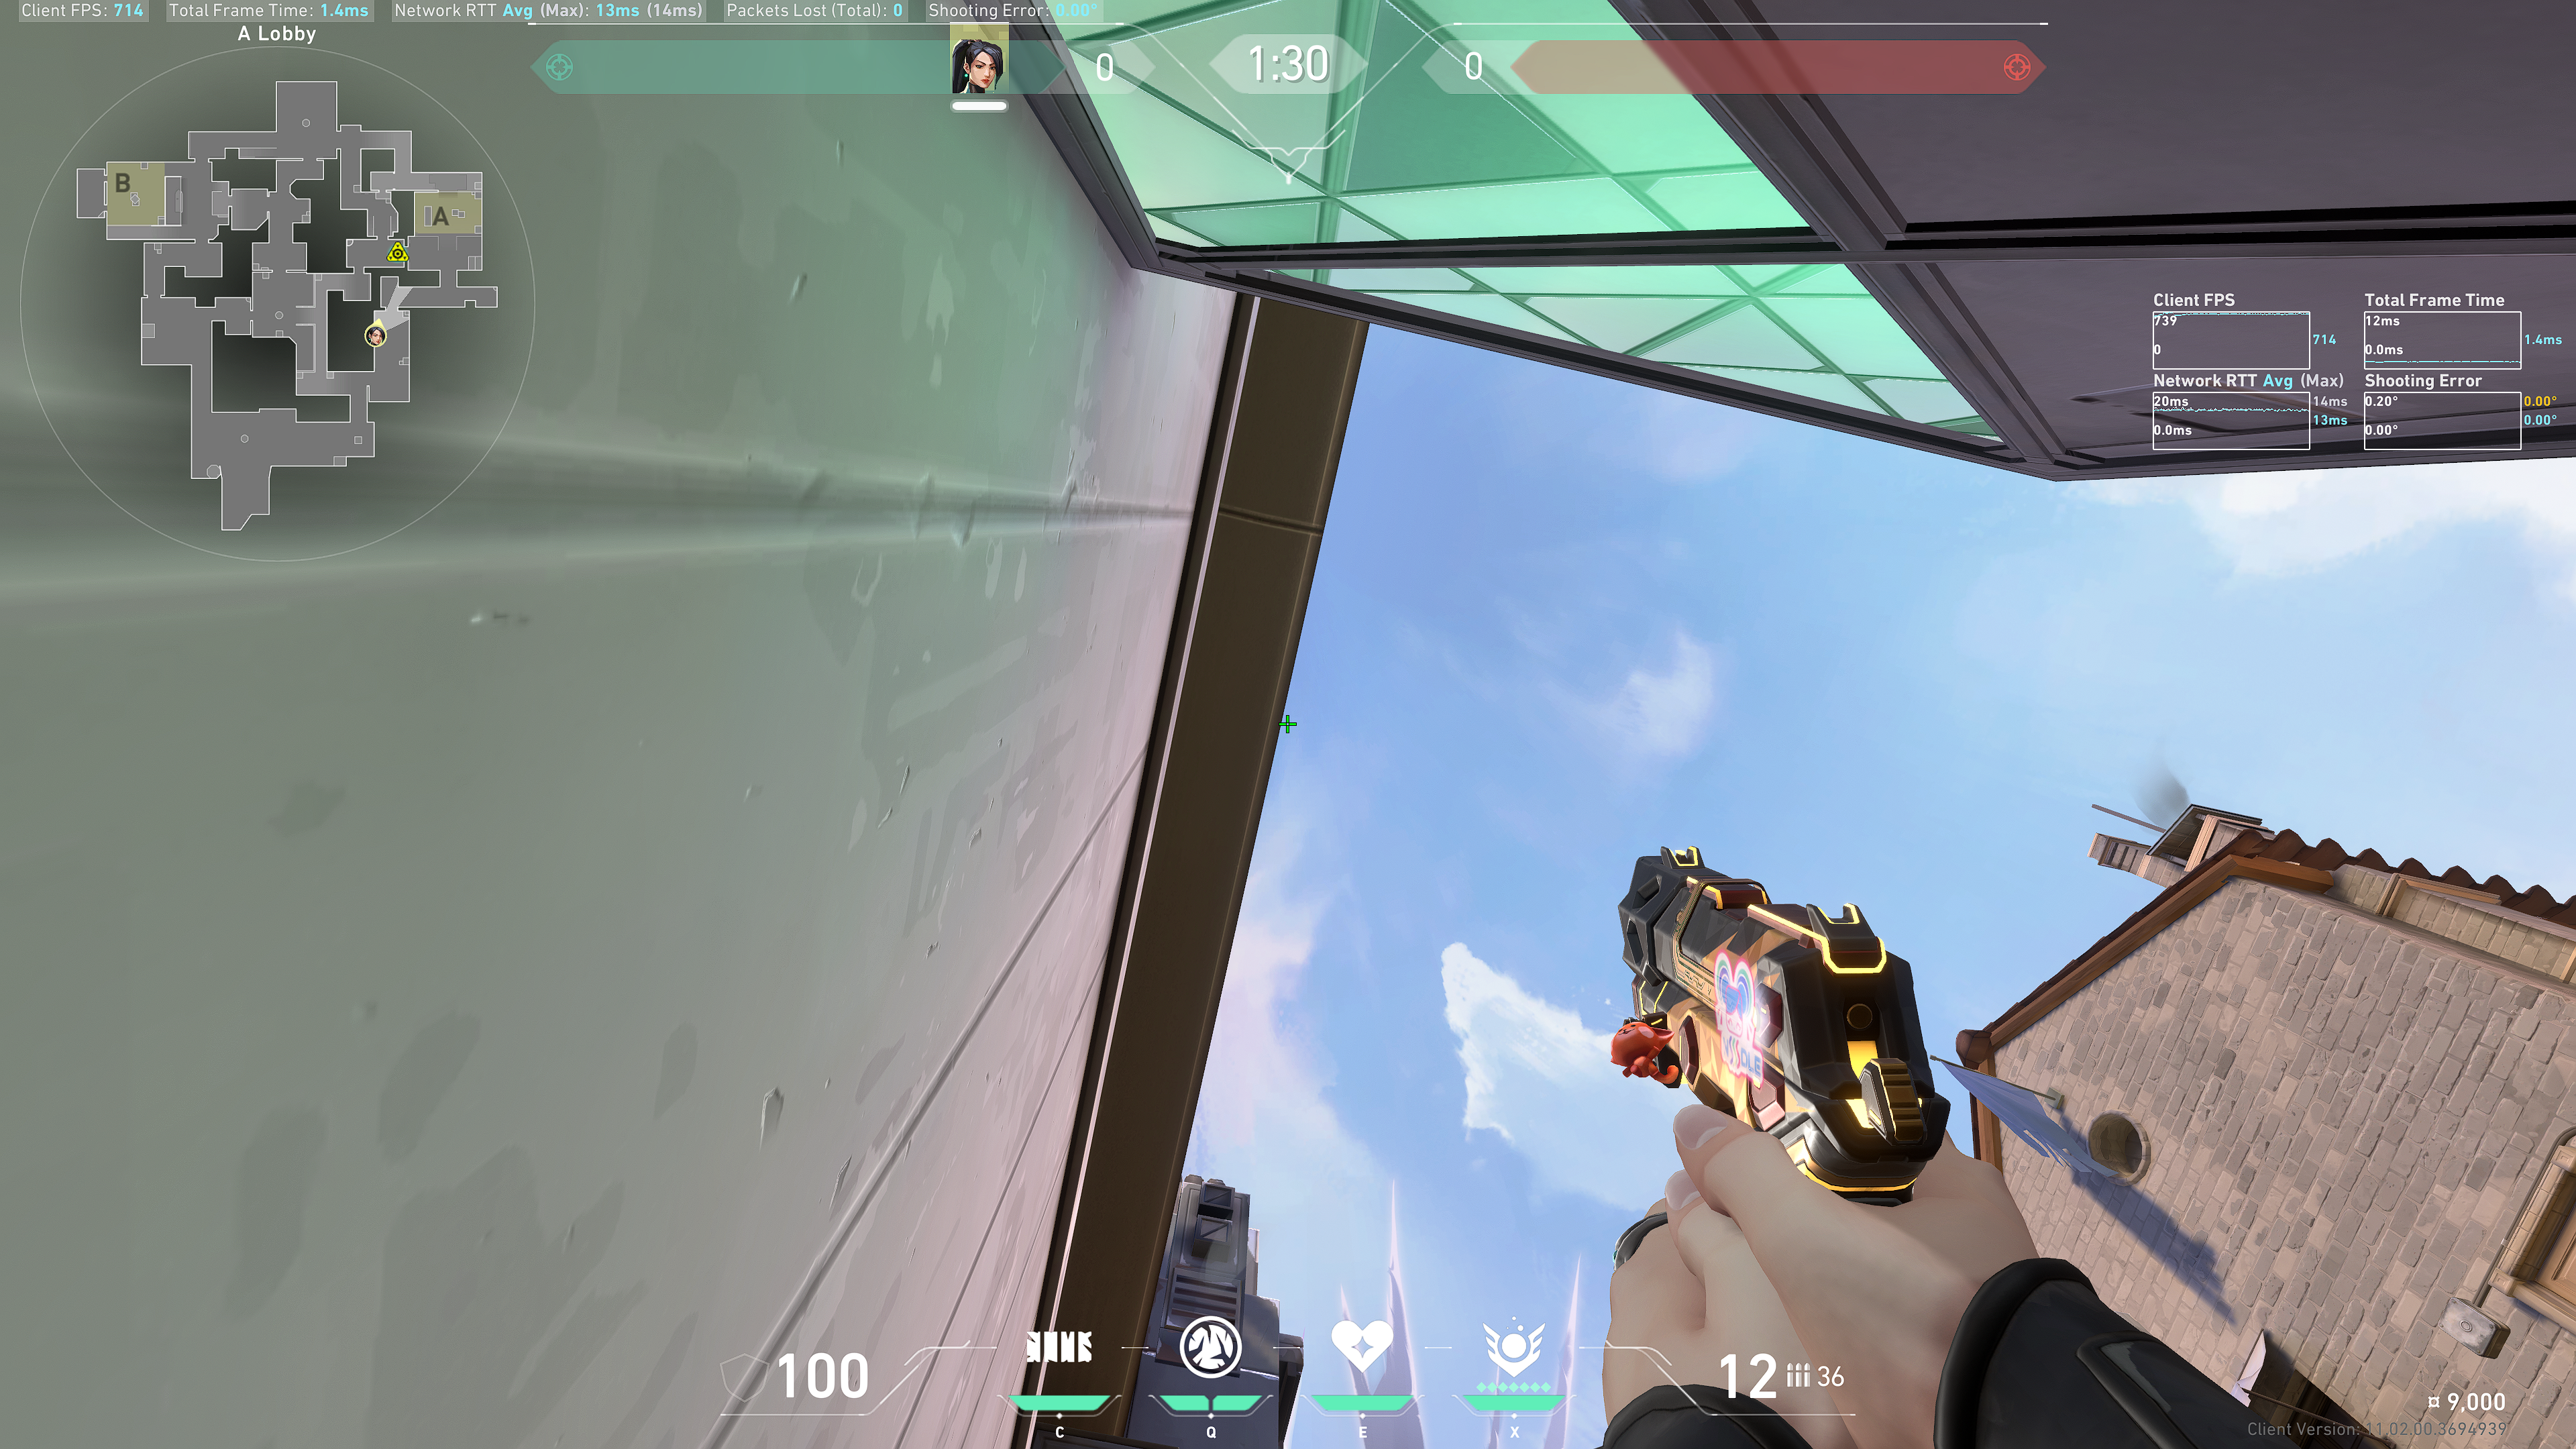
Heaven
Aim at the tip of this cloud in the sky:
 Note: the lineup is relatively lenient, as the back wall helps bounce the Ice Orb onto Heaven.
Result:
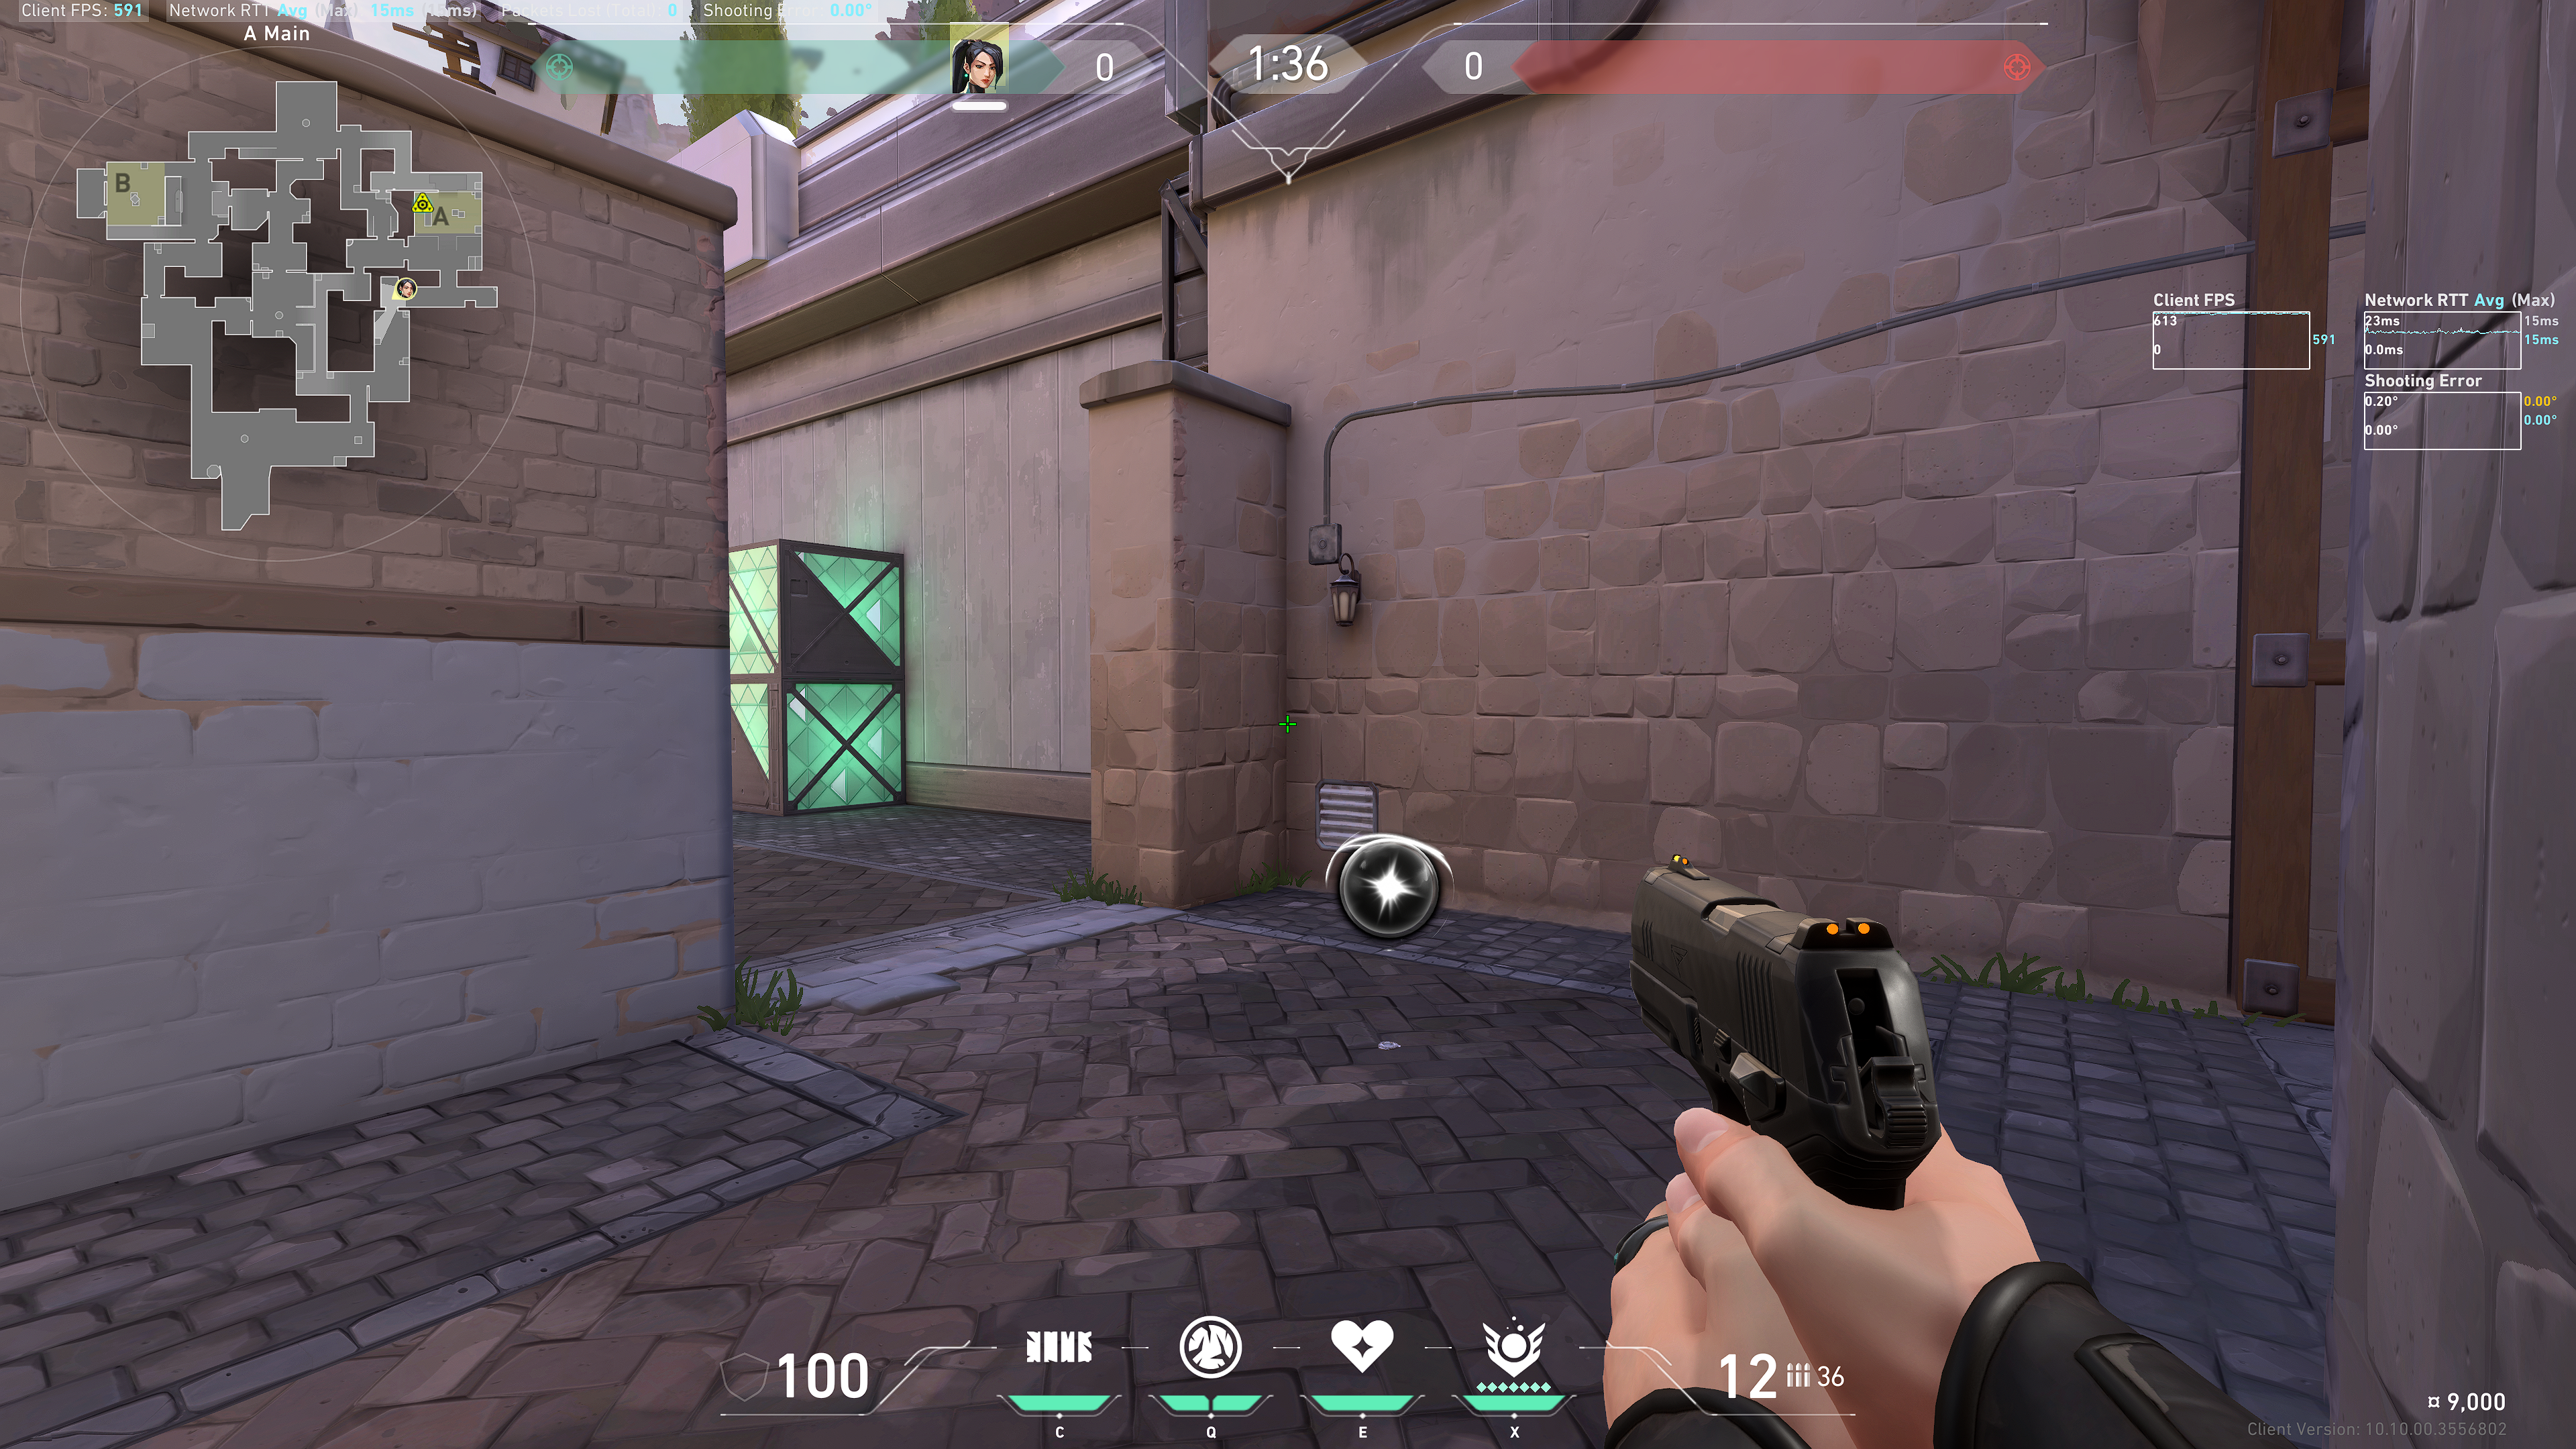
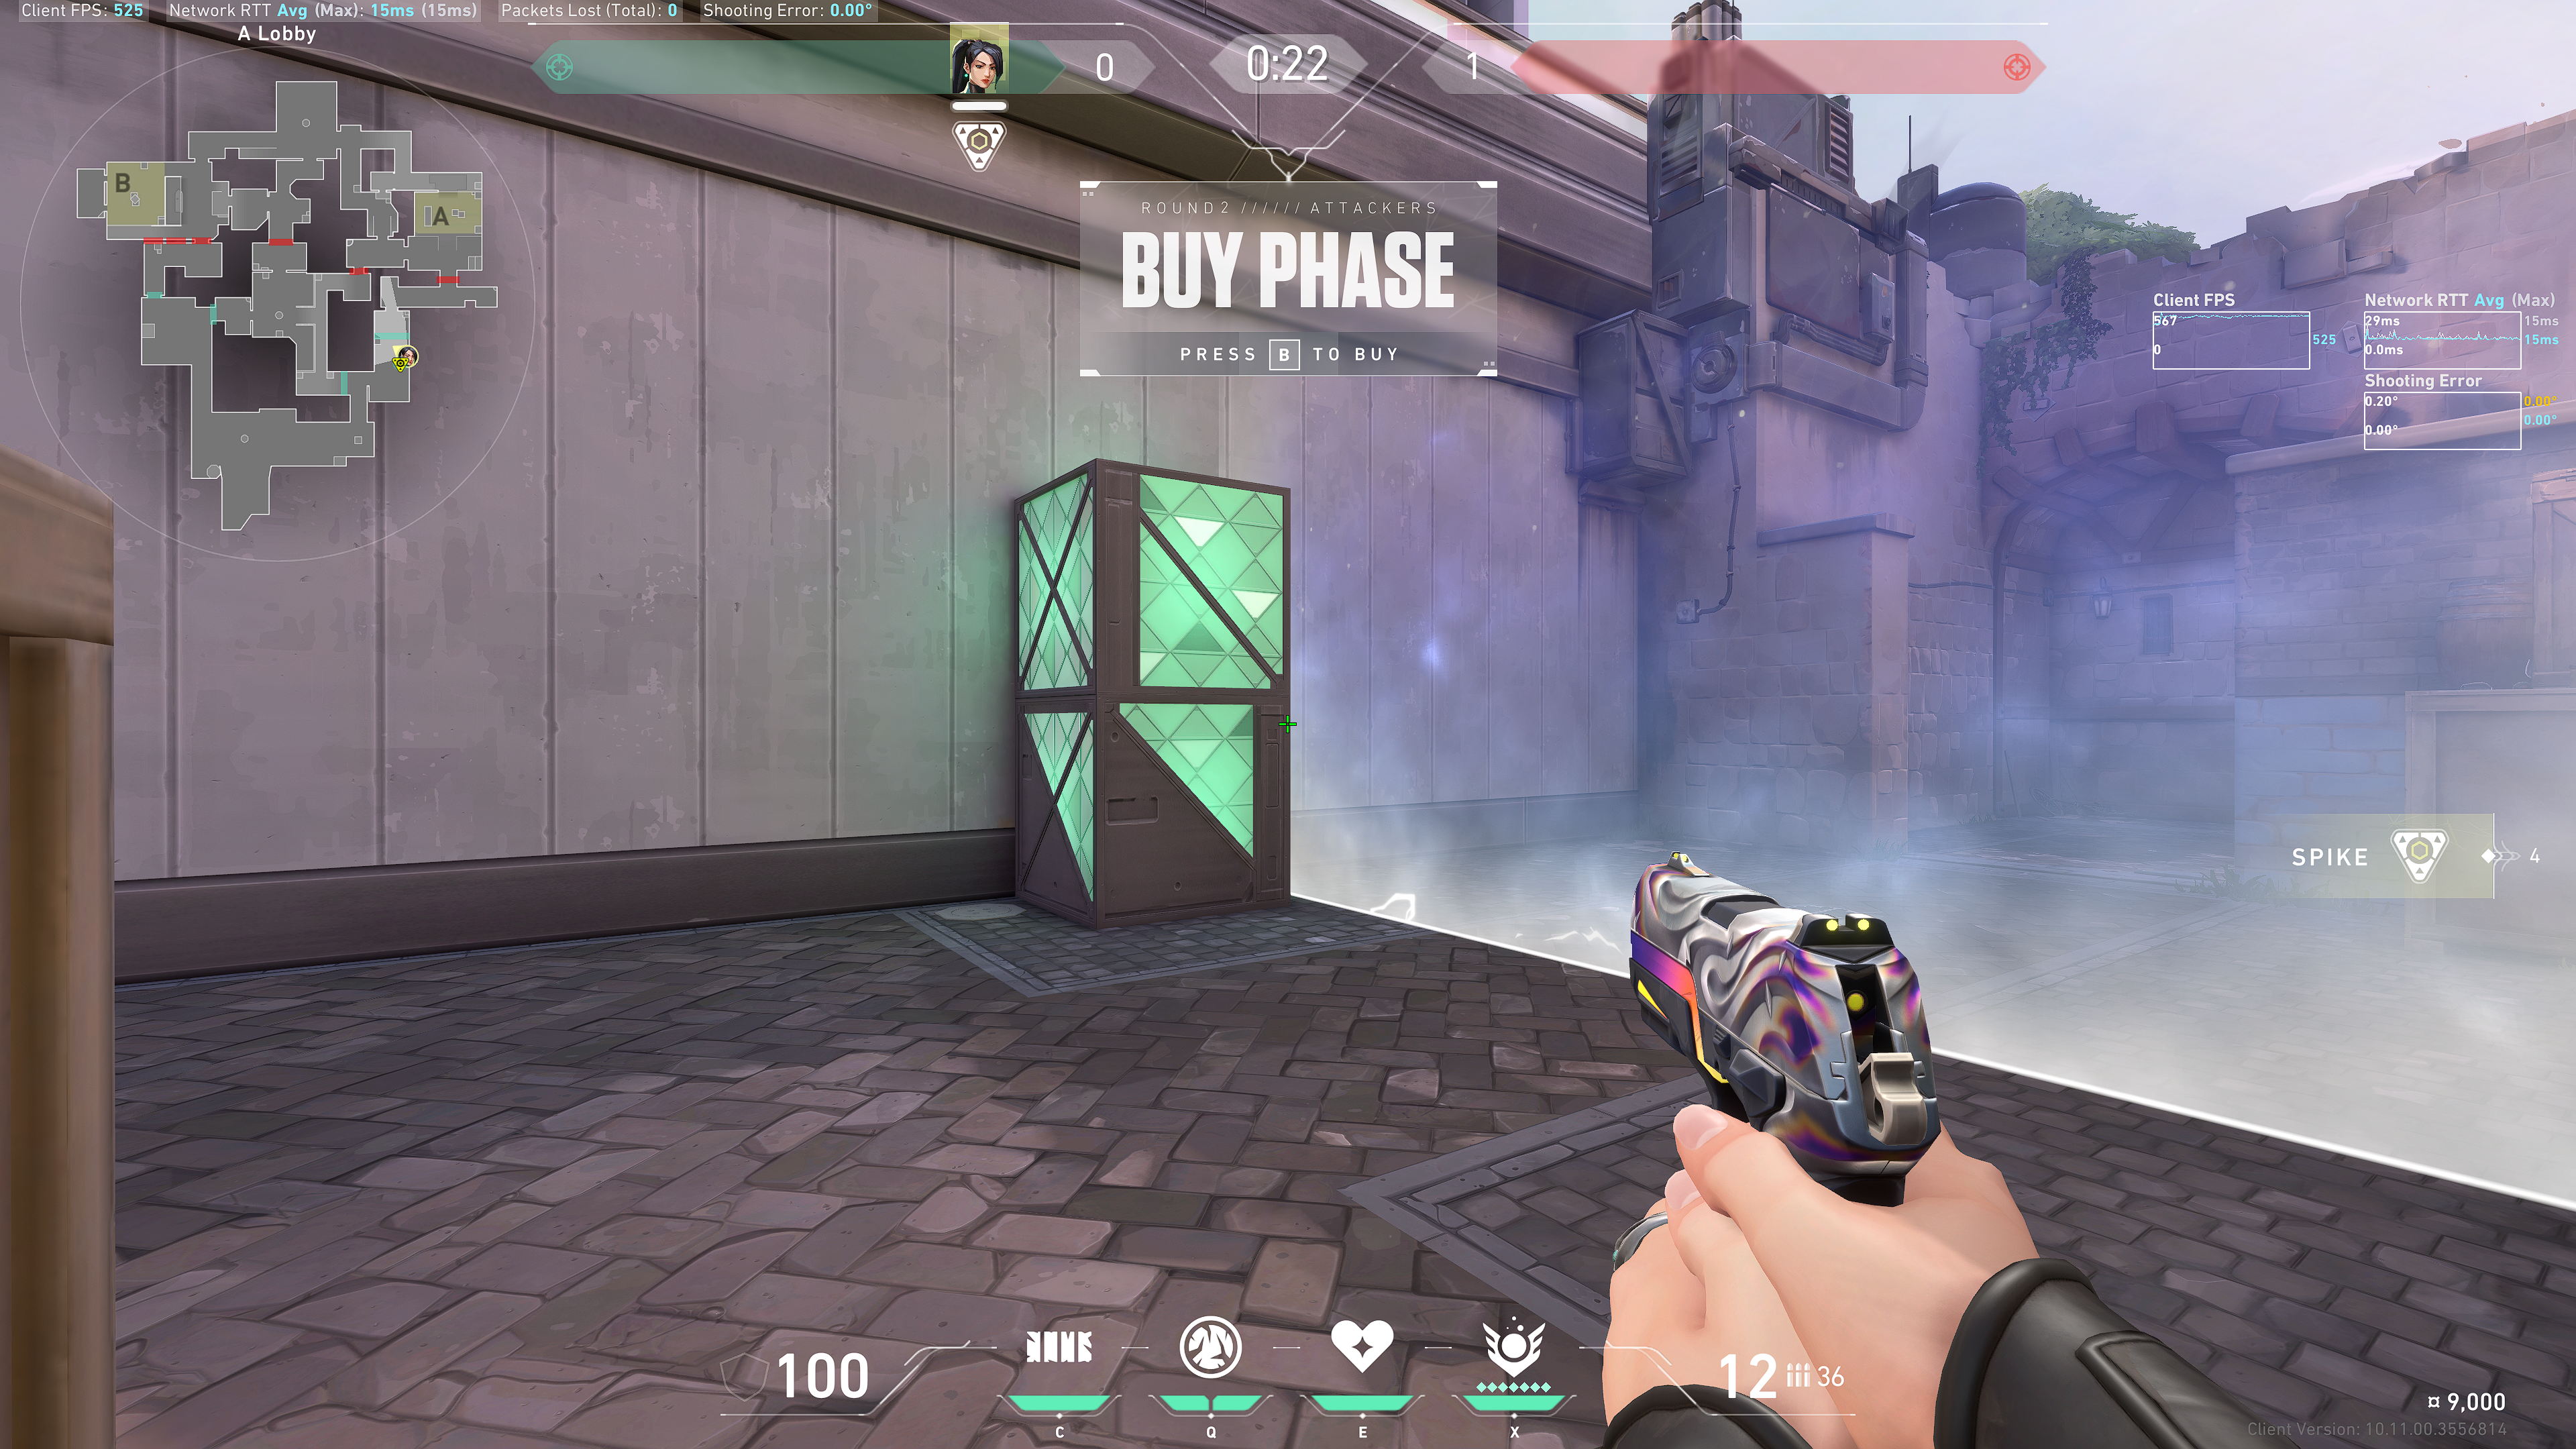
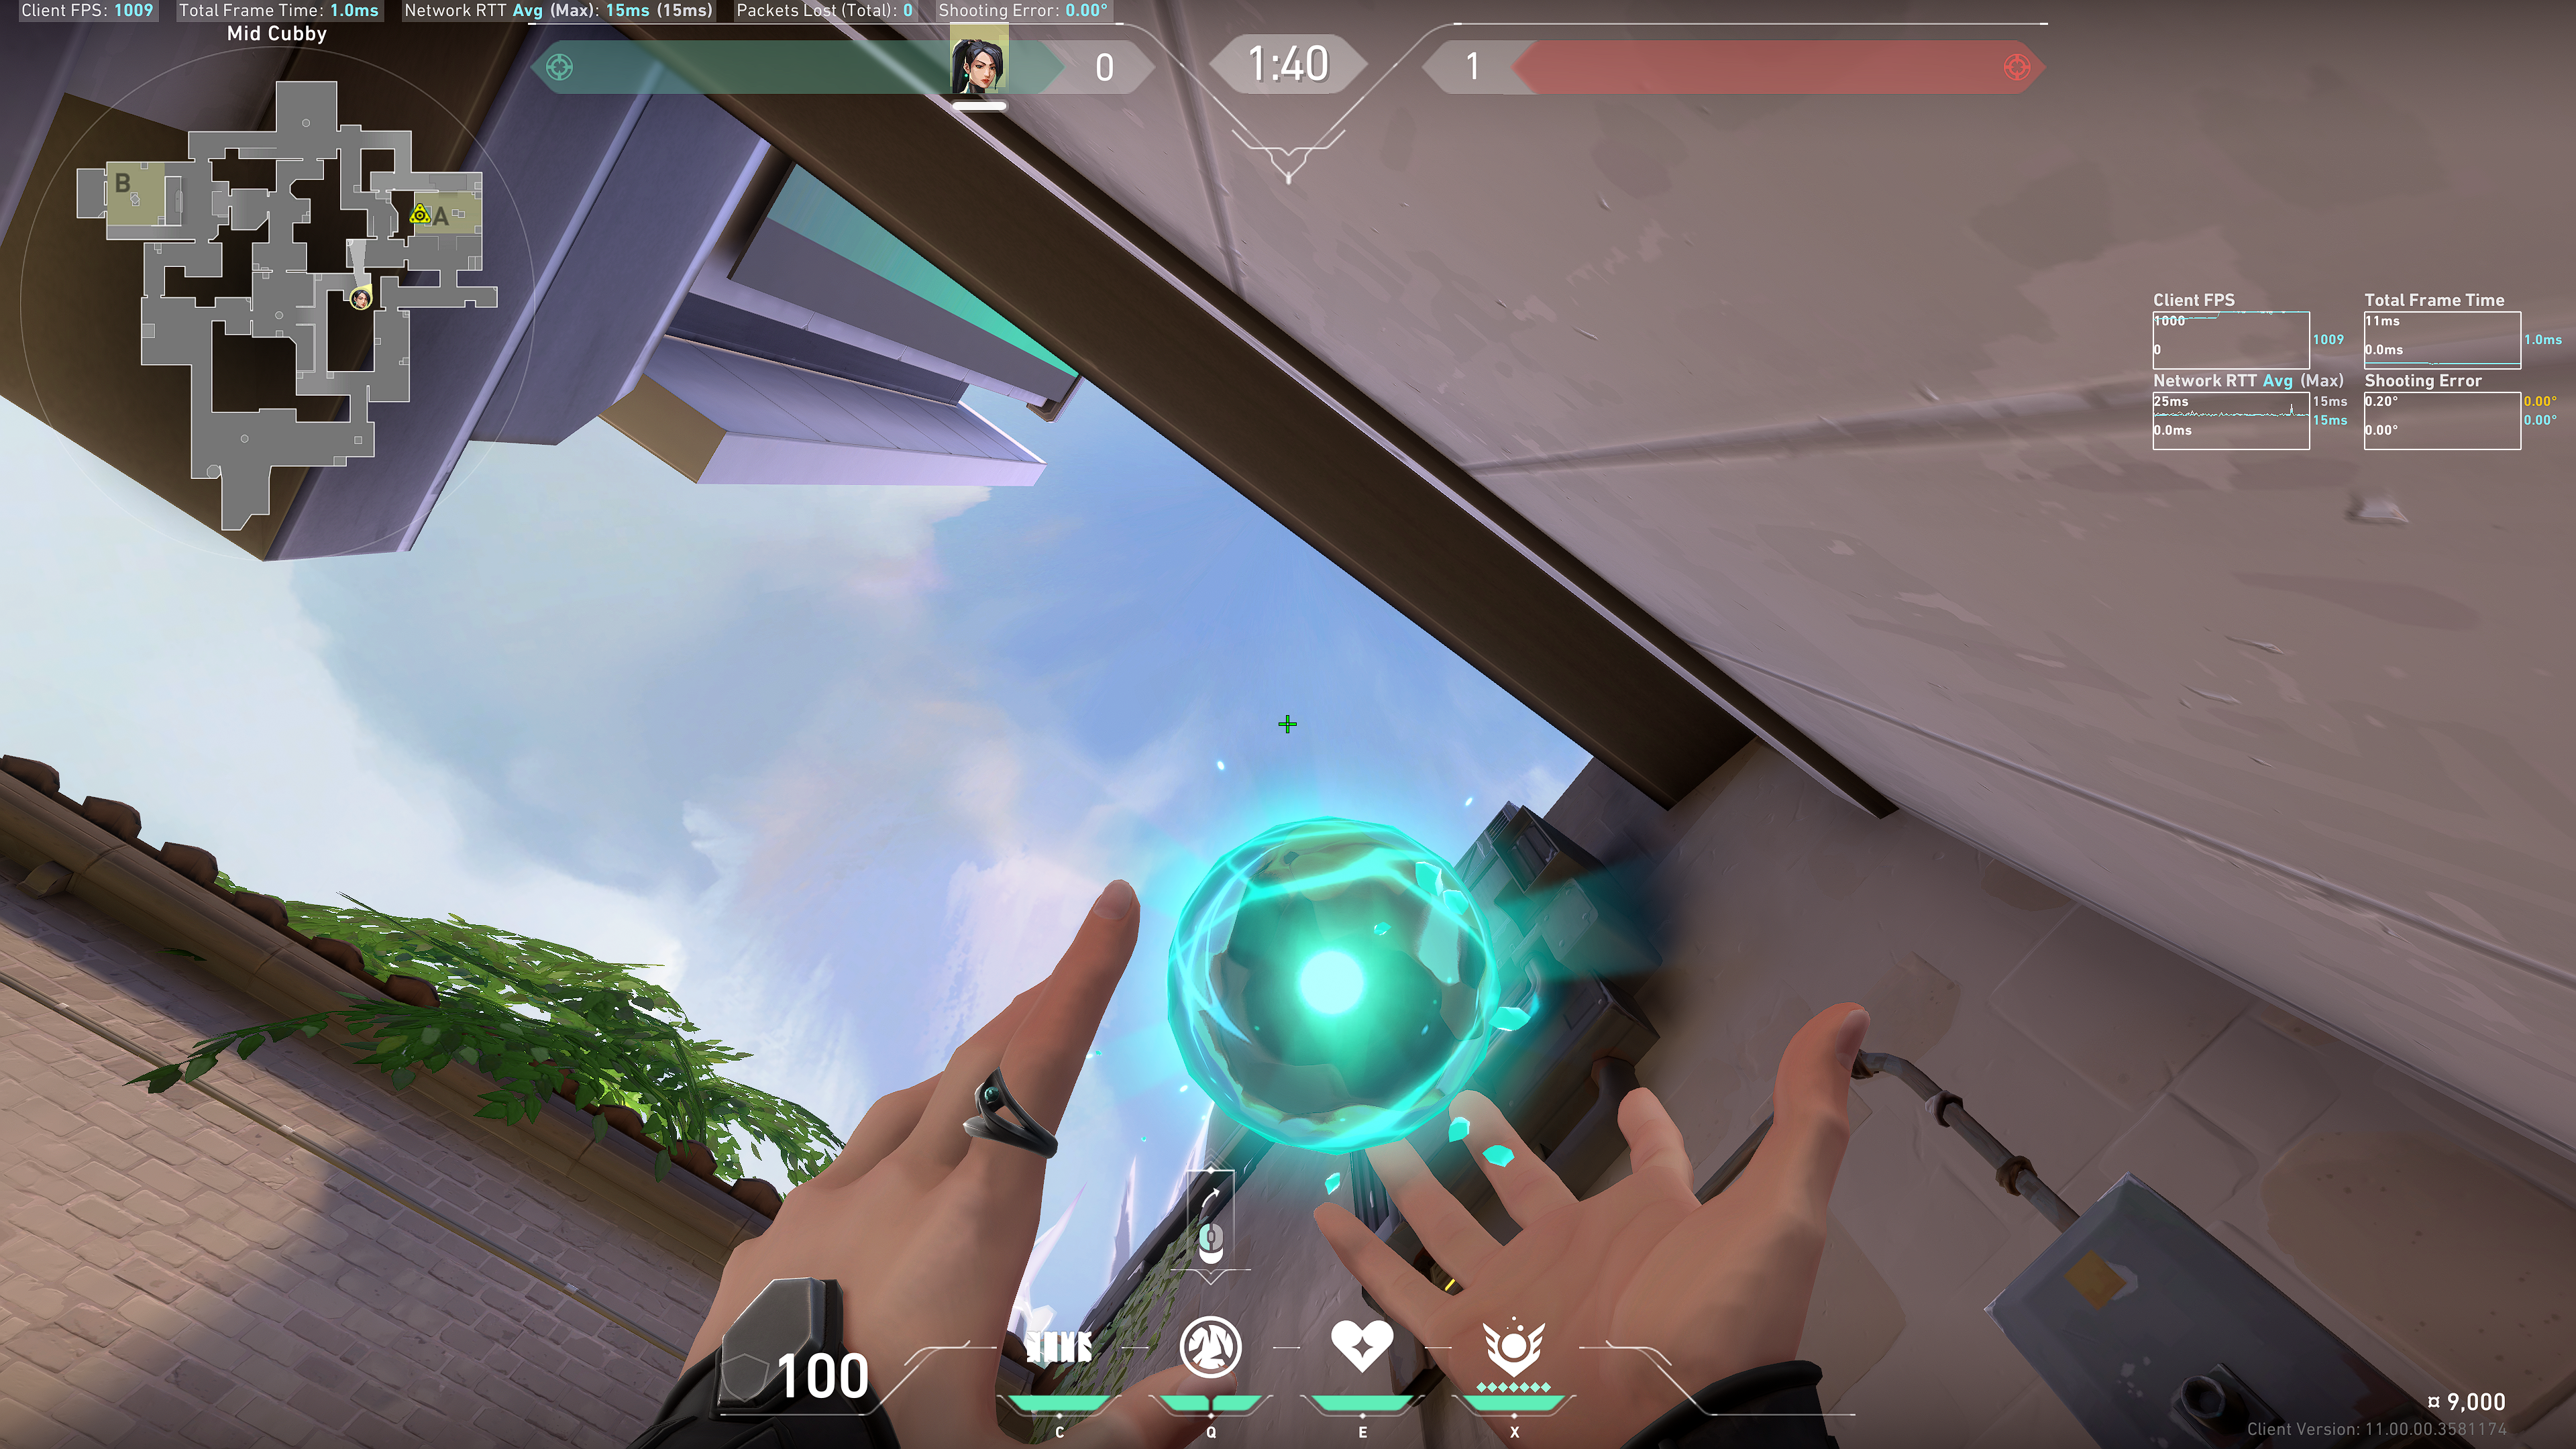
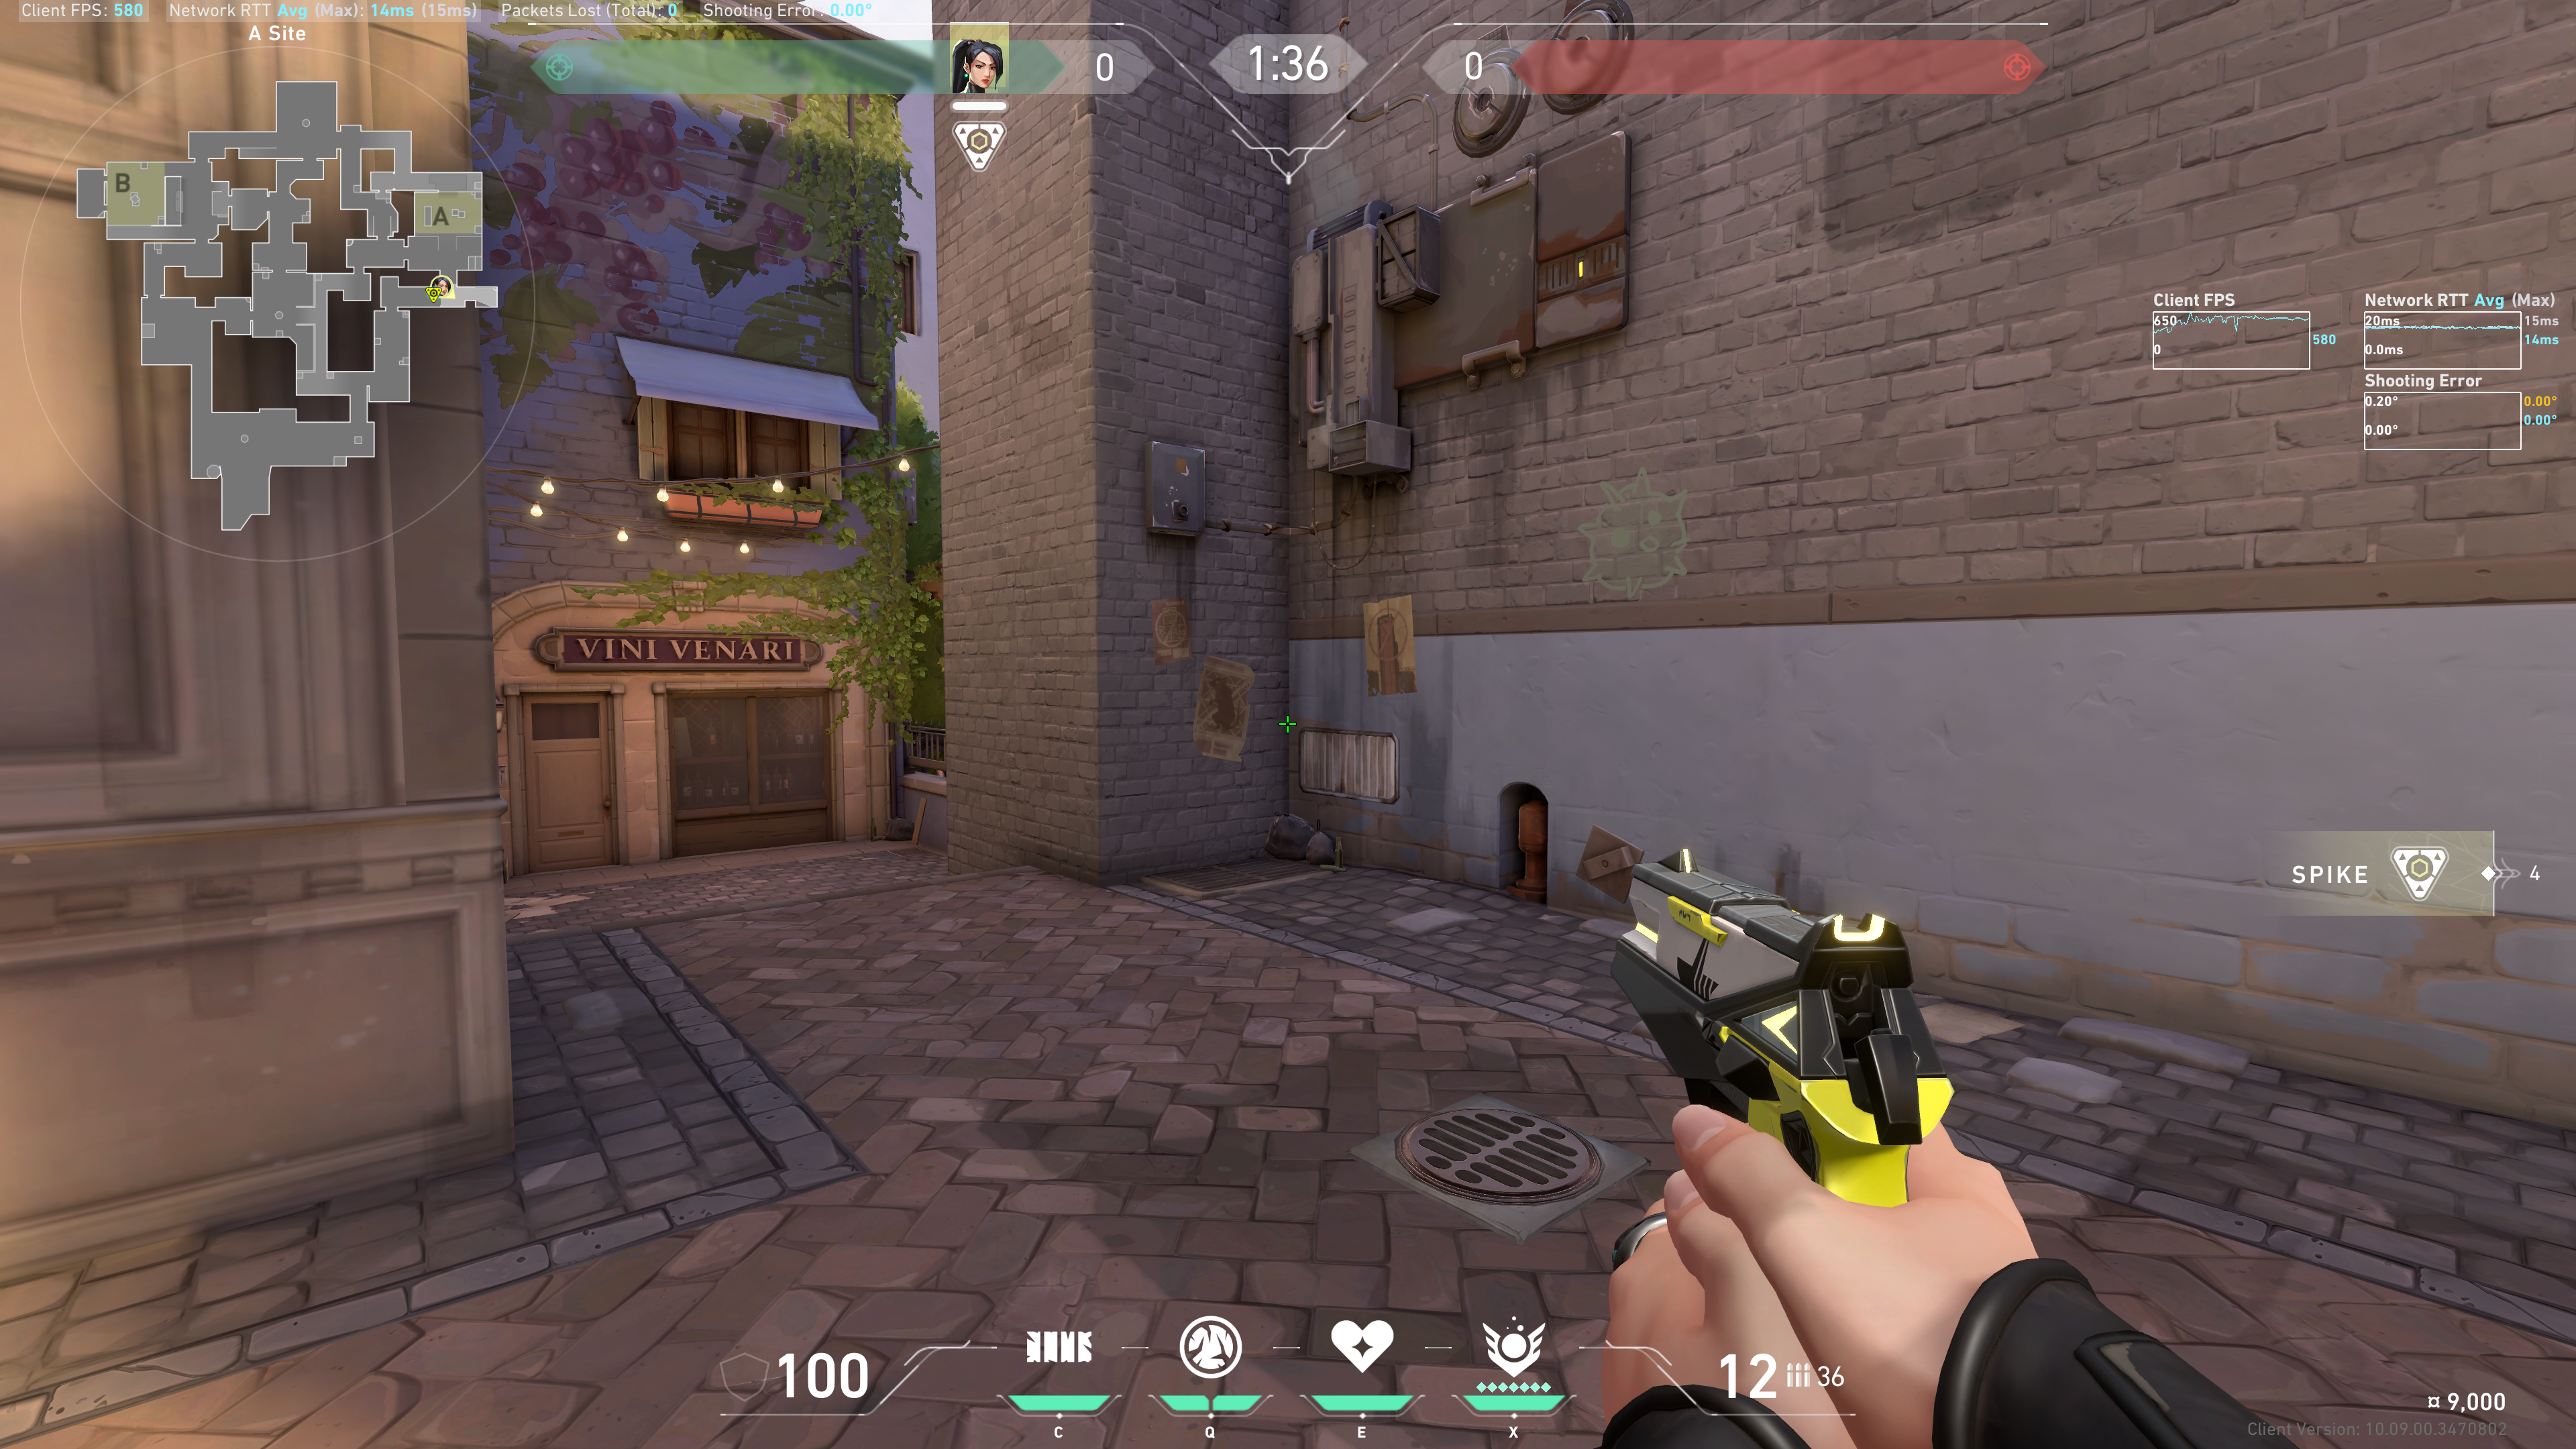
A Site - round start
Note: this is the fastest possible version. This is best when you know your team will execute fast and your team has mobility duelists such as Jett, Neon, etc.
Tuck between the box and the round start barrier:
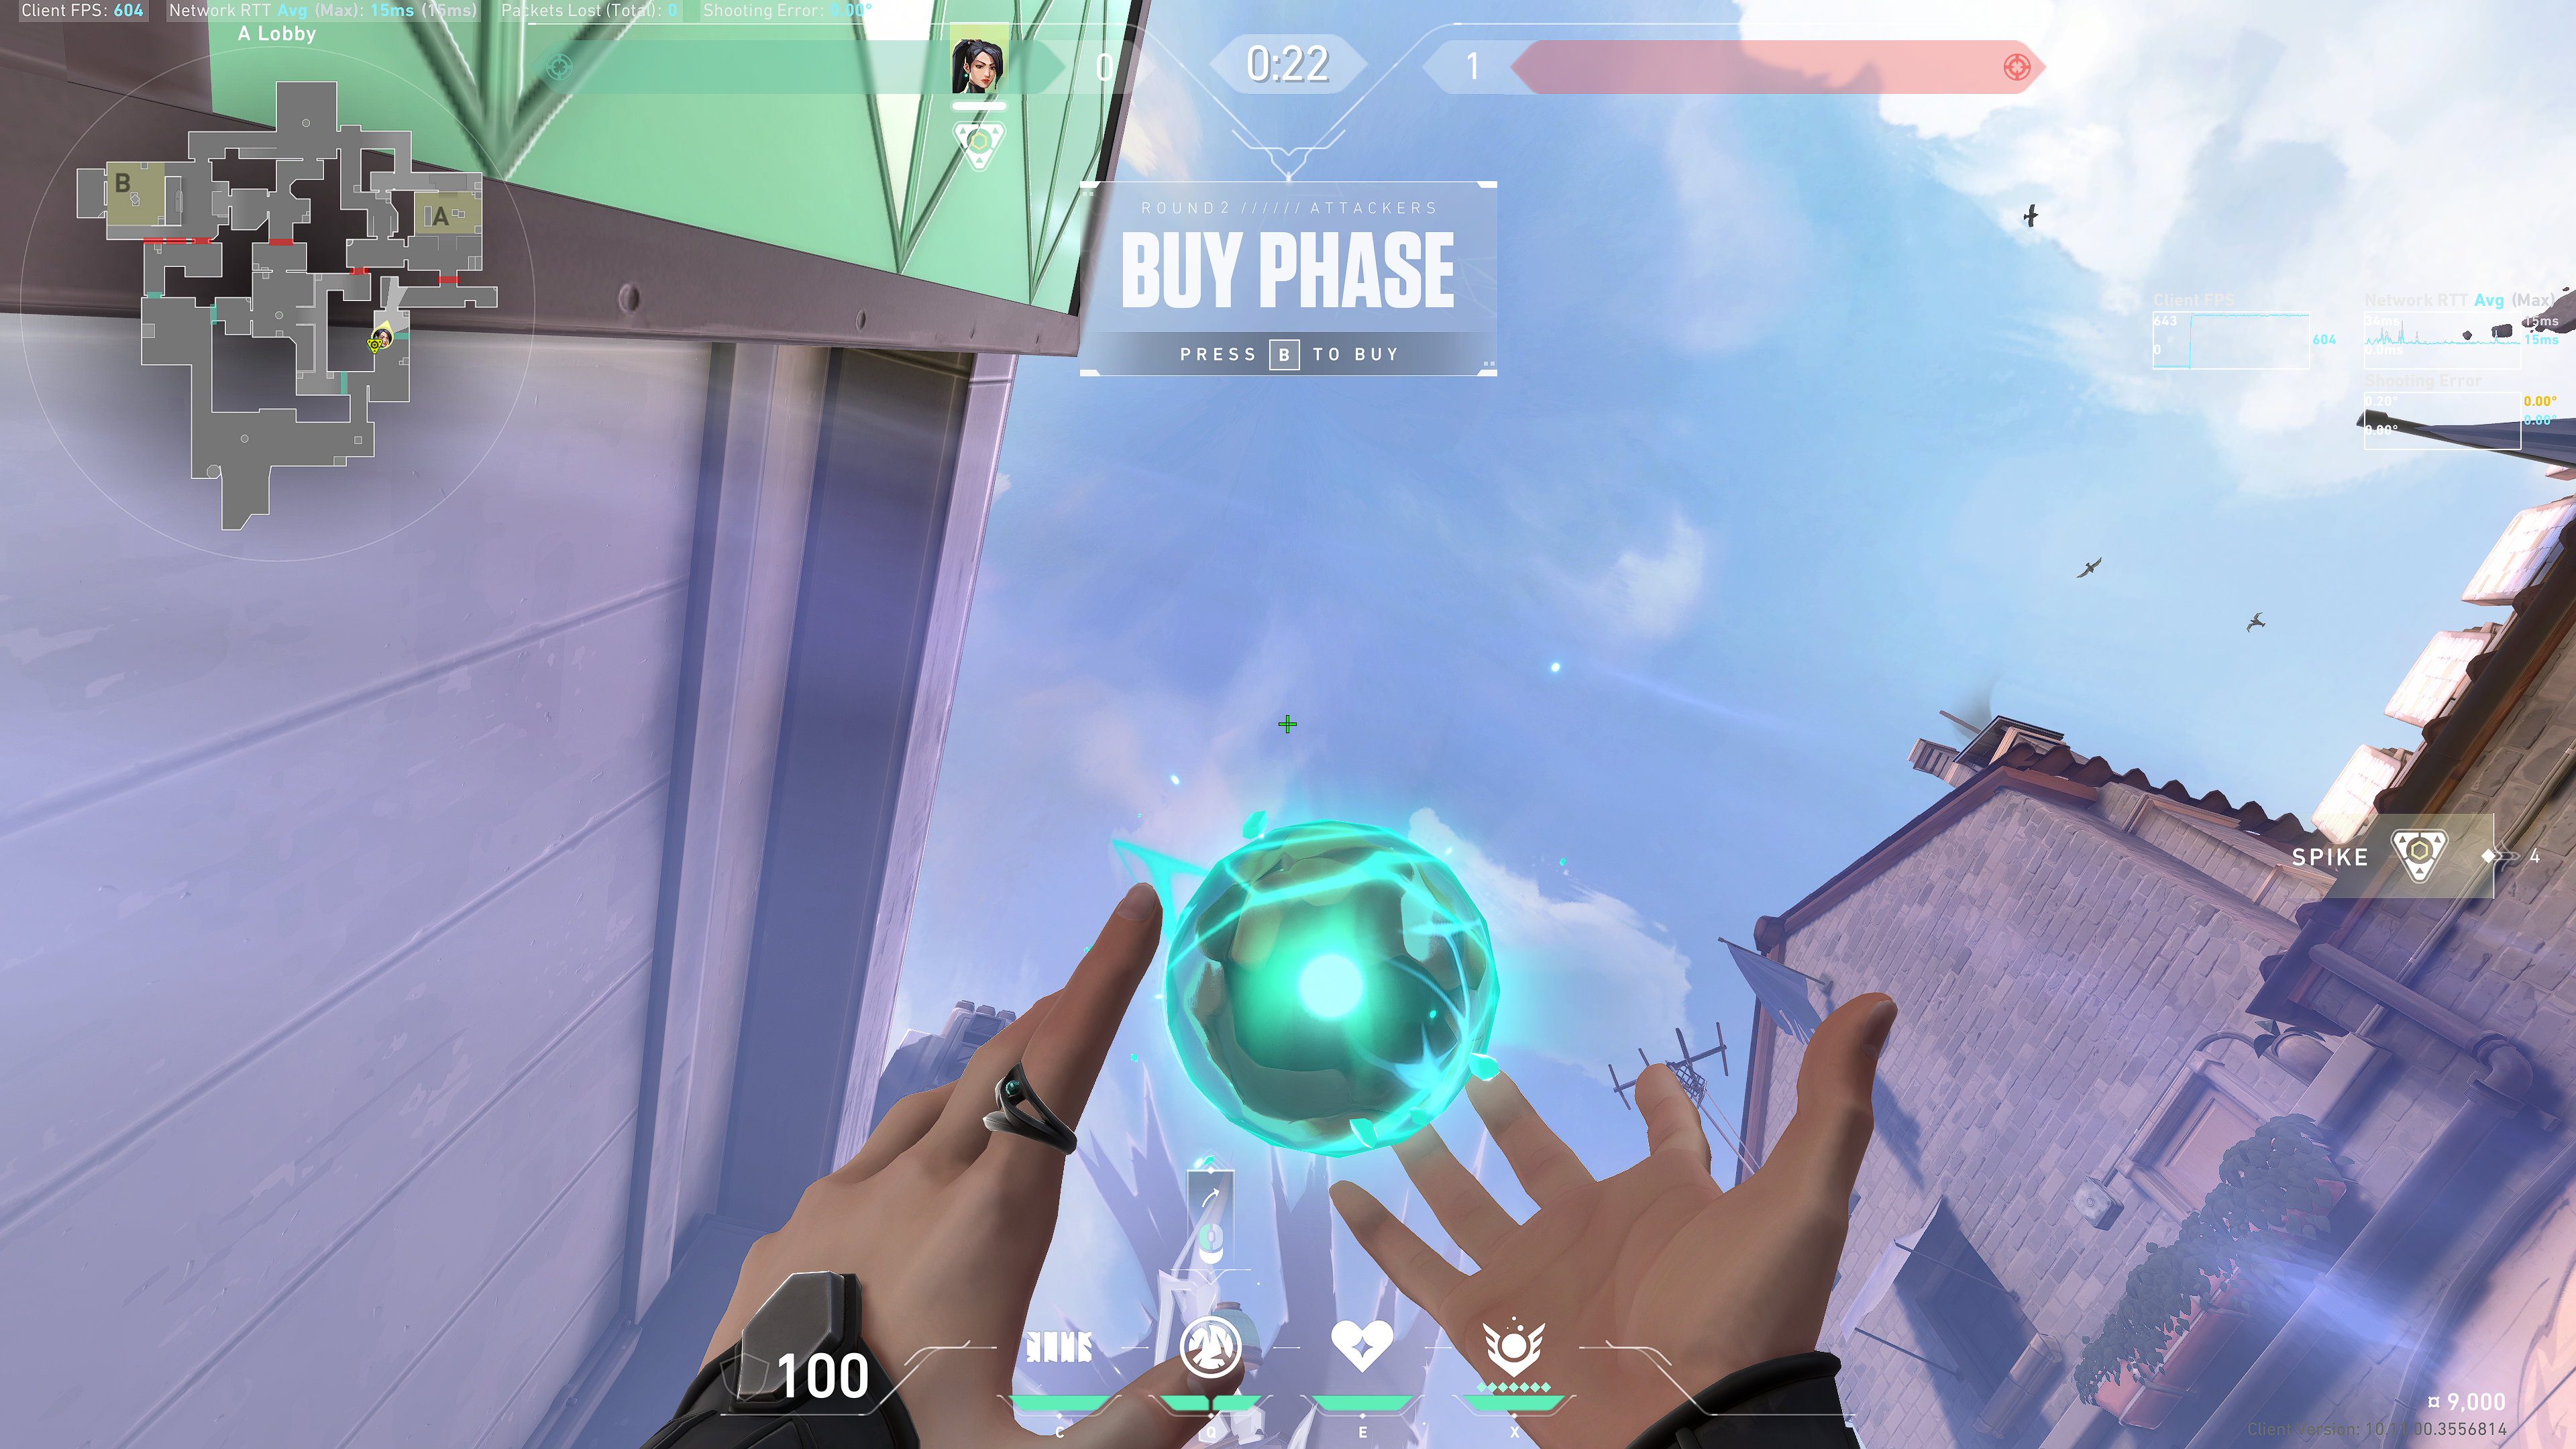
Generator
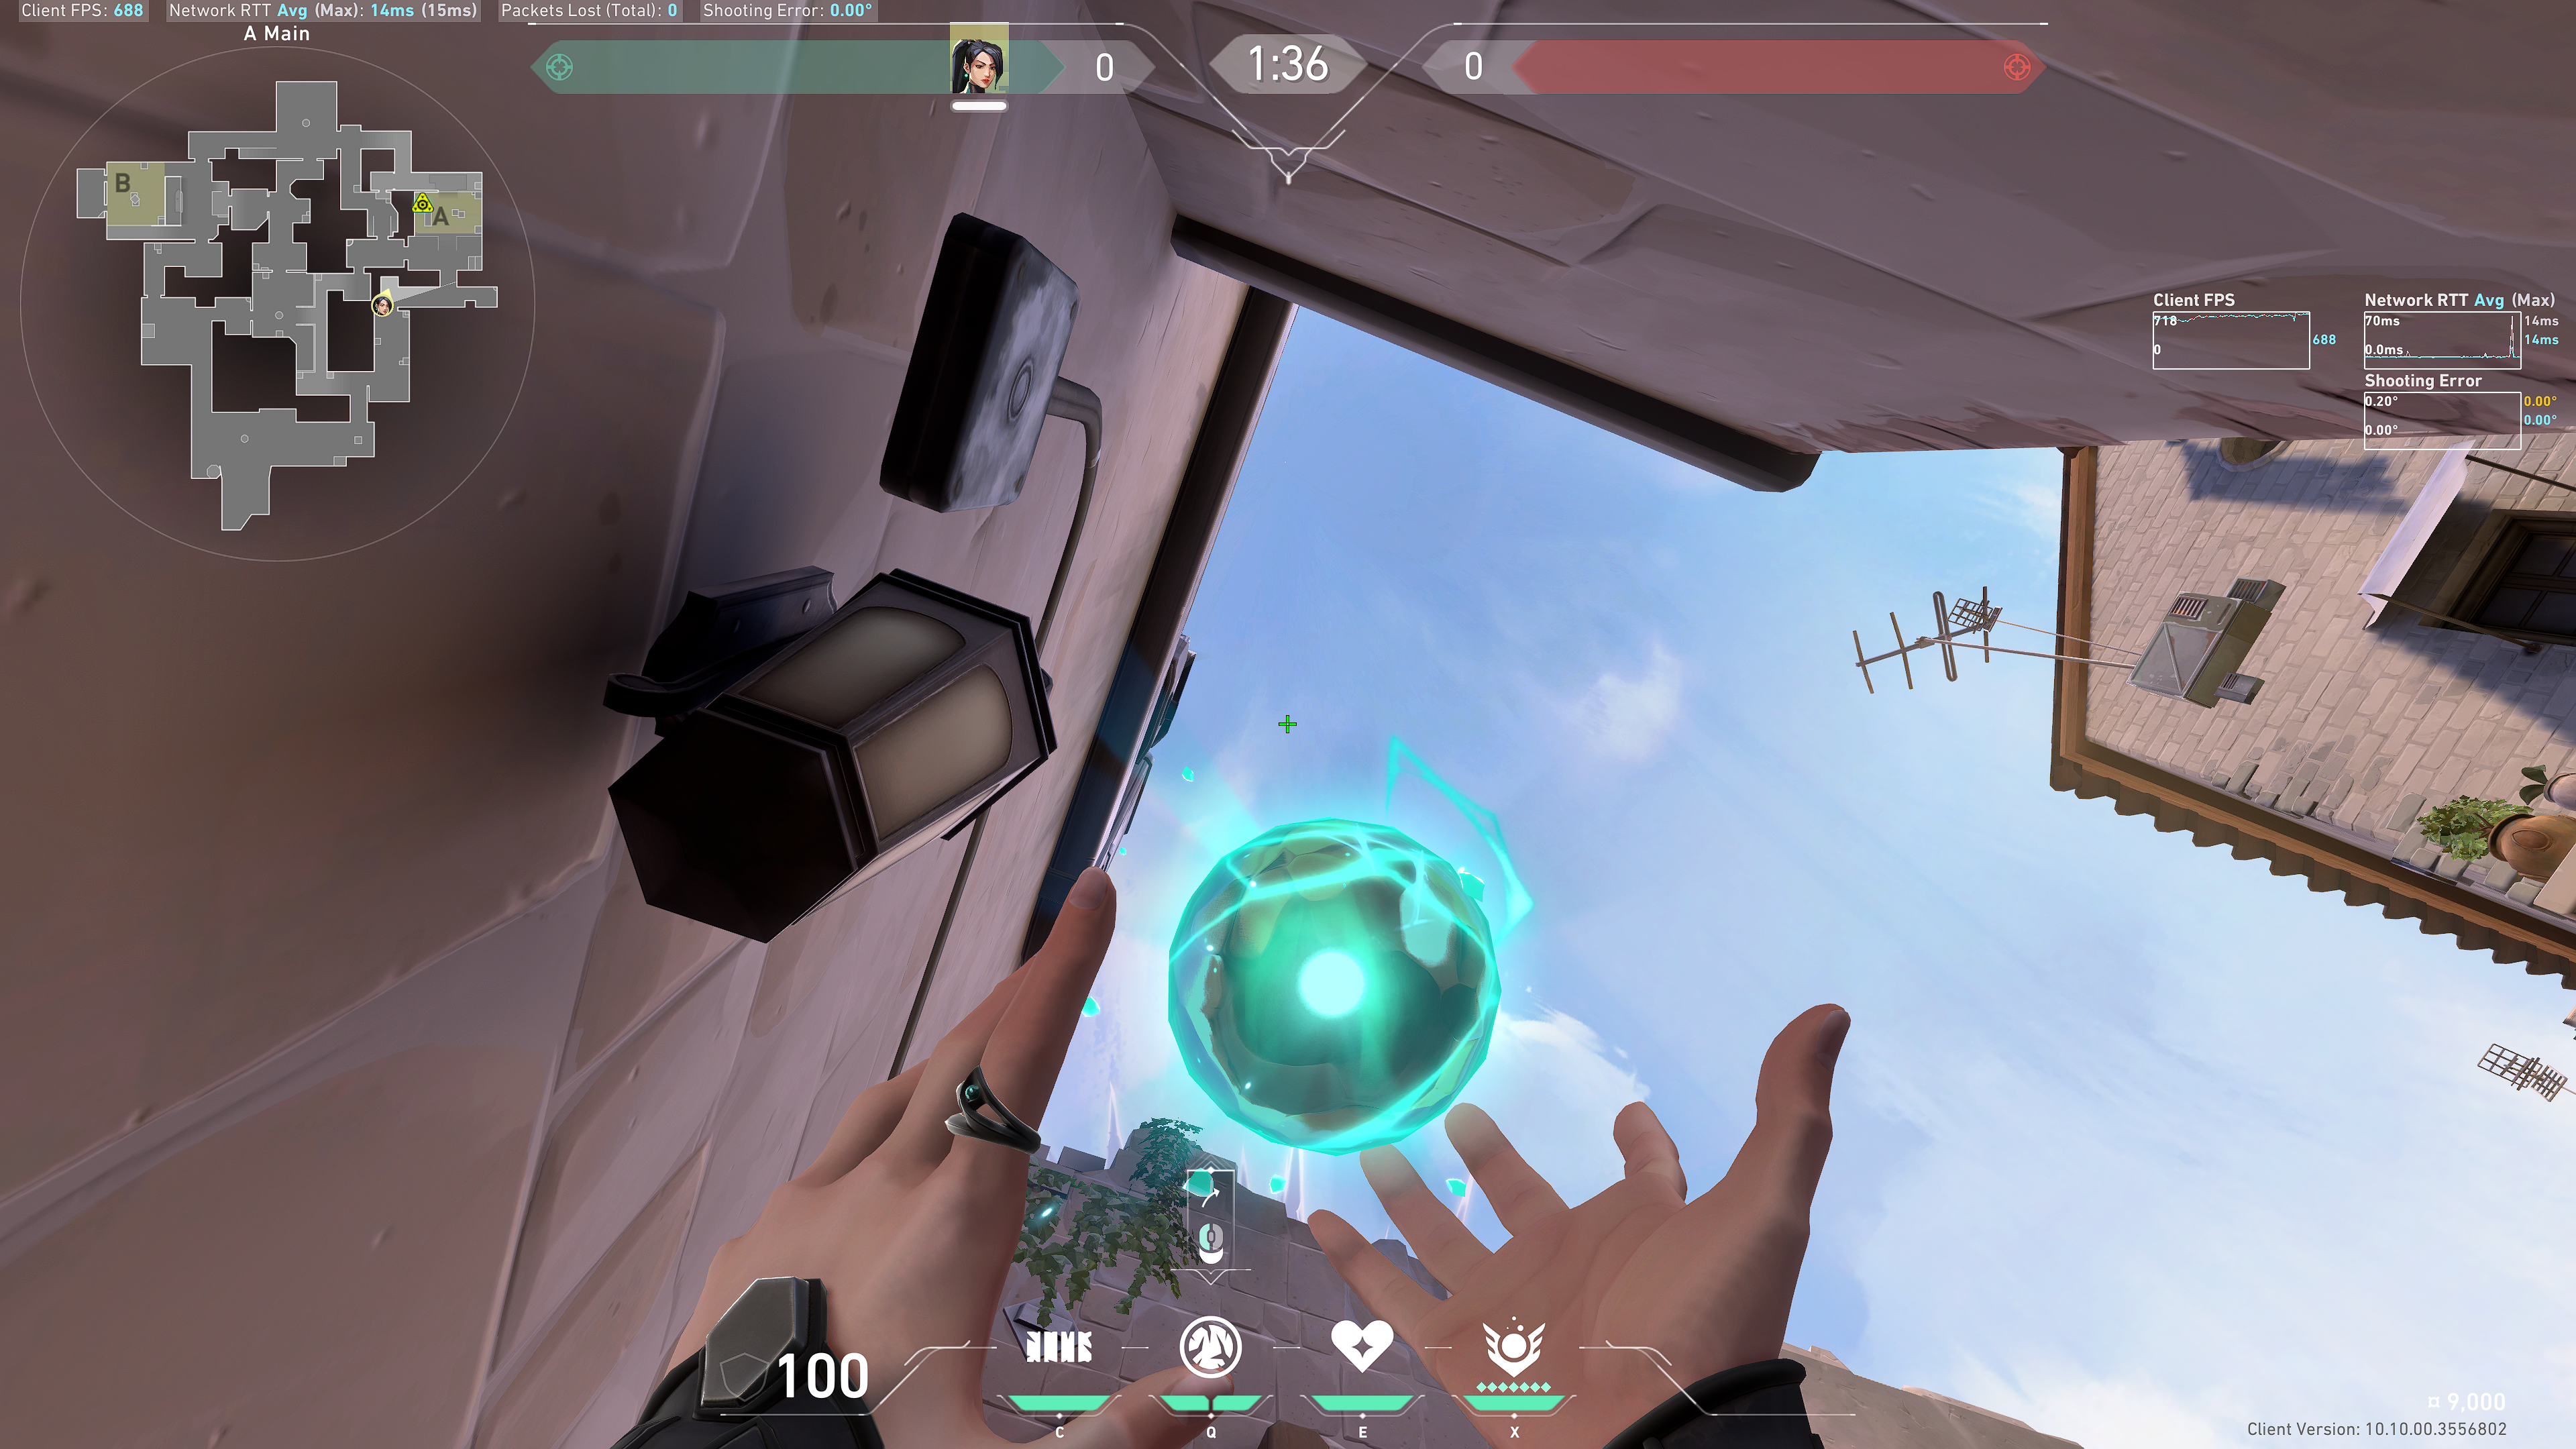
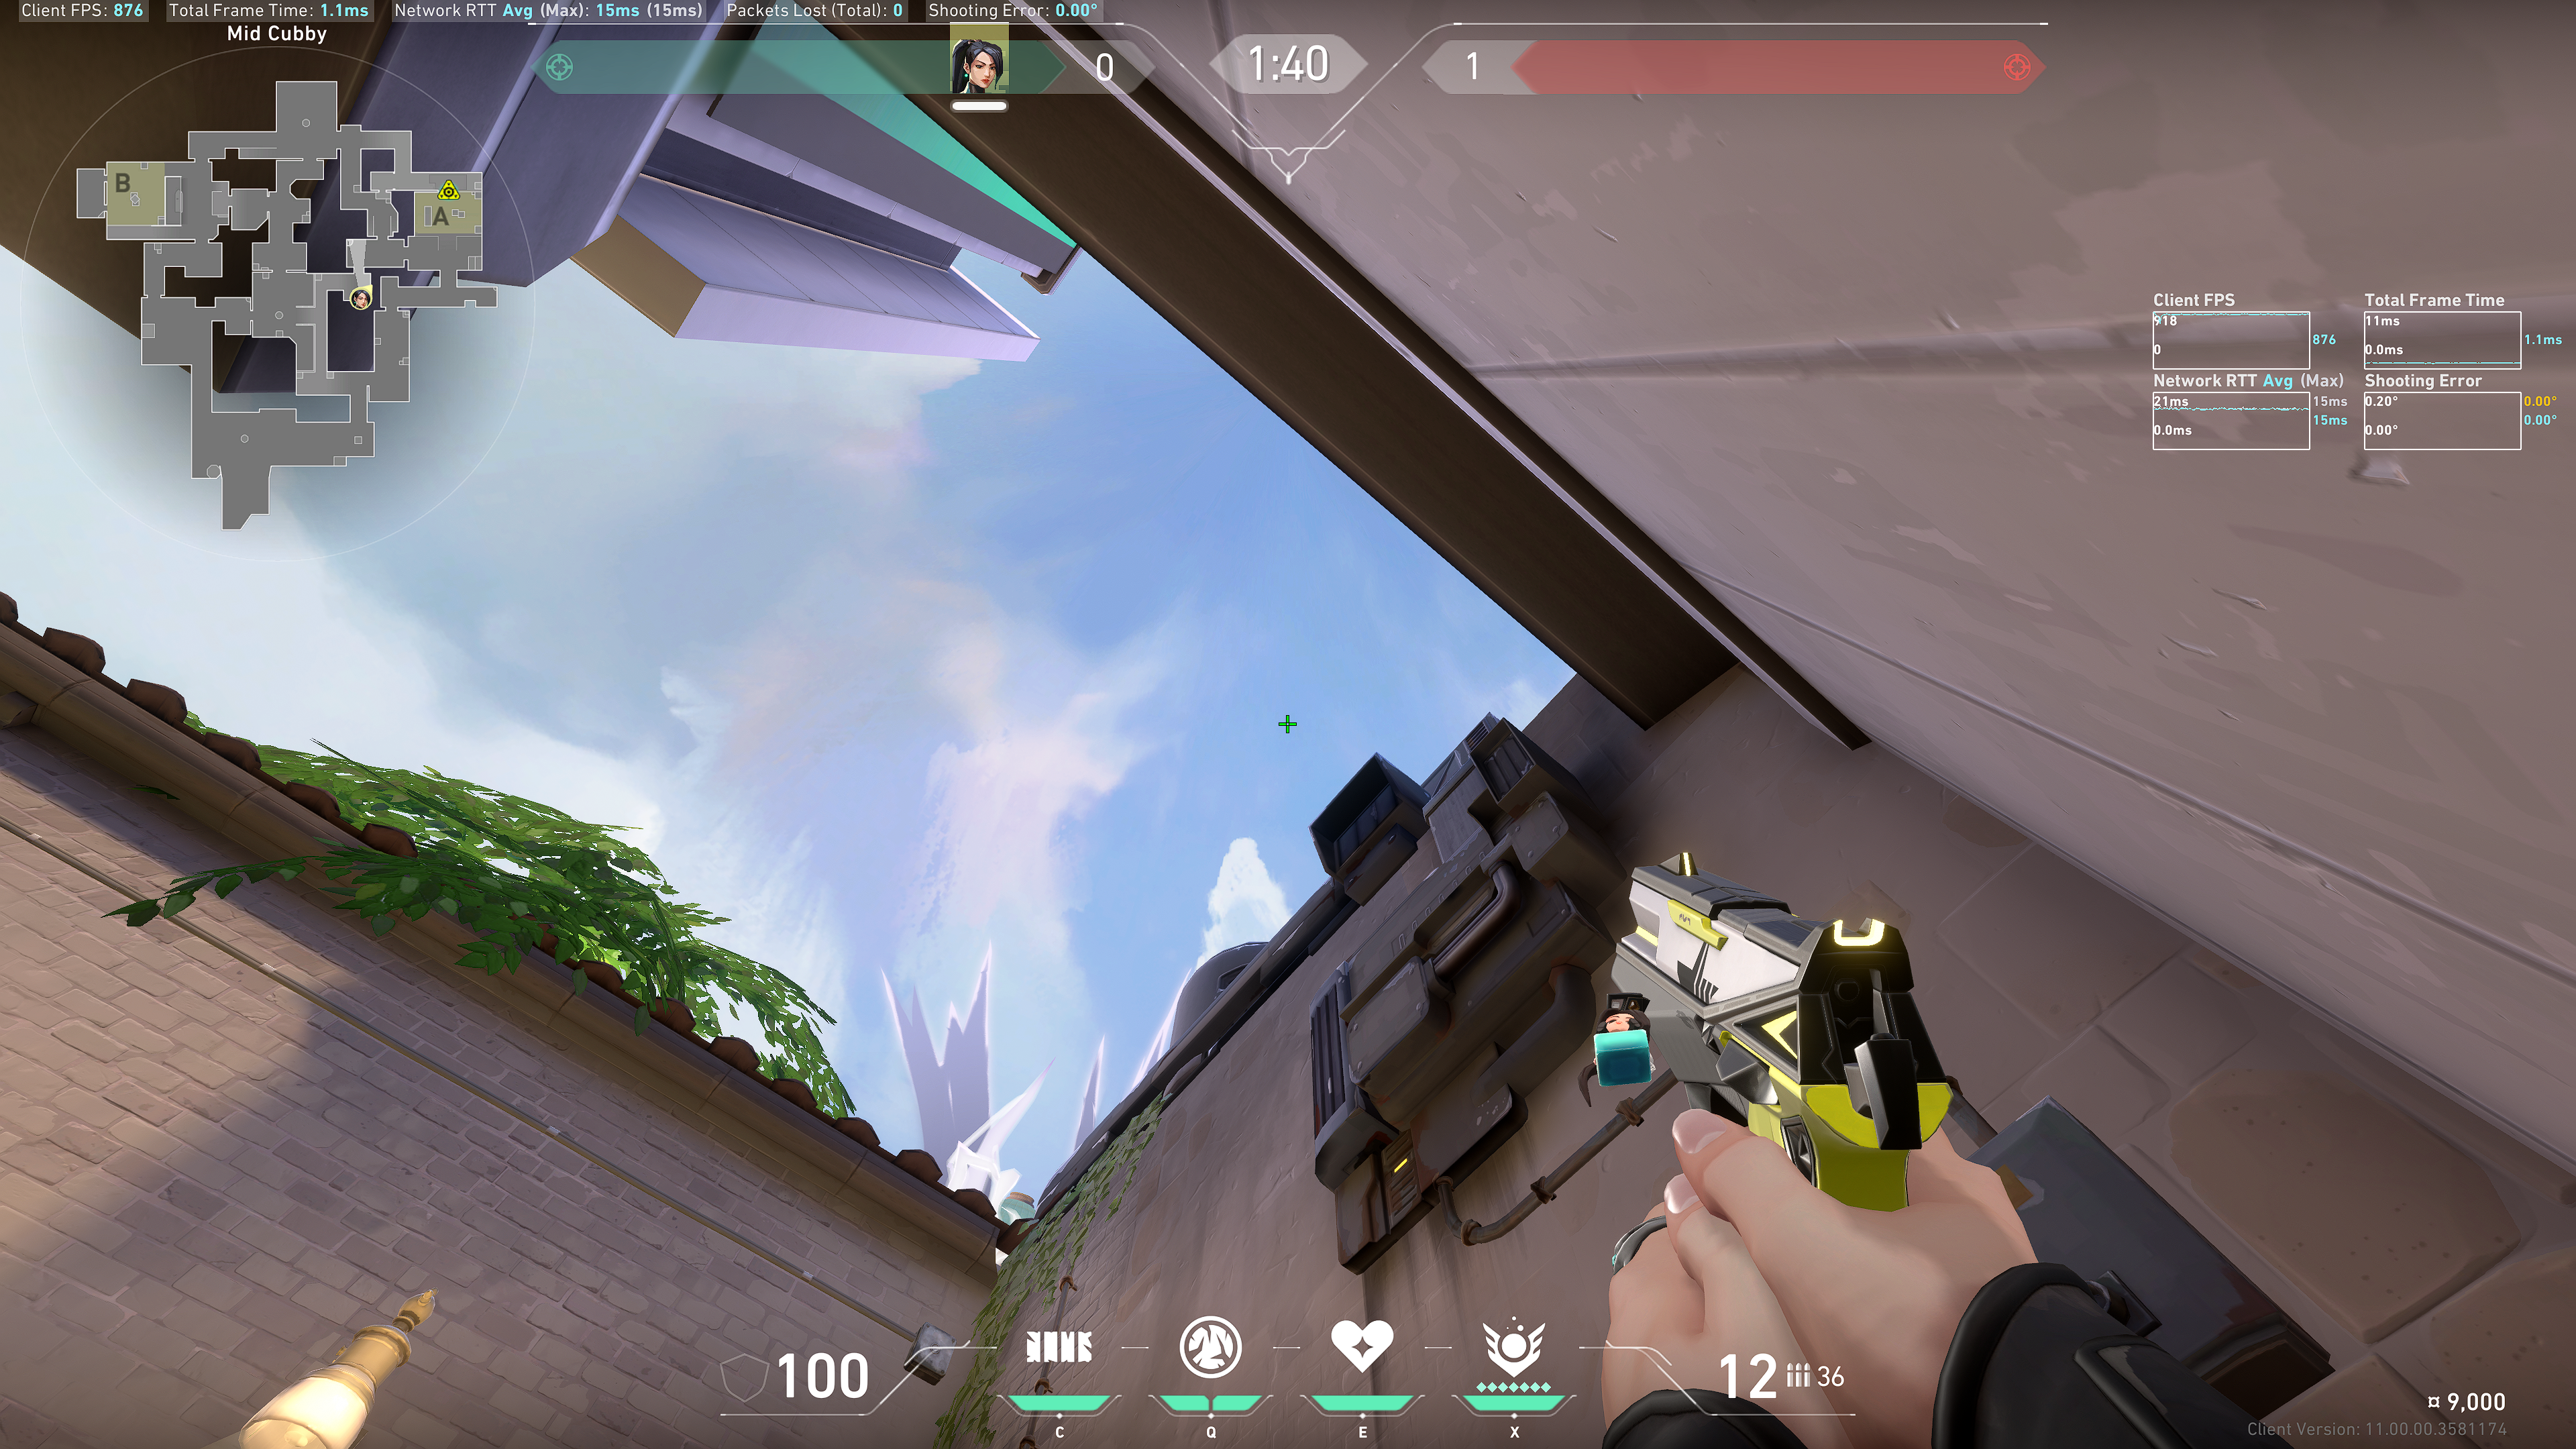
Aim in the middle of these pockets of clouds:
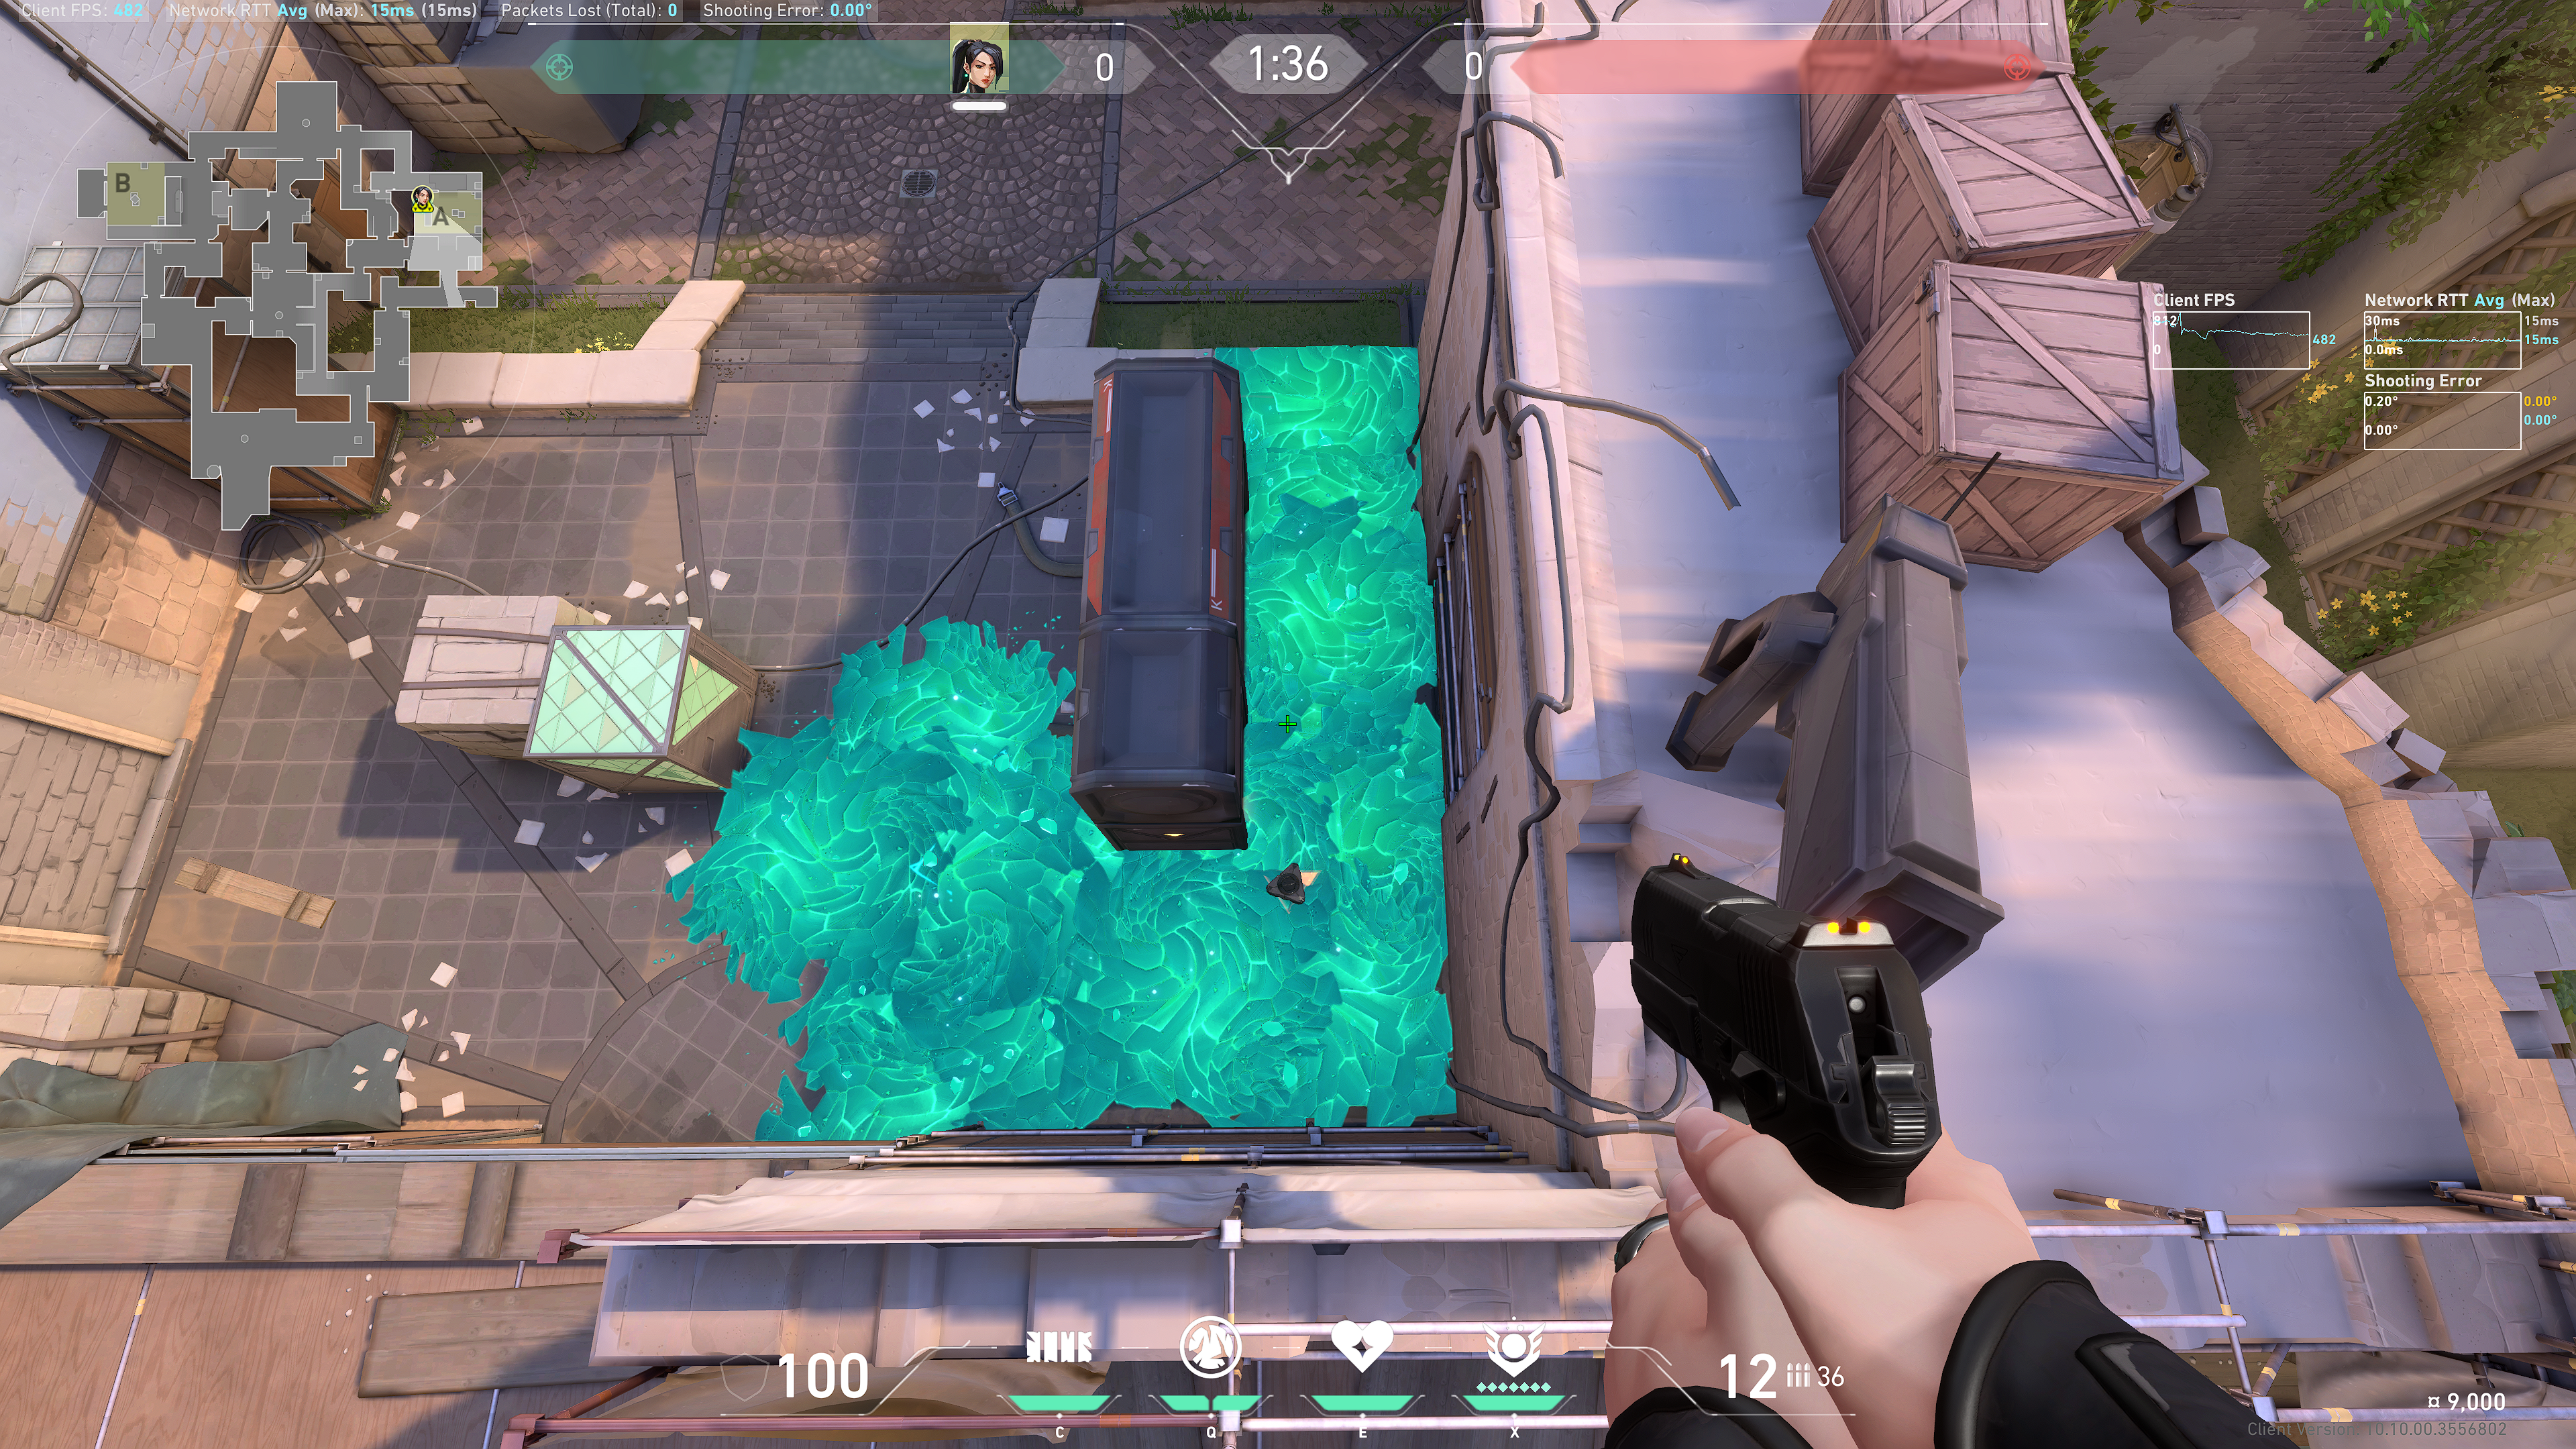
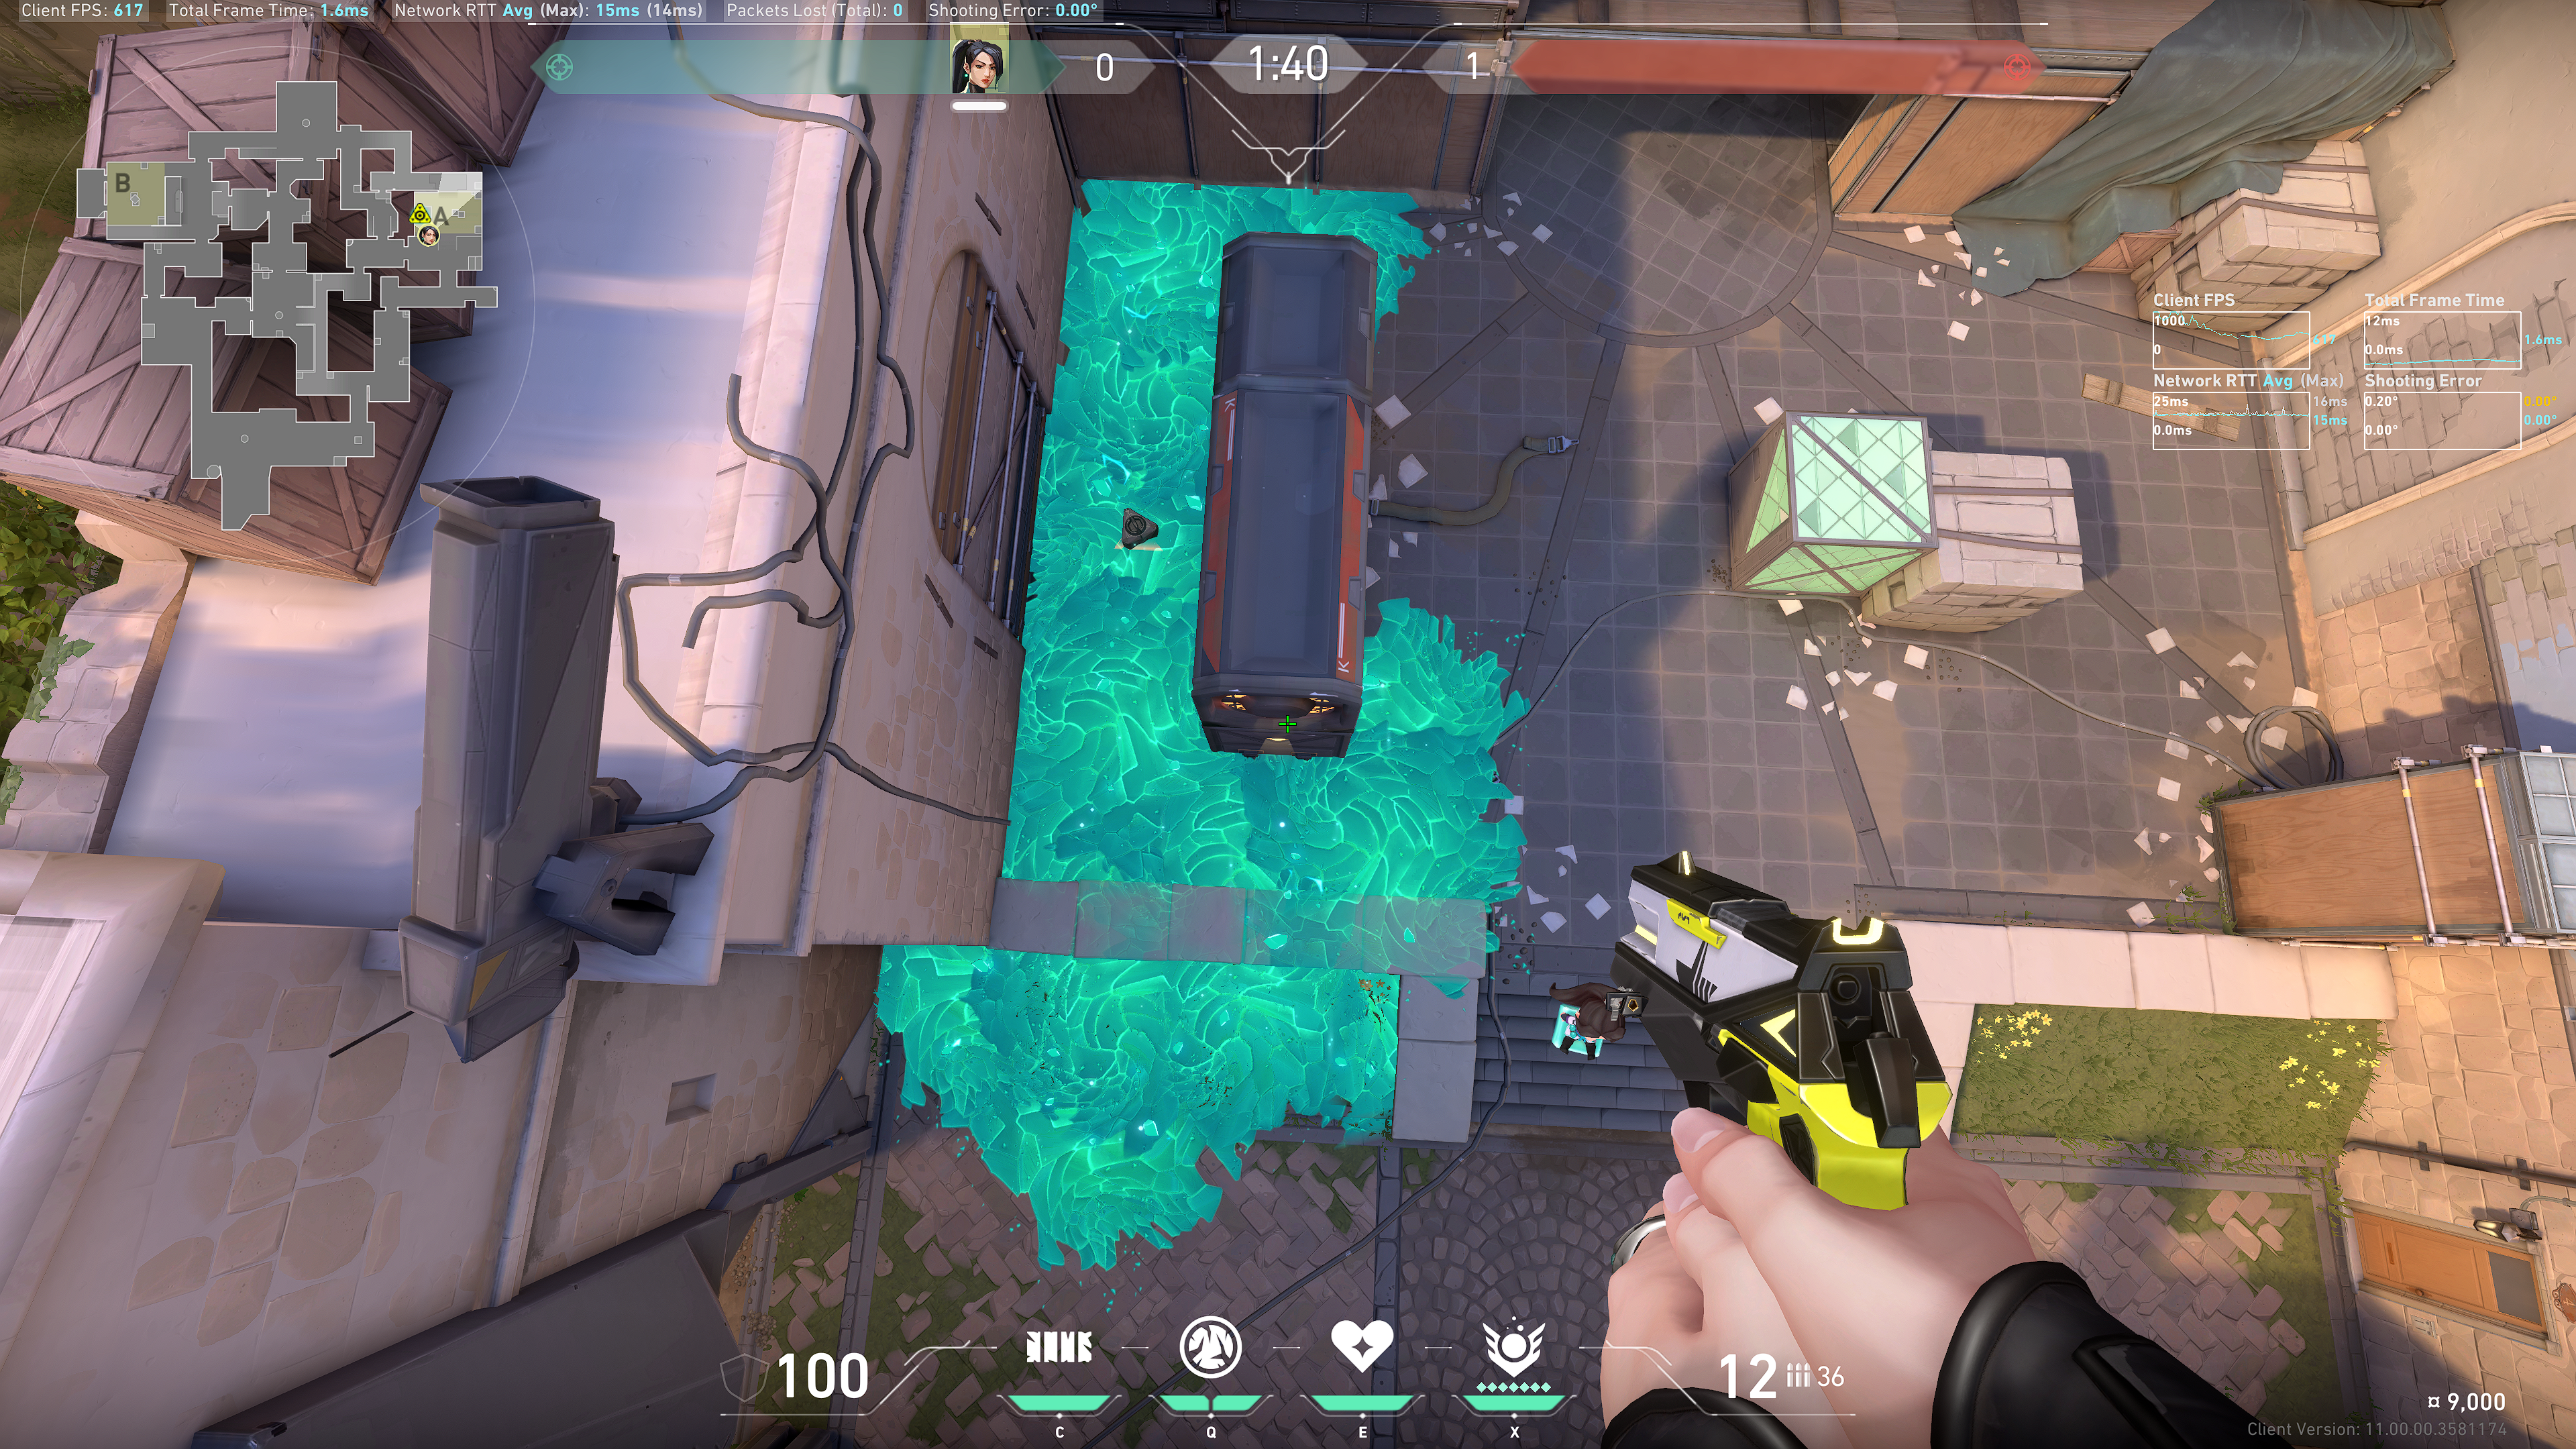
 Result:
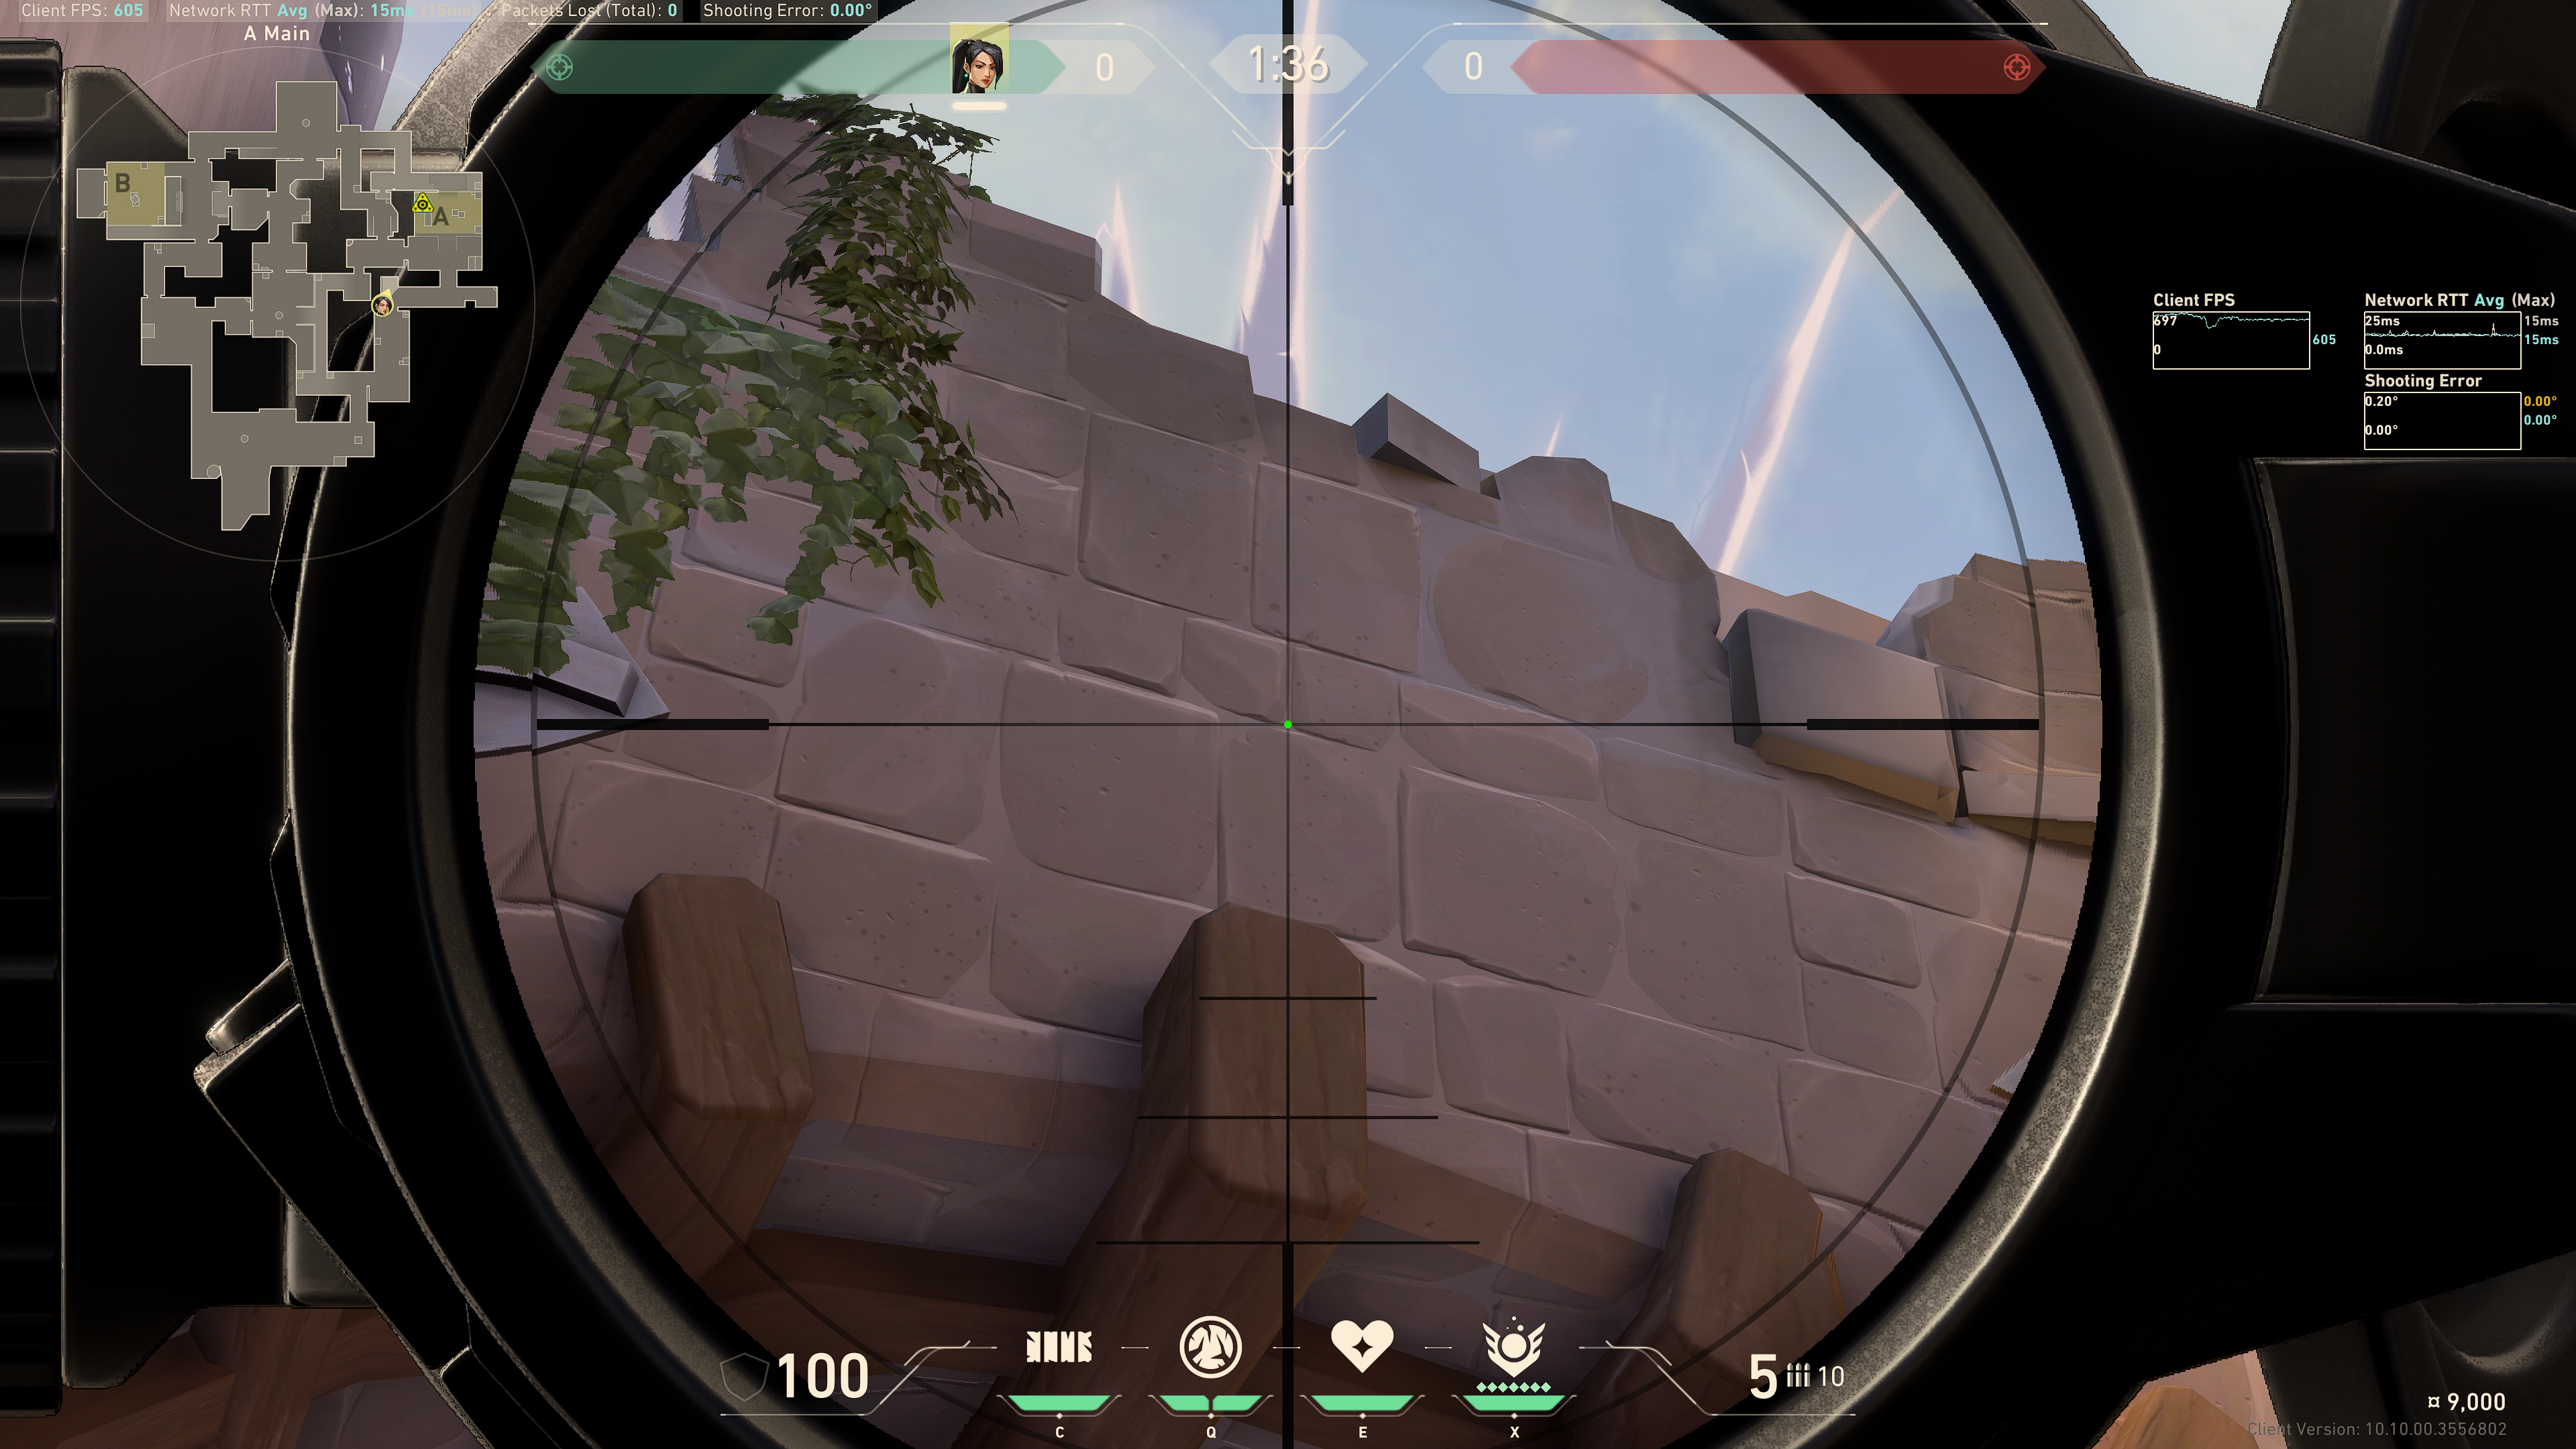
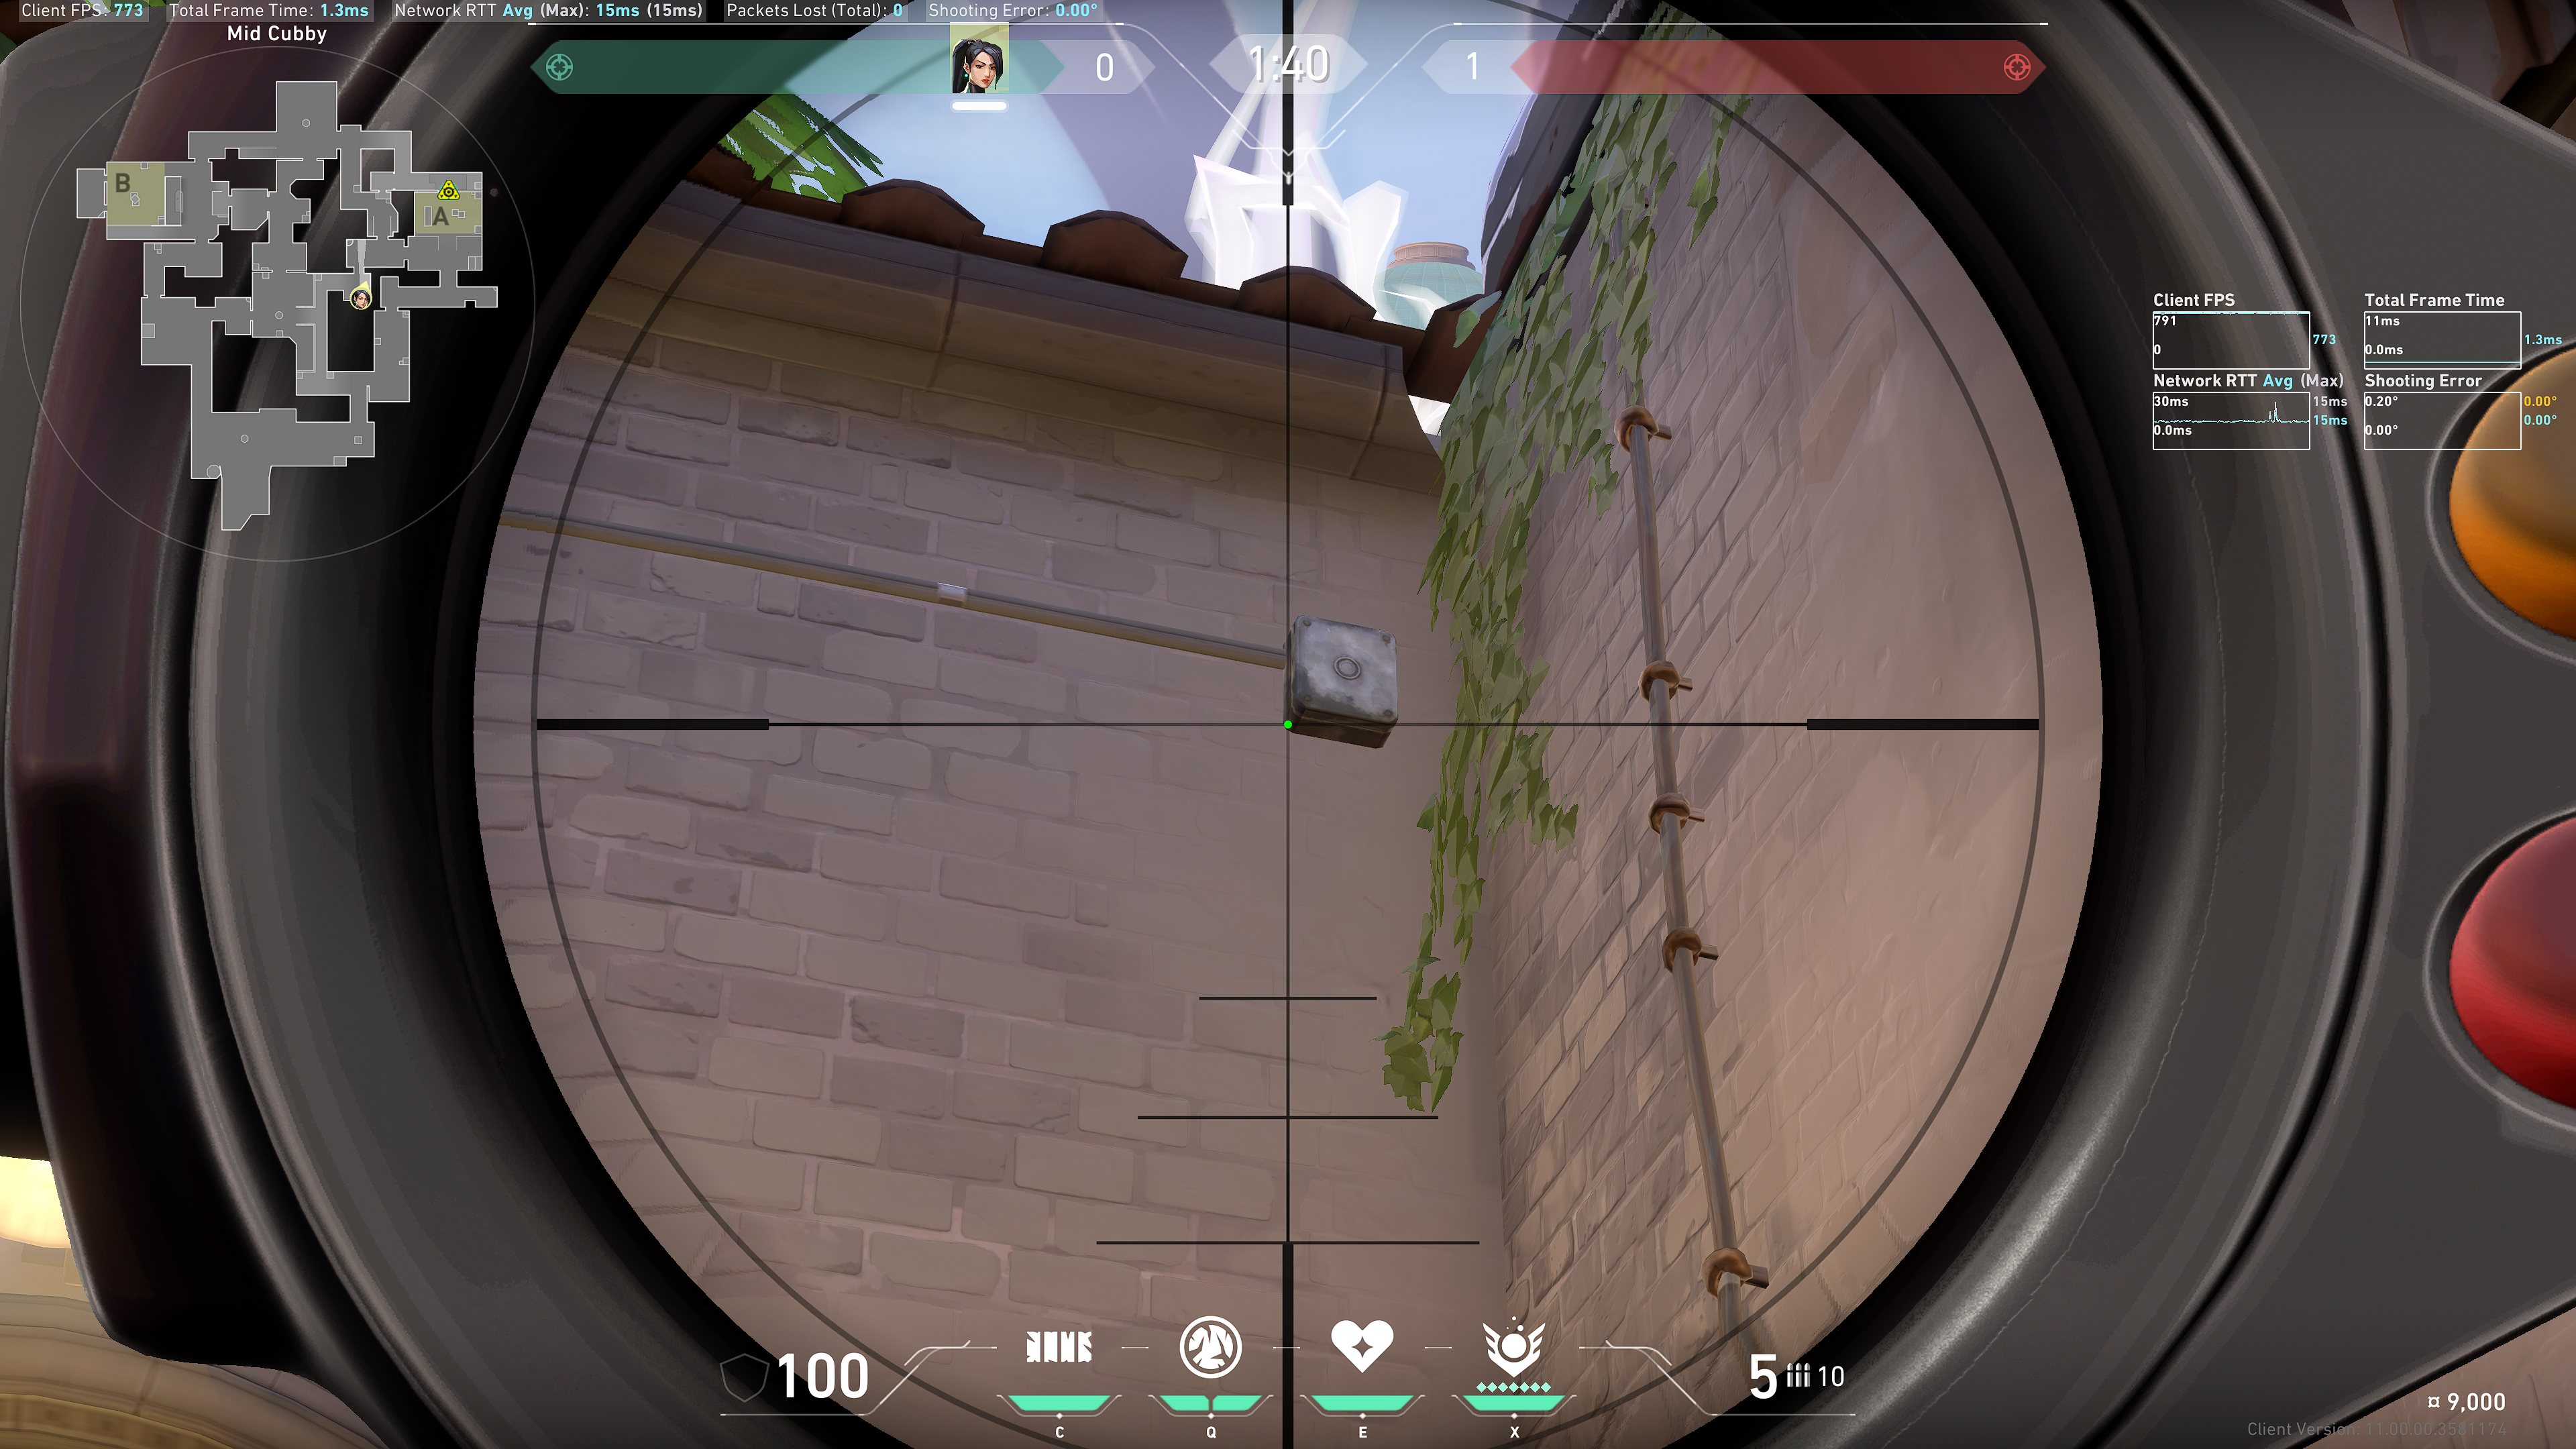
Back site
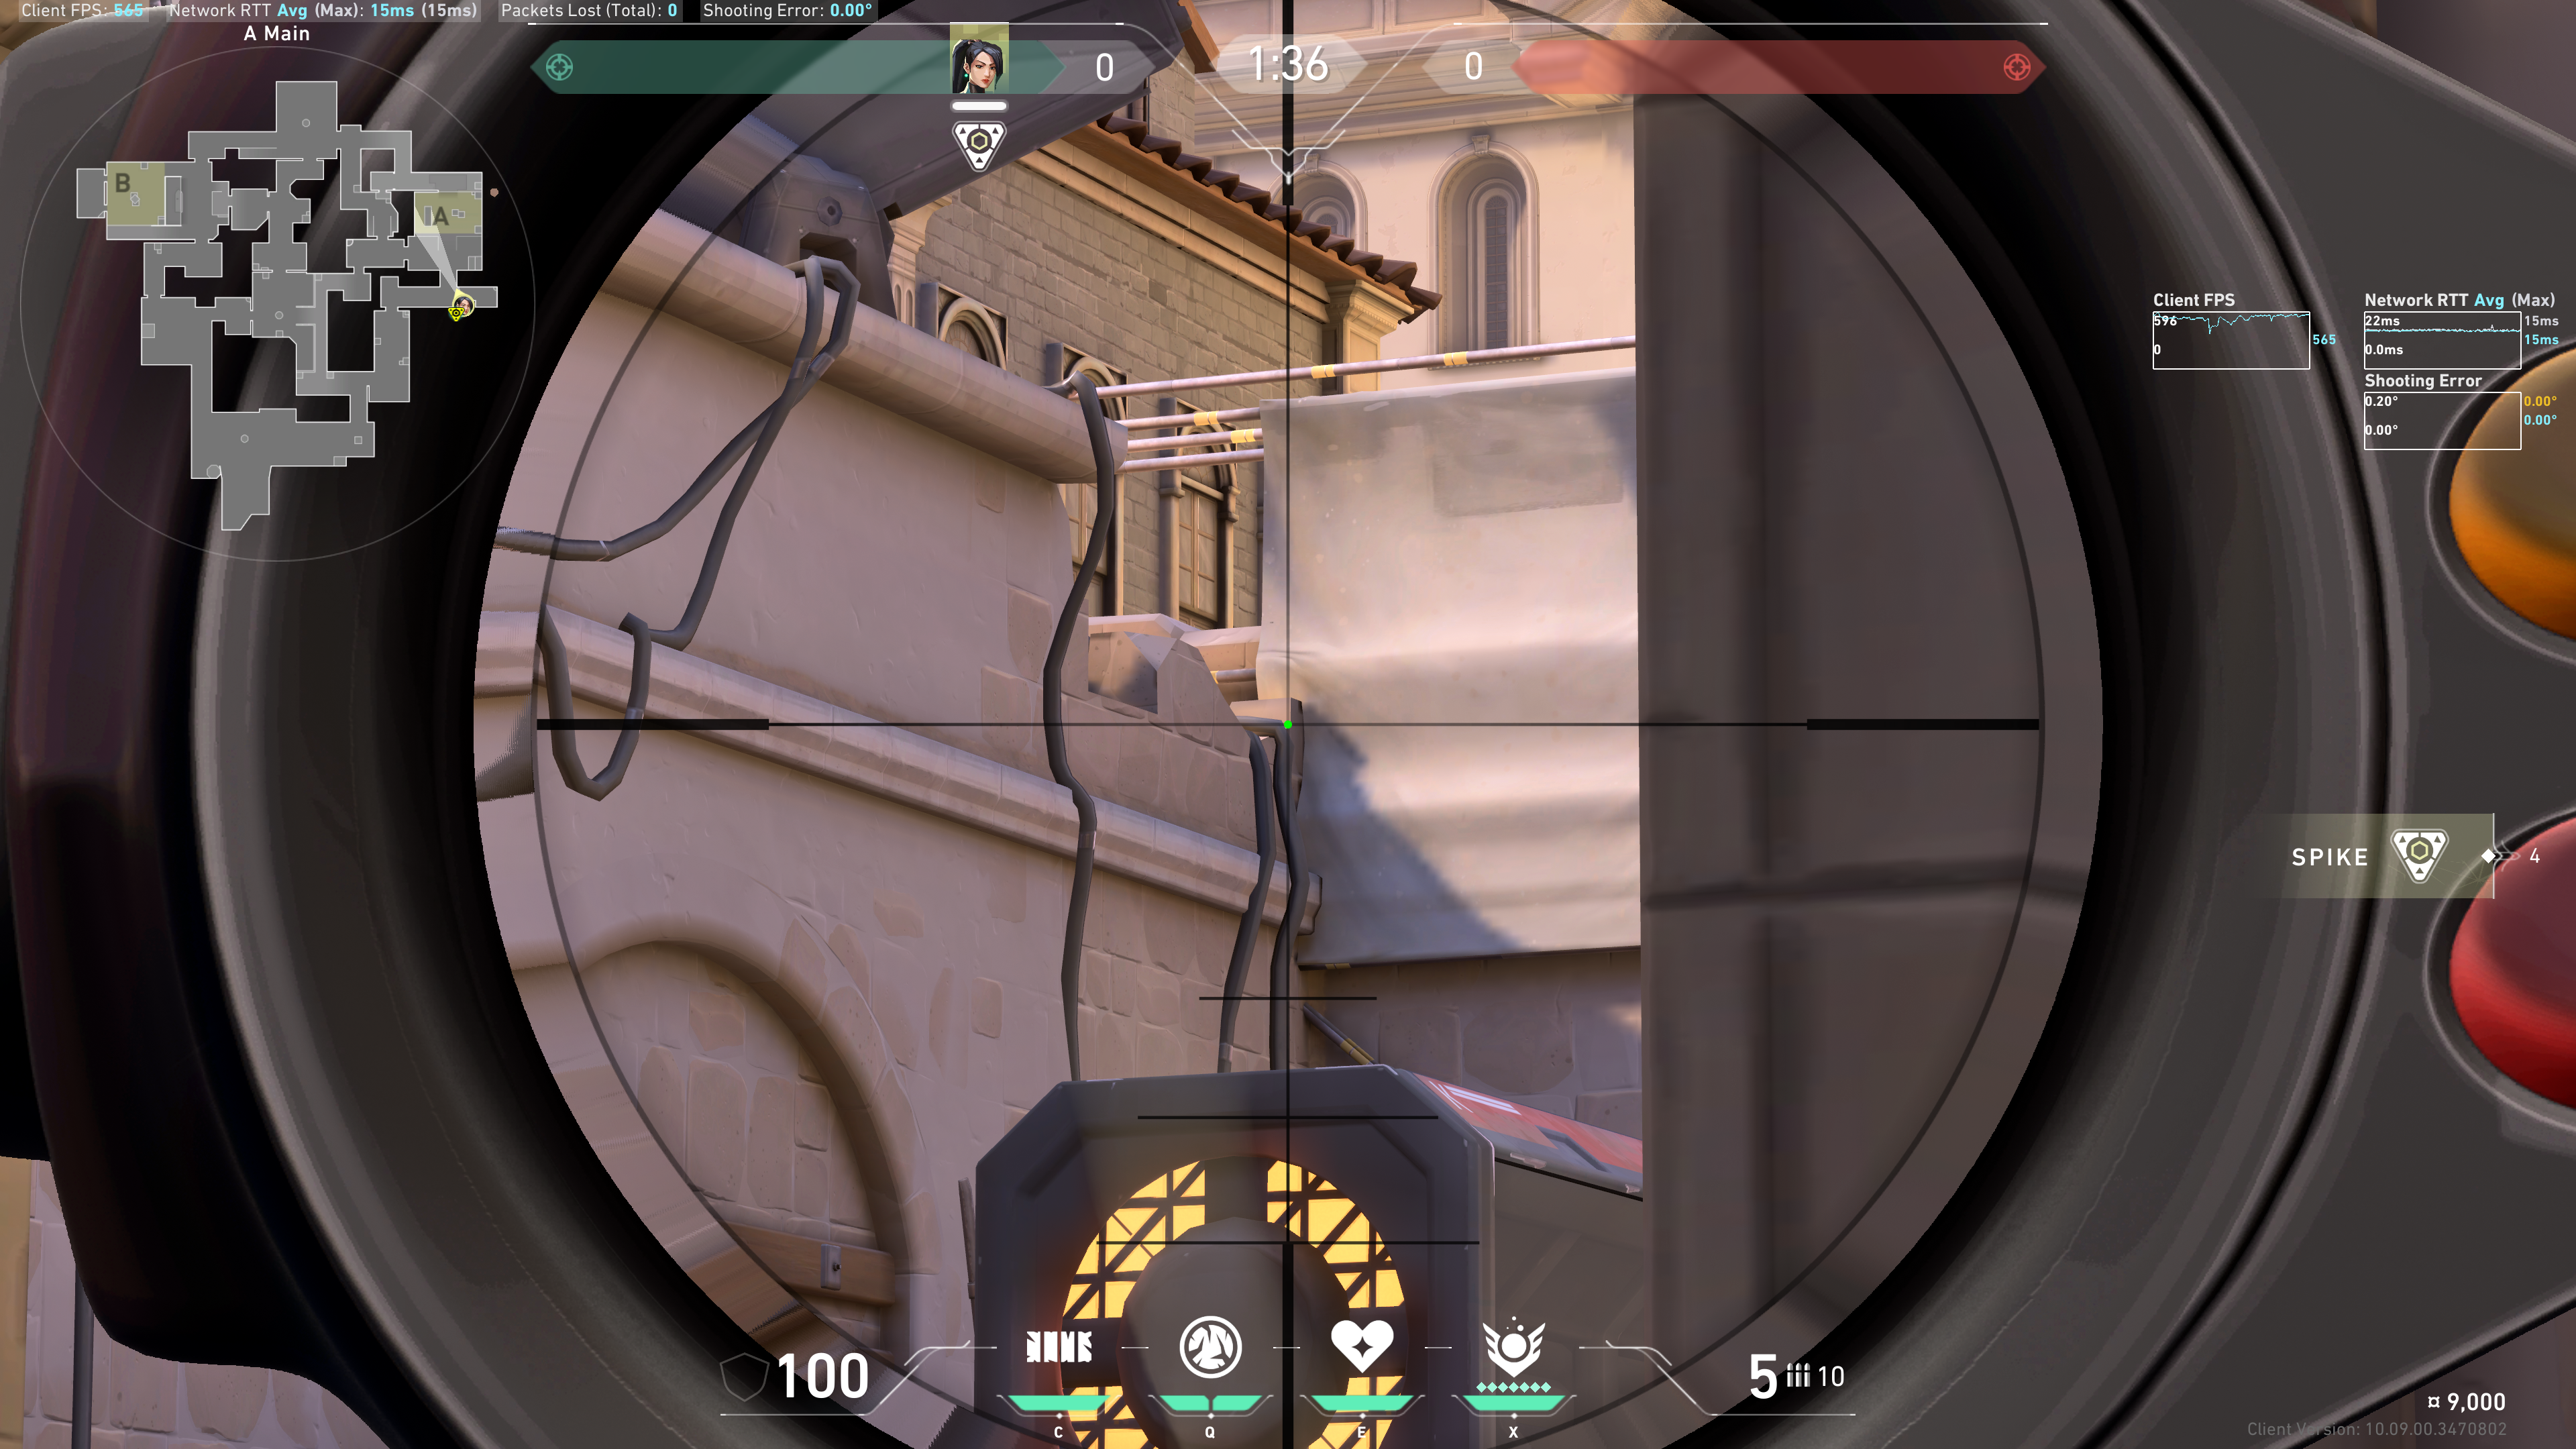
Note these spikes in the sky:
 Line up the down arrow of the Ice Ob indicator in the middle of this spike:
 Result:
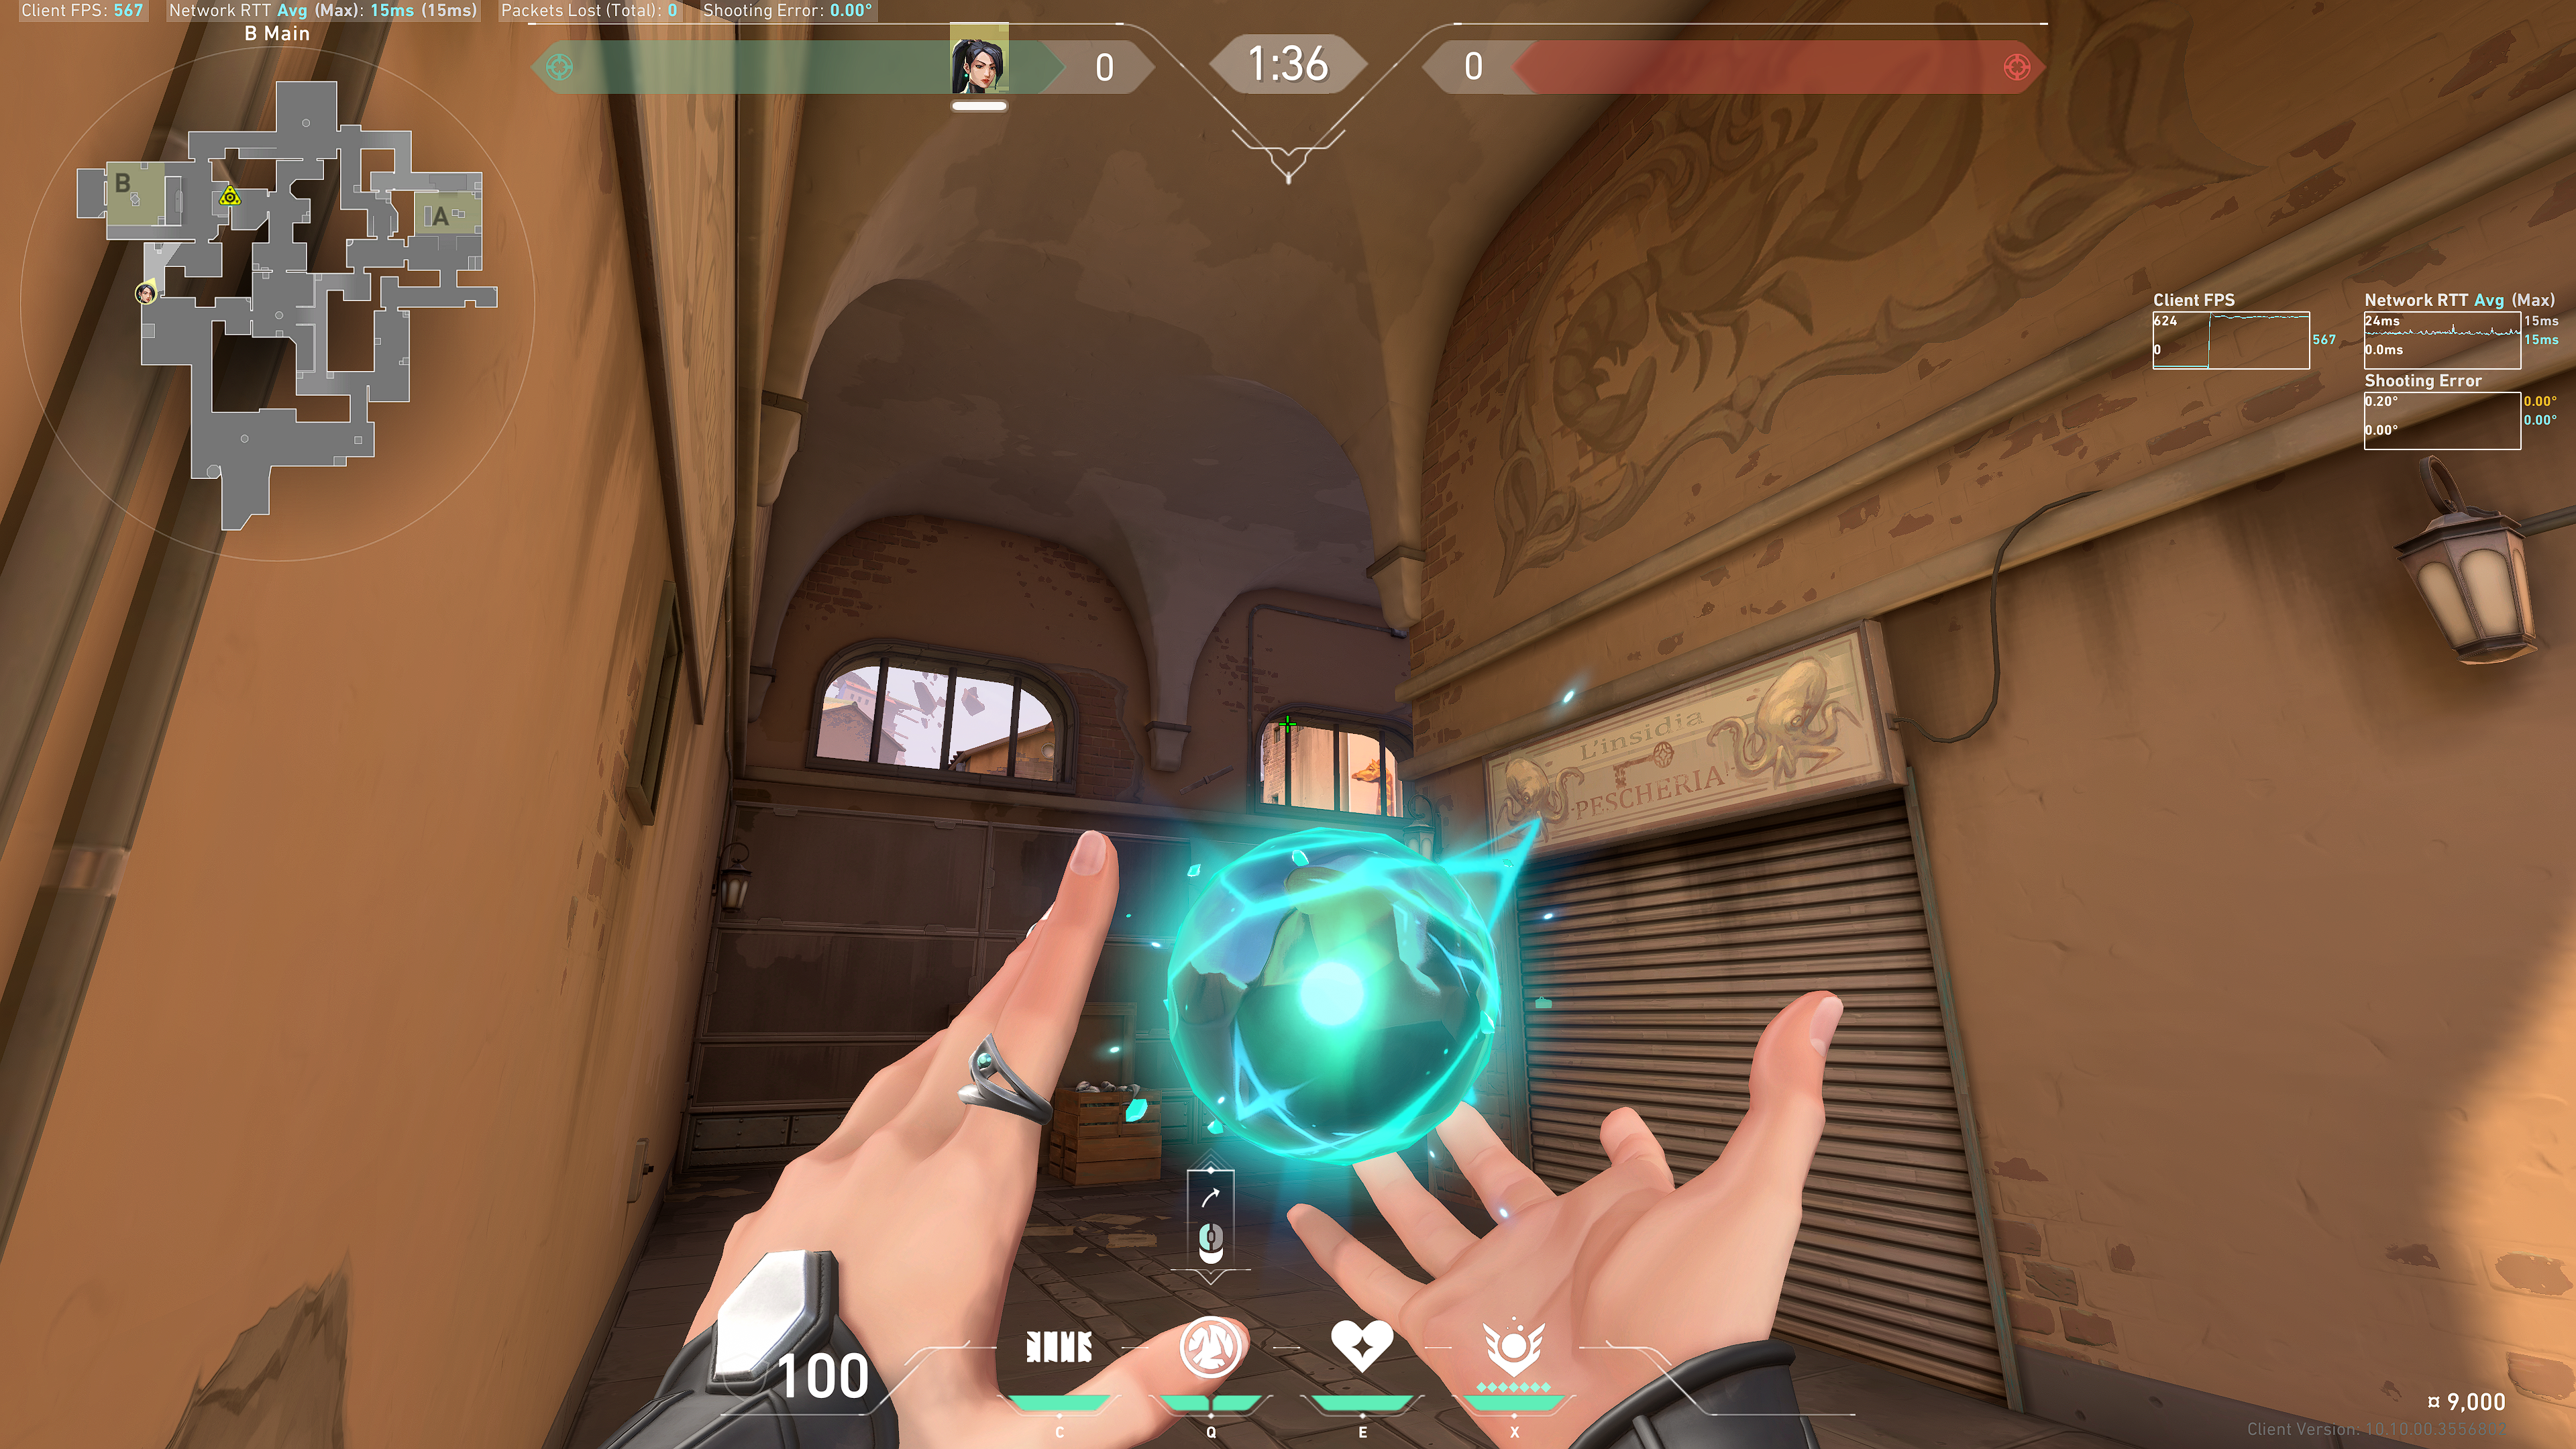
B Site
Tuck in this corner:
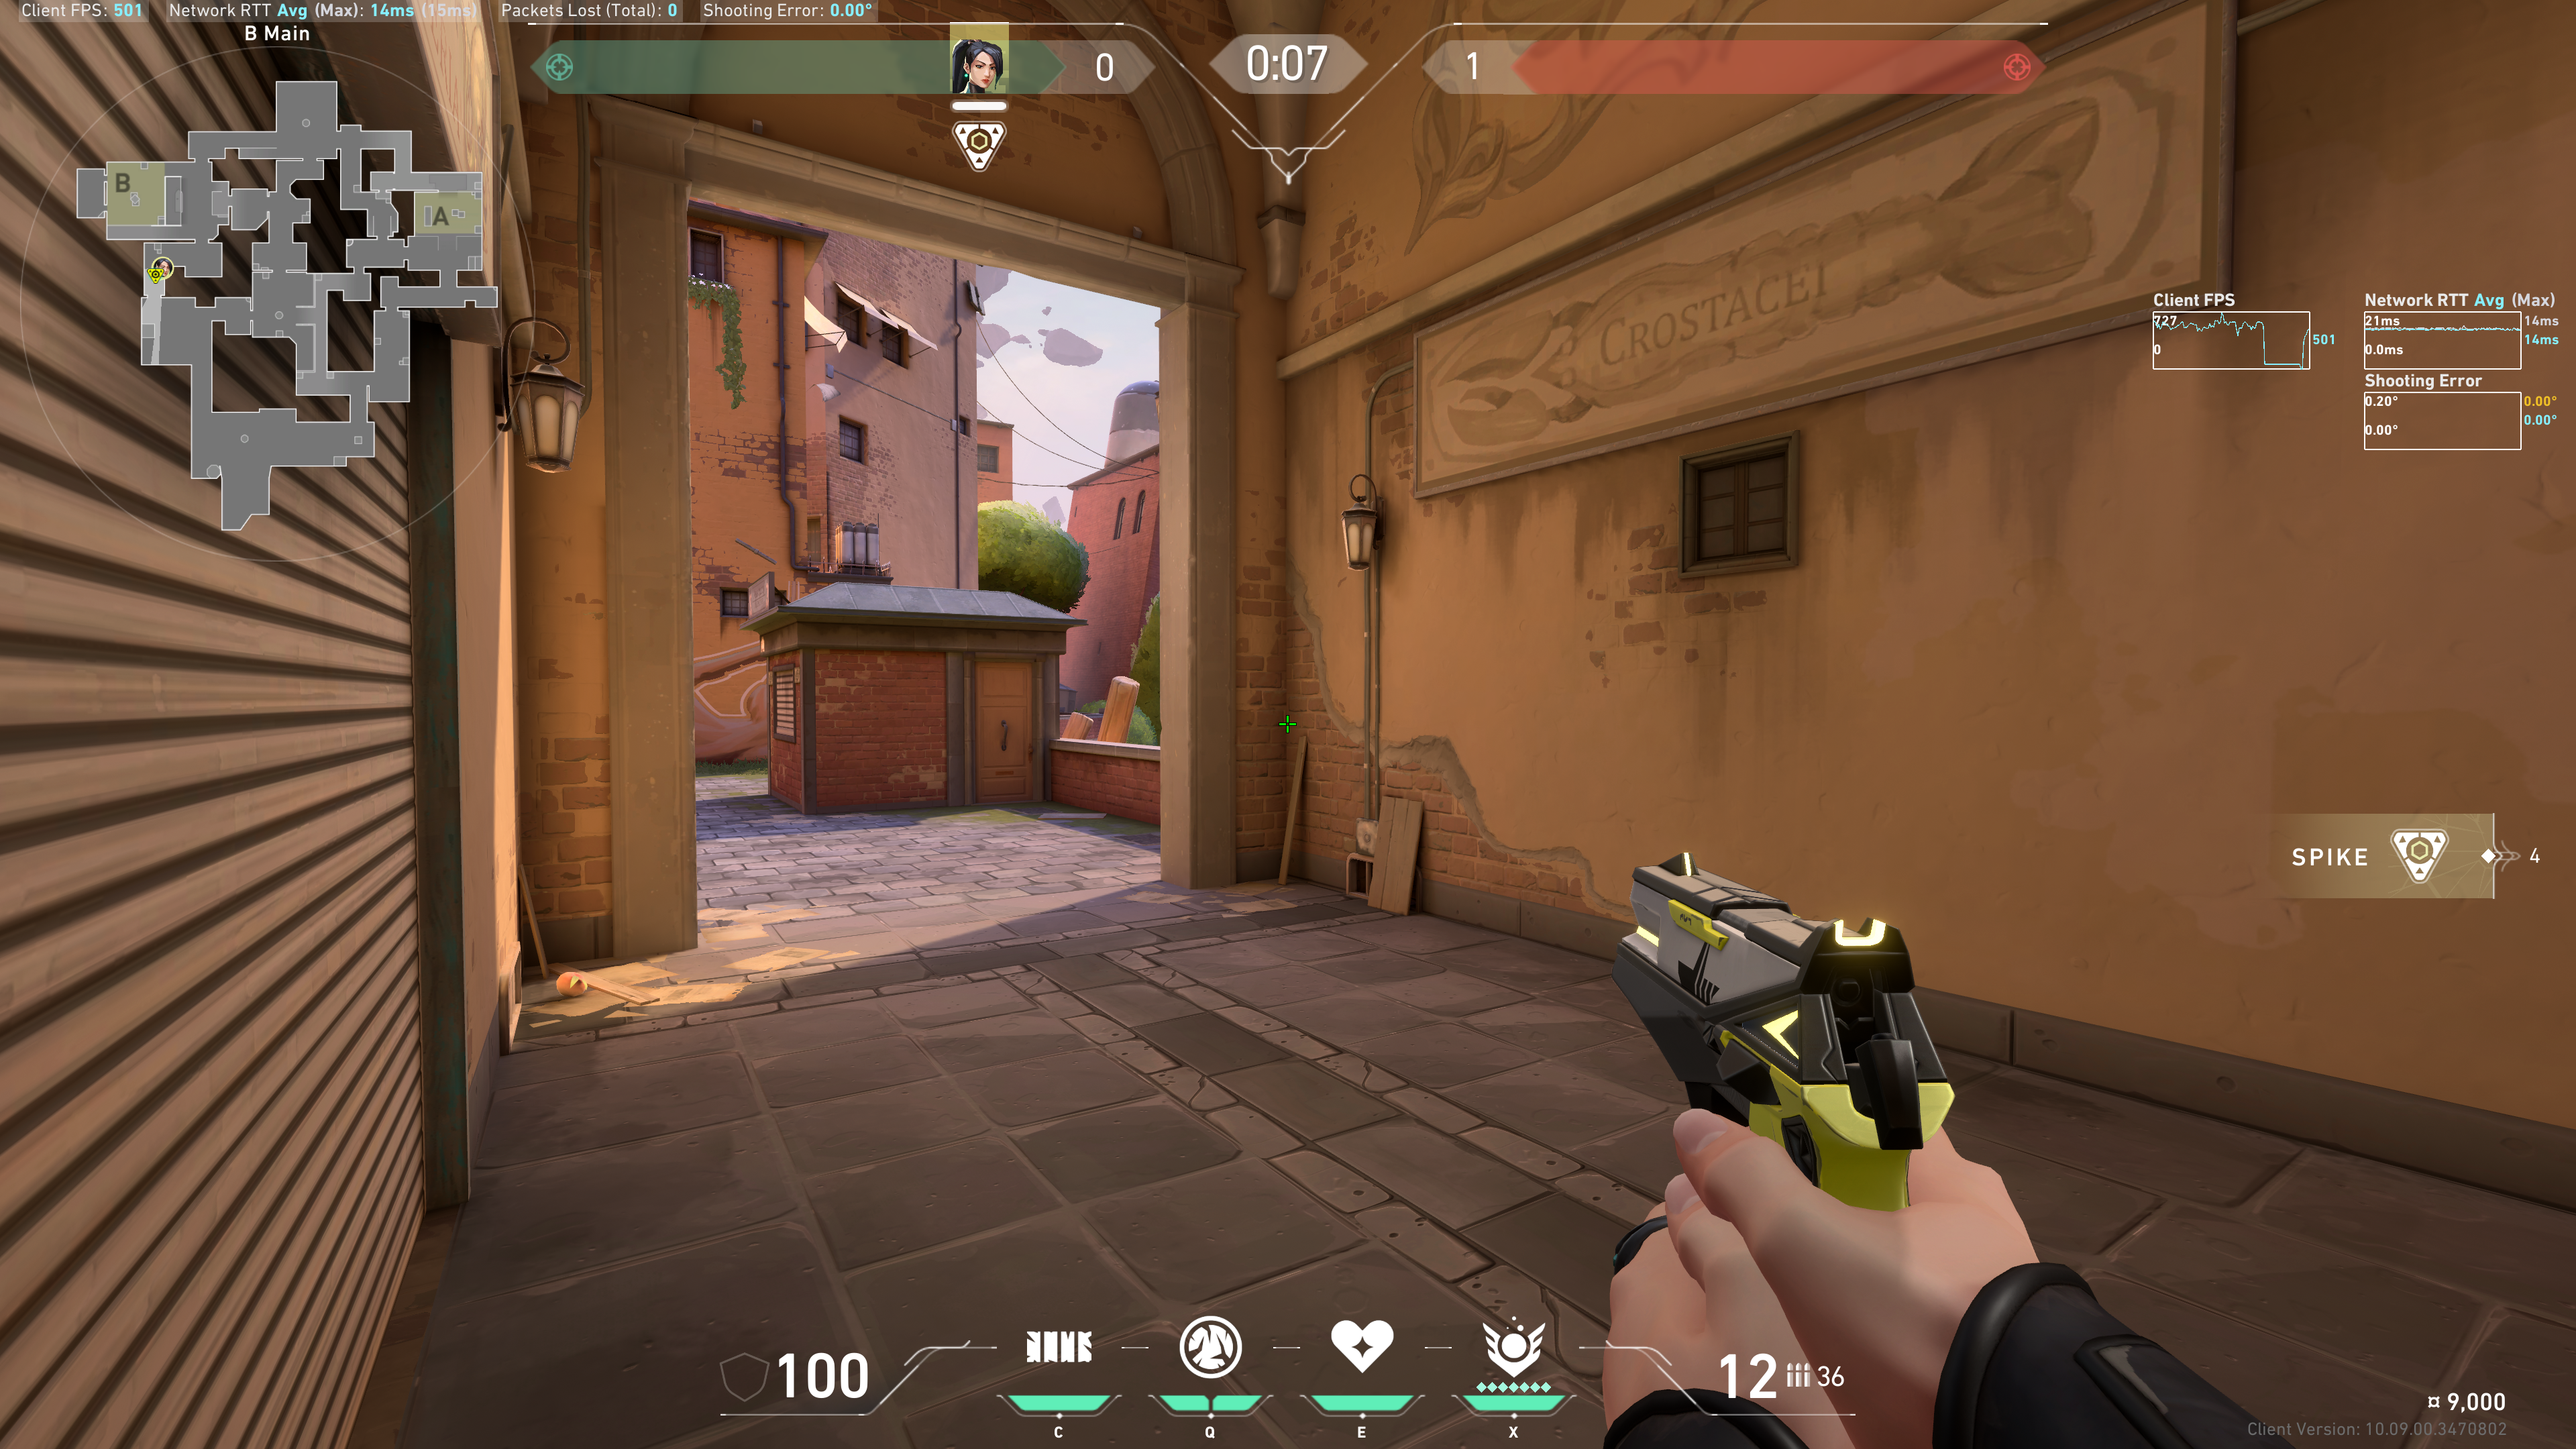
Stairs
Aim at the bottom of the middle bar:
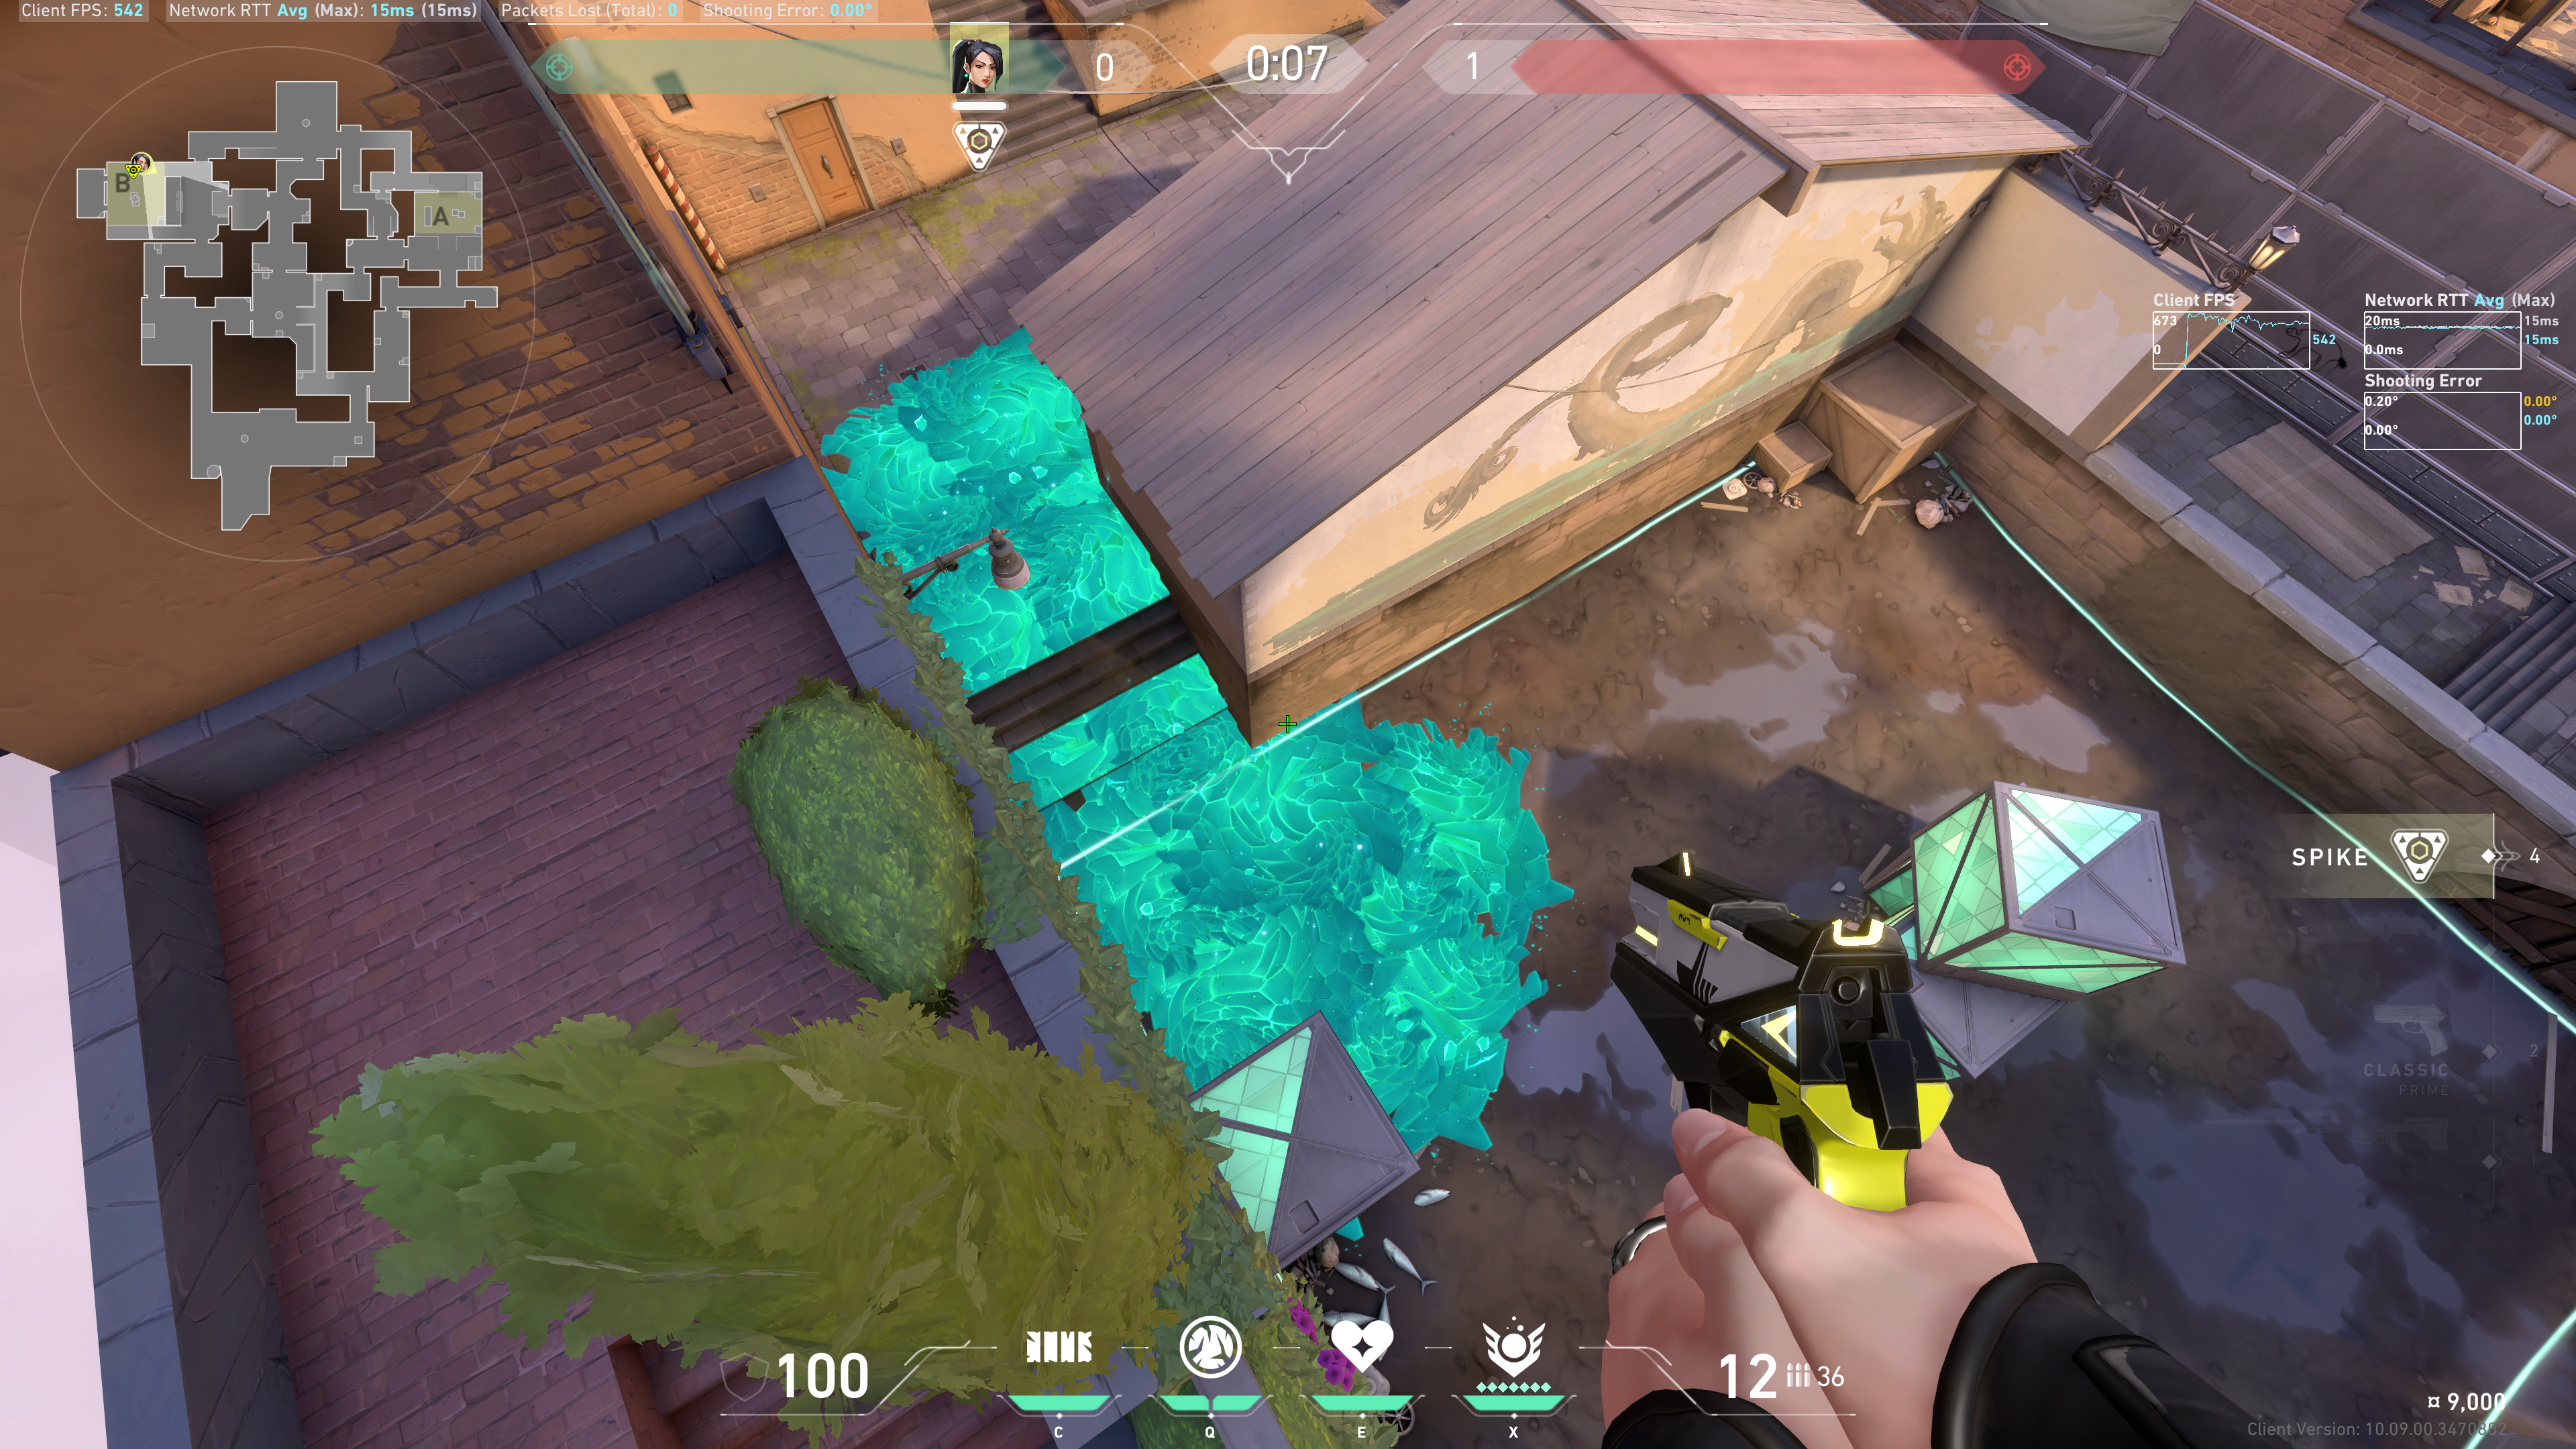
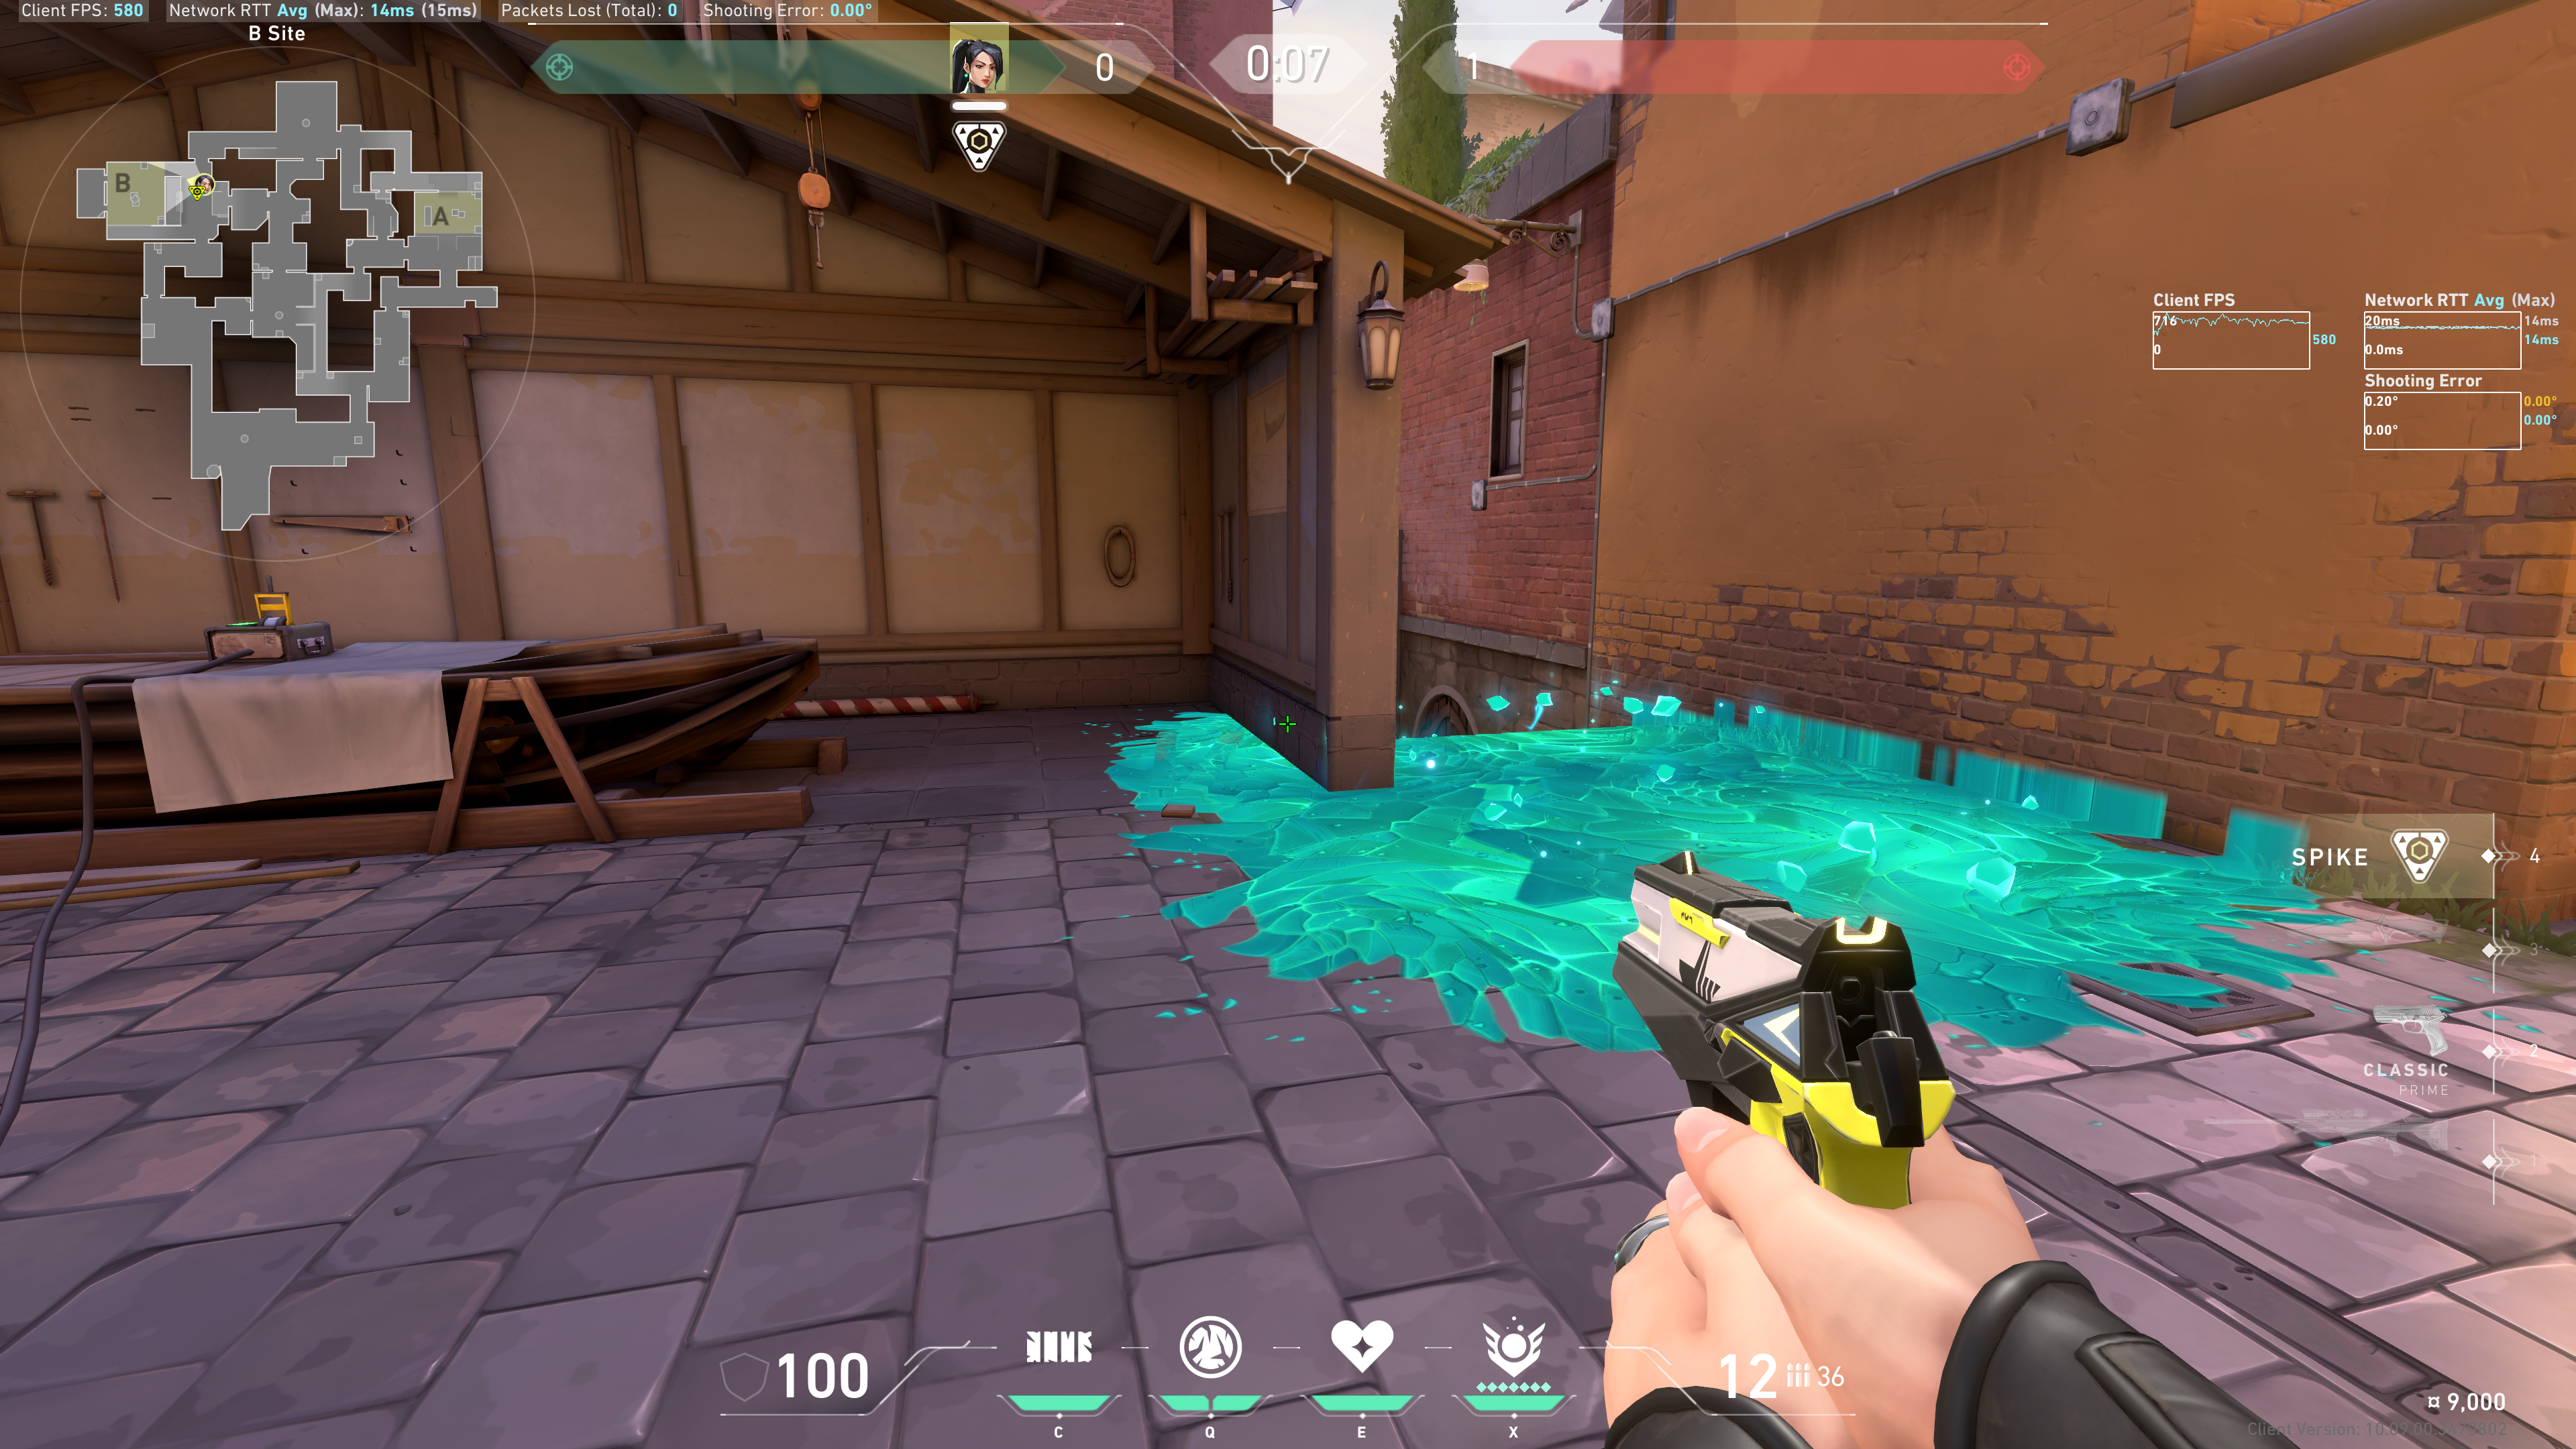
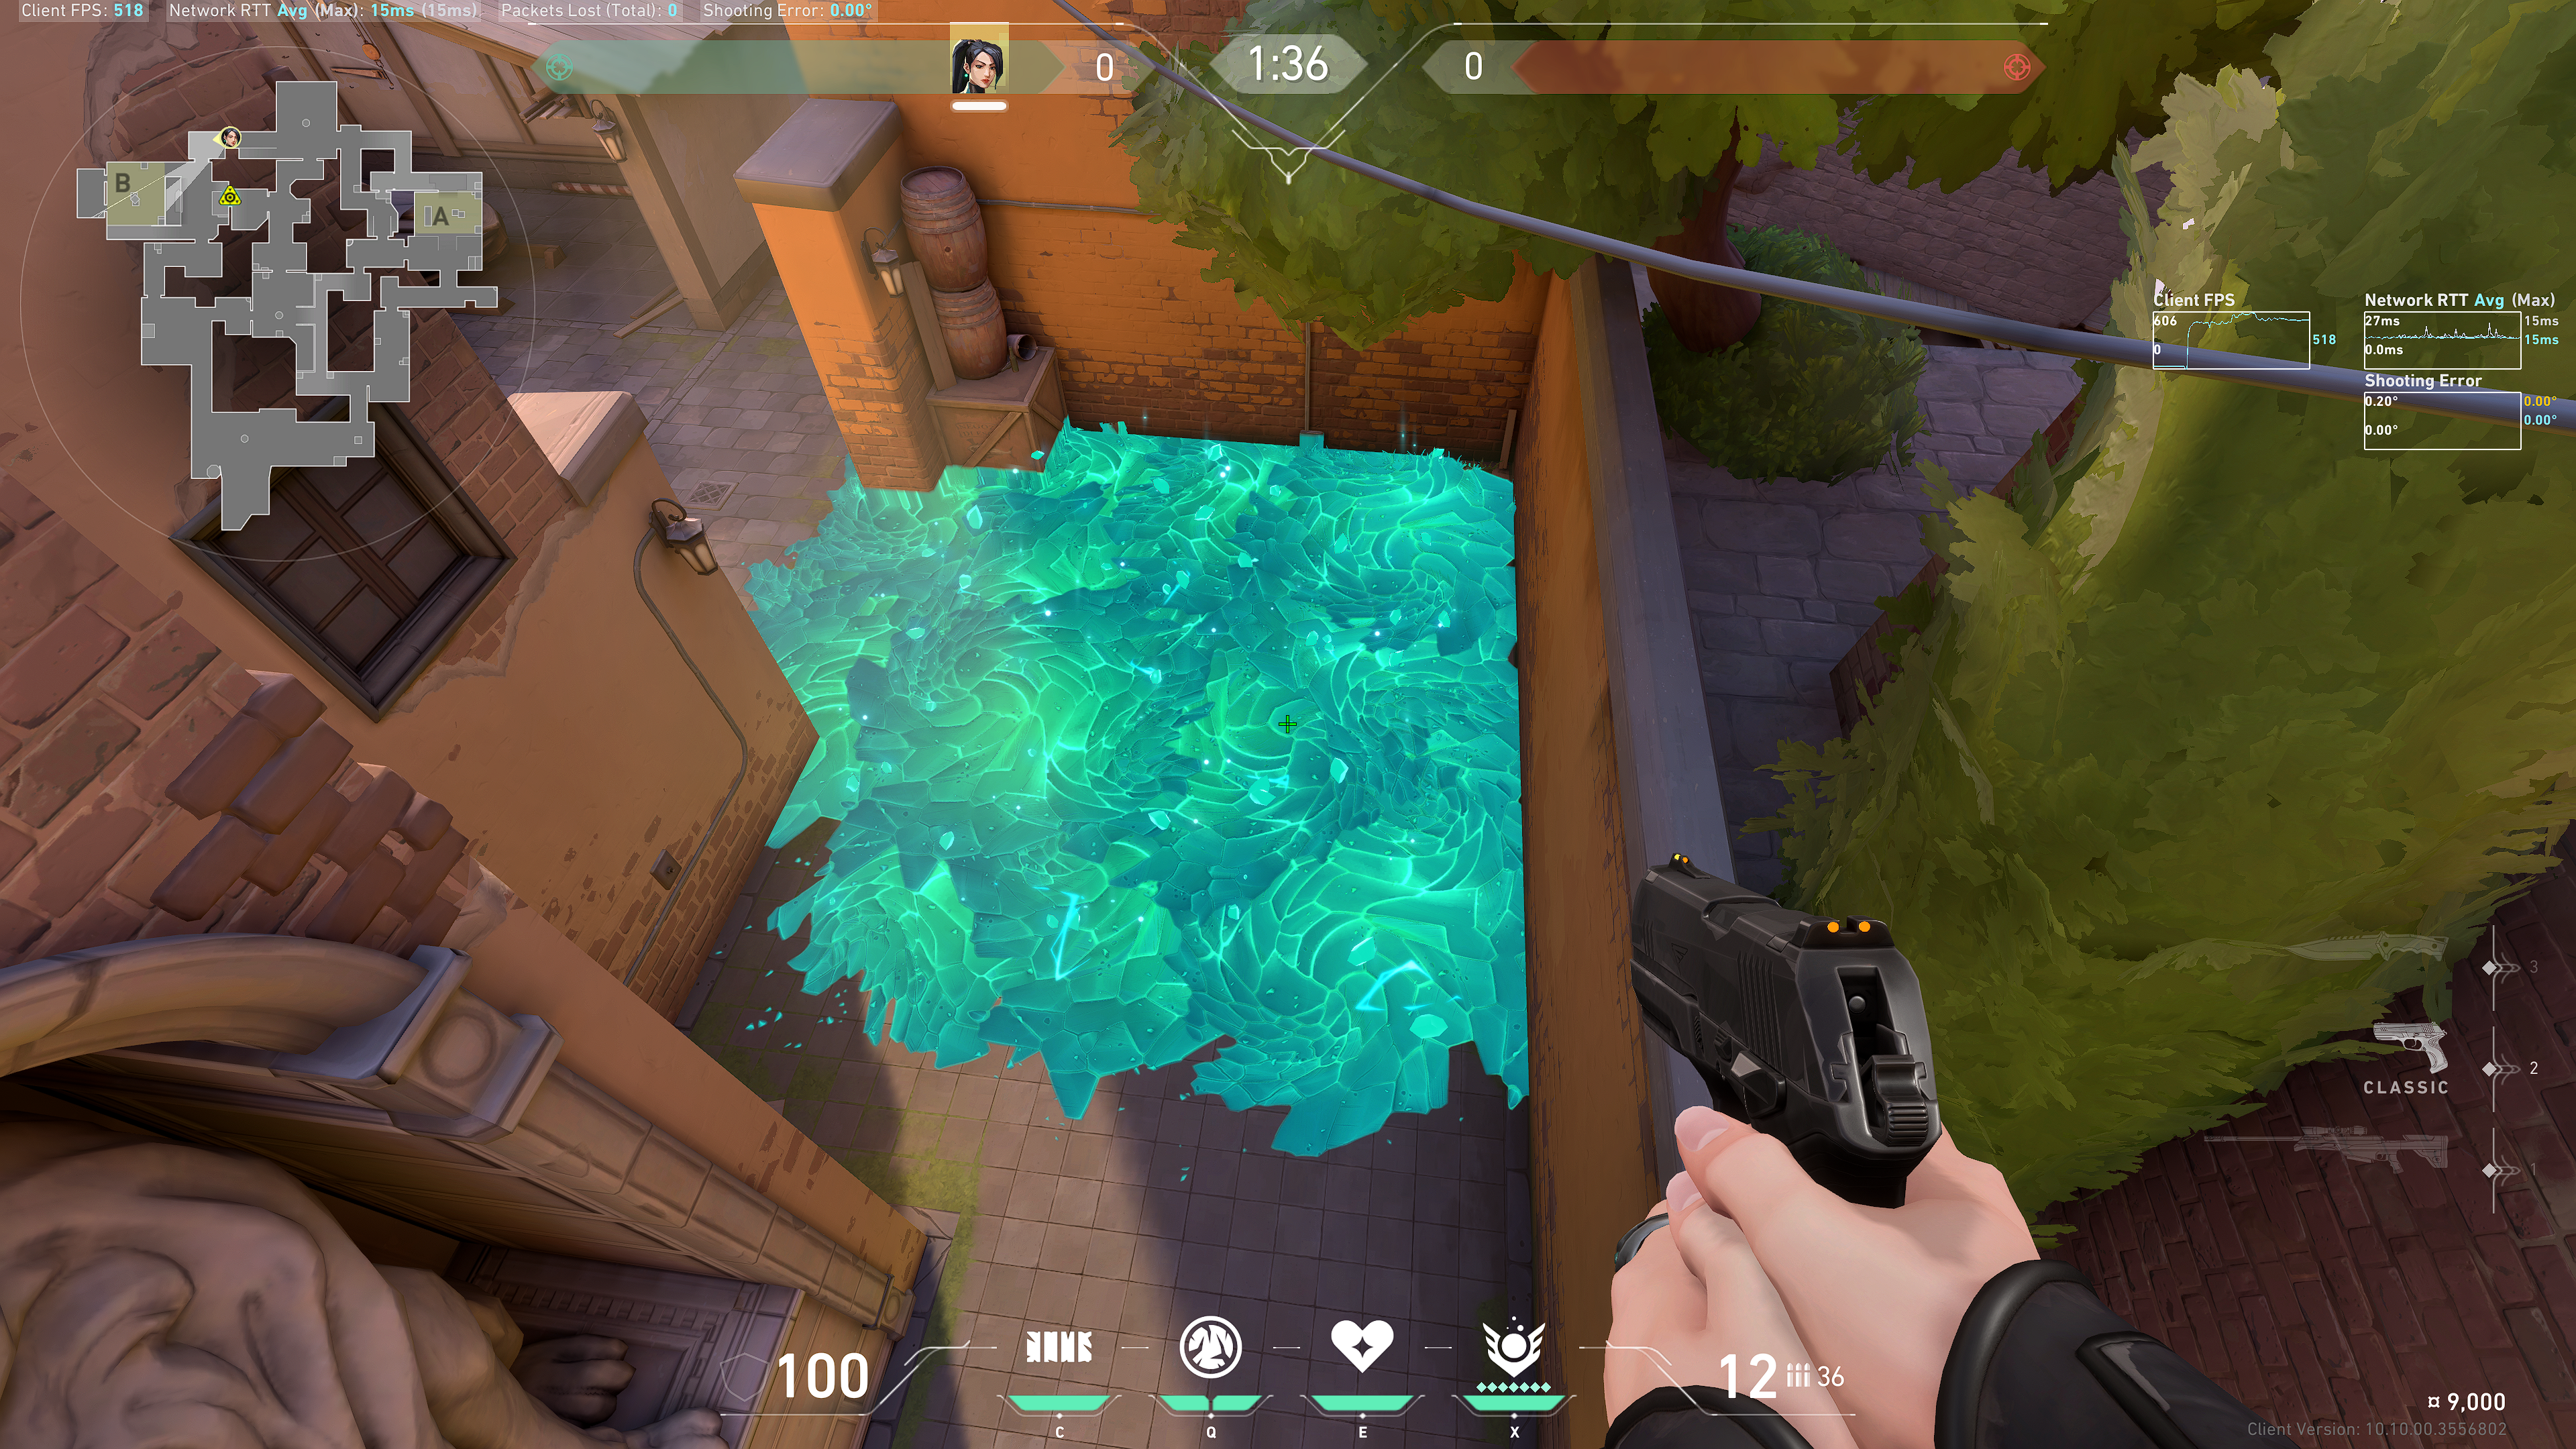
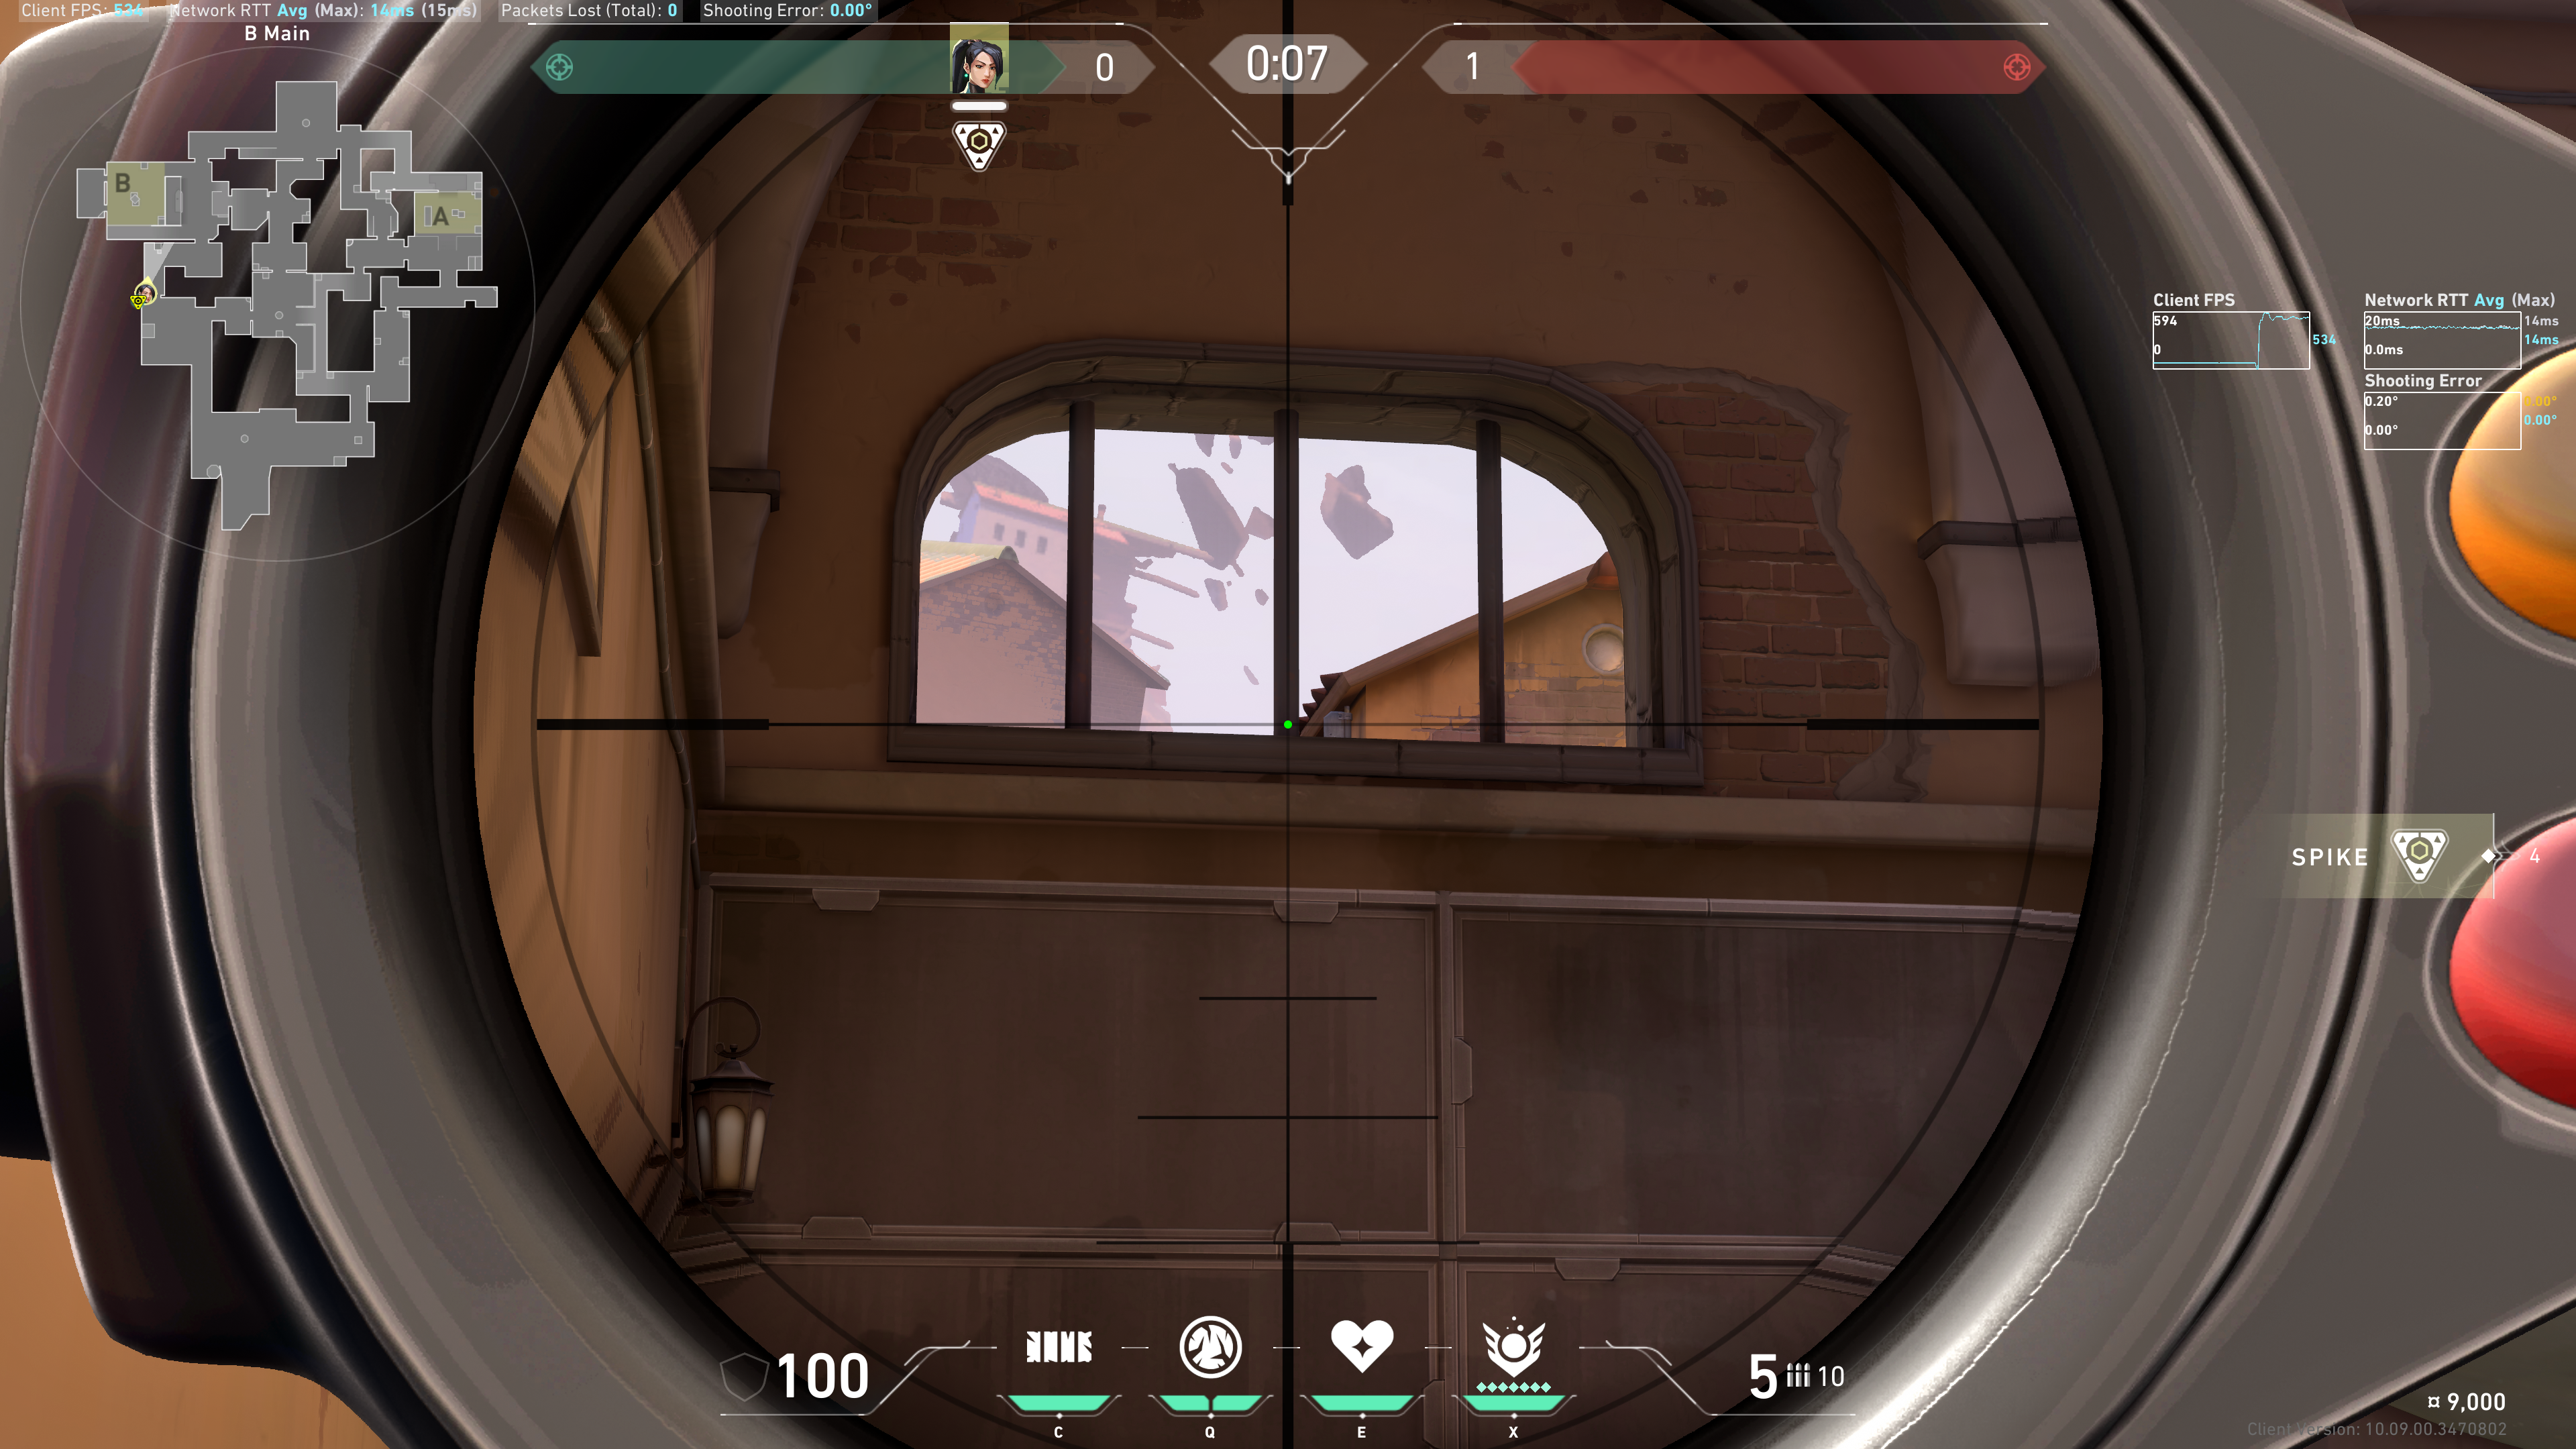 Result:
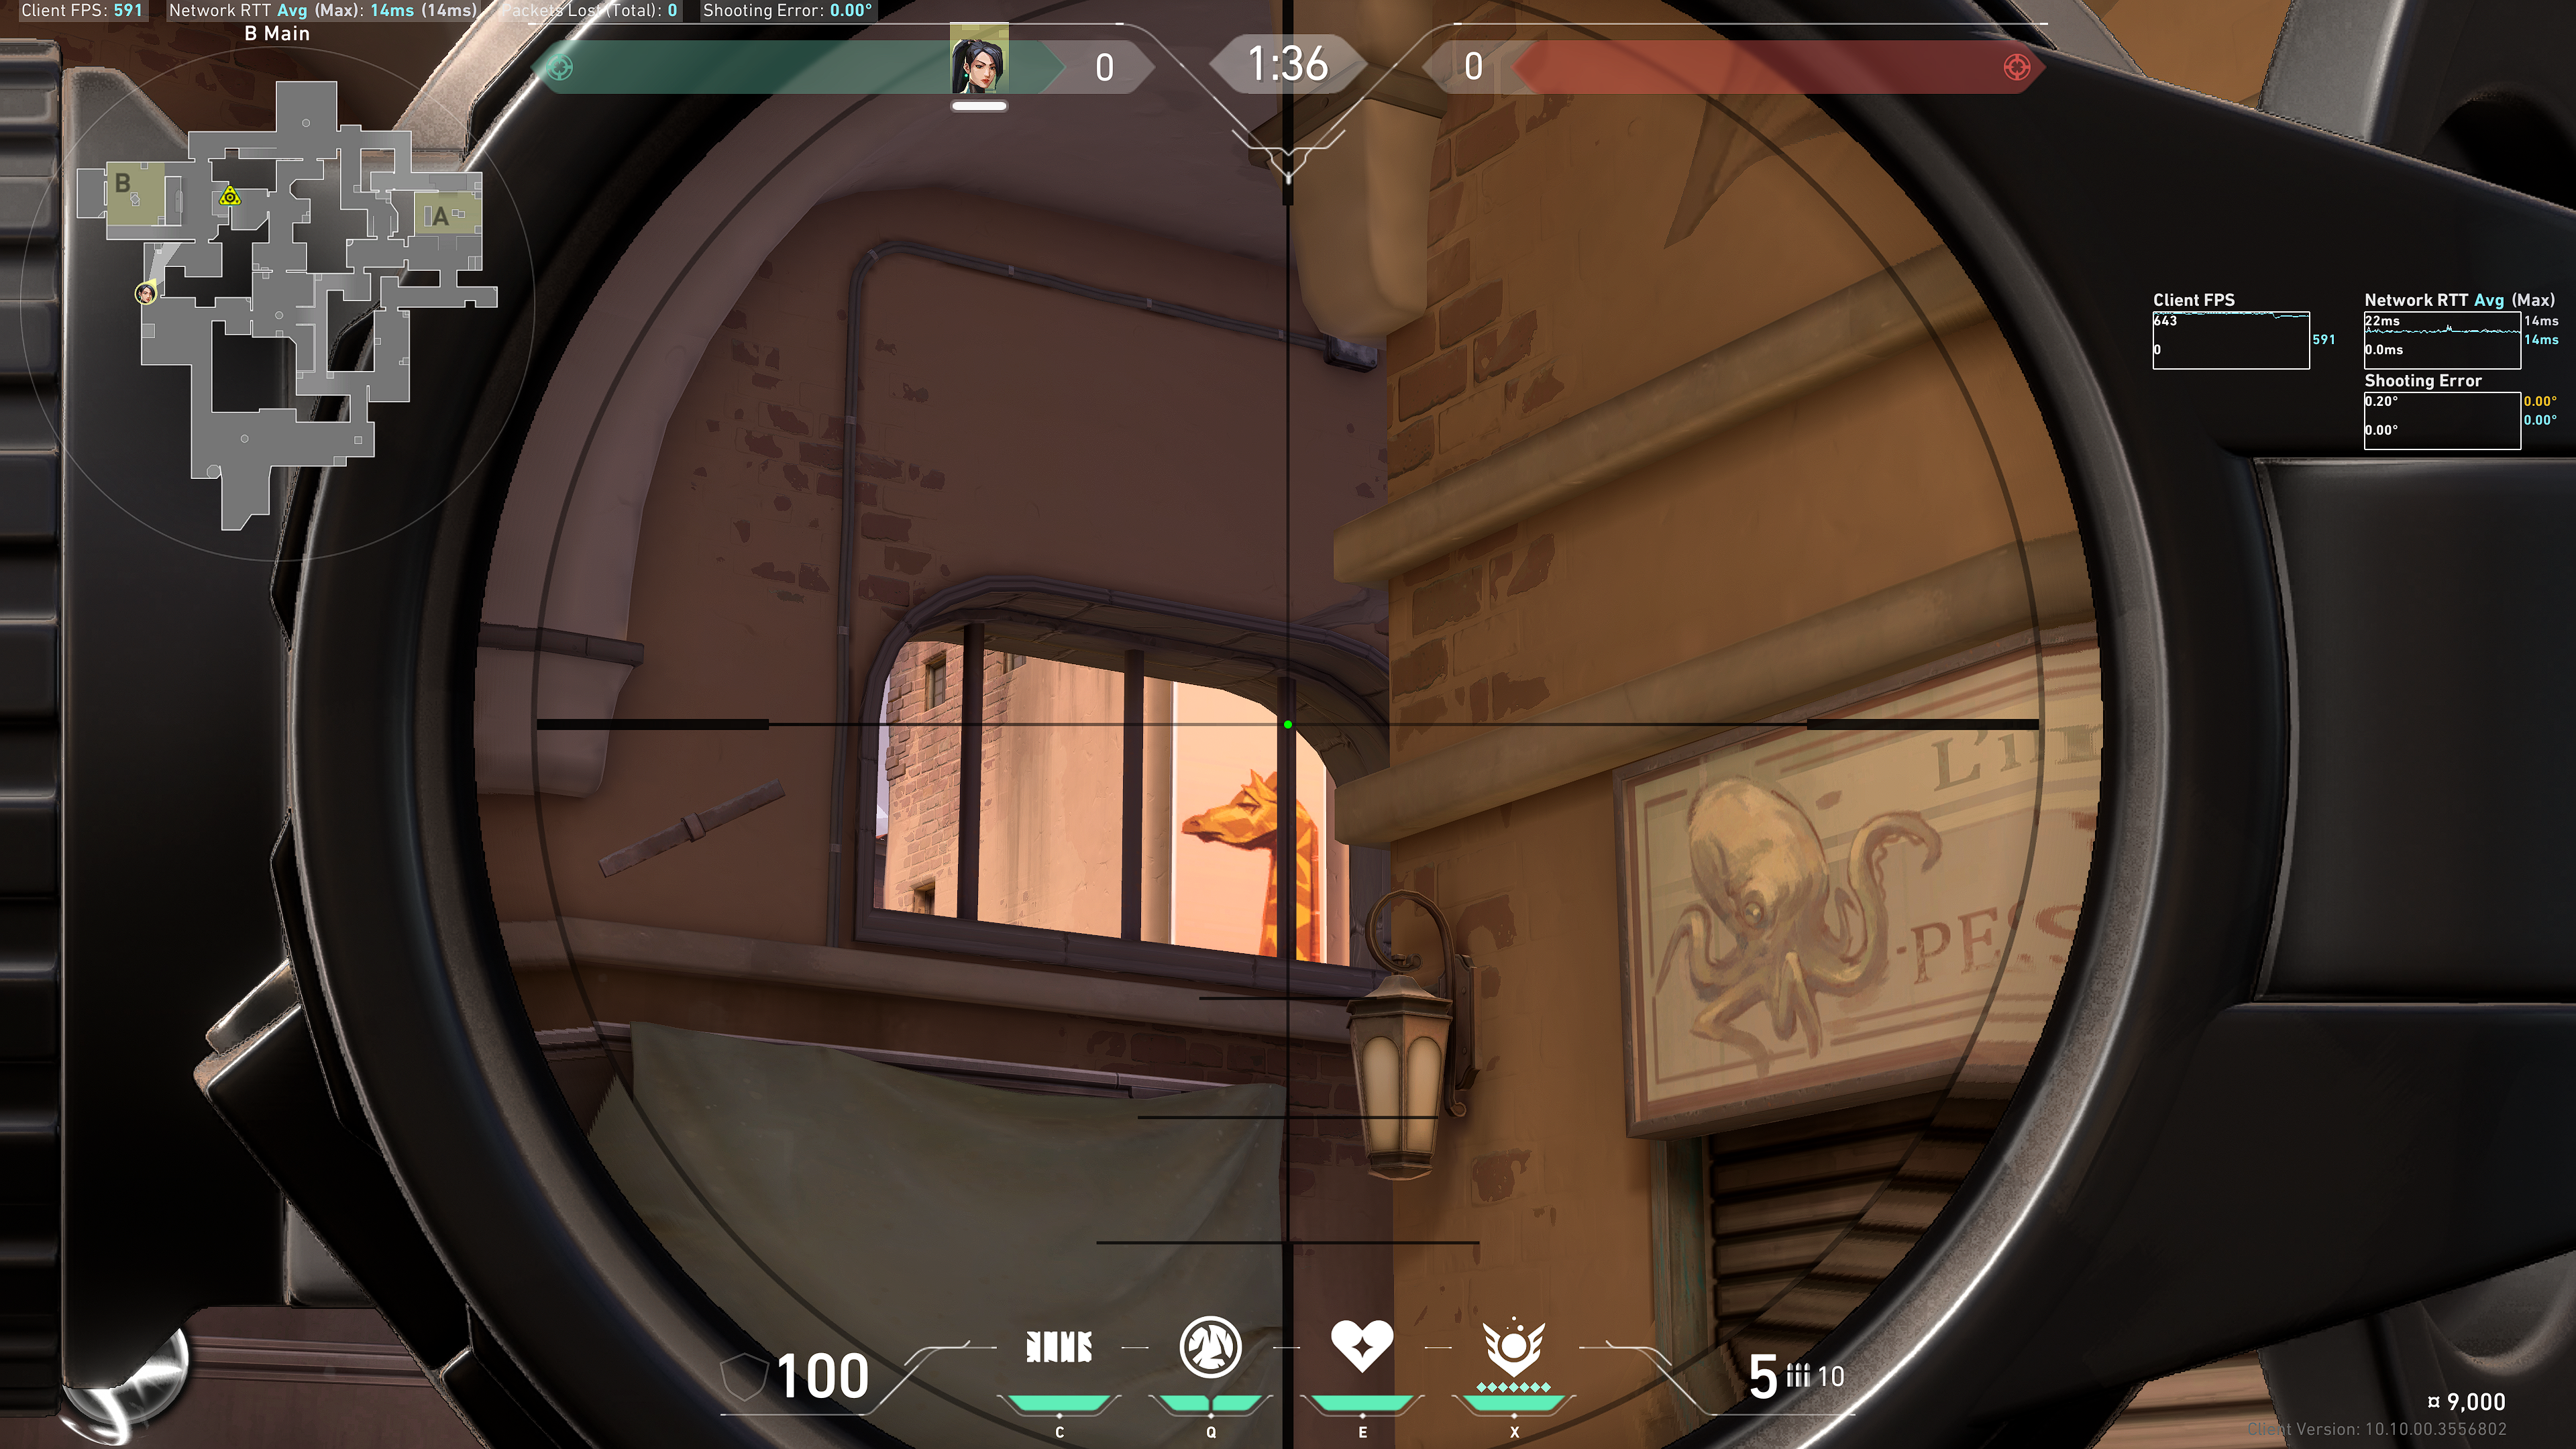
CT
Aim at the top of the left bar where it intersects with the window:
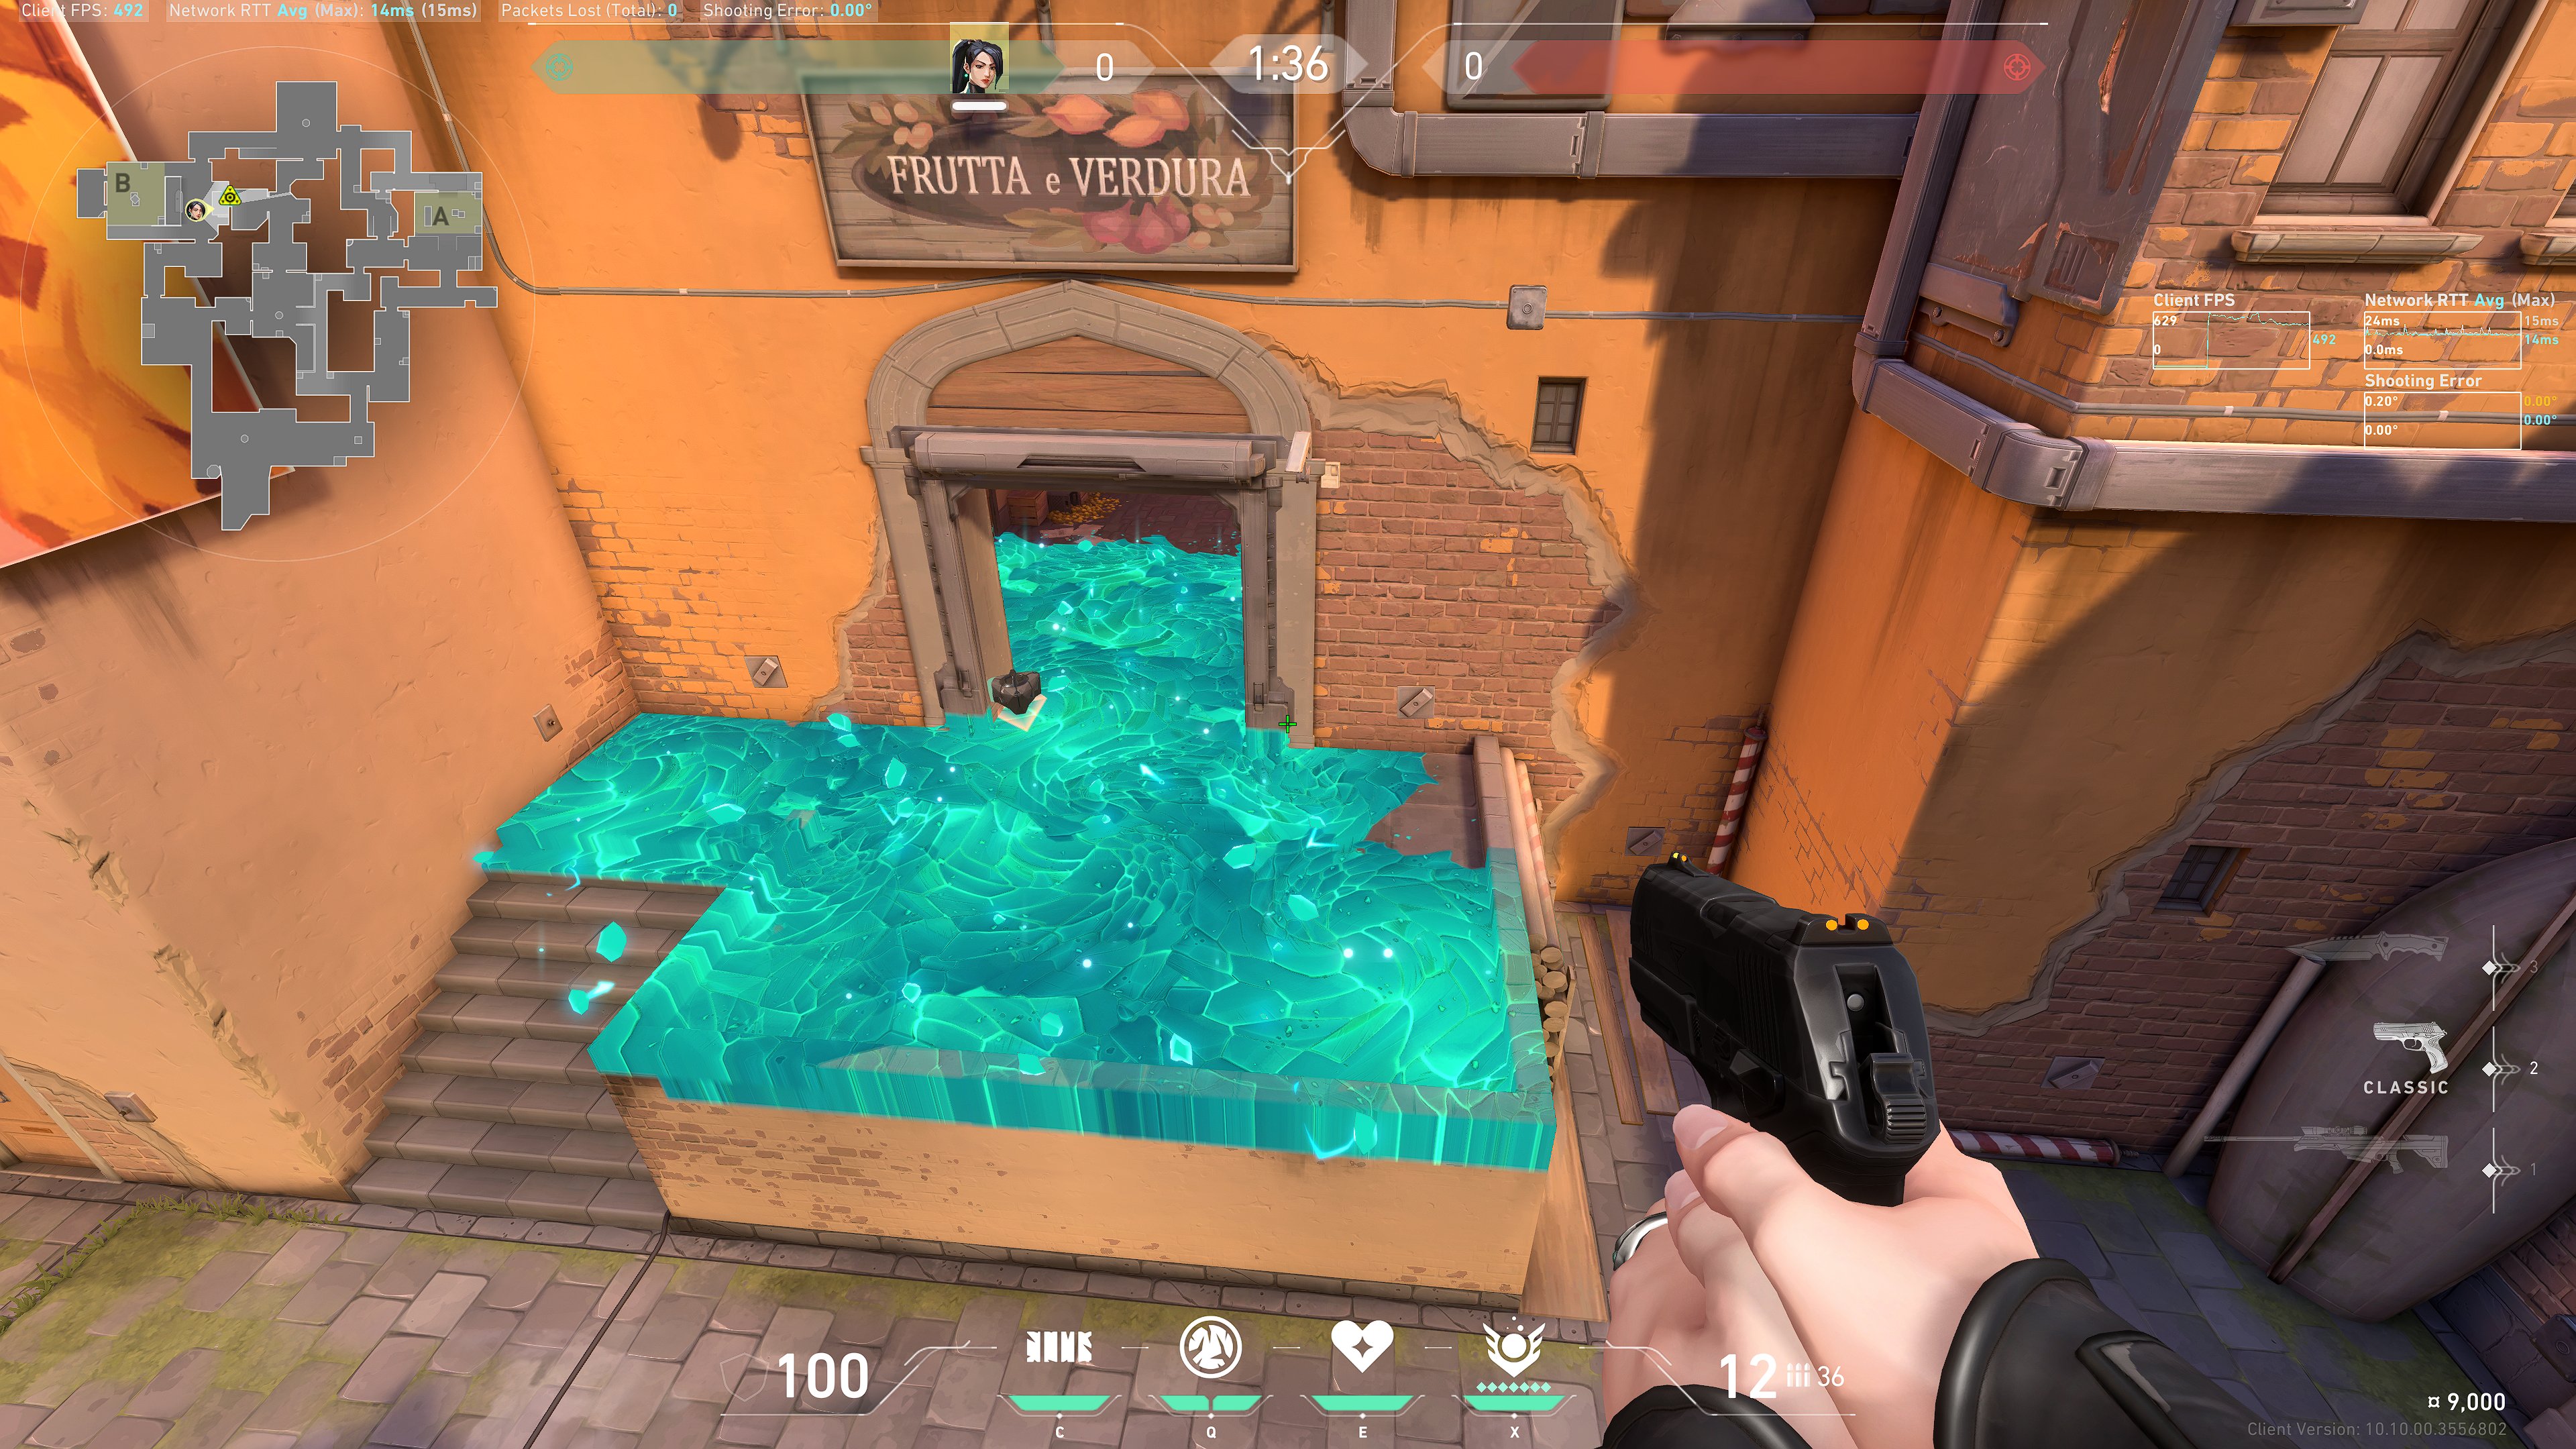
 Result:
Market
Aim at the right bar, where it intersects with the back of the window:
 Result:
Boat House
Tuck into this corner:
 Aim at this corner, but still through the window:
 Jump and after the peak of your jump (i.e. while you're falling), throw the Ice Orb.
Result:
Jump and after the peak of your jump (i.e. while you're falling), throw the Ice Orb.
Result:

Defense
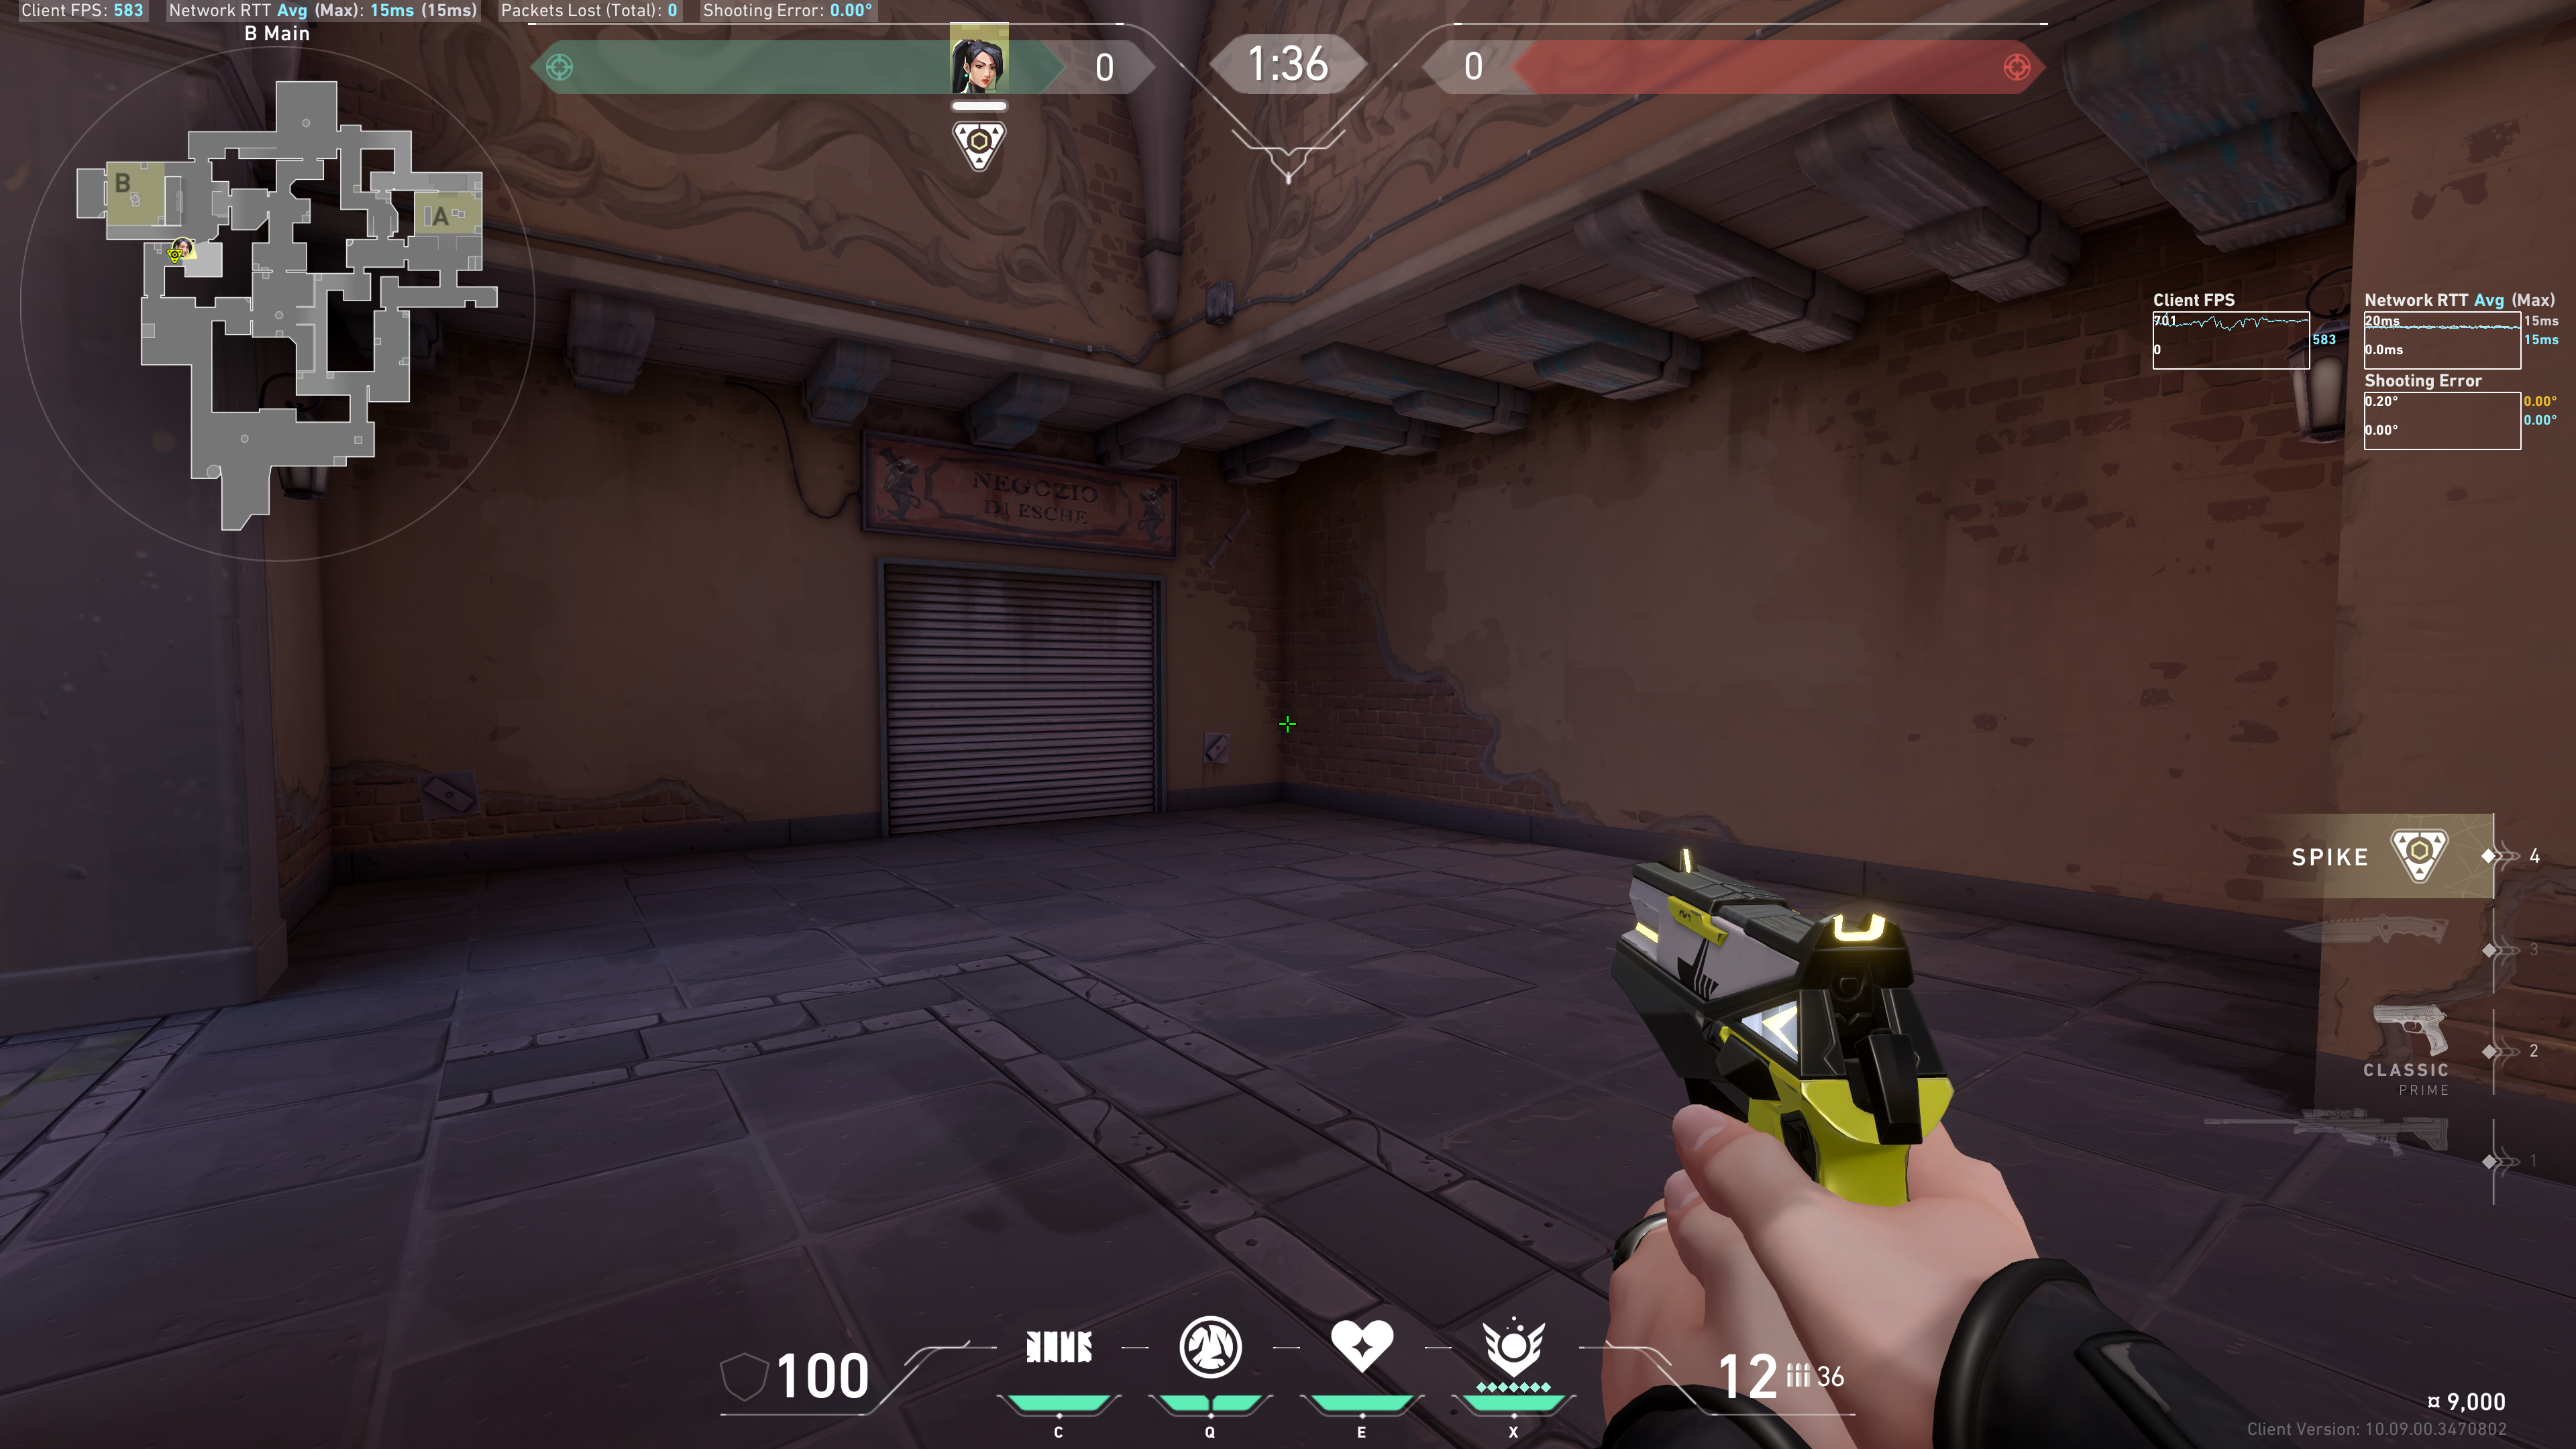
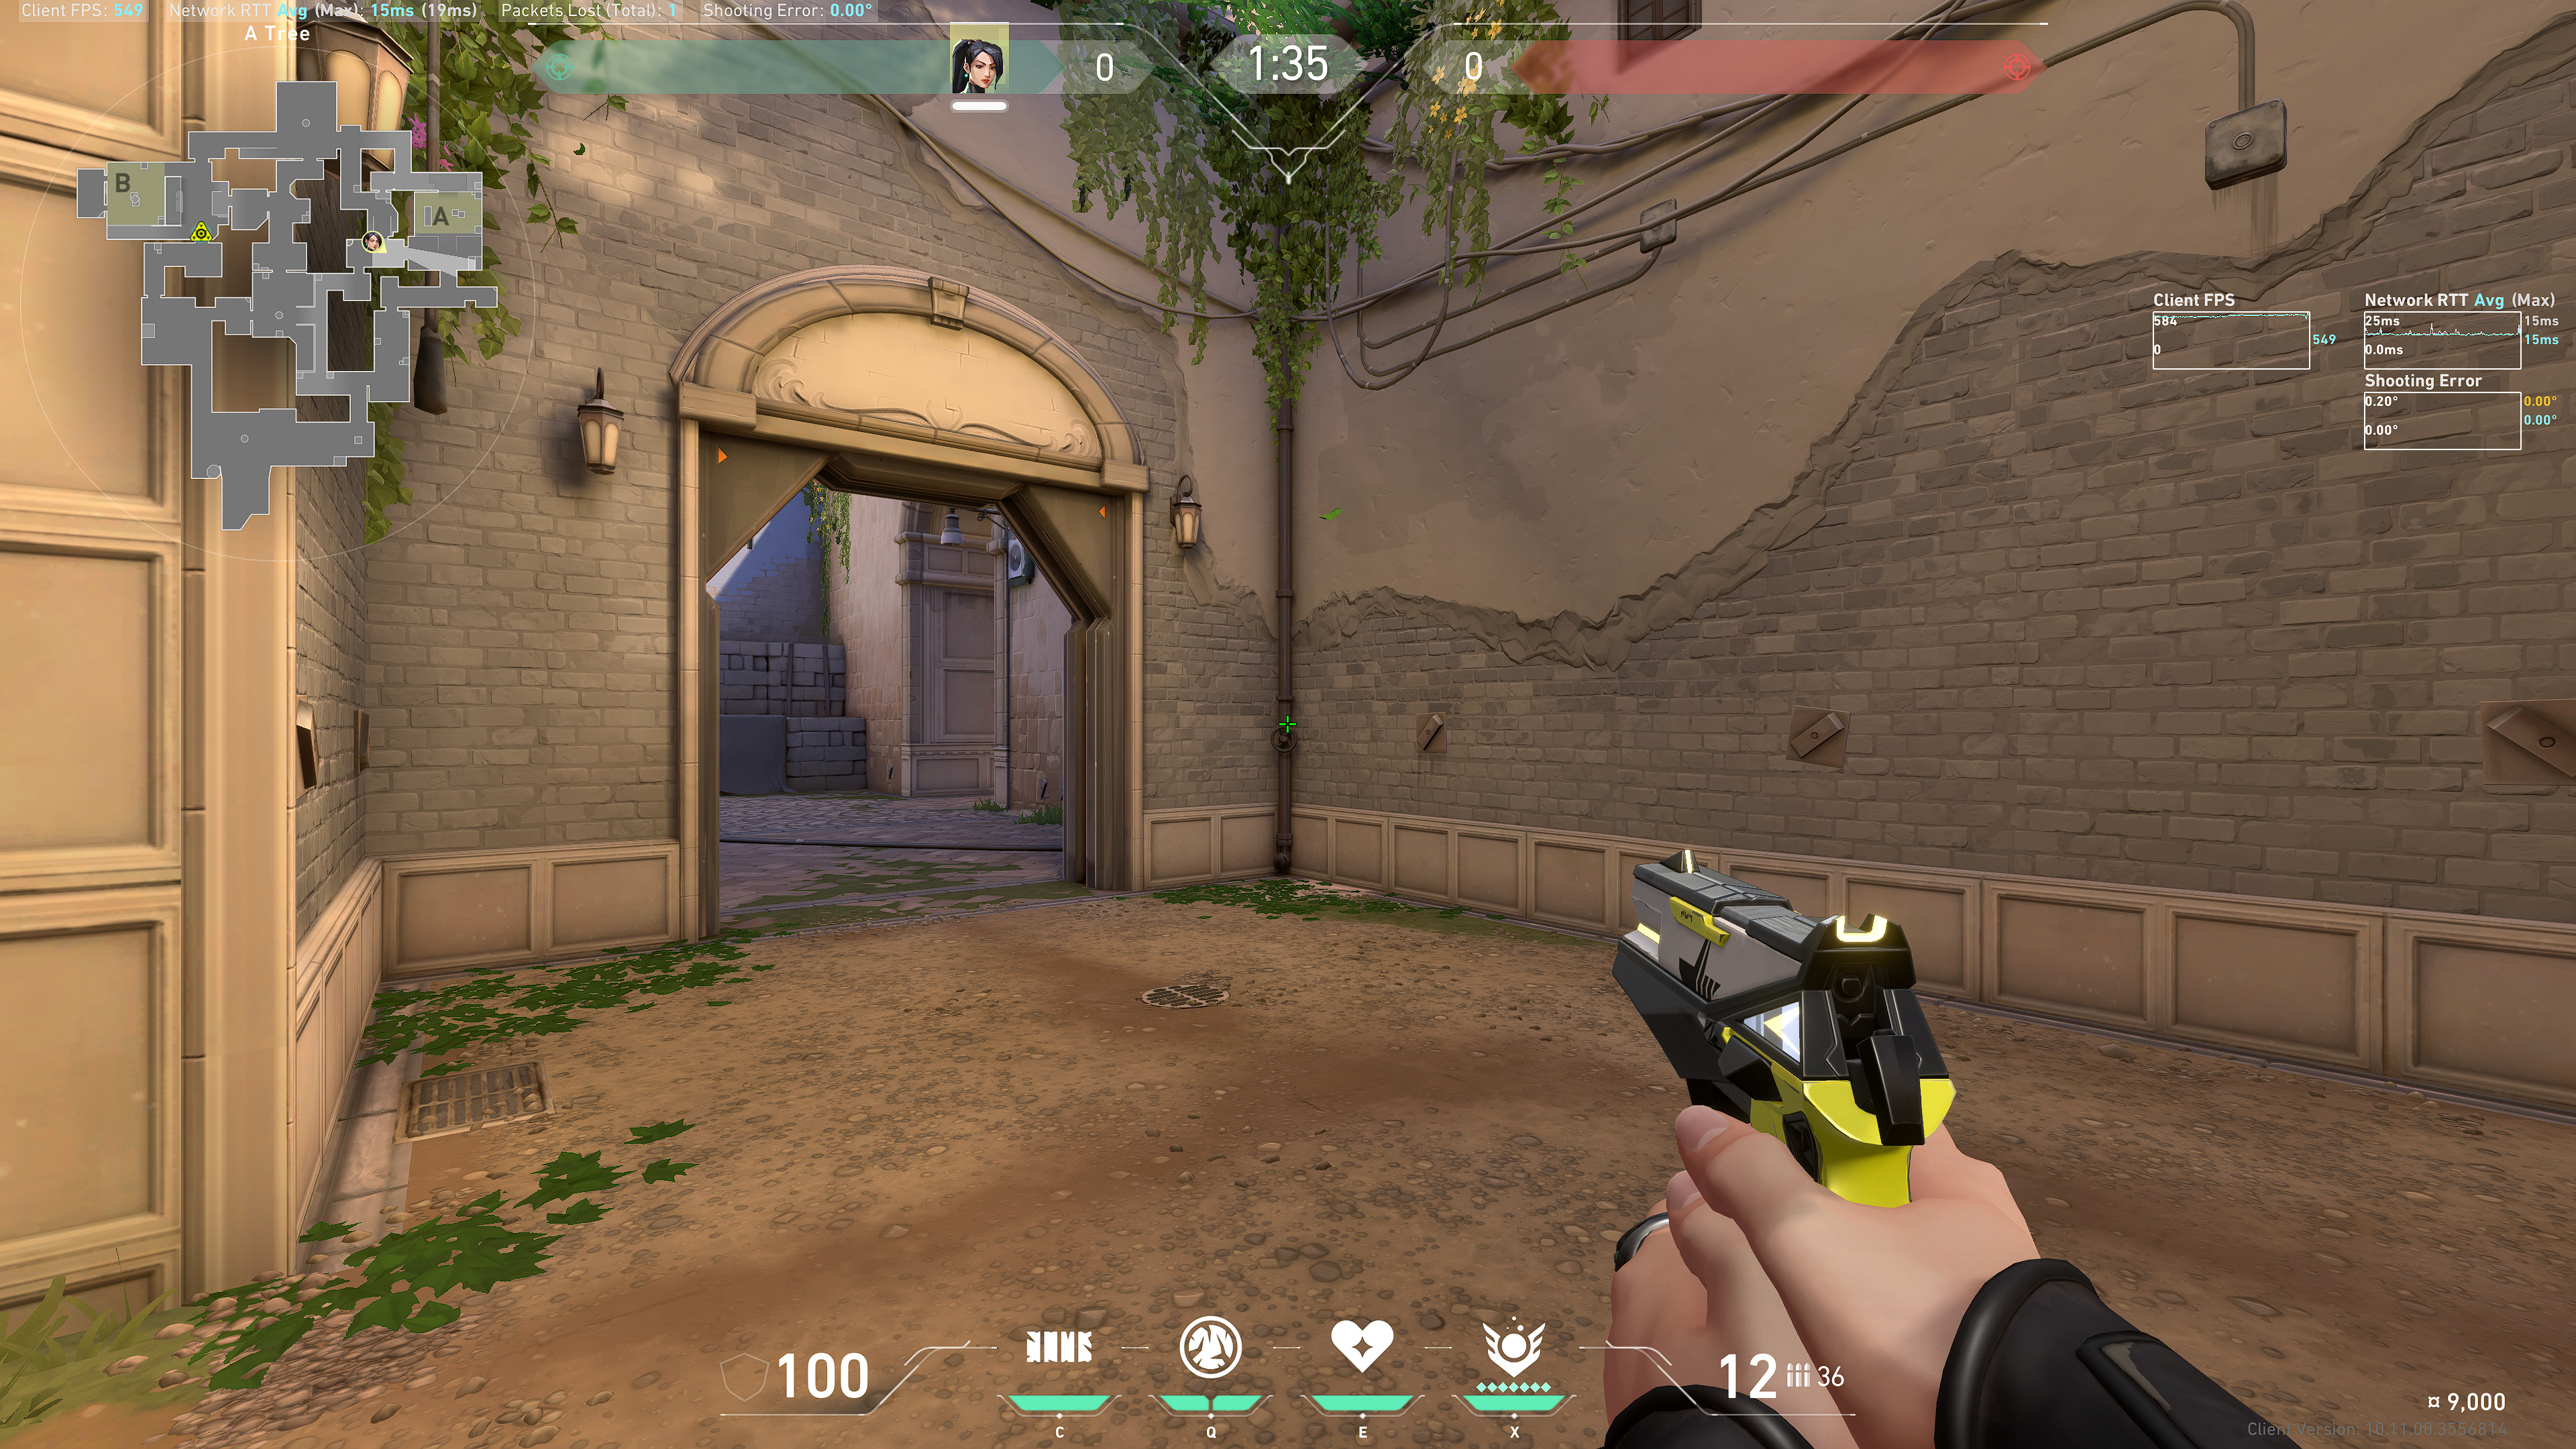
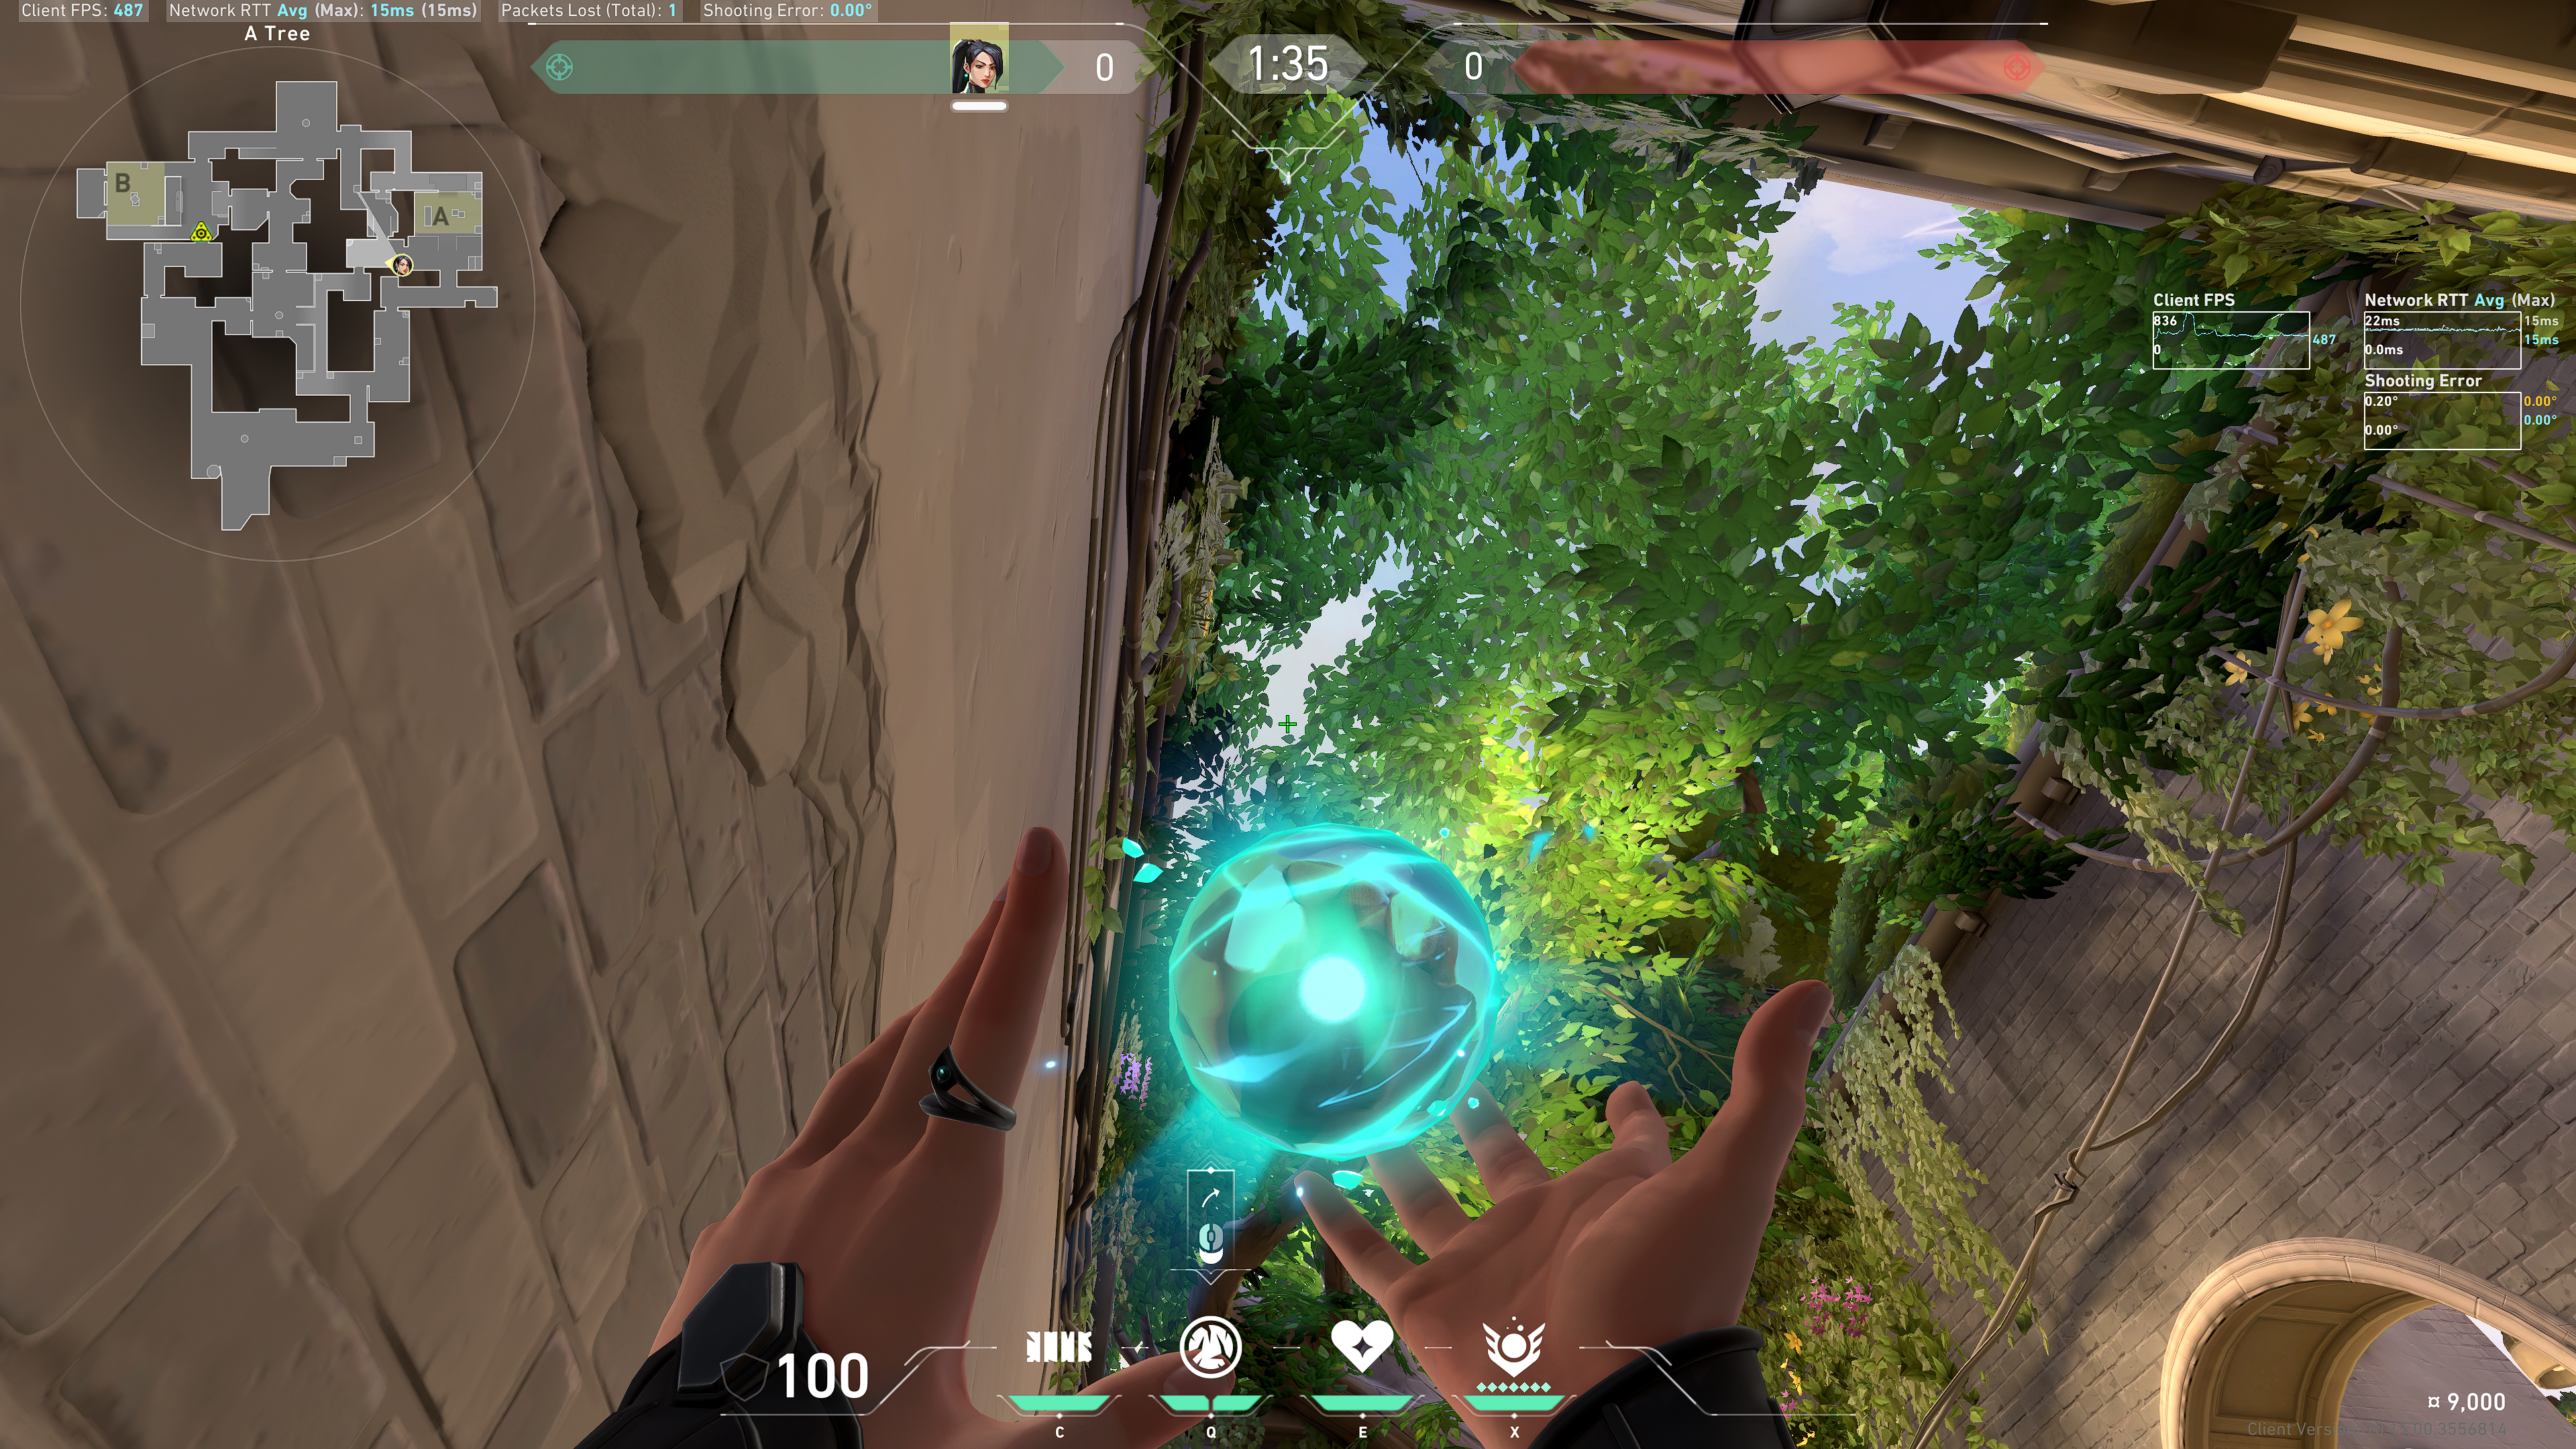
From Tree to A Main orb
Note: use this when you have a hard read on an A Main push and your team wants to fight A Main. Great to combo with a molly lineup on the ult orb.
Tuck into this corner:
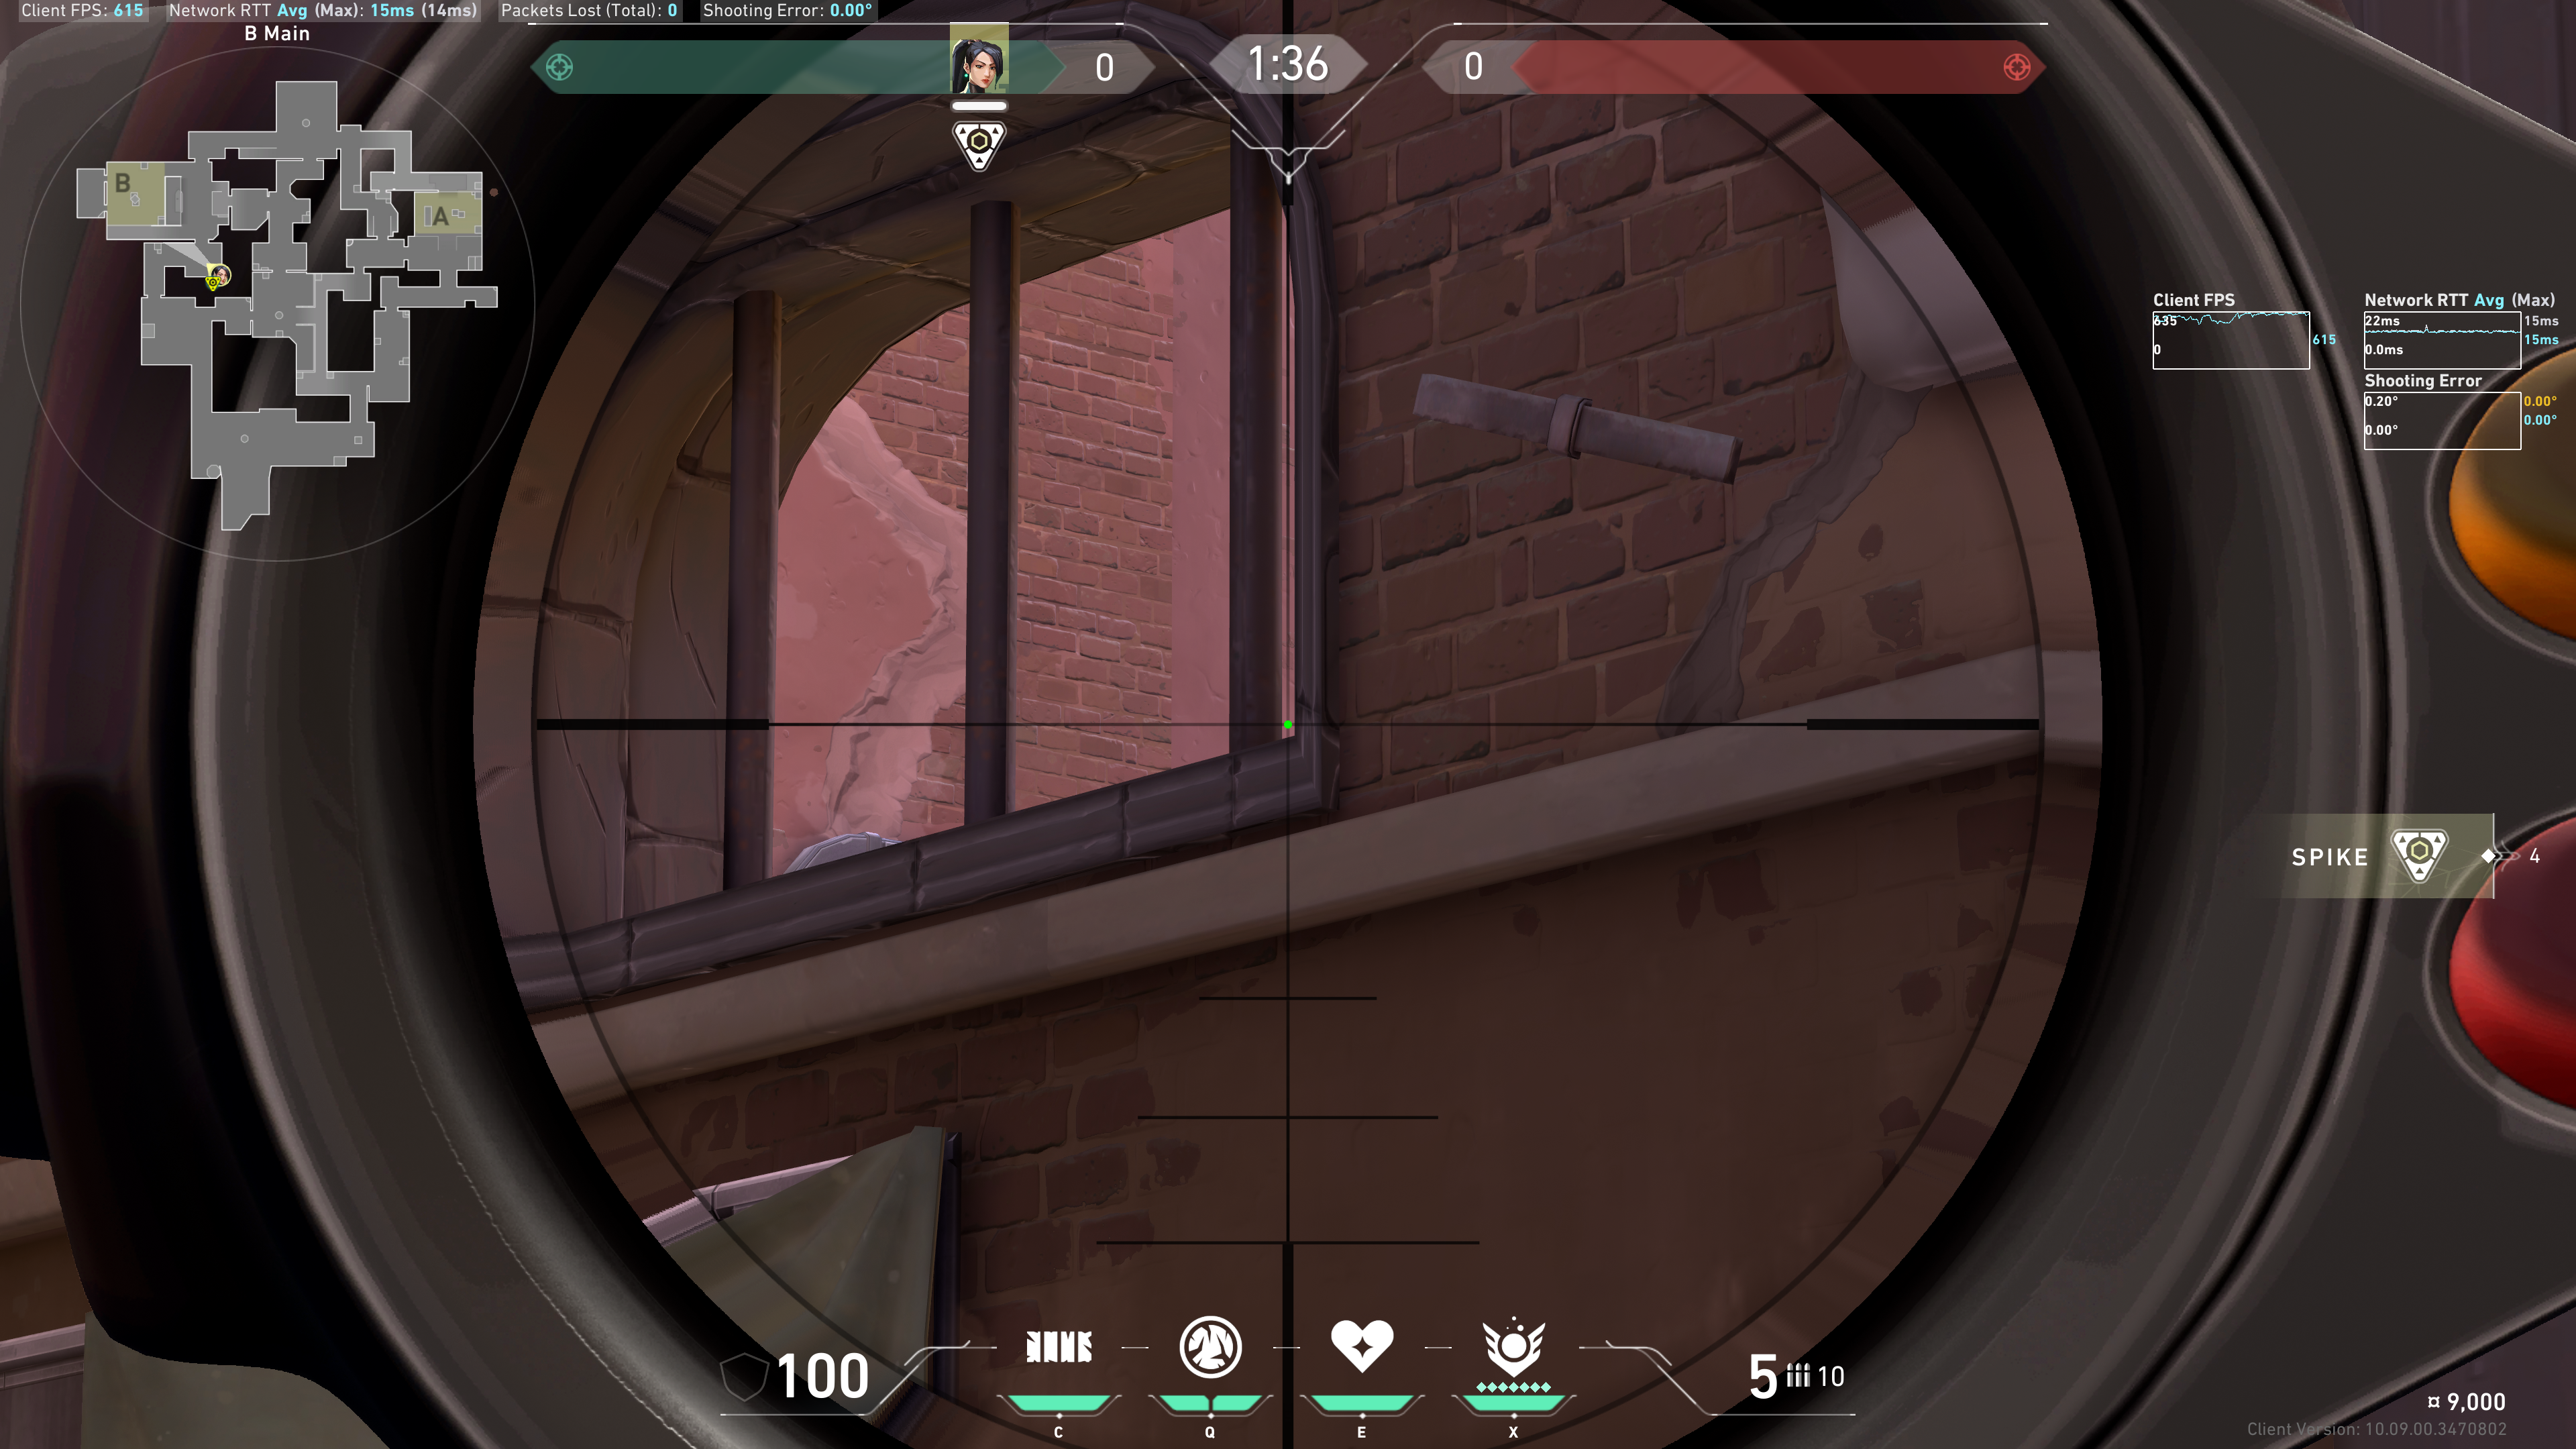
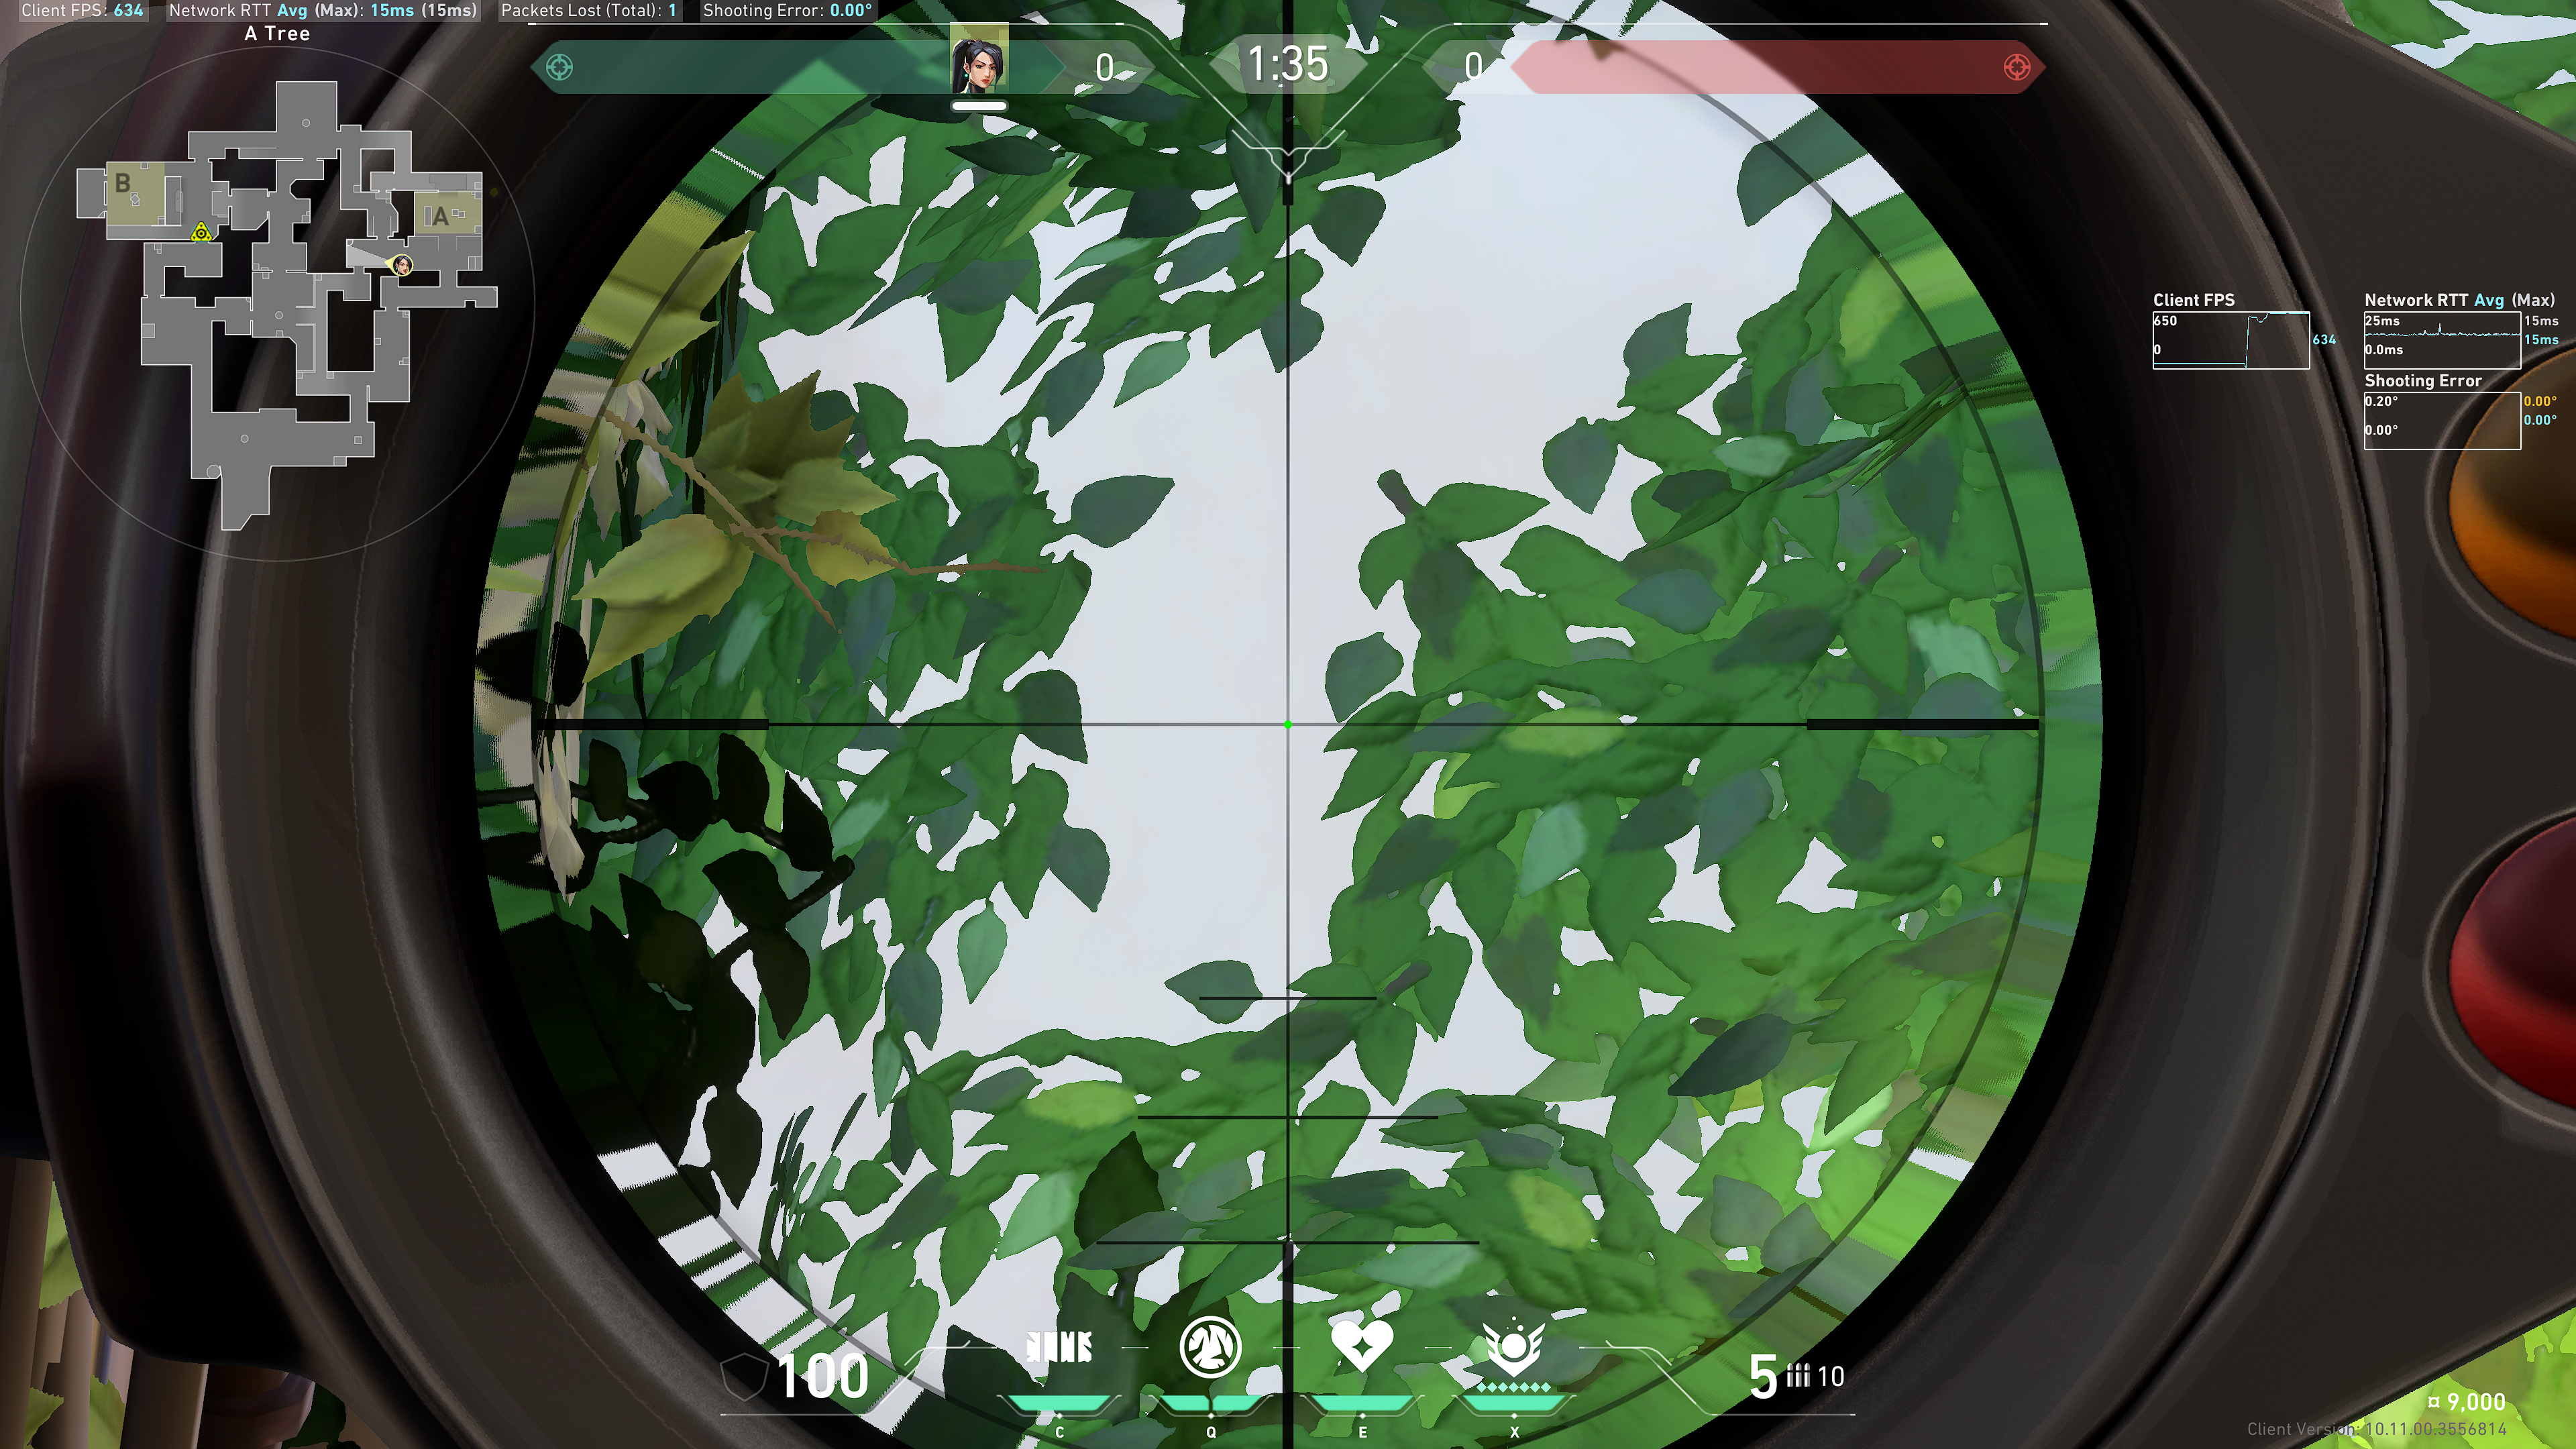
 Take note of this dark leaf in the sky:
 Line up your crosshair with the top left of that dark leaf:
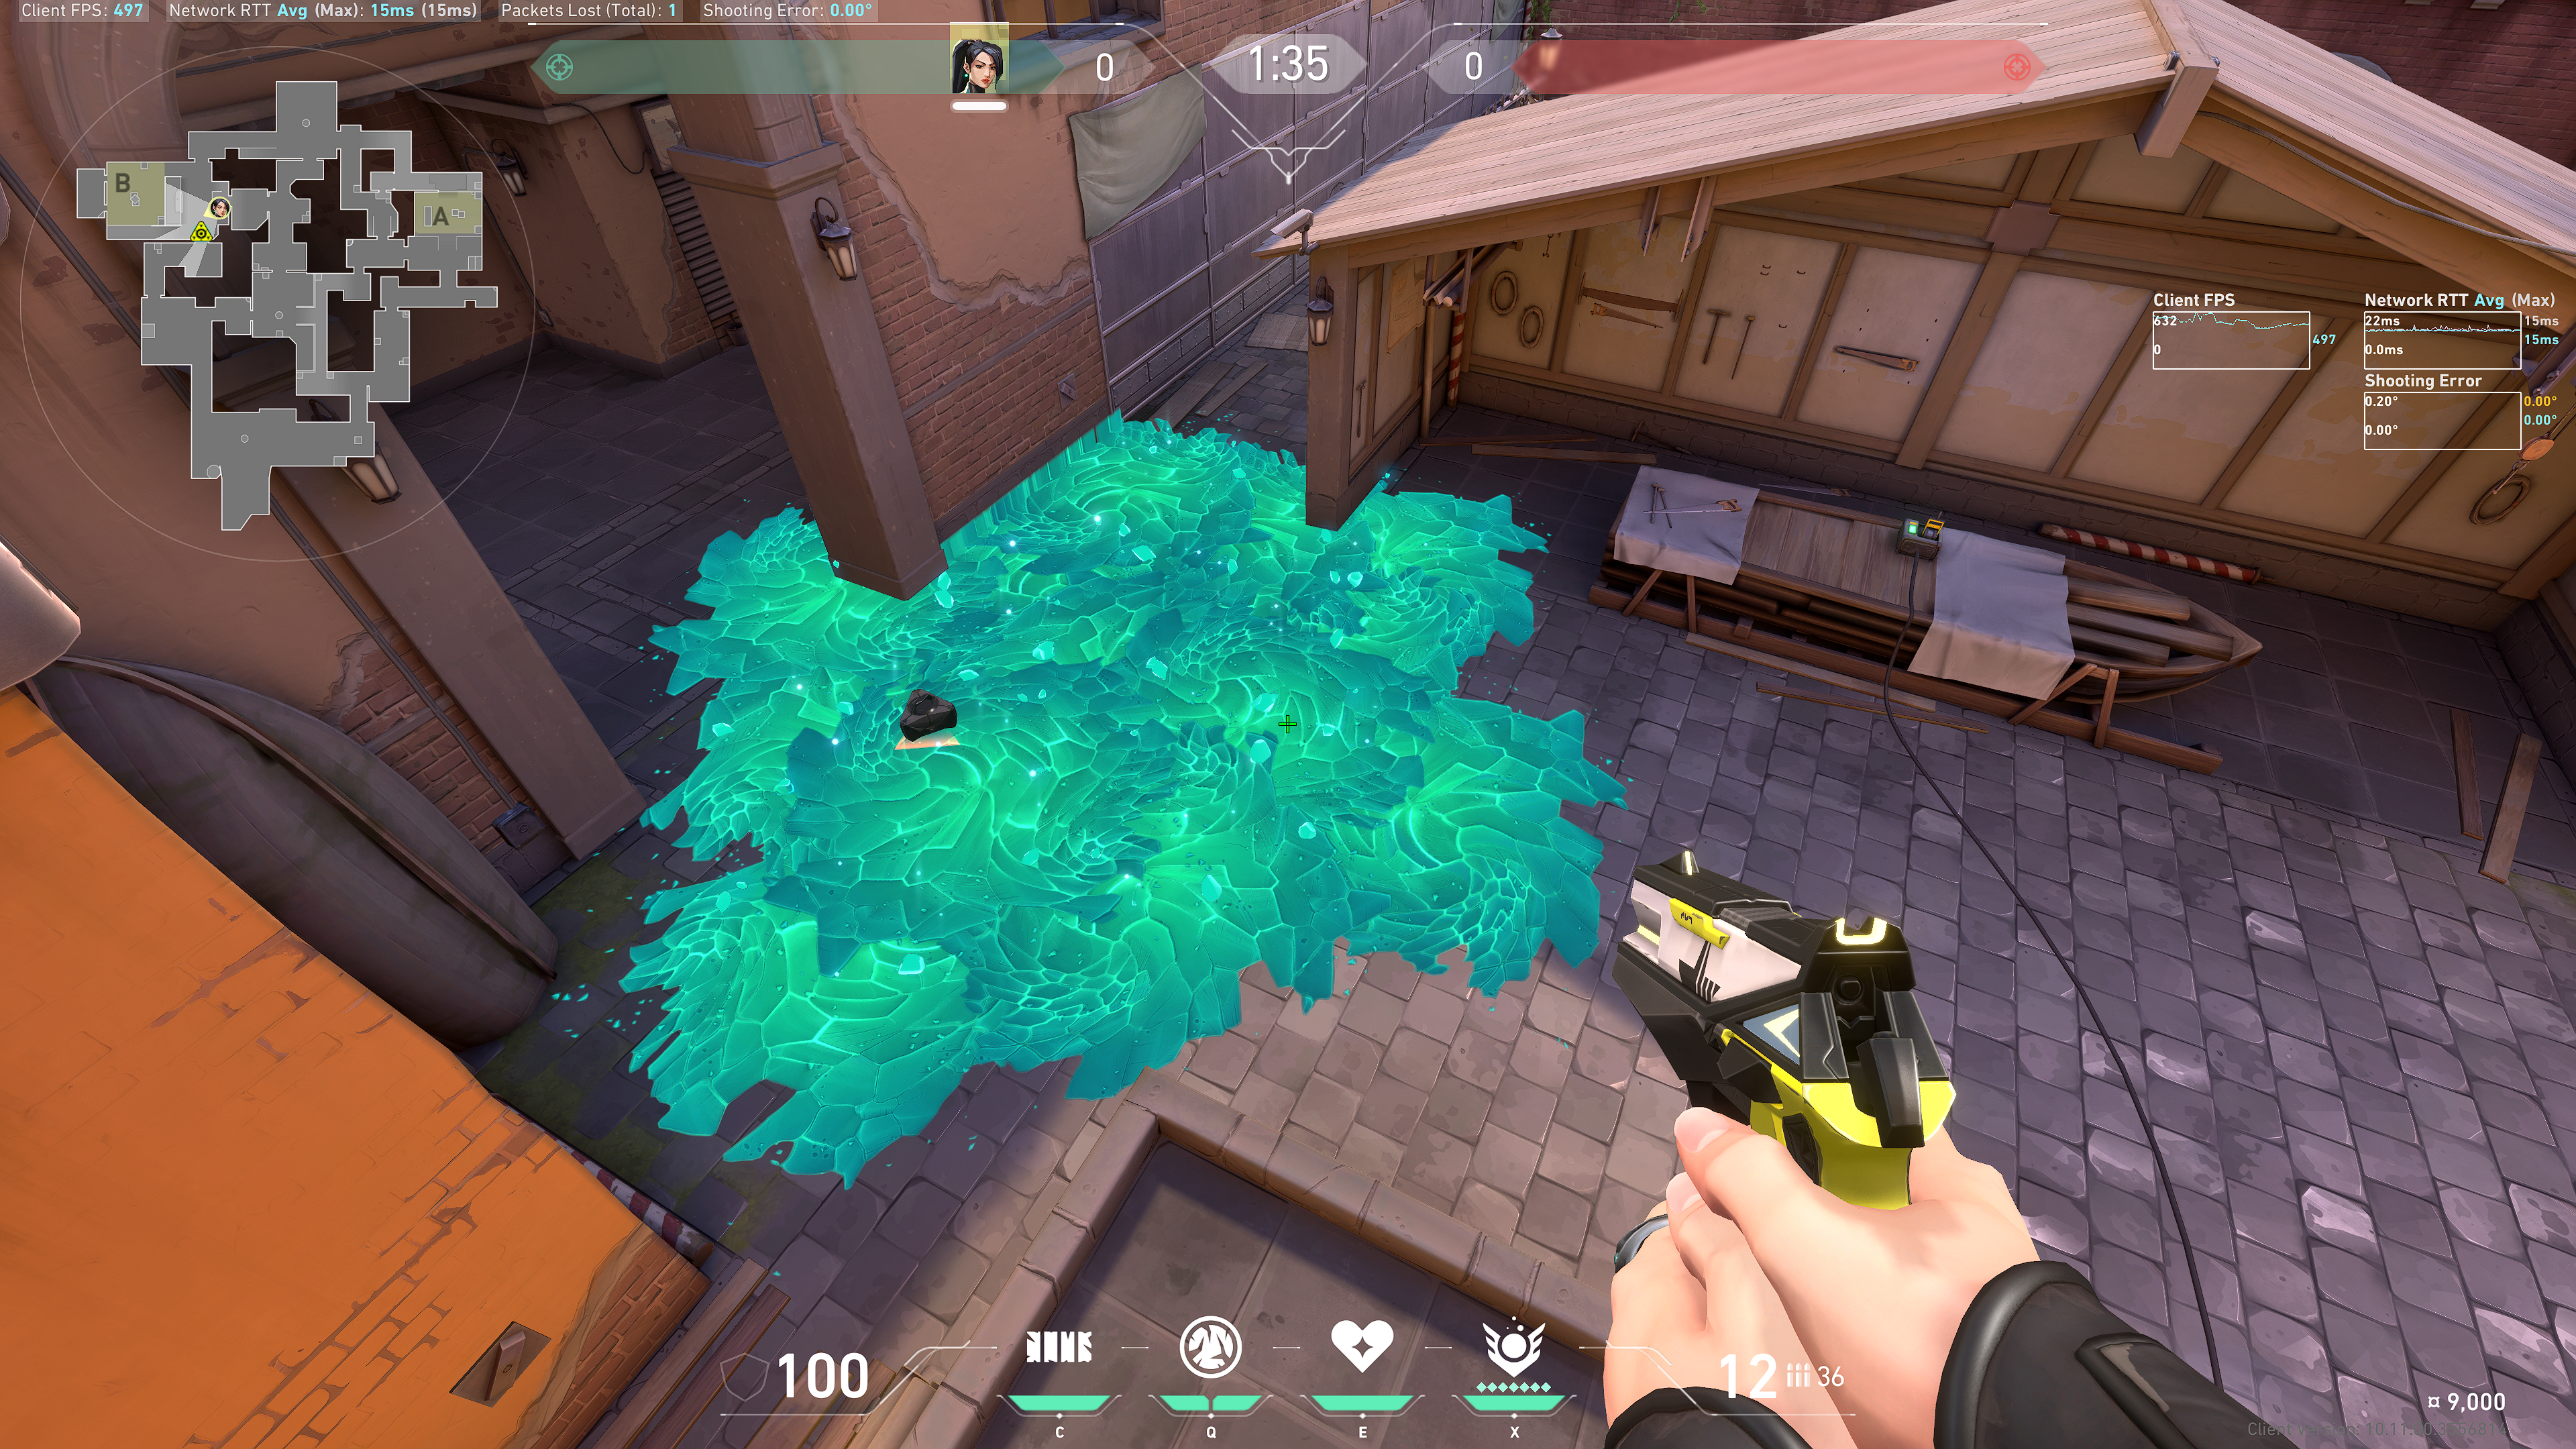
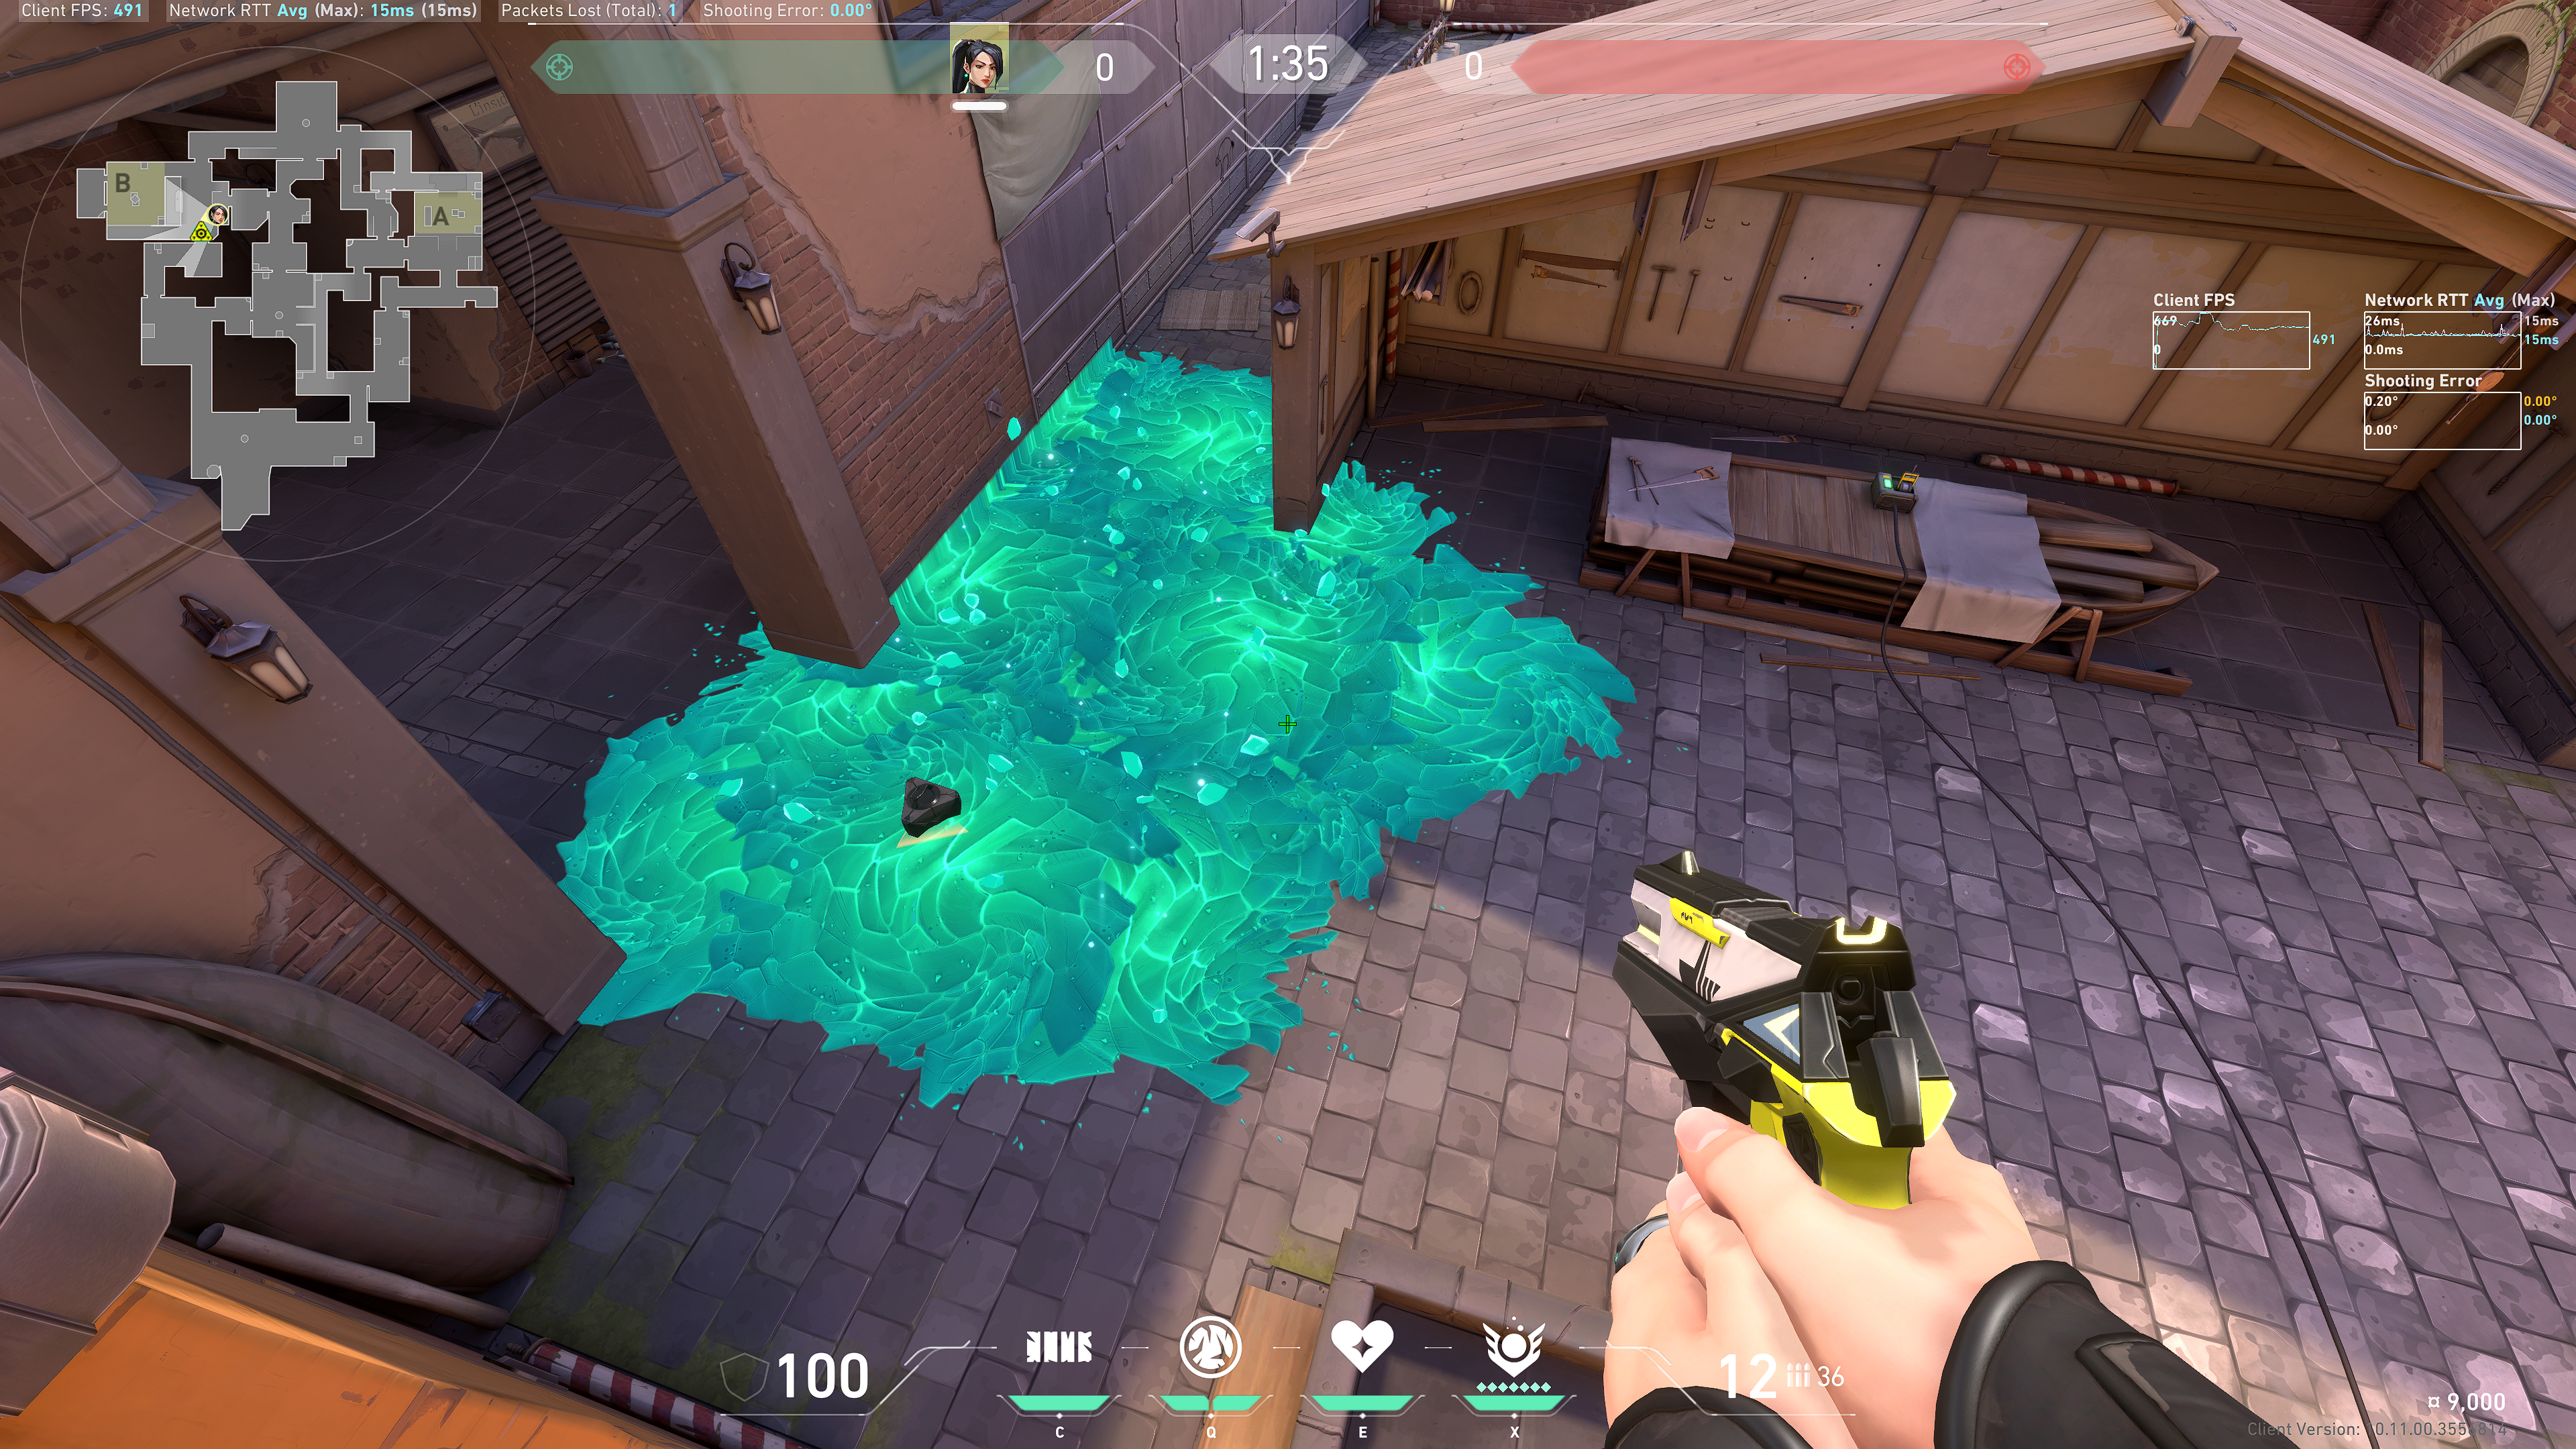
 Result:
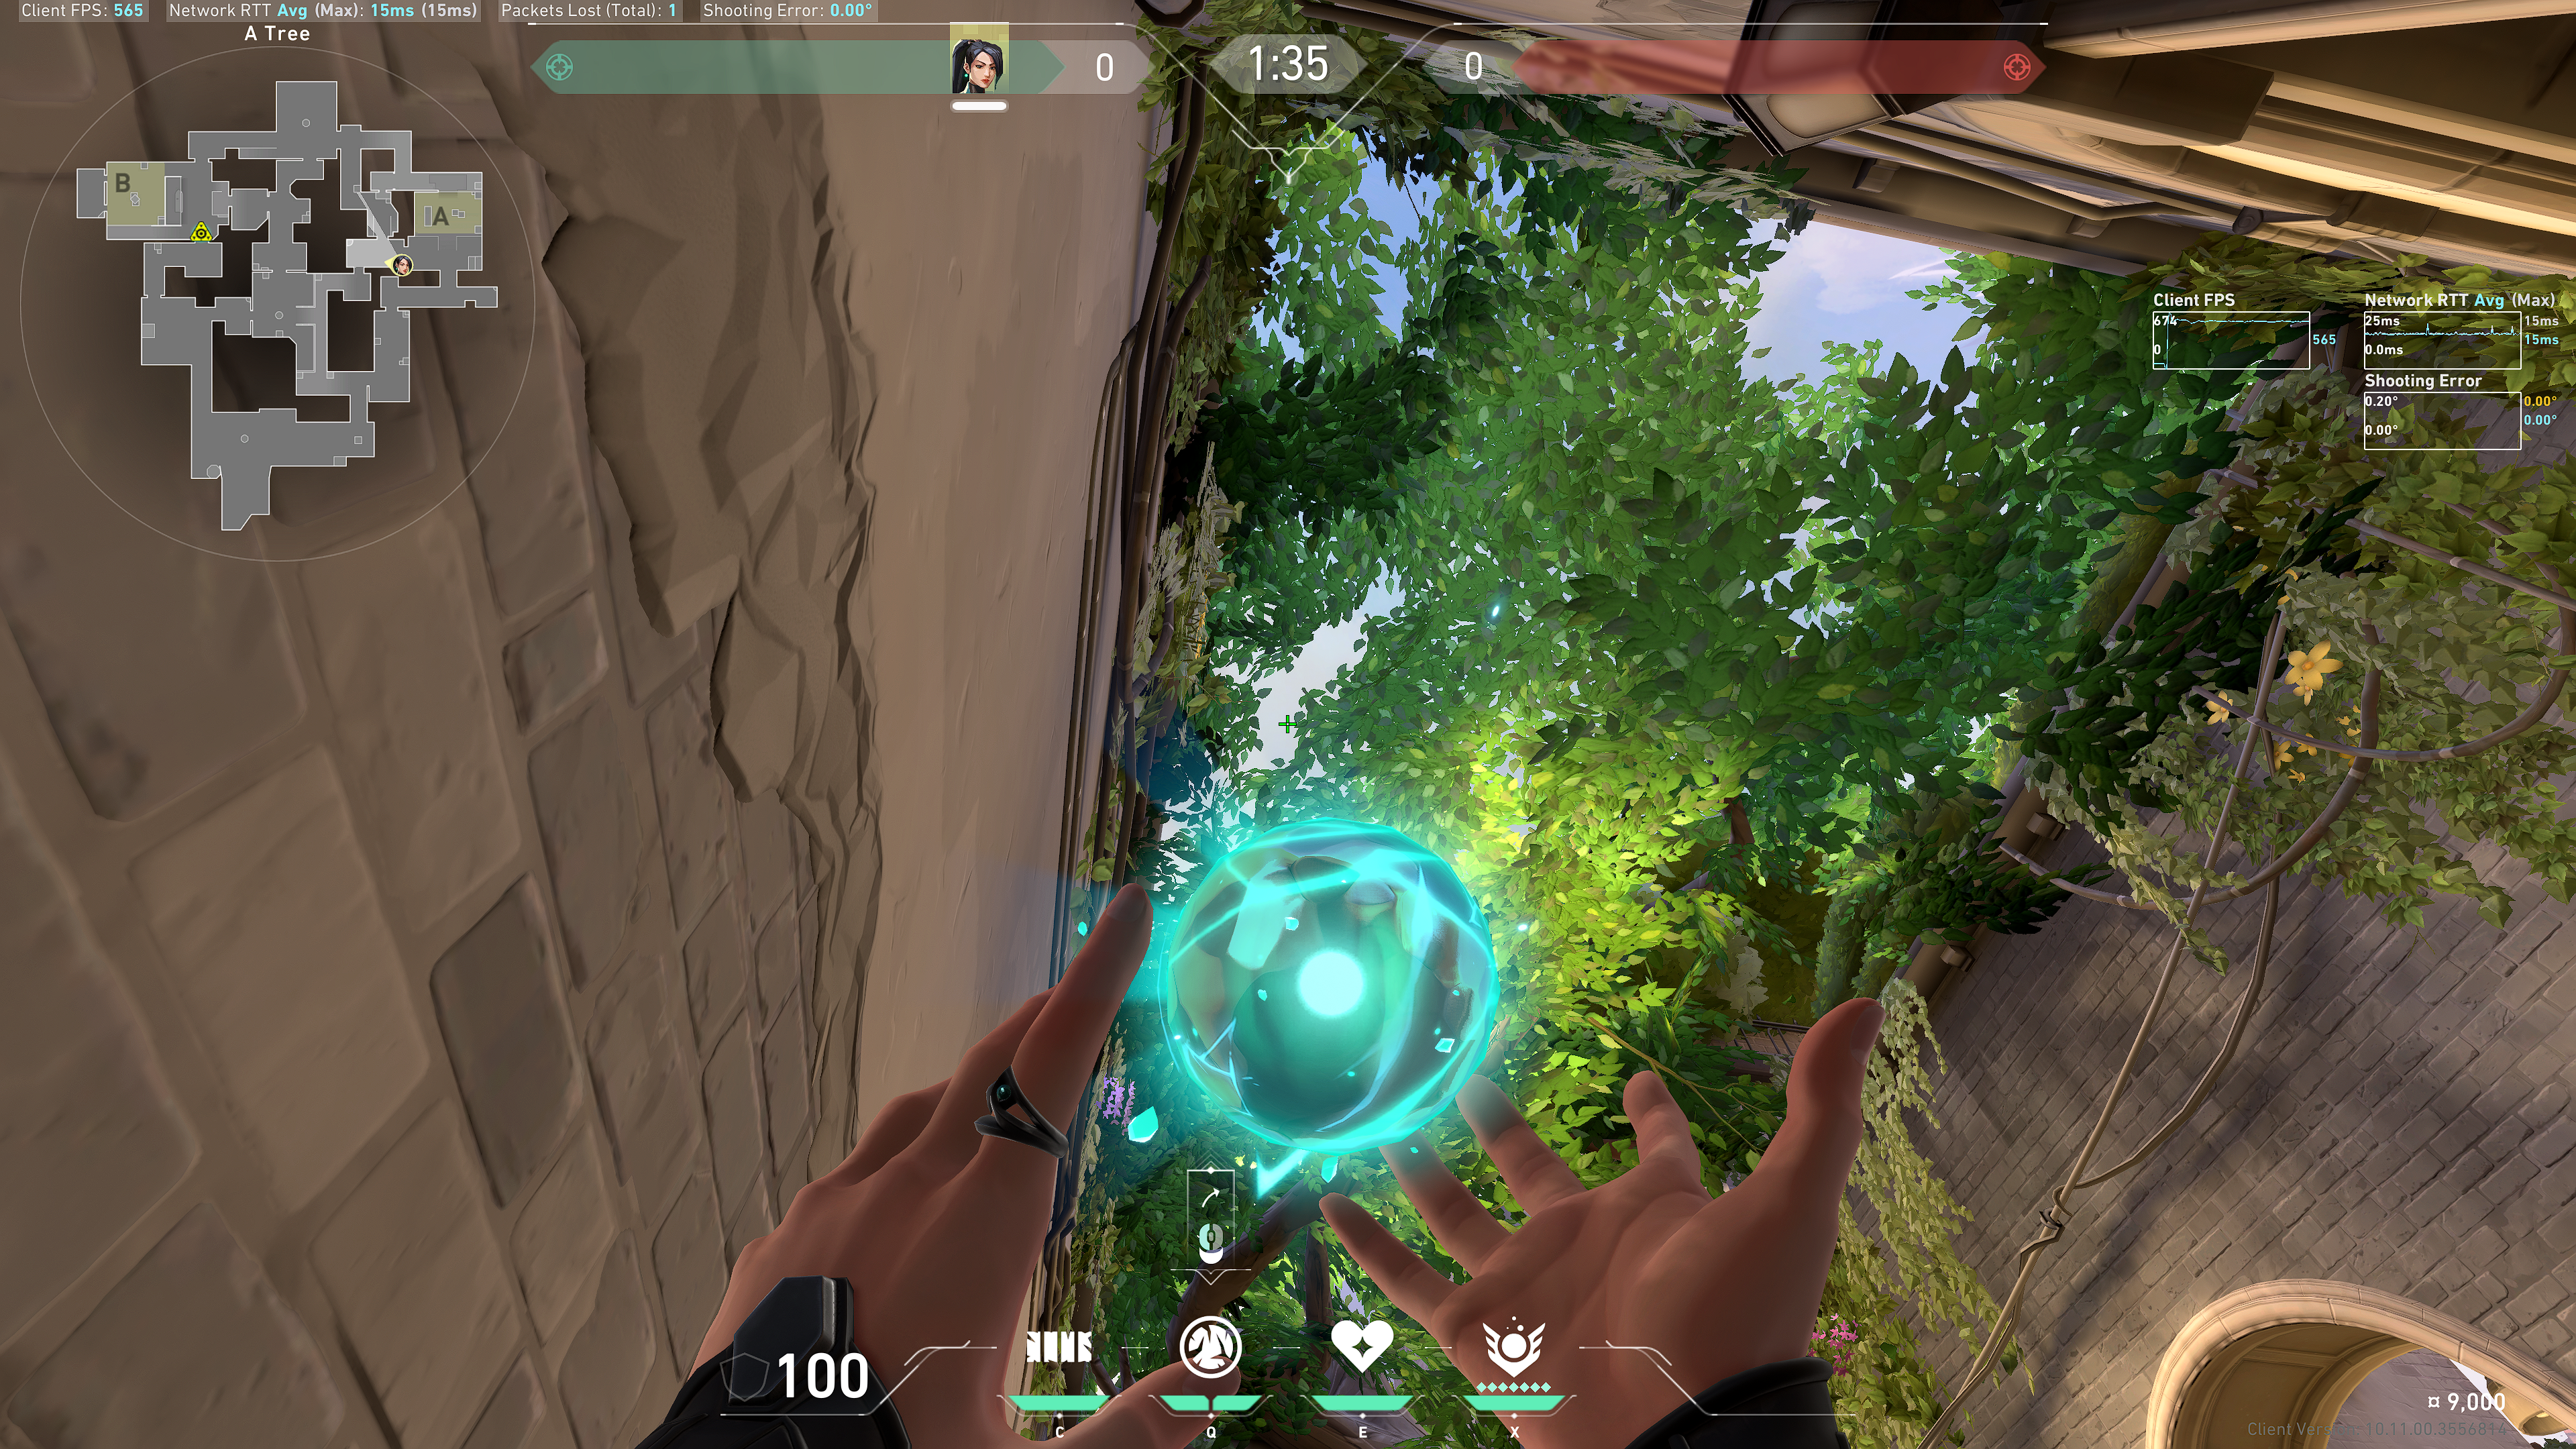
For an easier lineup, you can aim directly into the gap above the dark leaf:
 Result:
Tradeoff: this covers the nook that people like to hide in, but covers less of A Lobby, so you may want to include a one-way smoke.
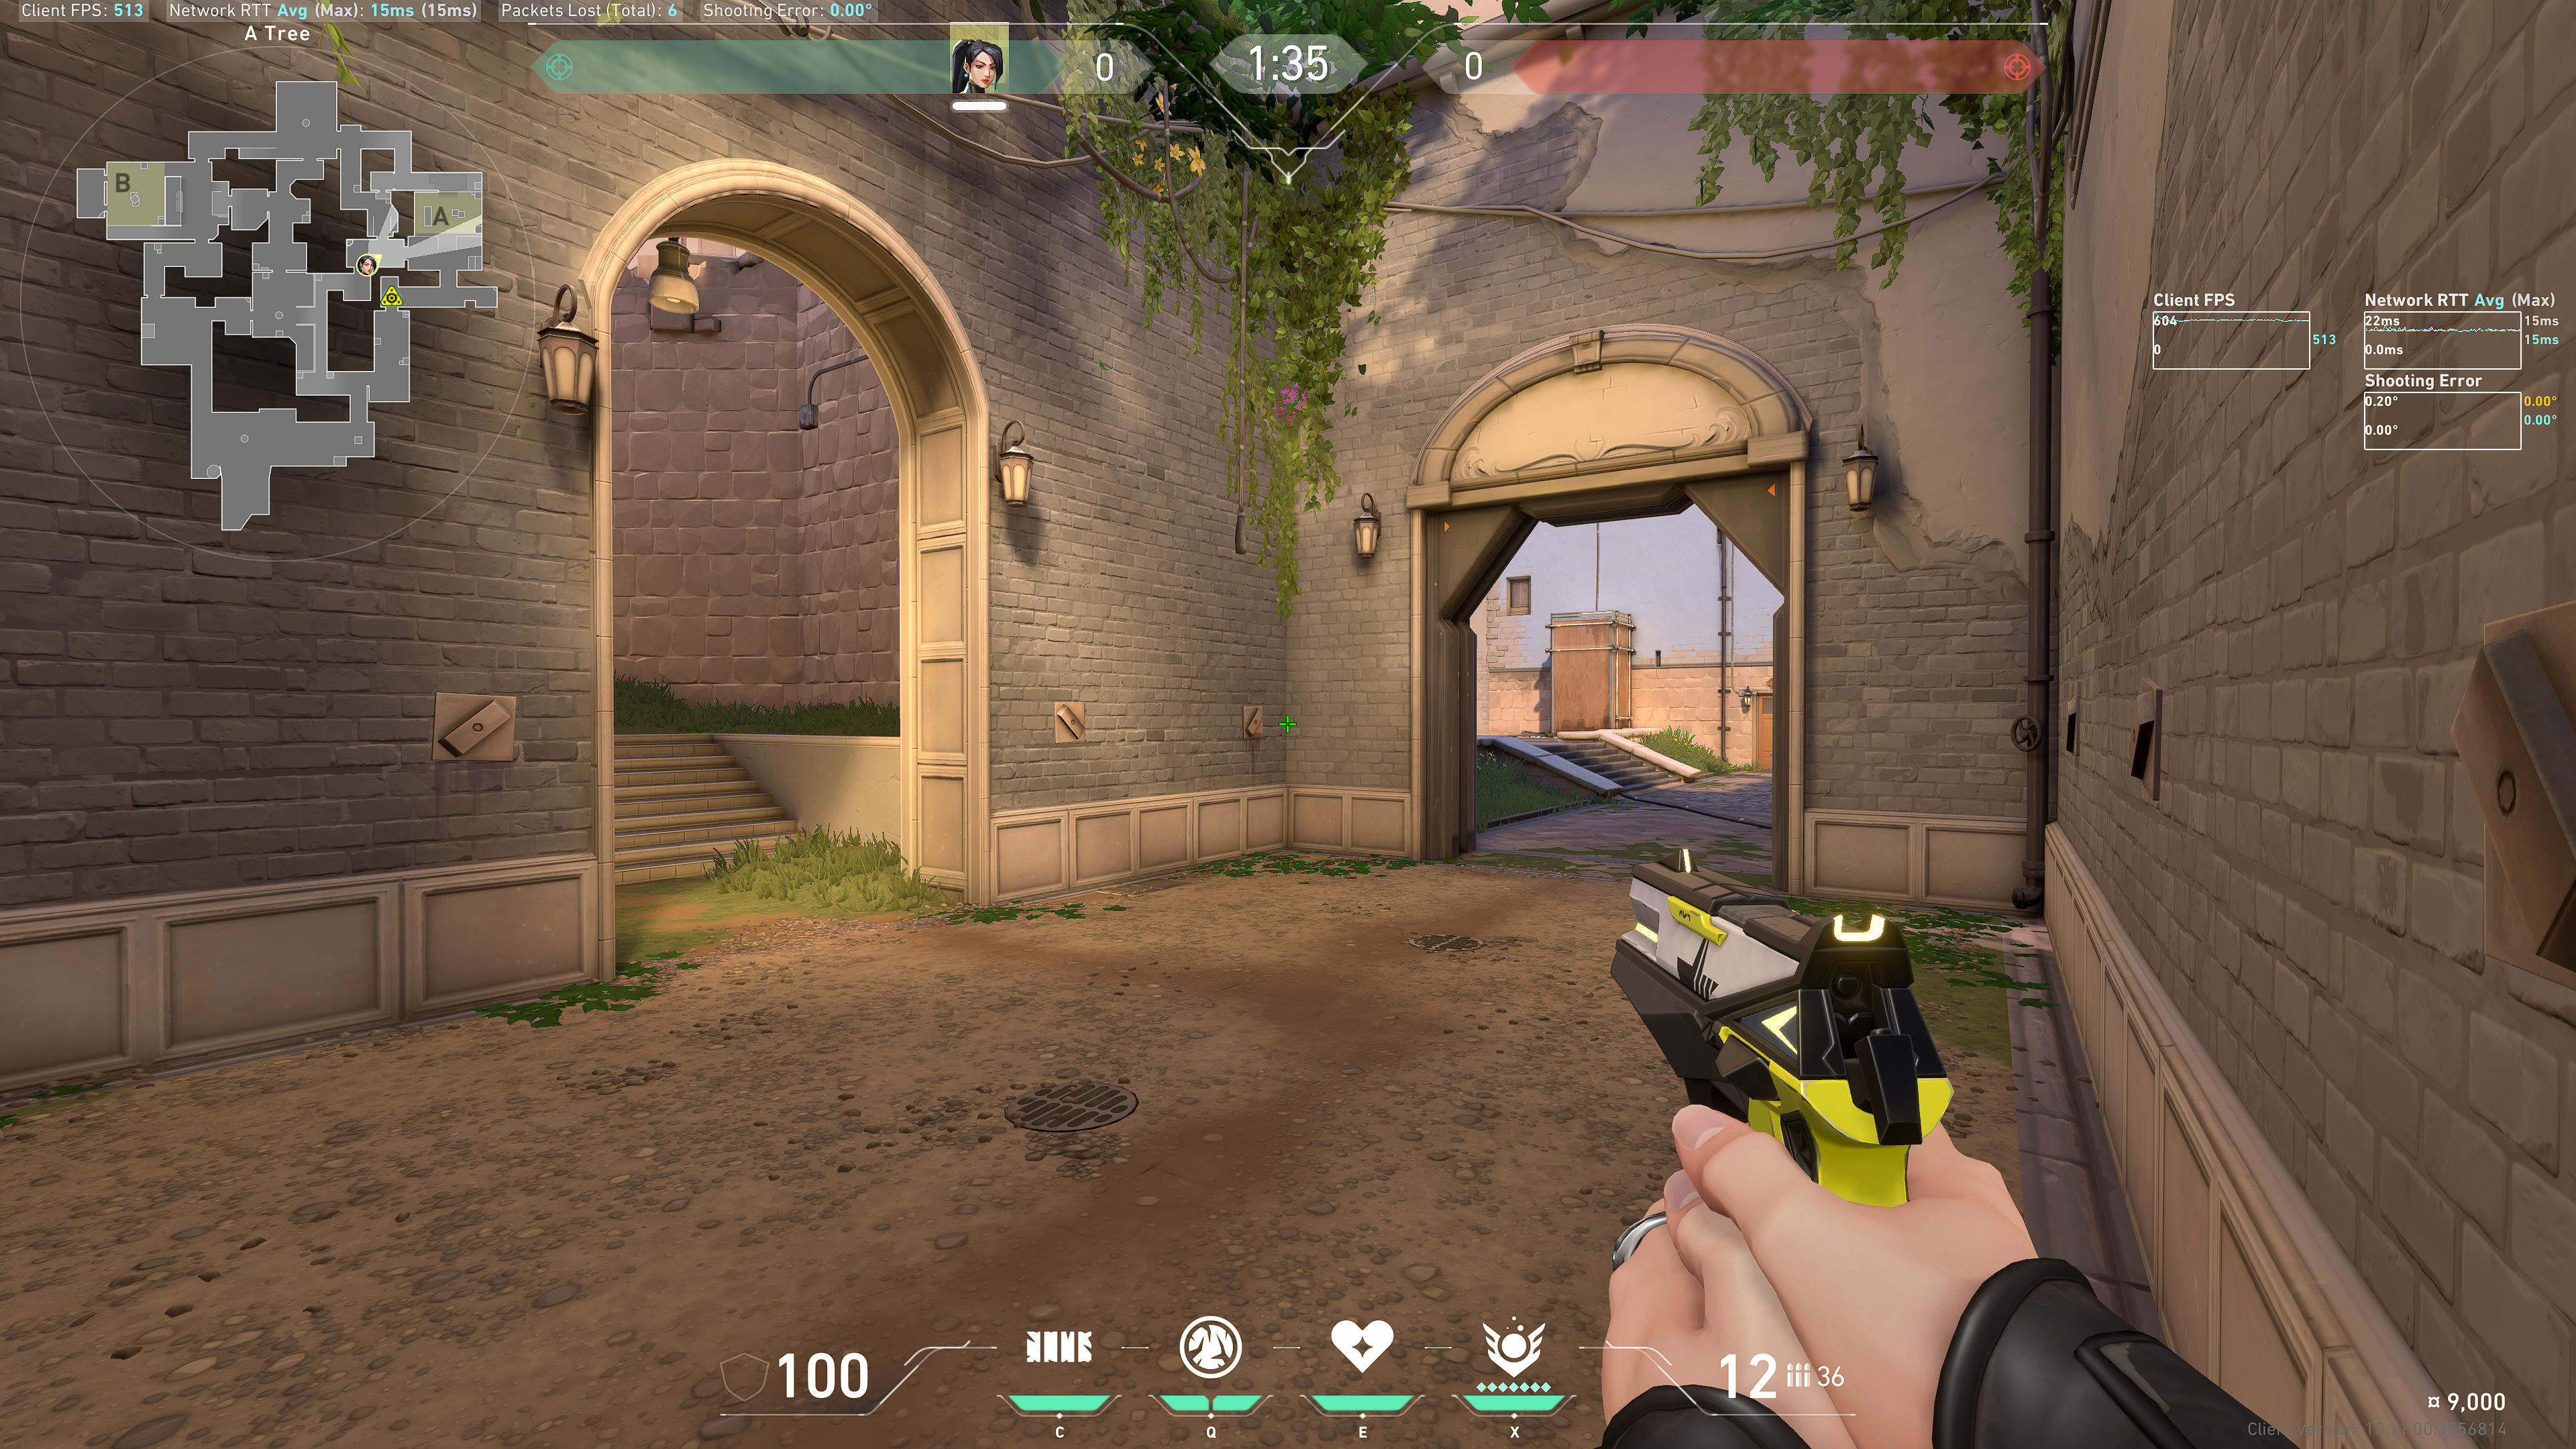
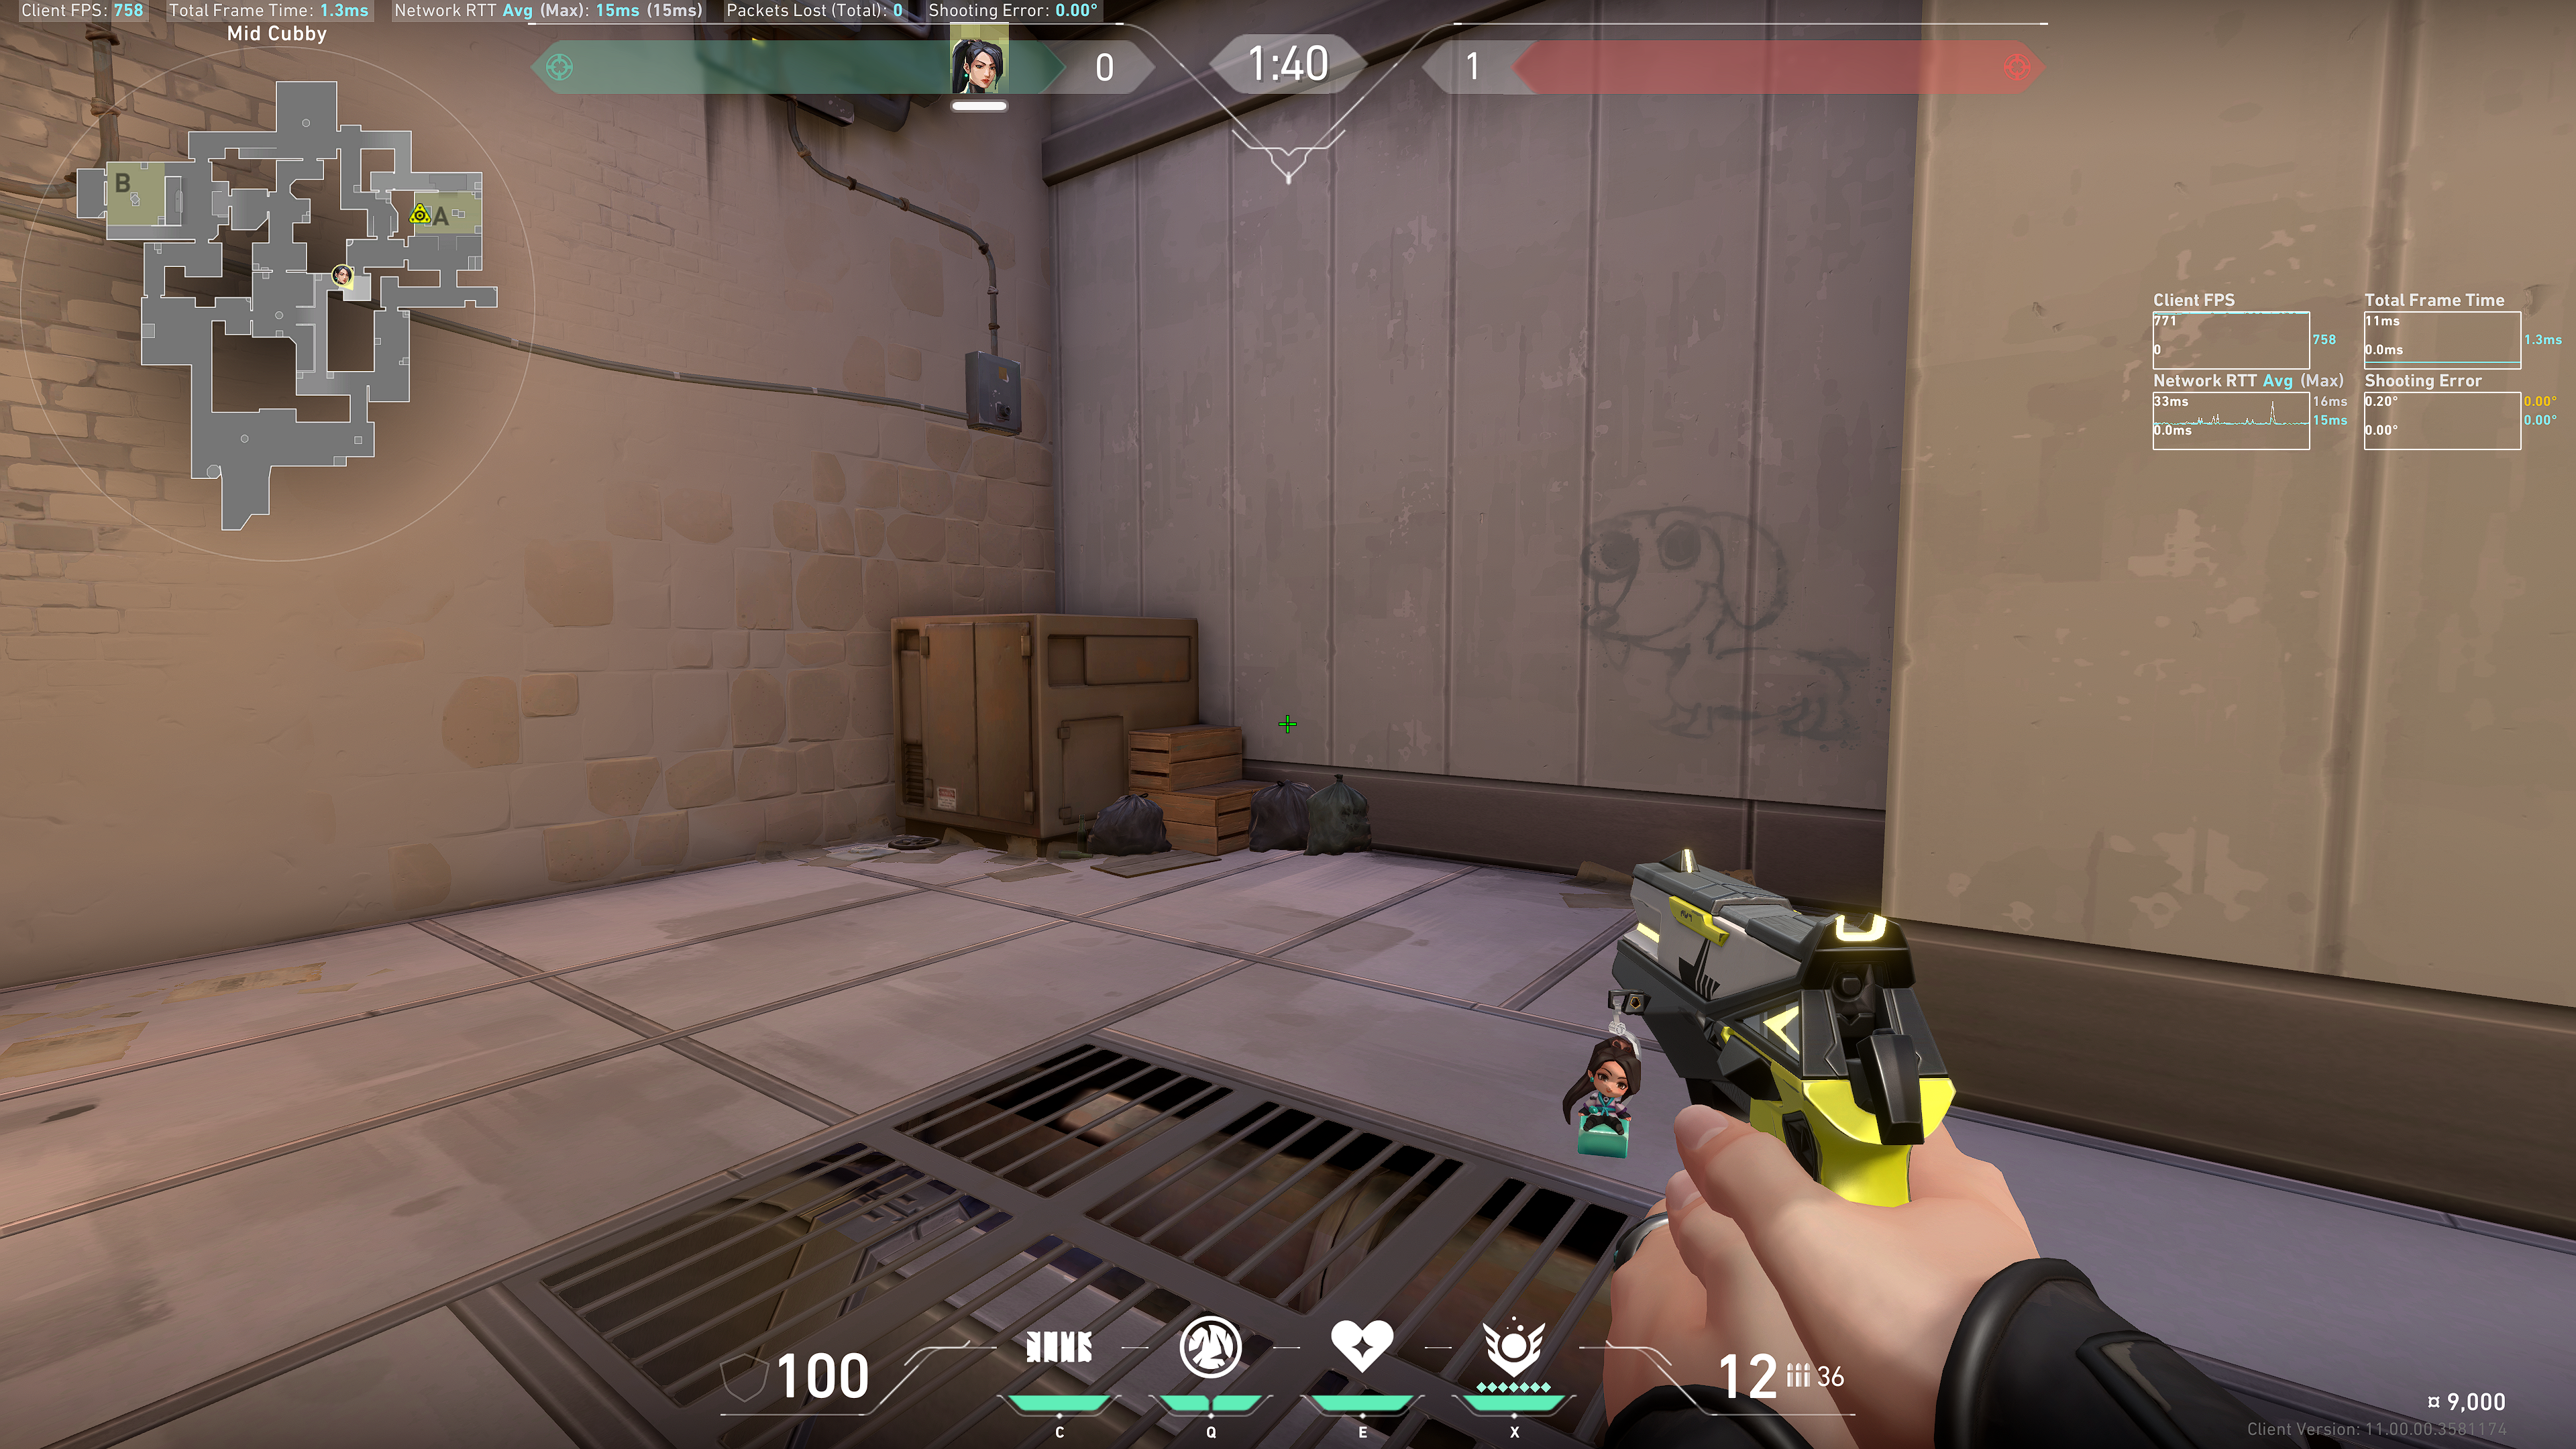
From Tree to B Site execute
Tuck into this corner:
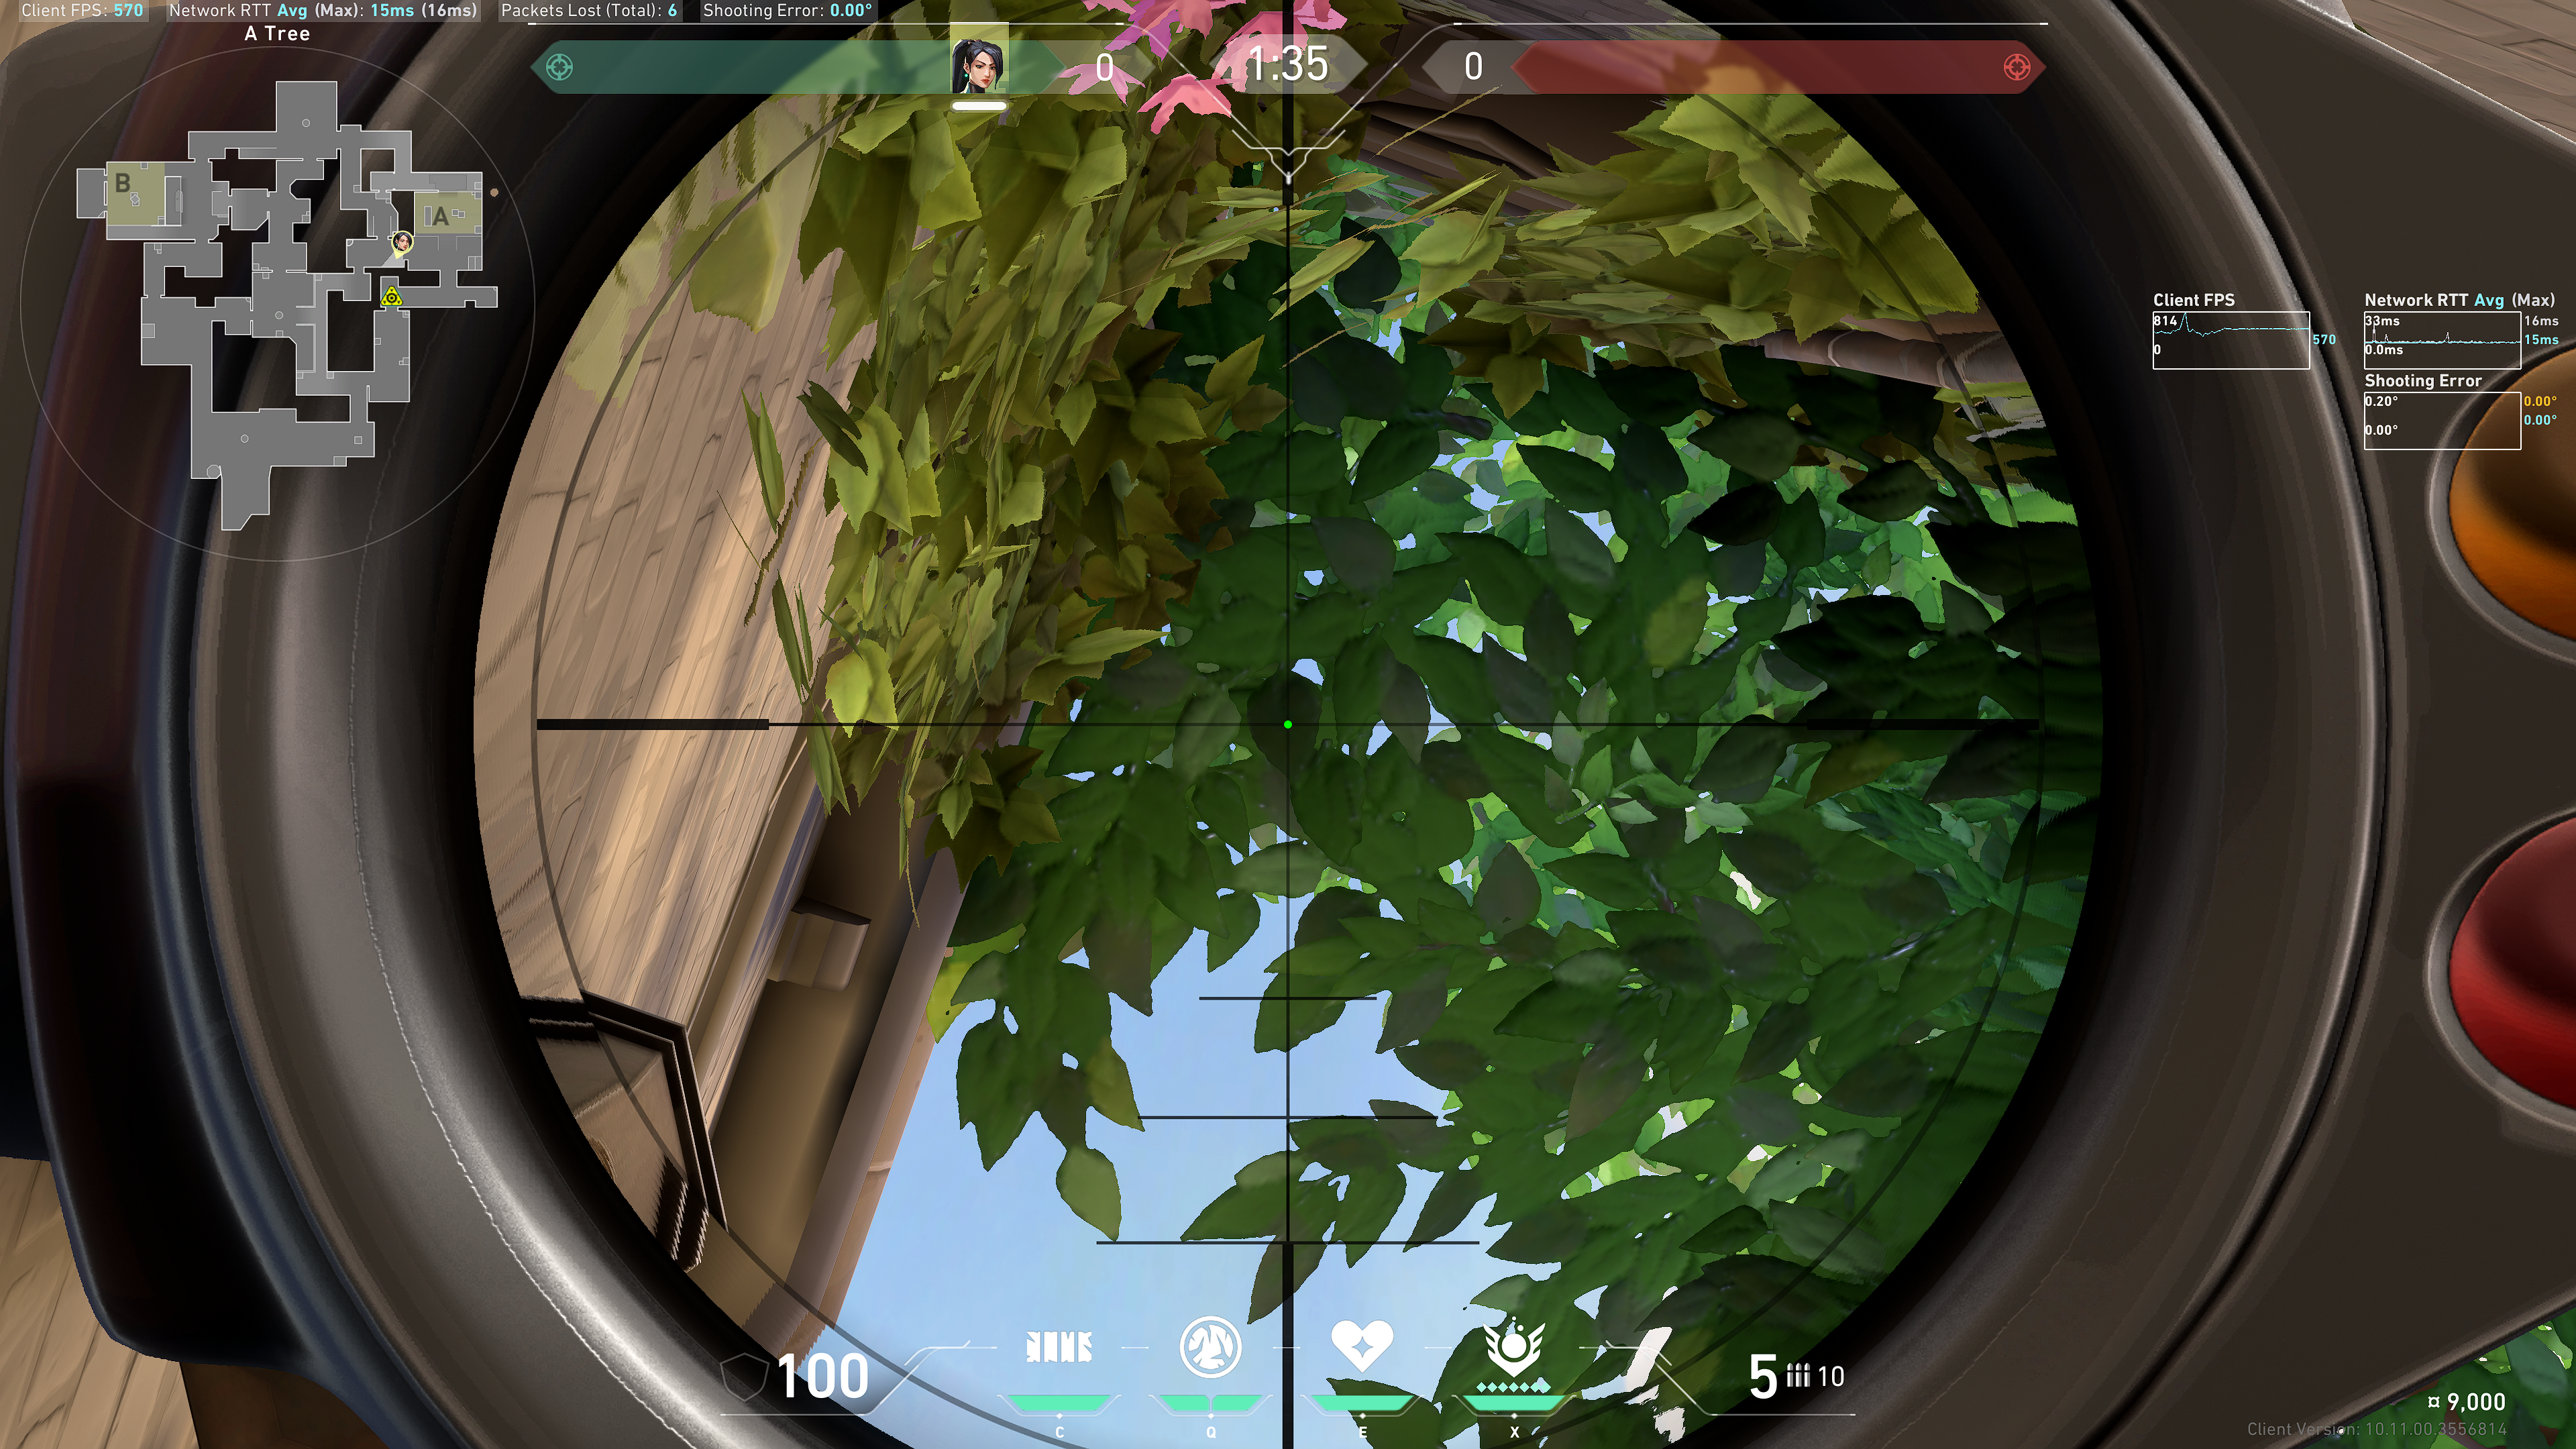
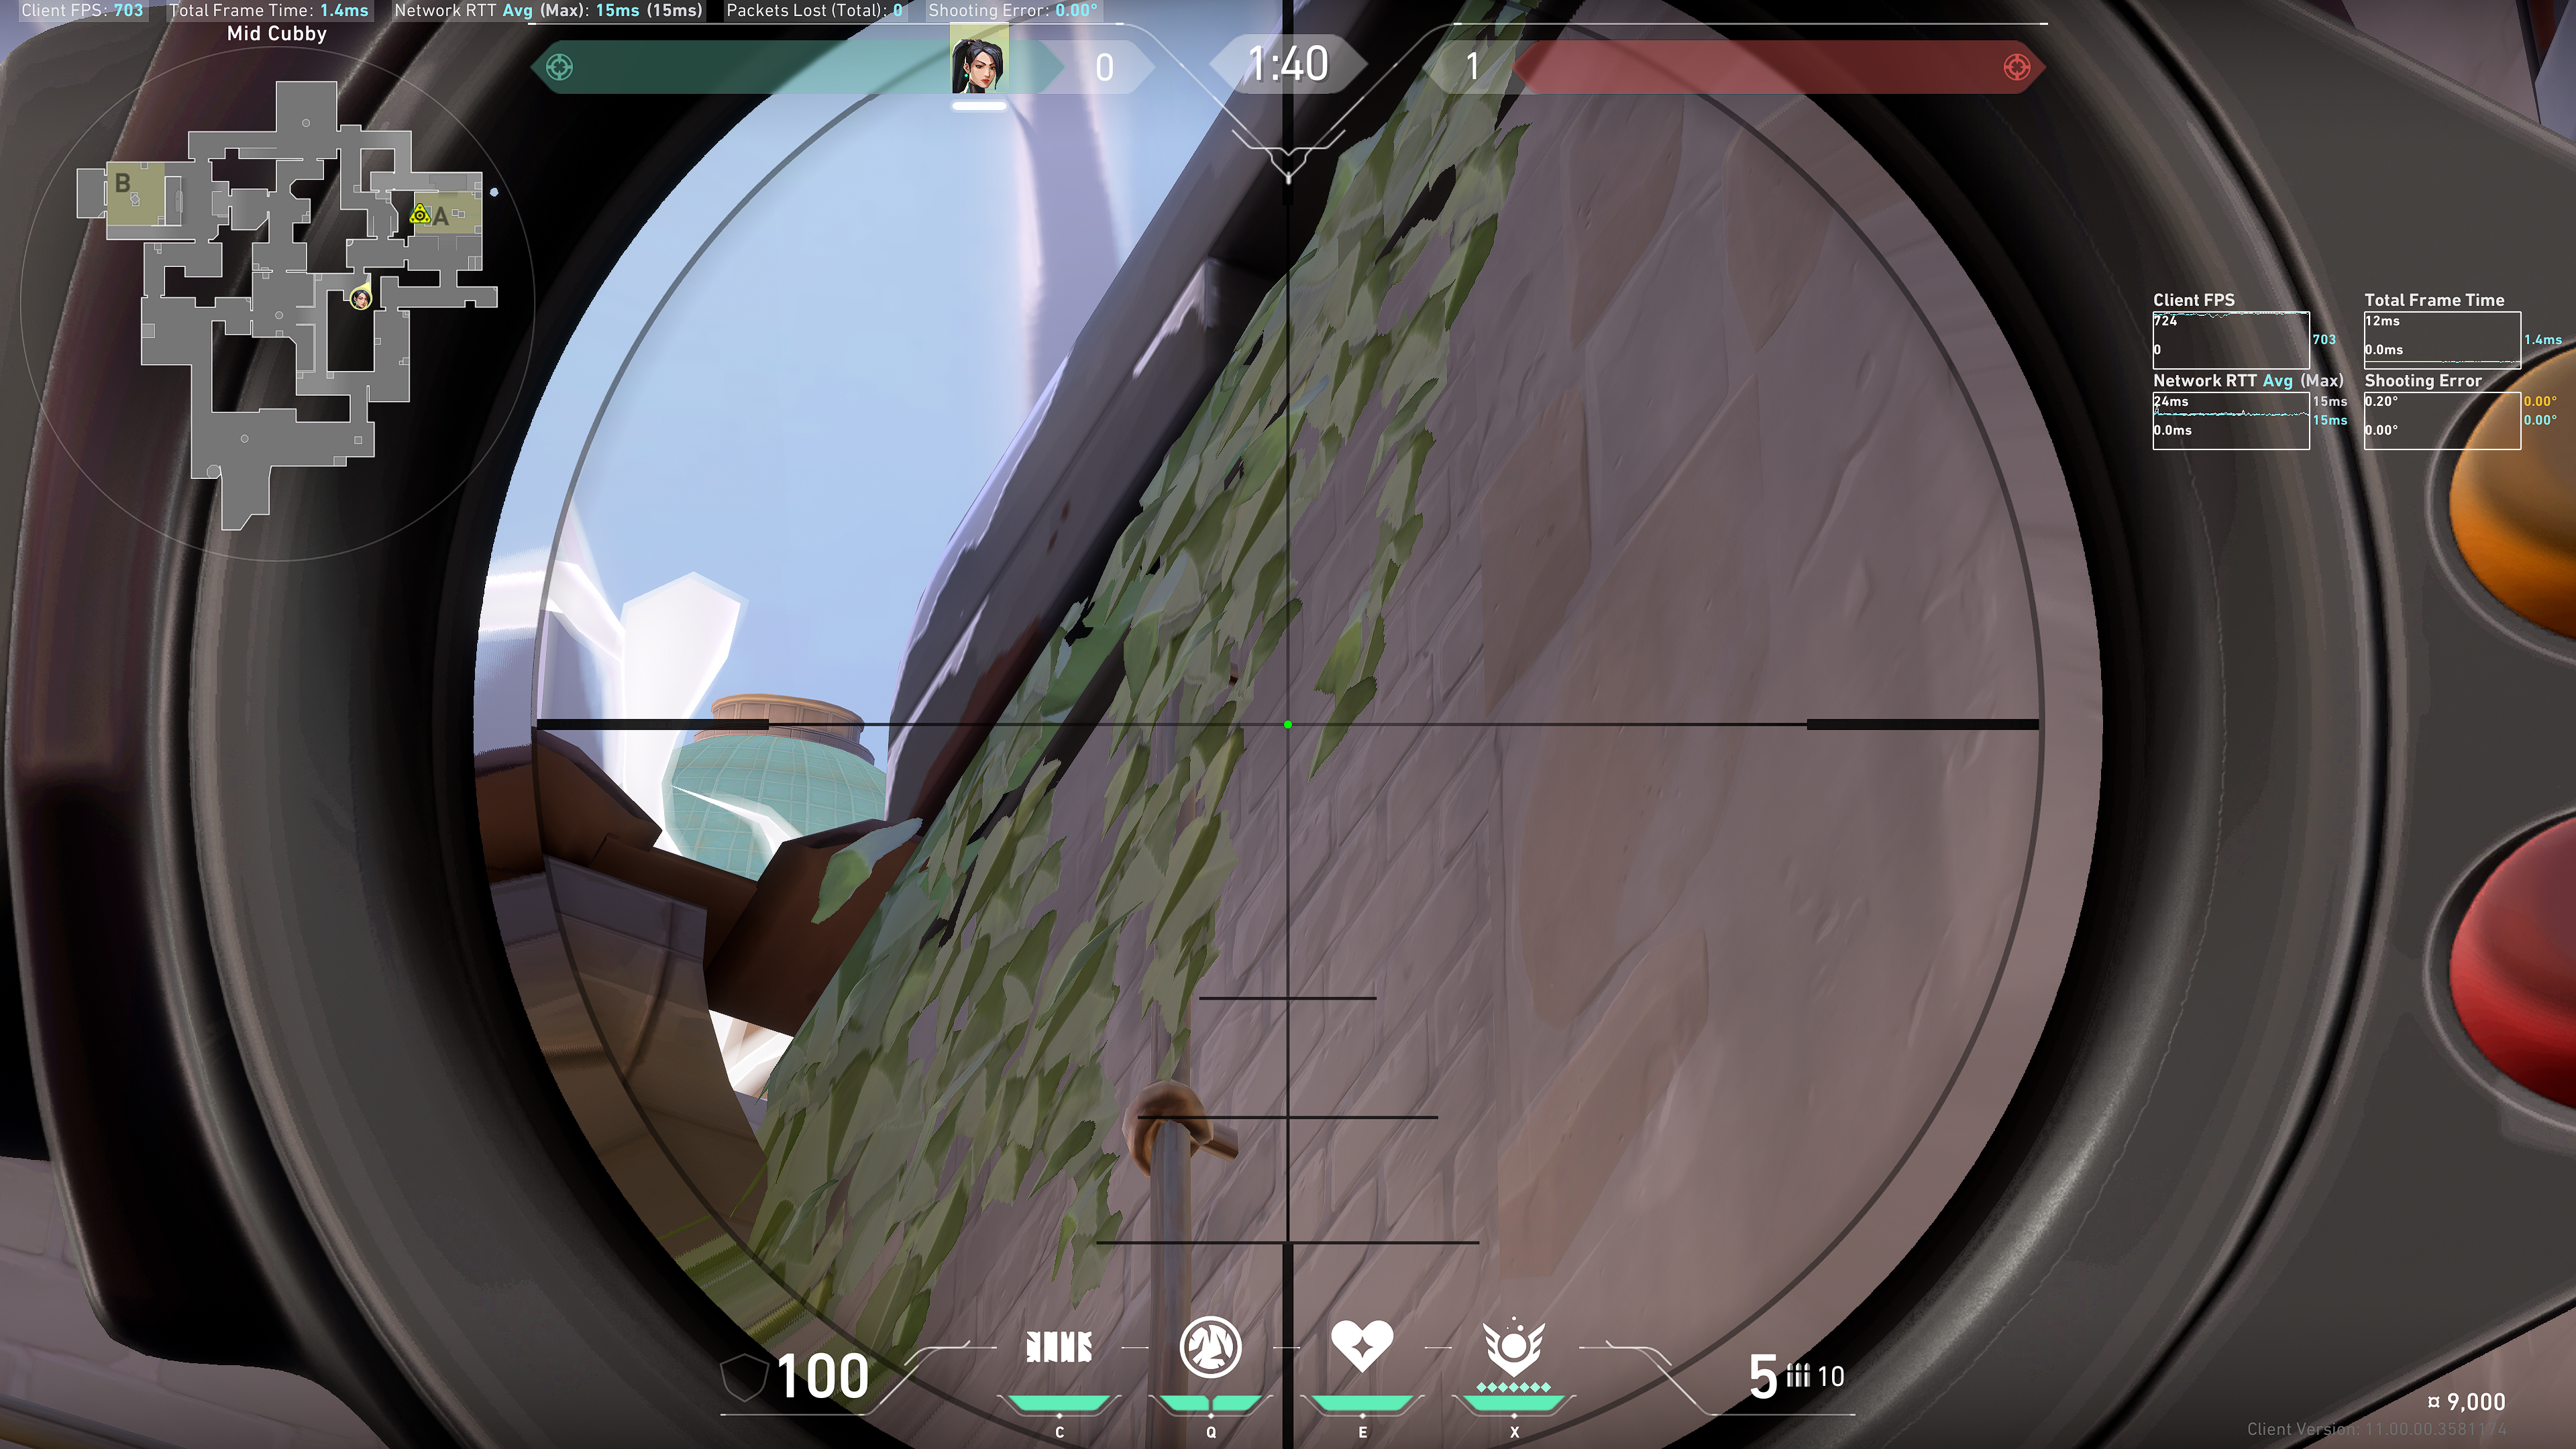
 Notice these pair of leaves to the right of the scoped crosshair:
 Note: an easy way to remember is that your crosshair is horizontally aligned with the dark leaf on the left.
Tuck the right side of your crosshair (if using a plus symbol) in between those two leaves:
 Result:
For a simpler lineup, just aim slightly above the bottom leaf:
 Result:
Tradeoff: you slow more of Lane but less of Logs.
A Site retake
Generator
Tuck into this corner:
 Note: don't jump on the boxes.
Notice the > symbol or Pacman of green leaves to the right of the crosshair:
The separator bar between the Wall and Slow symbols; tuck the right side of it into the Pacman leaves:
 Result:
Hell / Dice
Notice the bottom left of this alarm box:
Put the bottom left of the tilde UI on the bottom left of the alarm box:
 Note: err slightly upwards, since if you are too far down then you might accidentally slow Heaven.
Result:
Combined results:
Honorable Mentions
A Site
Generator (trapped behind smoke)
Note: use this when your team is temporarily trapped behind smoke, but team is soon to be executing onto site (e.g. Phoenix is equipping a Flash into his hands).
Tuck in this corner:
 Aim anywhere at this vertical line above the generator:
 Note: as long as the Ice Orb is thrown above the generator, then it will bounce roughly into the same spot.
Example result:
Note: as long as the Ice Orb is thrown above the generator, then it will bounce roughly into the same spot.
Example result:
Back site (easy)
Hug anywhere along this wall:
 Aim above this wooden wall, using it as a backboard:
 Example result:
Back site / Hell
Hug this wall:
 Make it so you cannot see this broken thing at the top anymore:
 Line up the transparent part of the team's round wins with the top left lamp post:
 Result:
Heaven (easy)
Hug this wall:
Angle yourself so the orb cannot accidentally bounce back into site:
 Run and throw so it goes as far as possible.
Result:
Run and throw so it goes as far as possible.
Result: